Welcome, Guest
Username: Password: Remember me
  • Page:
  • 1

TOPIC: 1968 16' Boston Whaler

1968 16' Boston Whaler 10 years 9 months ago #90650

  • CAT*FIN*k
  • CAT*FIN*k's Avatar Topic Author
  • Offline
  • Gold Boarder
  • Gold Boarder
  • Posts: 620
  • Karma: 35
  • Thank you received: 0
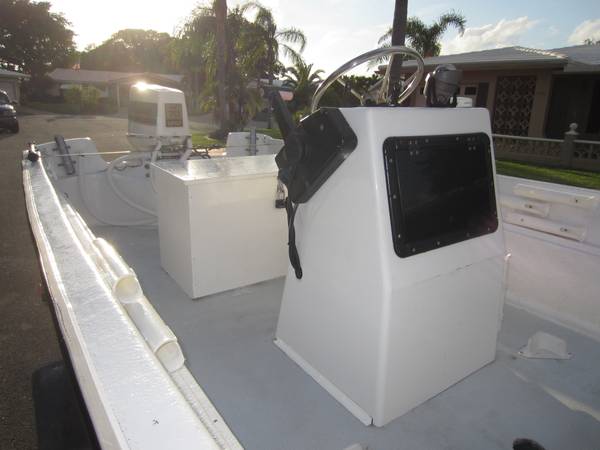
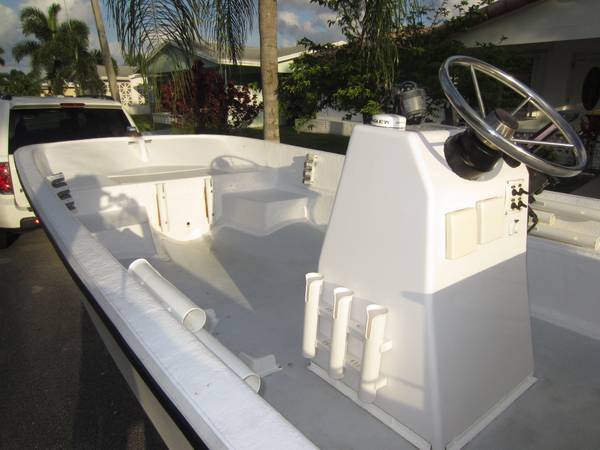
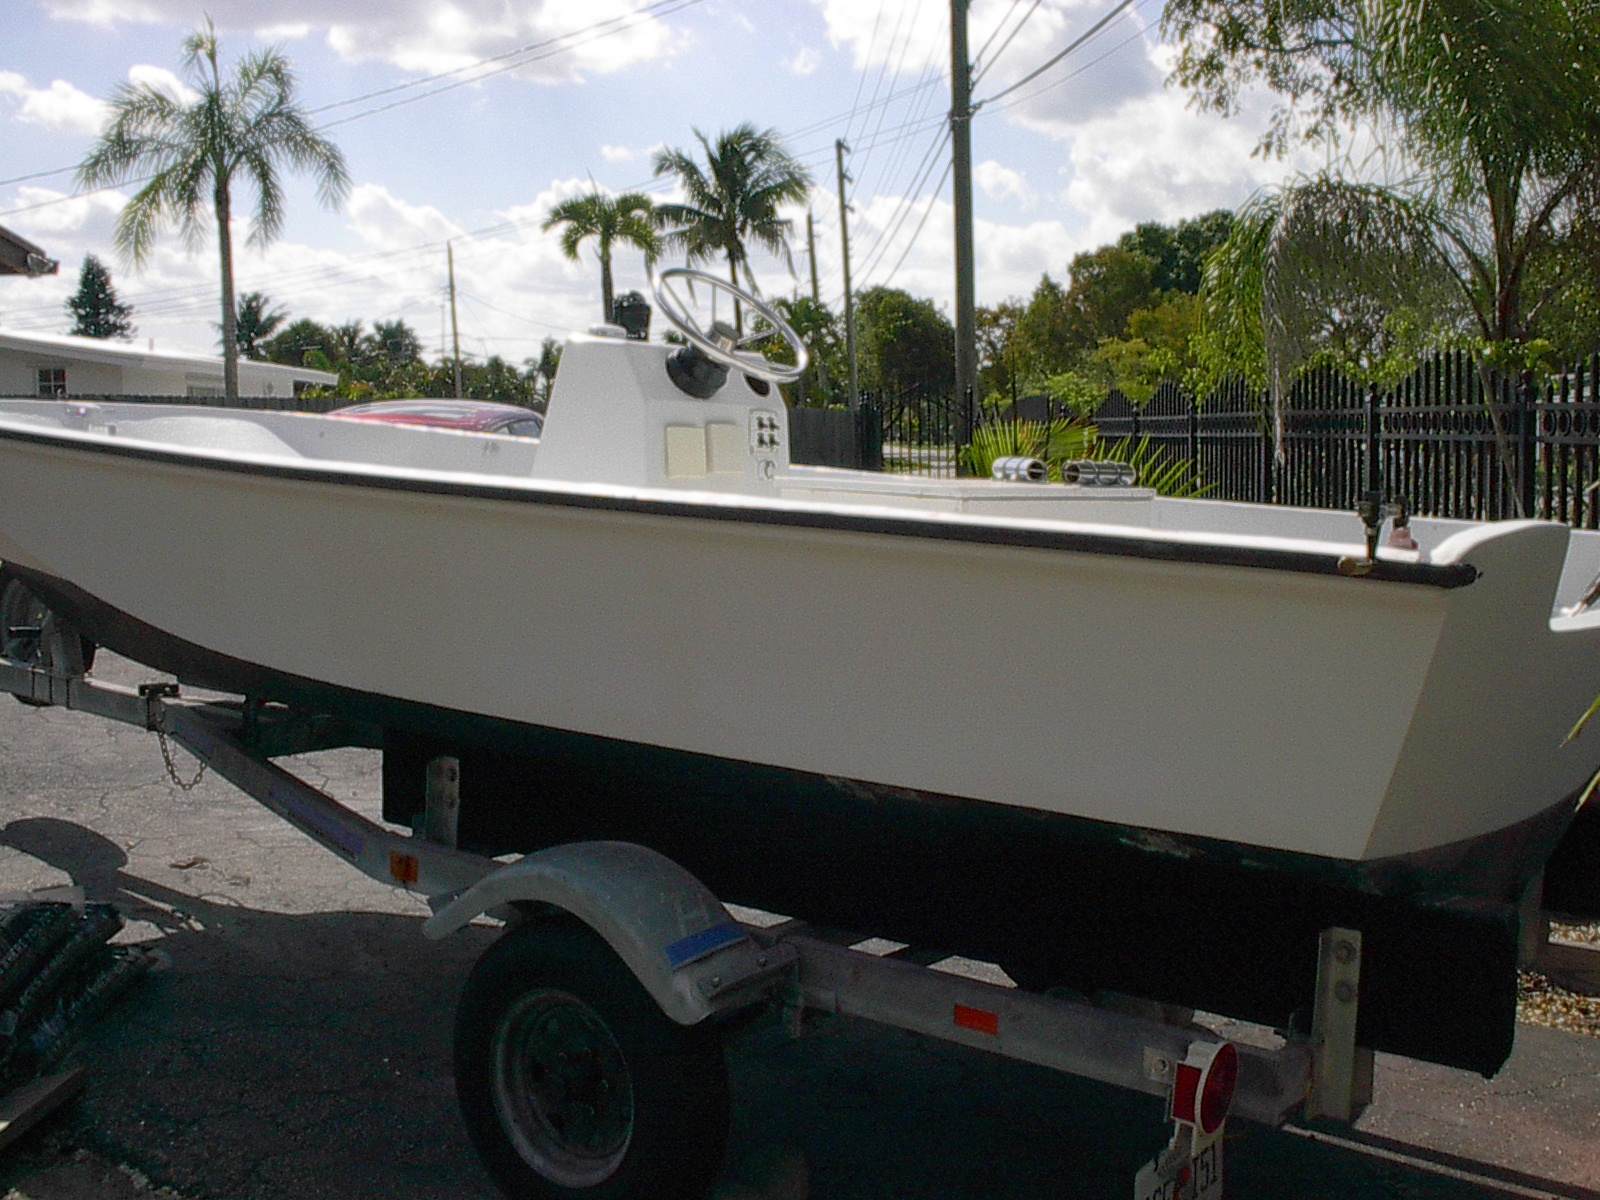
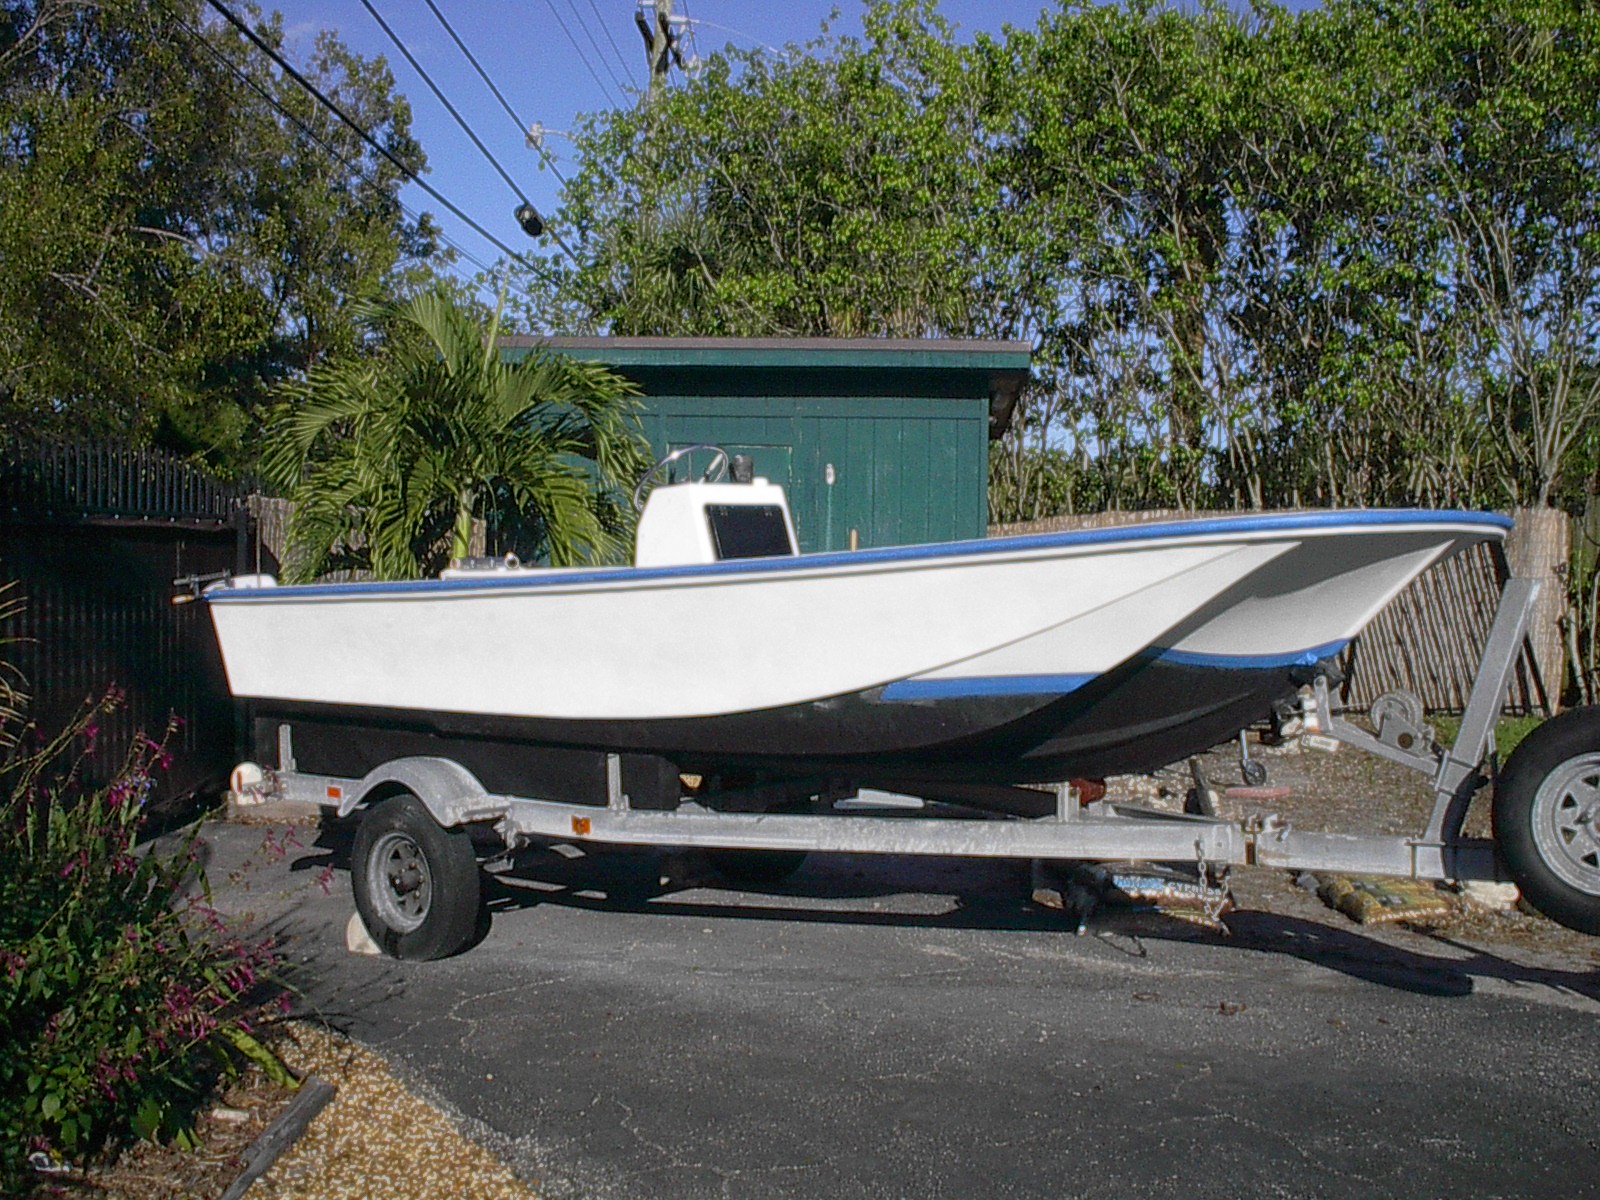
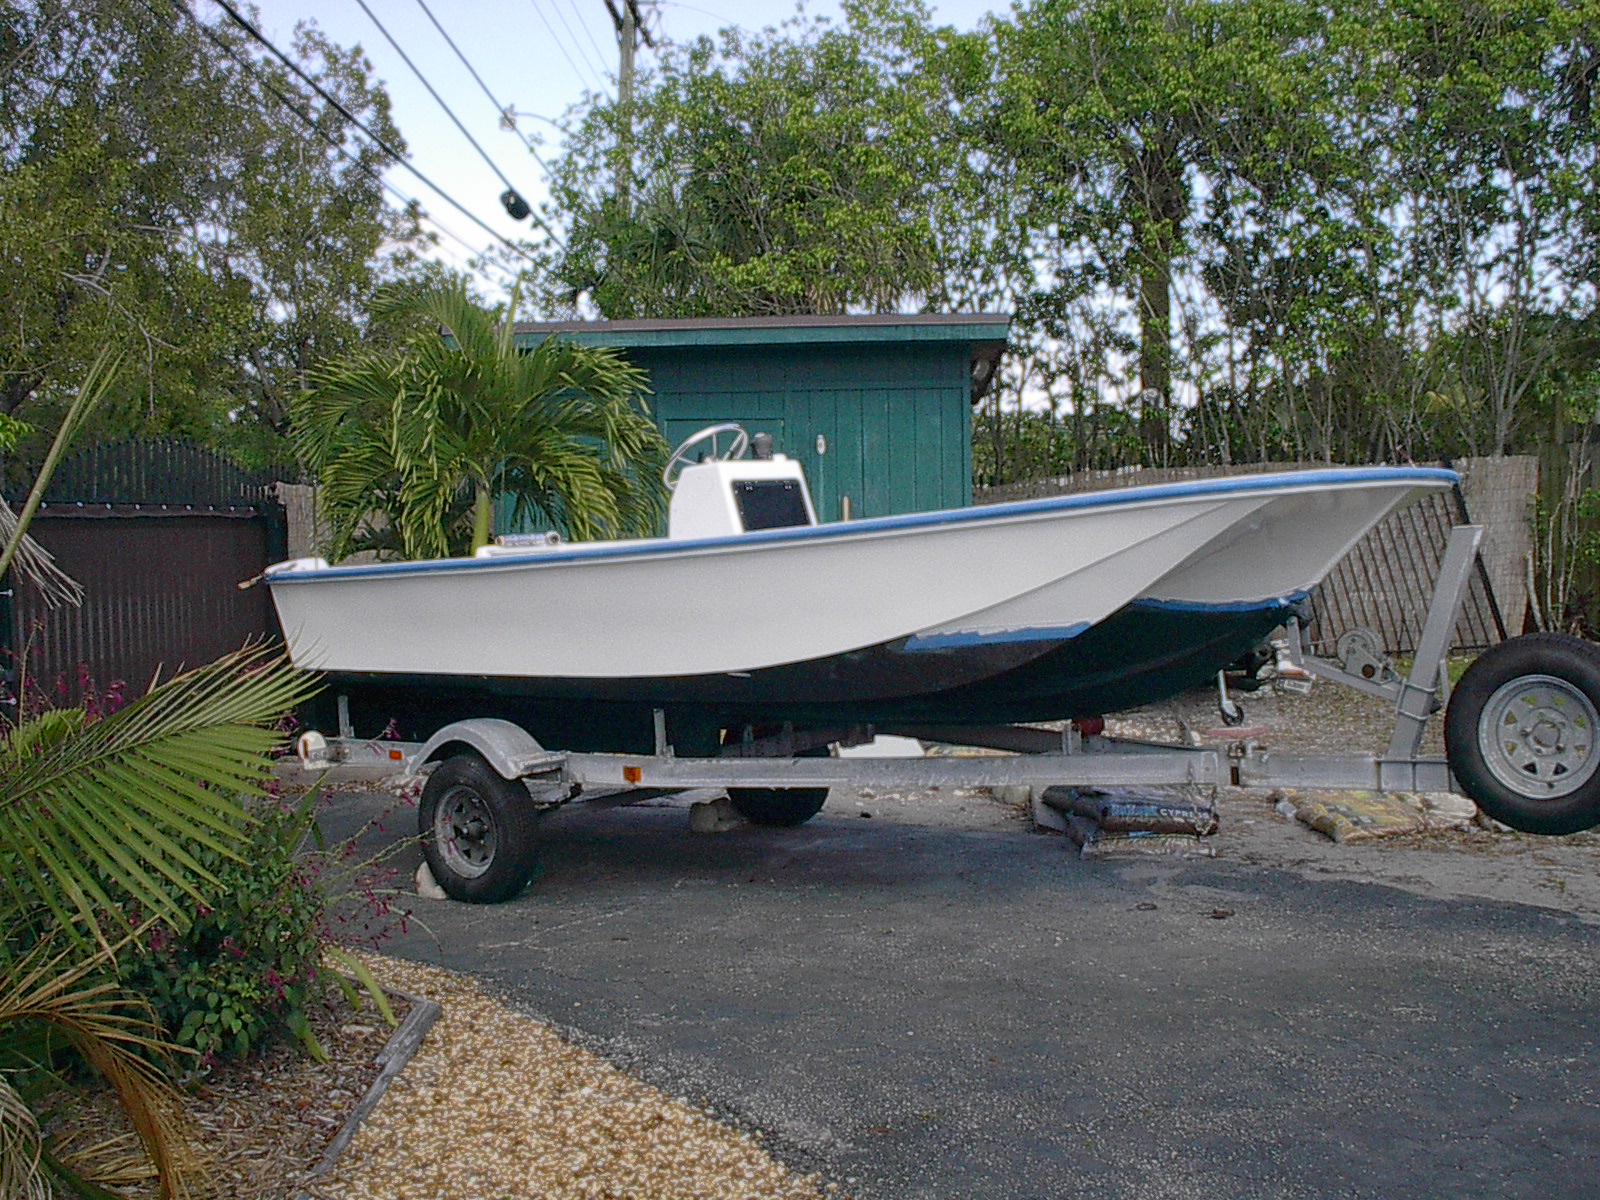
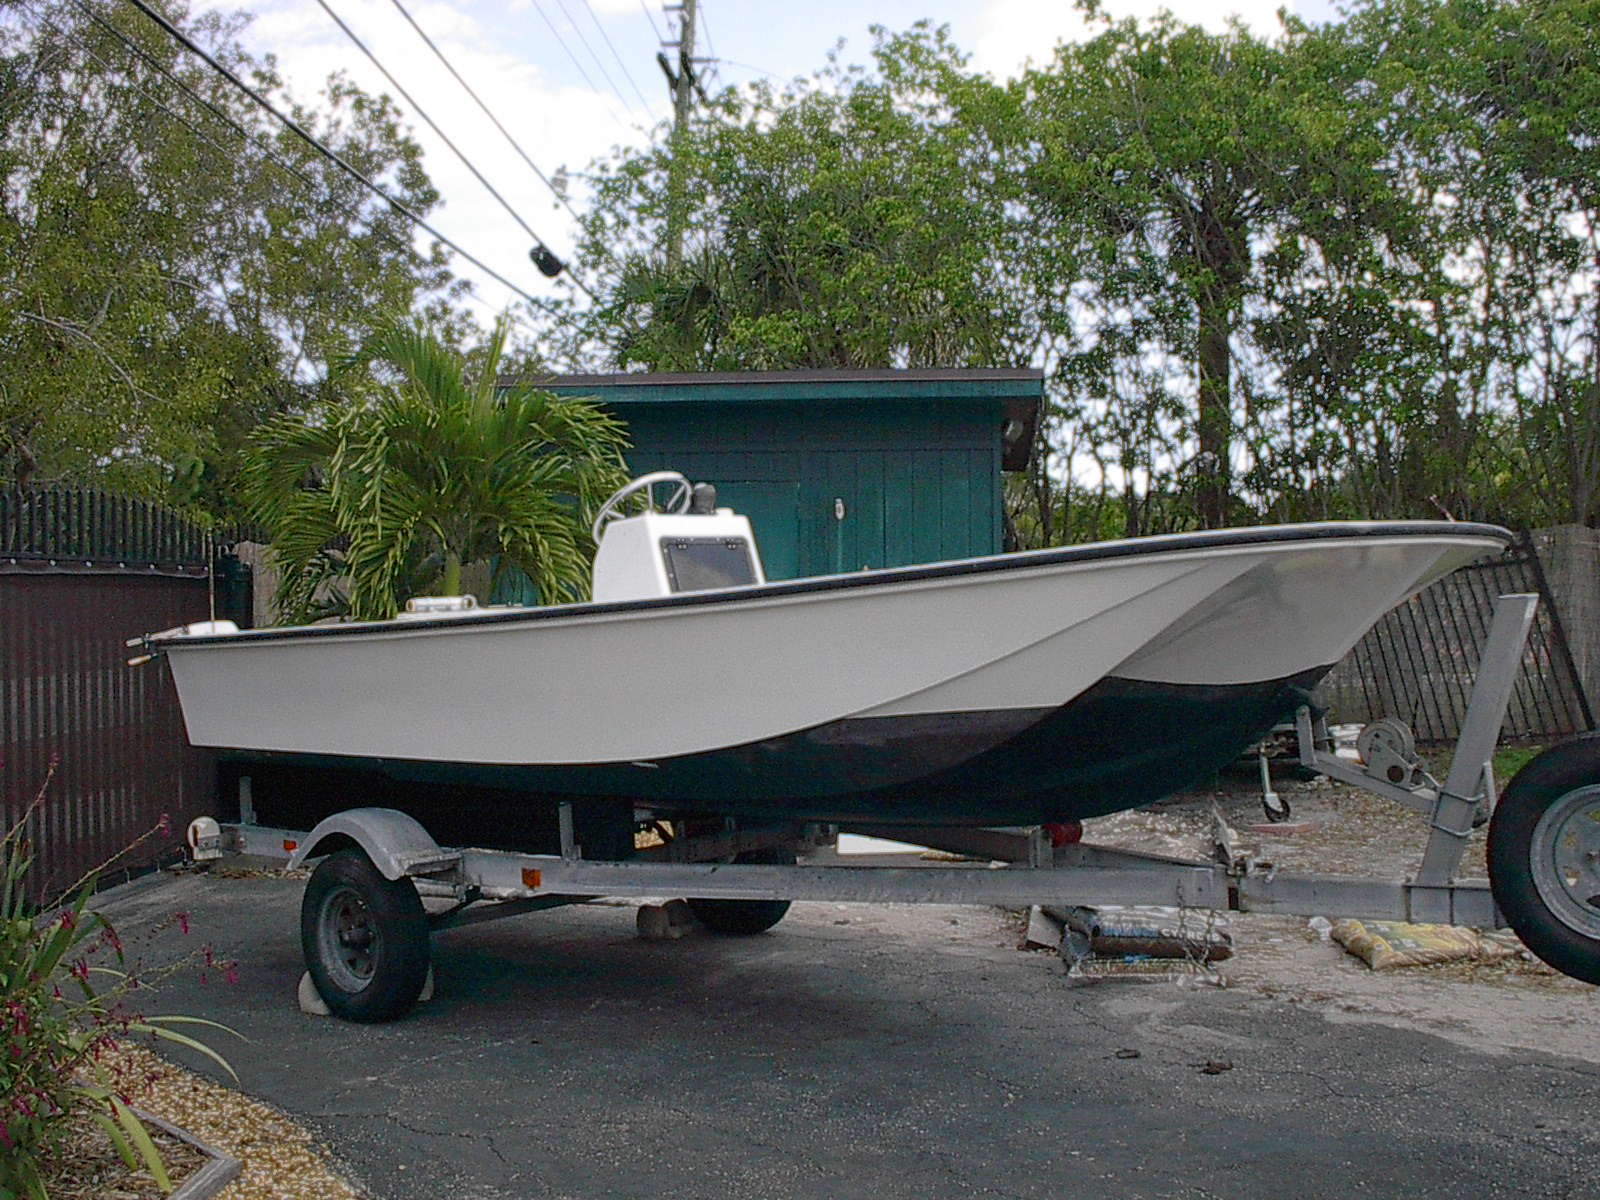
We picked up the Whaler earlier this year. It was in nice condition.


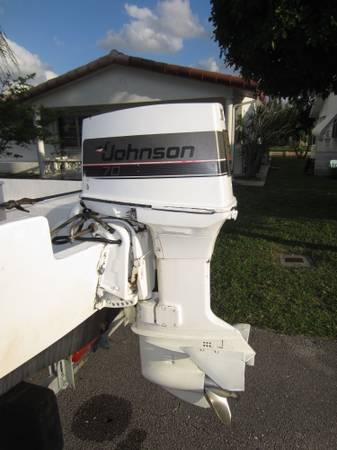
For some reason I have bad OMC karma, the 1986 70hp Johnson was nothing but trouble. It got to the point every time I touched it something broke.


A friend of mine had been eyeballin' the 70hp Johnson since I picked up a 86 Merc 115hp to replace it. He likes em and wanted it for a boat he's doing for his kid, even knowing all the problems I've had with it. I finally gave up hope of getting it to run well enough to sell. I called him up and told him if he still want the 70hp Johnson all he has to do is remove it and the rigging and he could have it free.

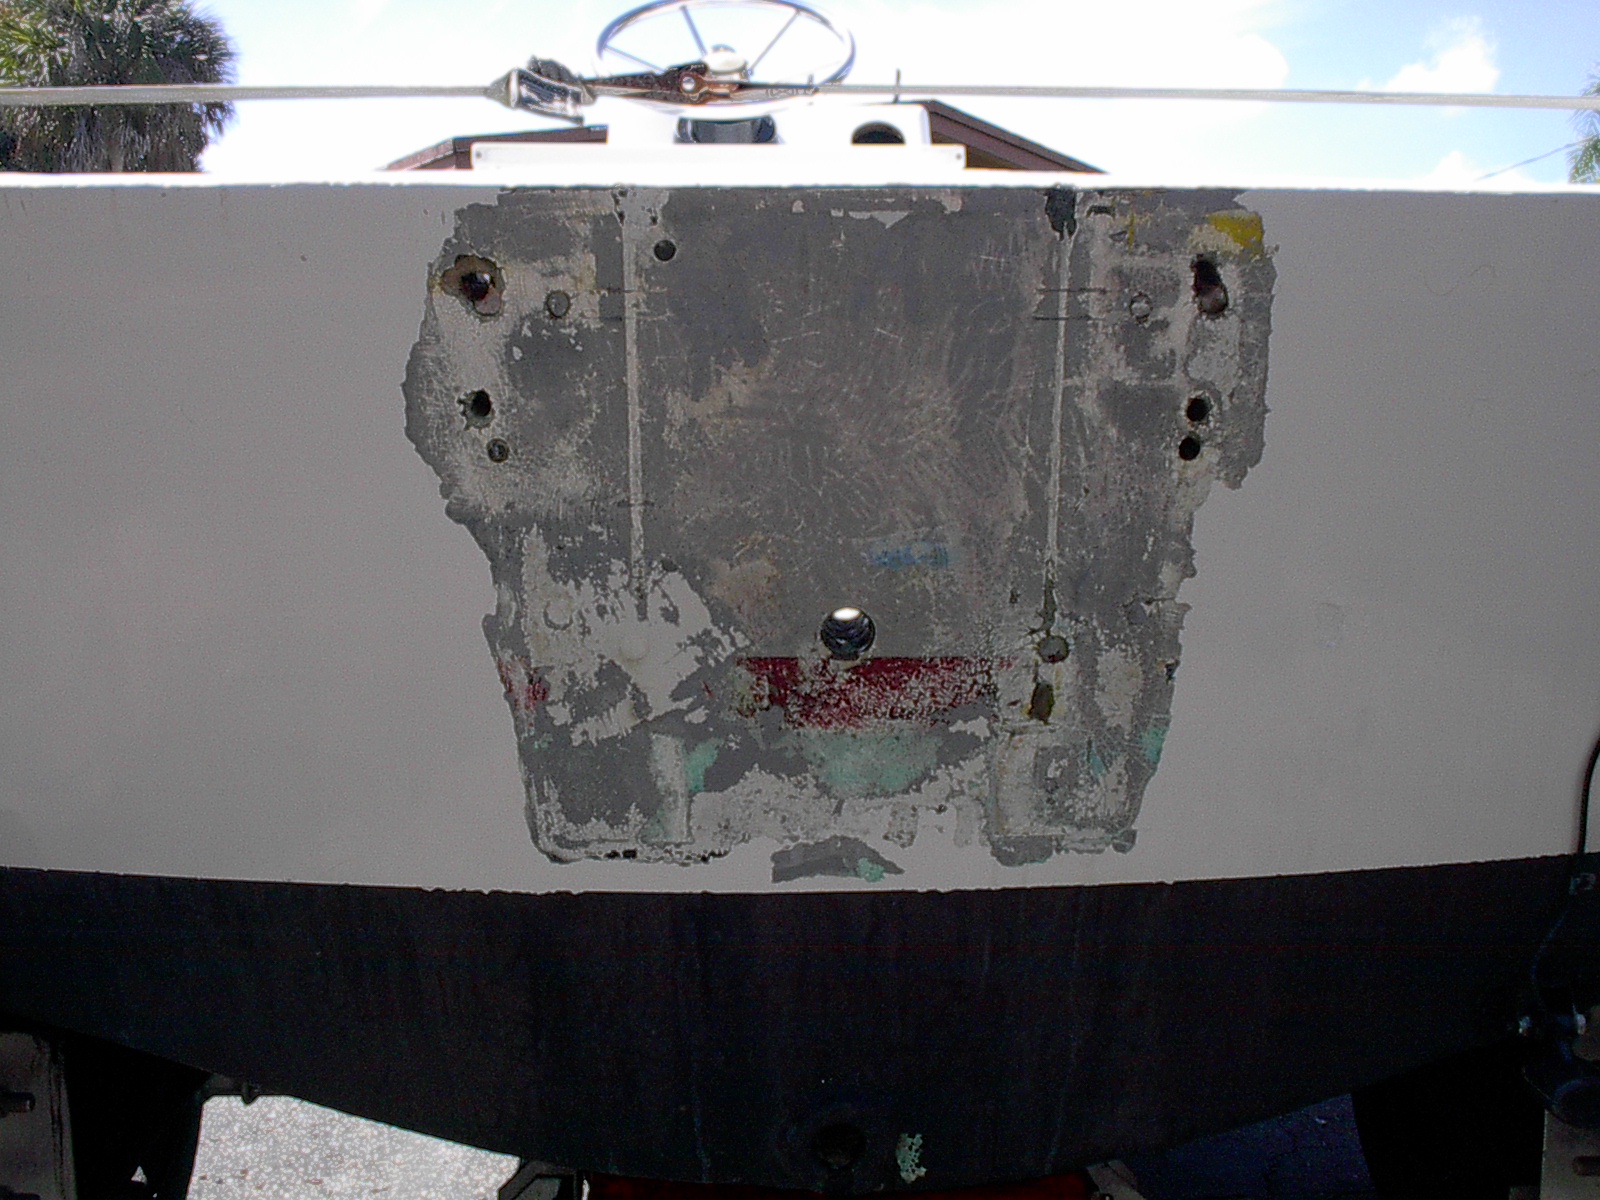
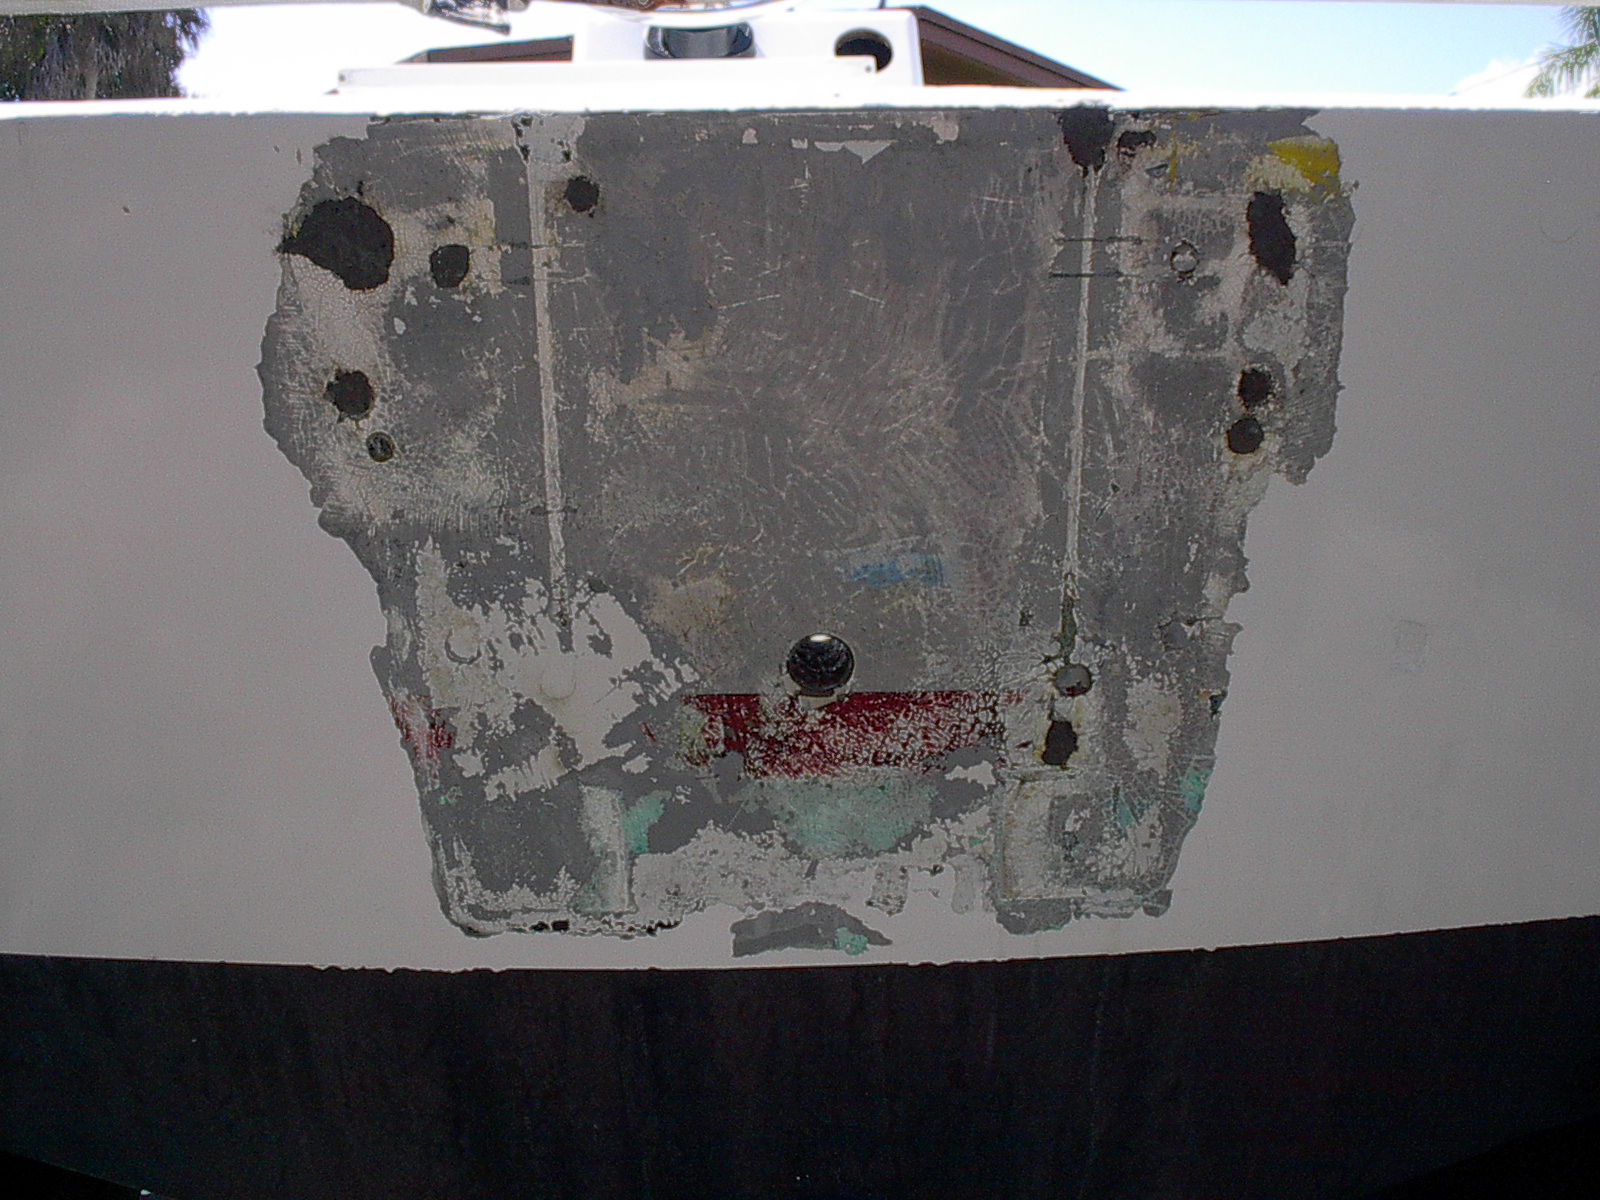
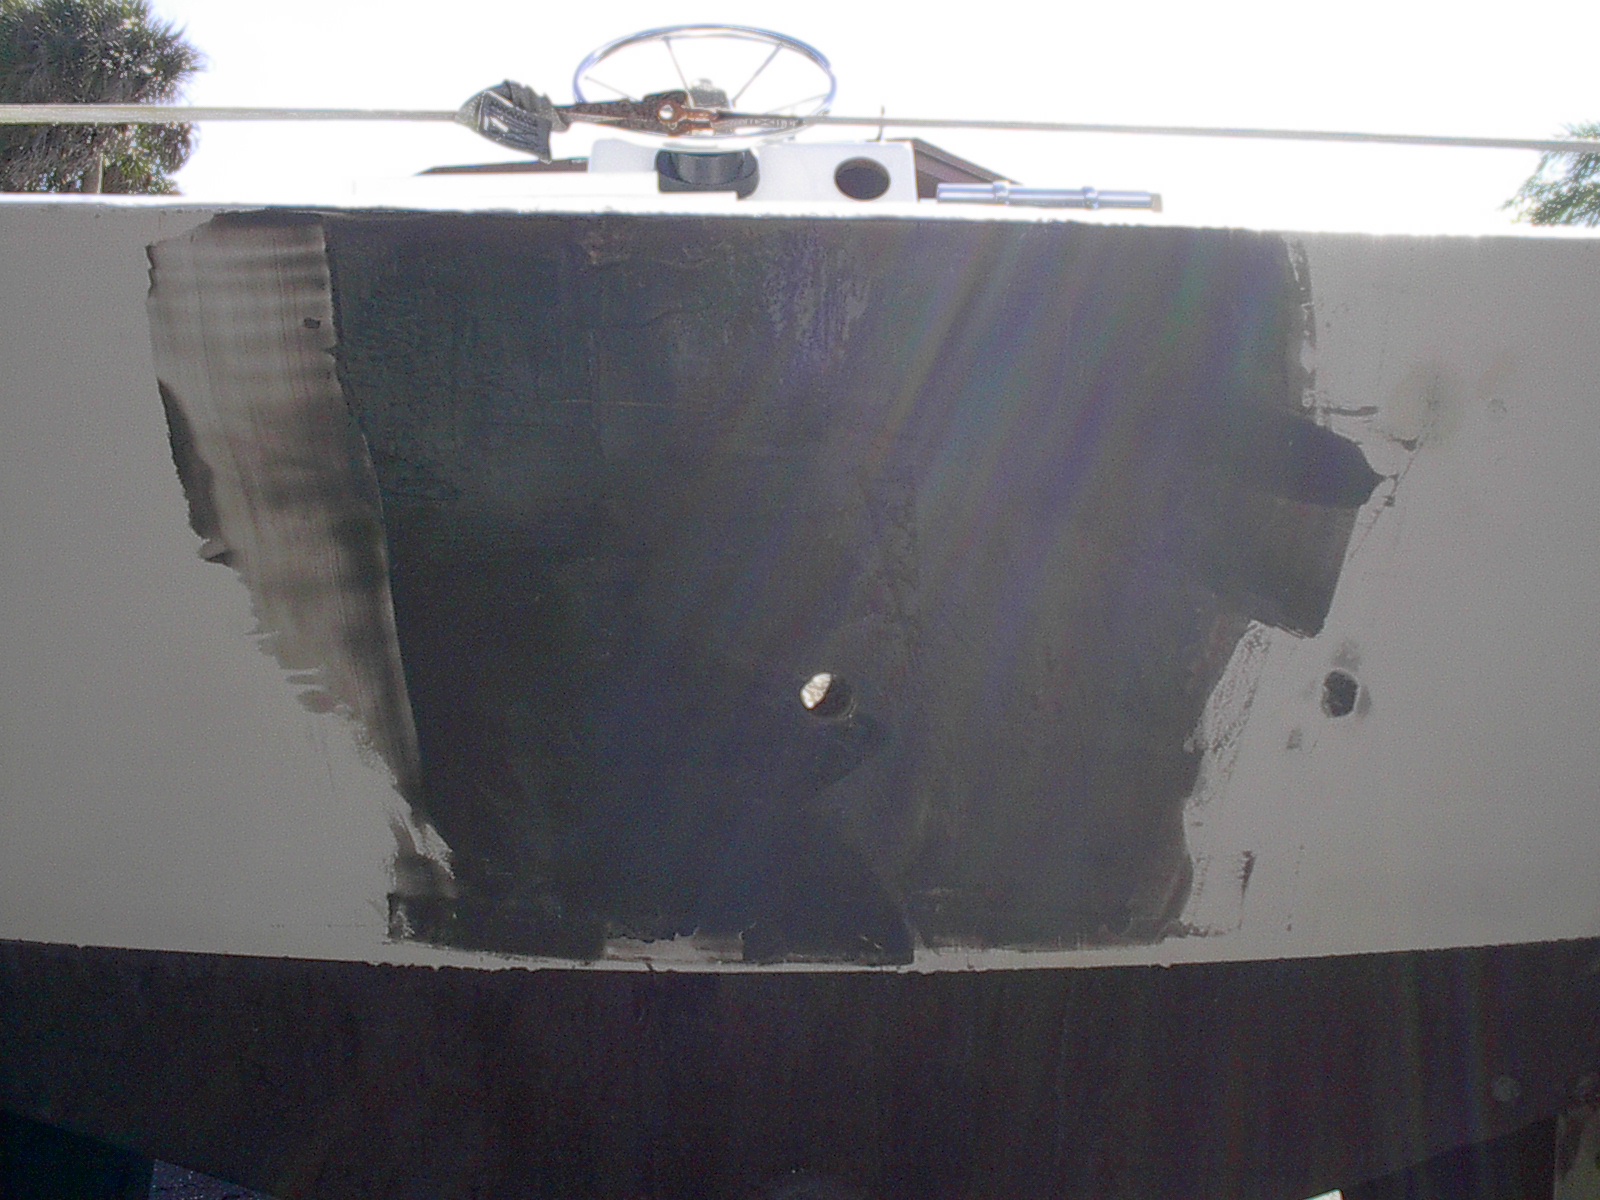
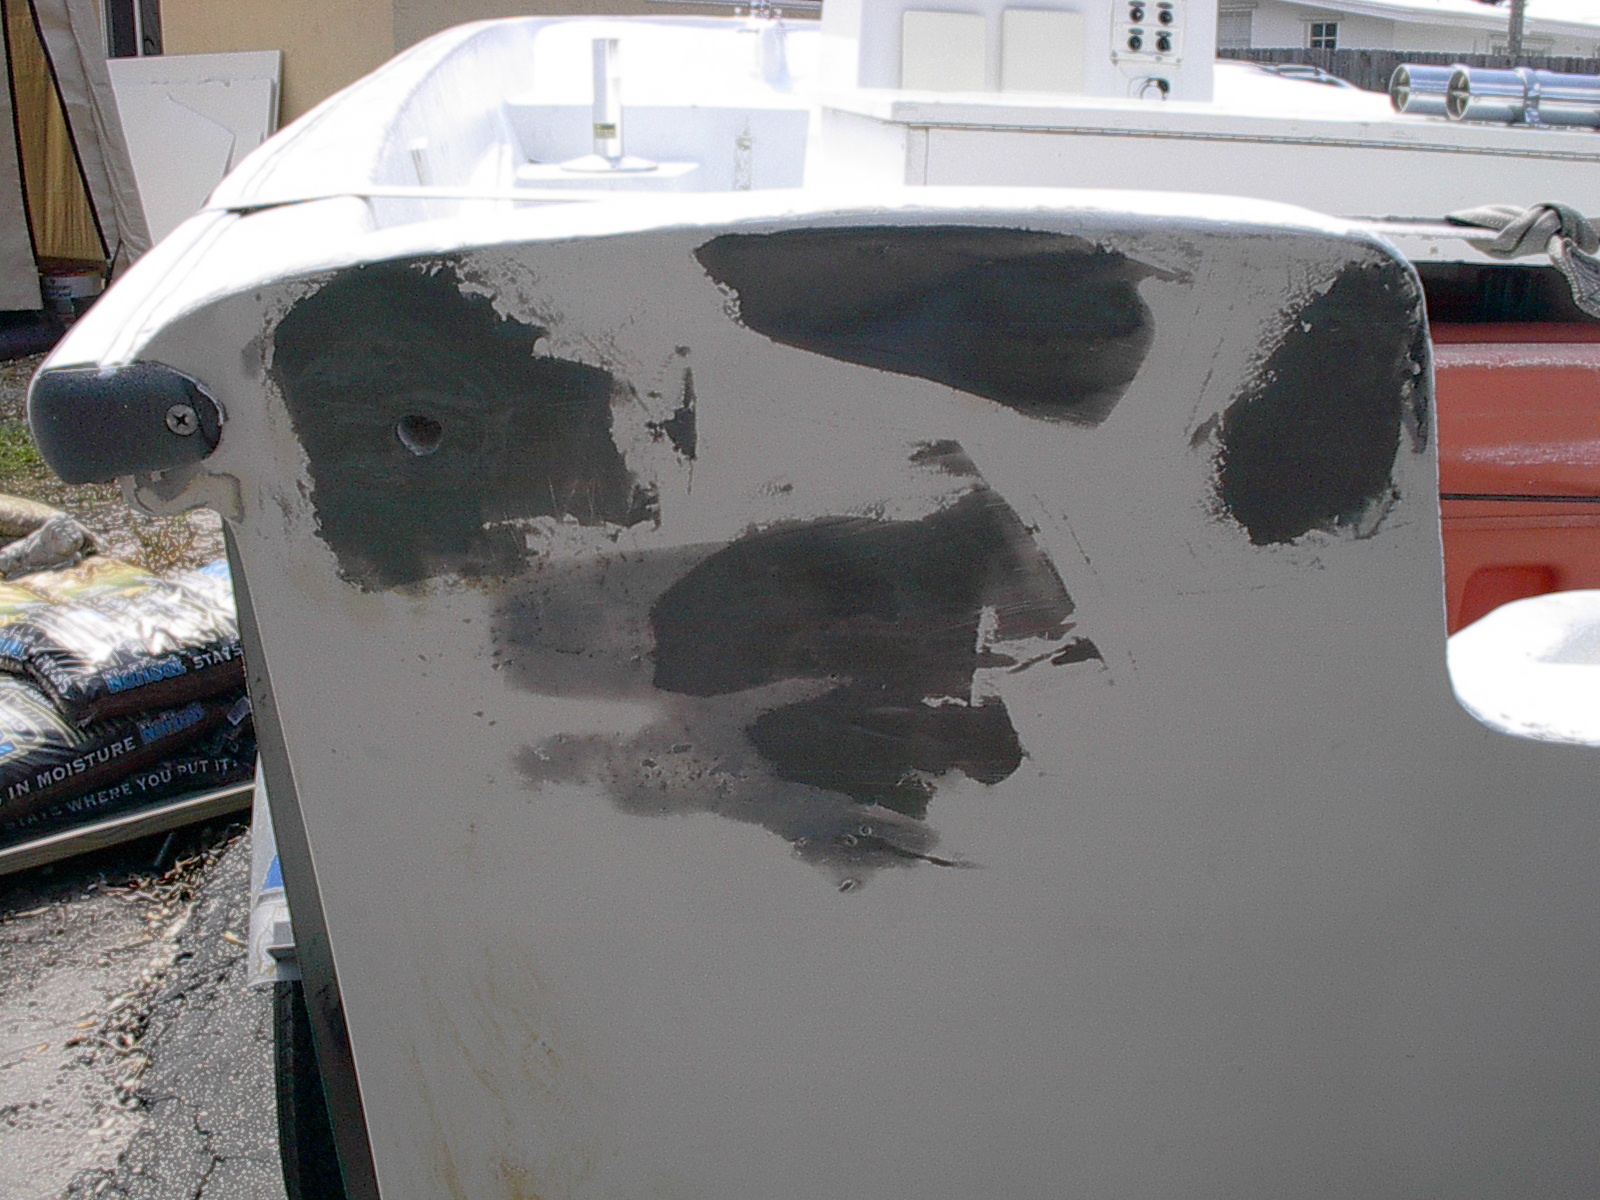
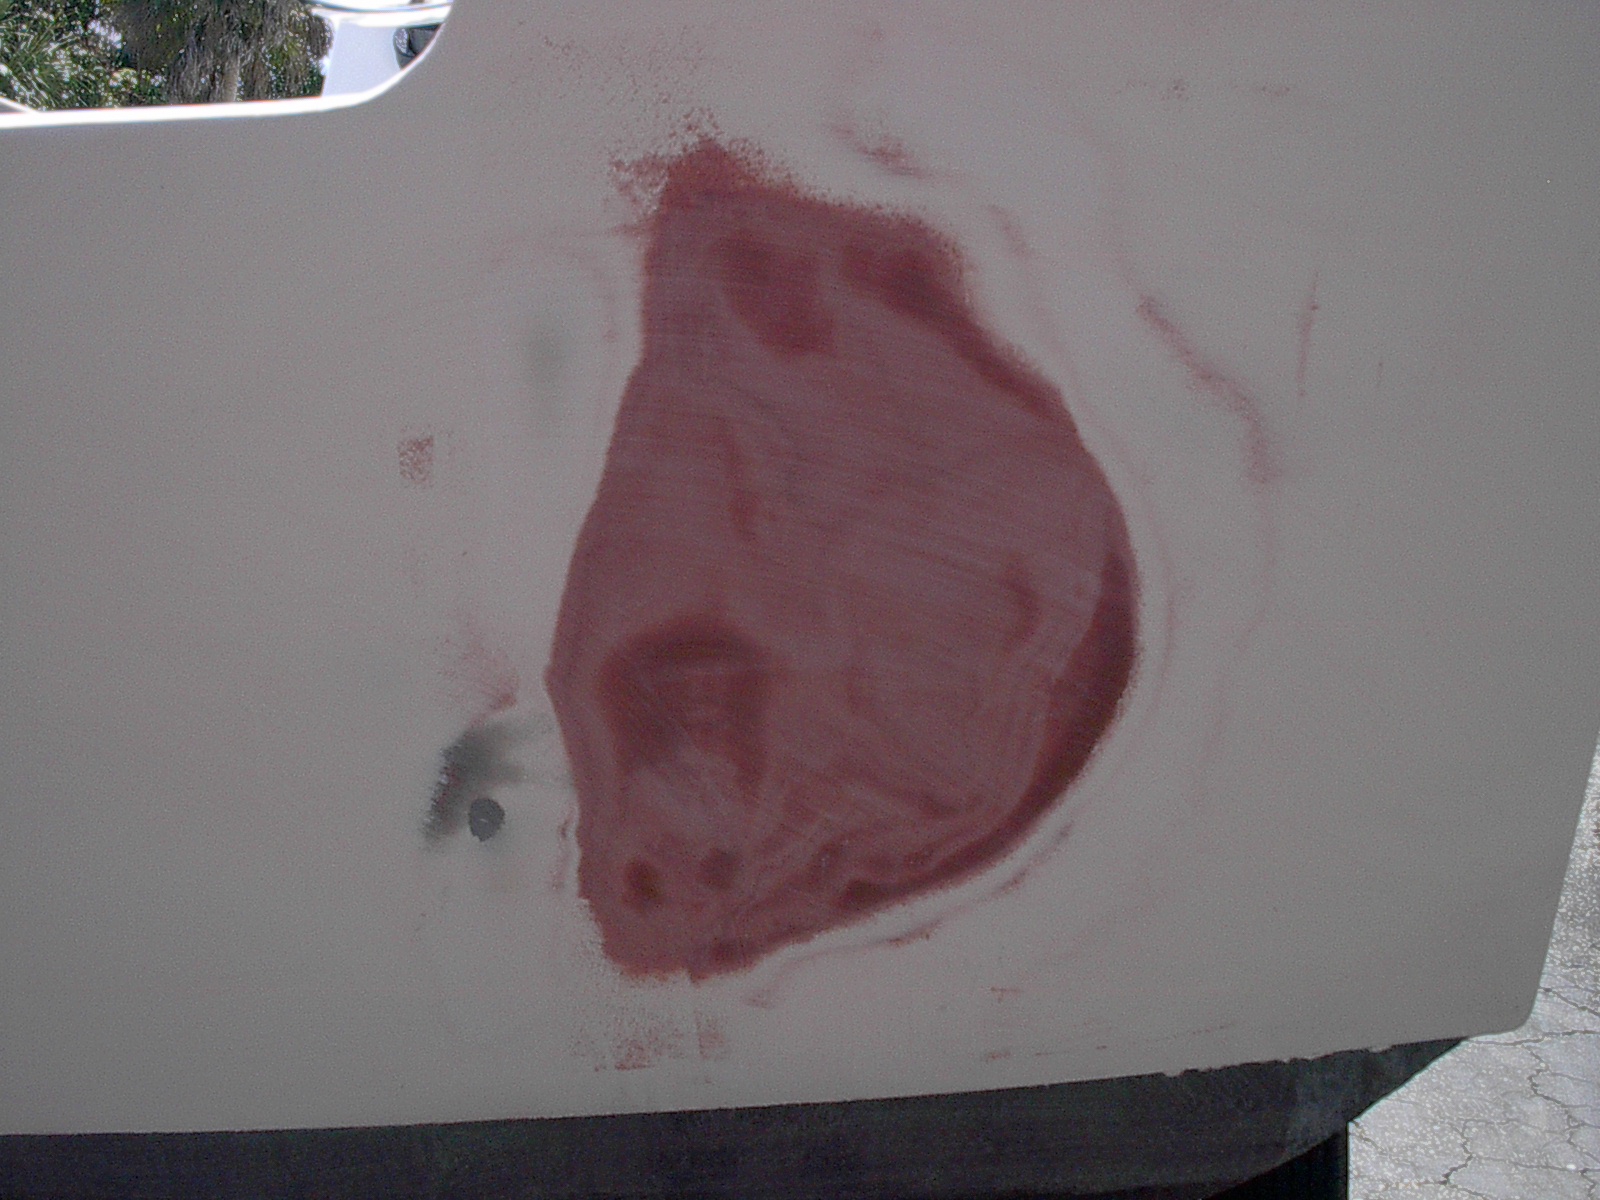
Removing the 70hp and a good scrape it left me with quite a scar on the transom.


LET THE GAME BEGIN !!!
Attachments:

Please Log in or Create an account to join the conversation.

Re:1968 16' Boston Whaler 10 years 9 months ago #90651

  • CAT*FIN*k
  • CAT*FIN*k's Avatar Topic Author
  • Offline
  • Gold Boarder
  • Gold Boarder
  • Posts: 620
  • Karma: 35
  • Thank you received: 0
Transom Motor Mount Holes;
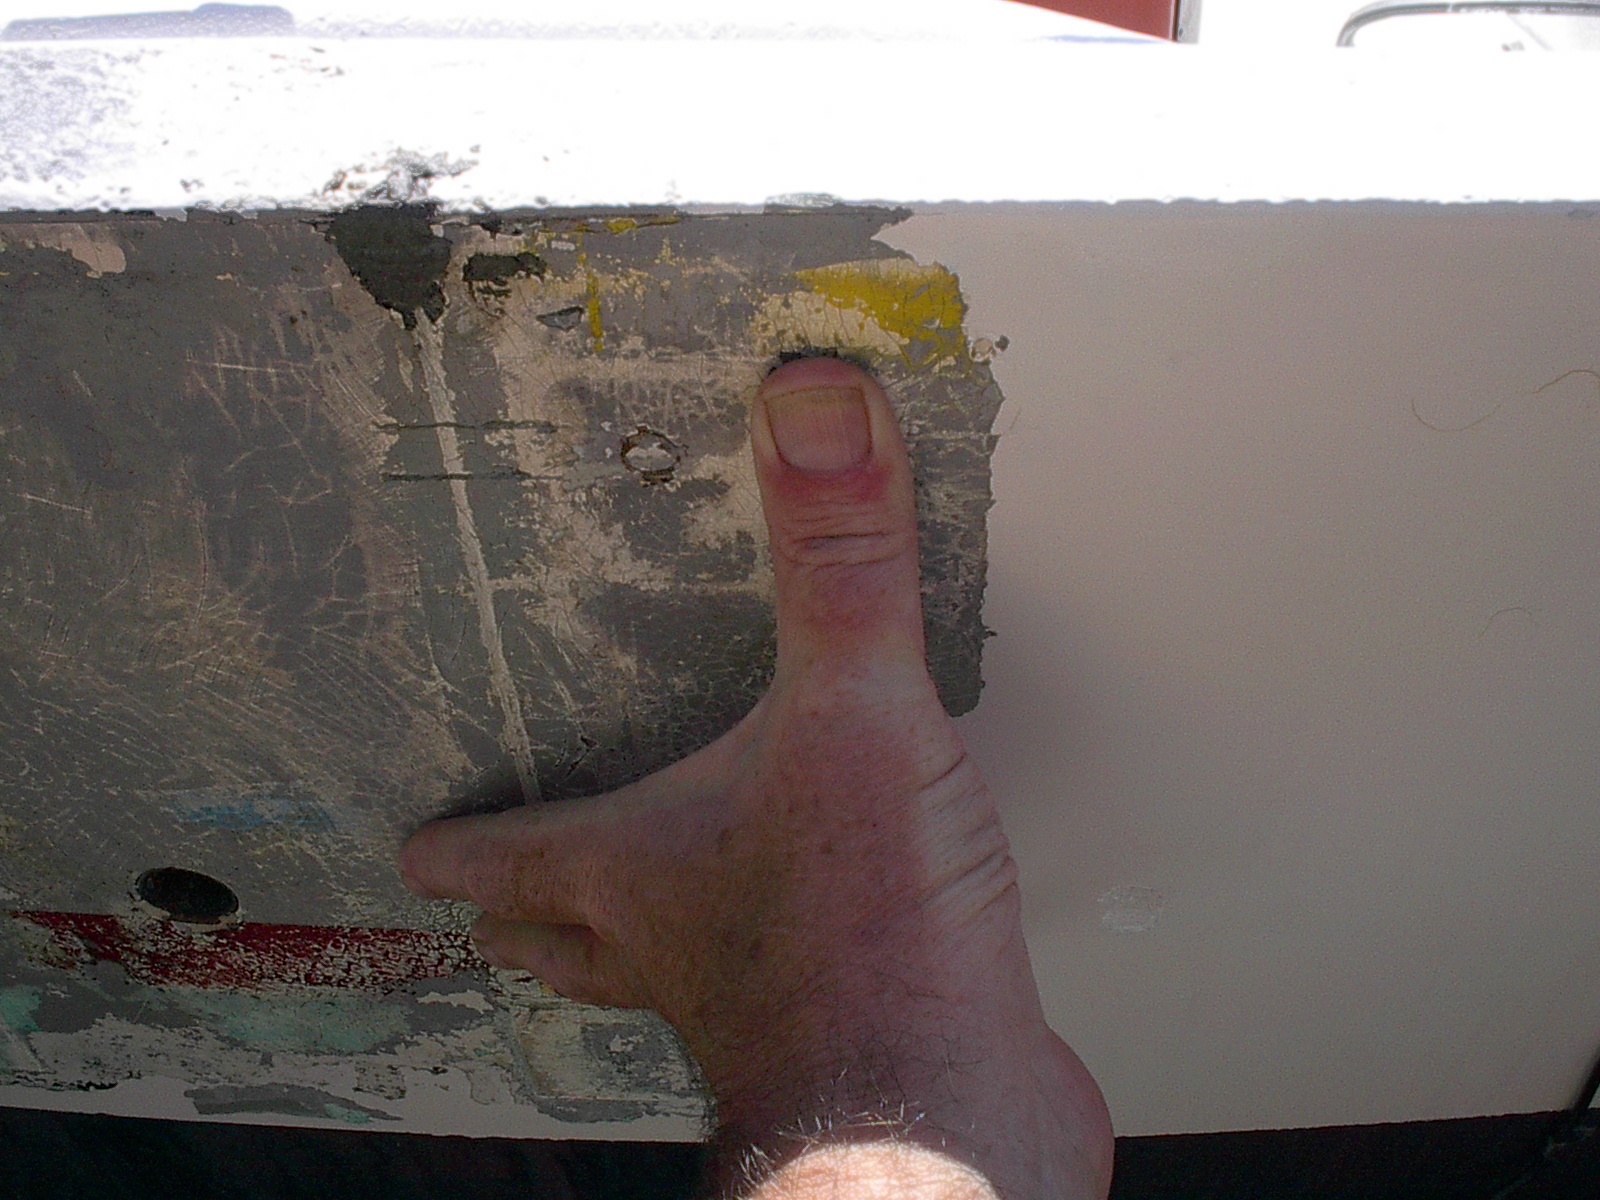
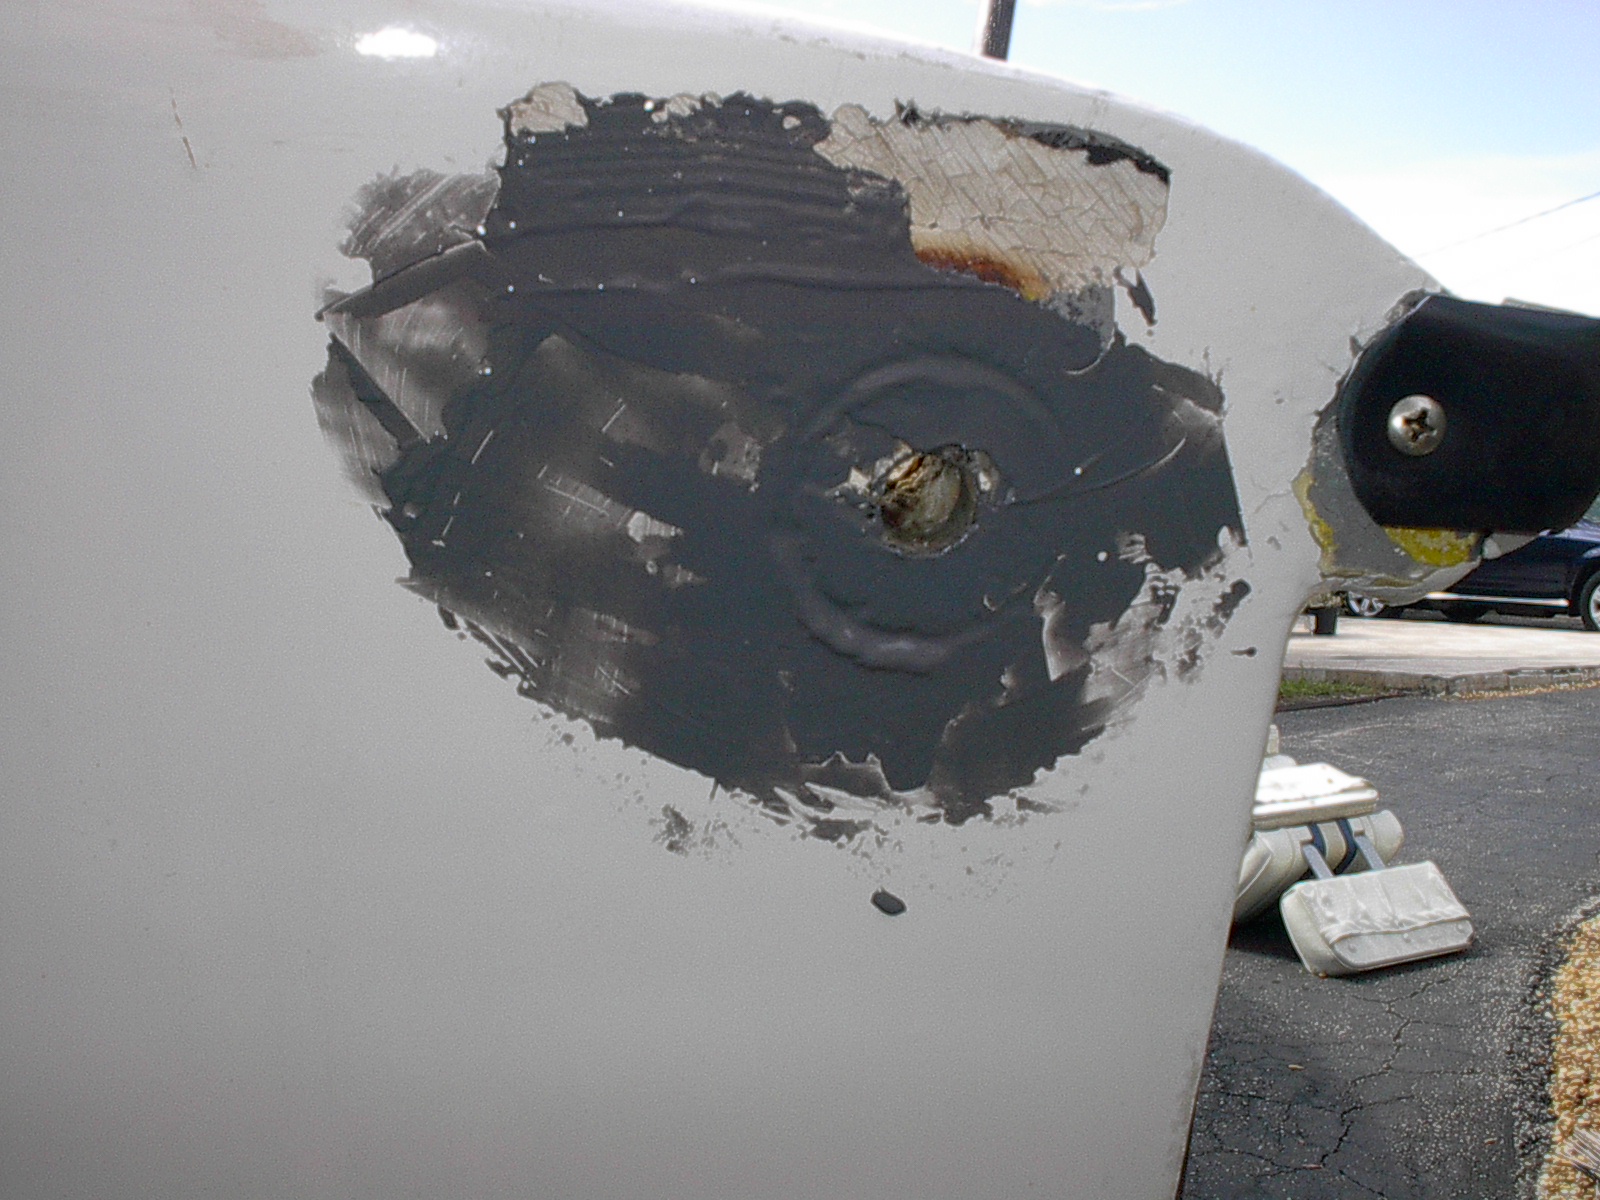
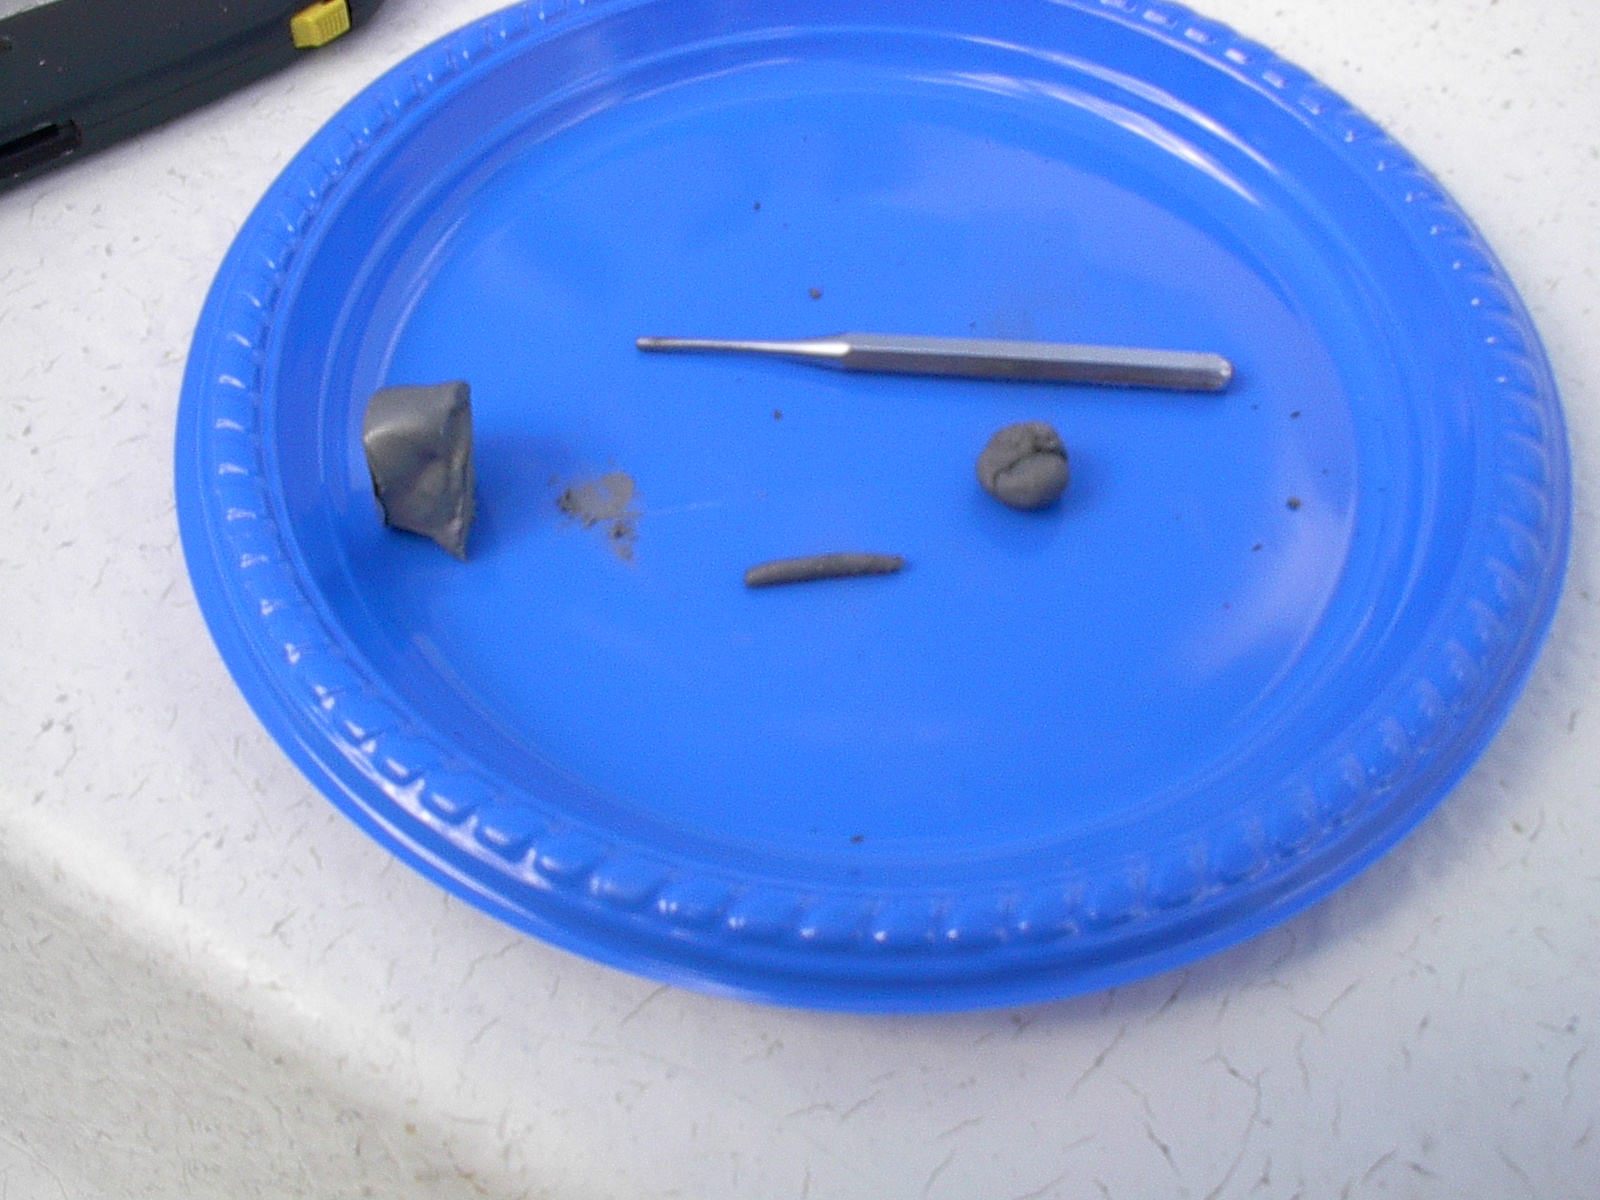
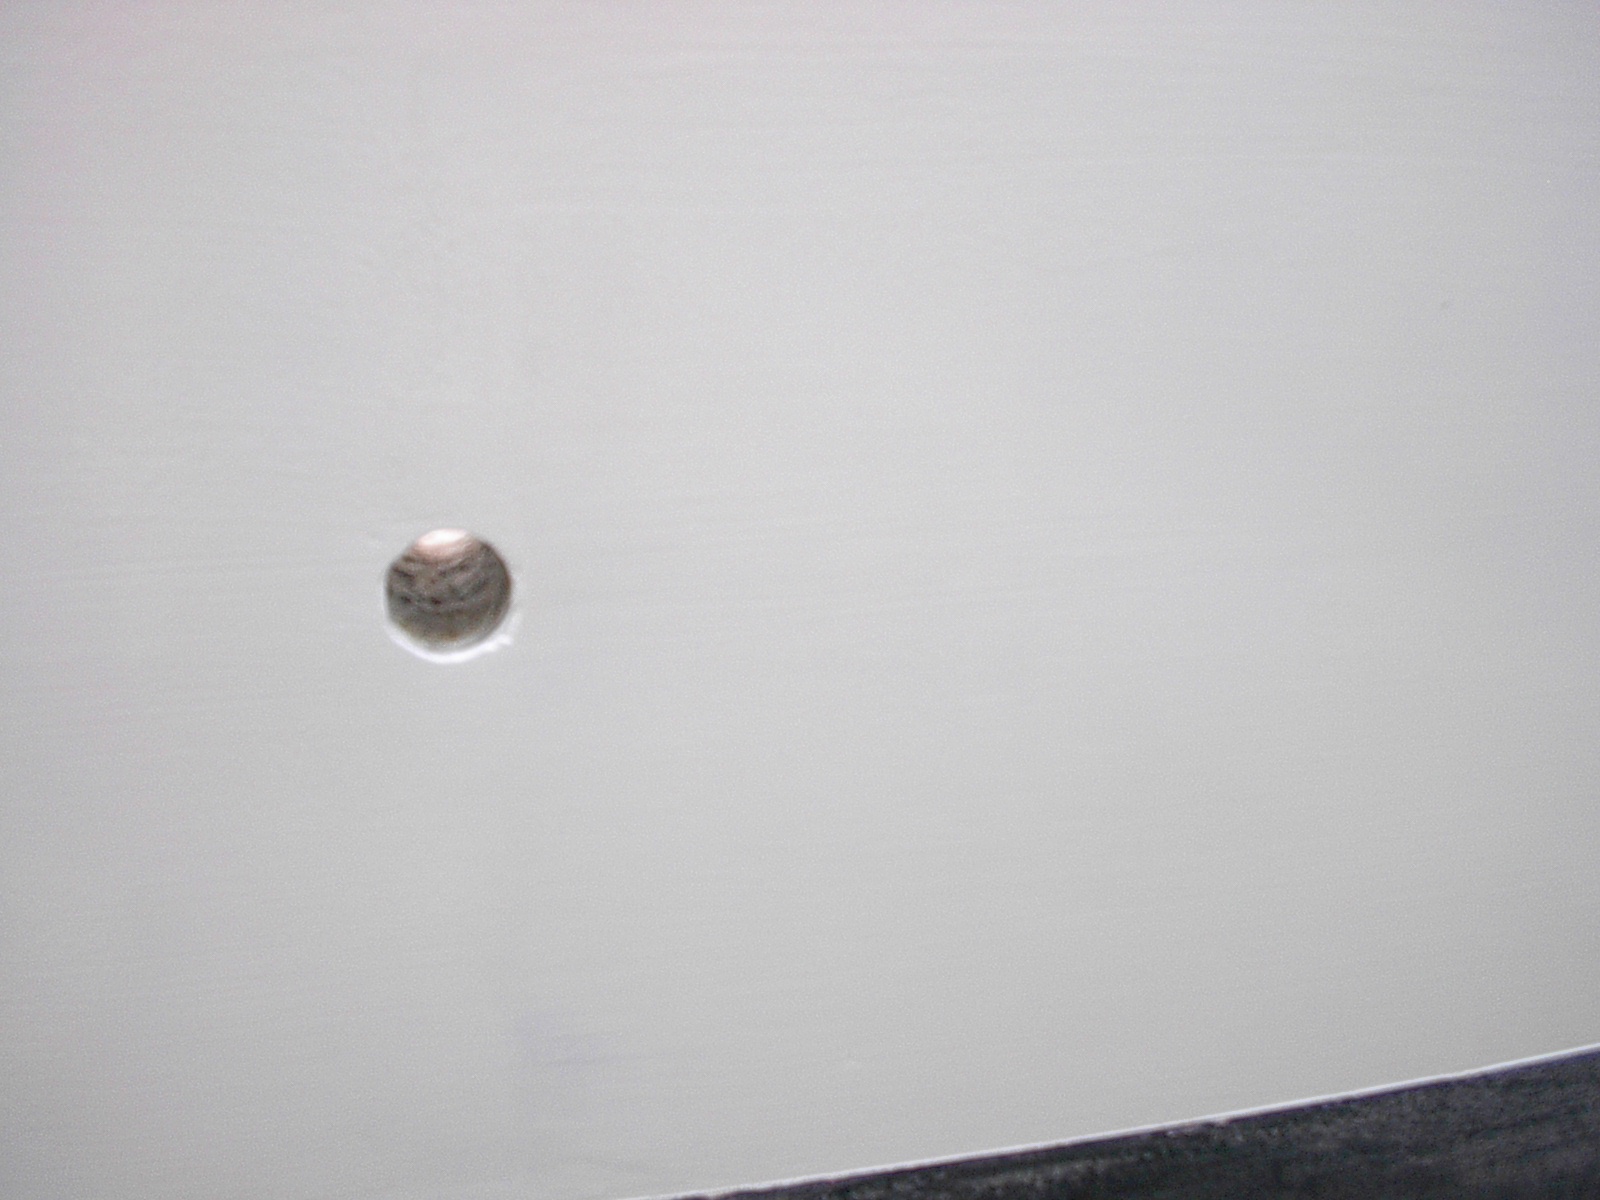
There has been many holes drilled before and filled. I filled the 4 motor mount holes, 2 would not be used and 2 were drilled very poorly. To fill the holes I used Loctite epoxy putty.

To start with I cut off a piece about 1/2" long, using a utility knife blade. After mixing I molded it into a small sausage shape and inserted it in the hole from the back side of the transom. Then I would place my thumb over the hole.

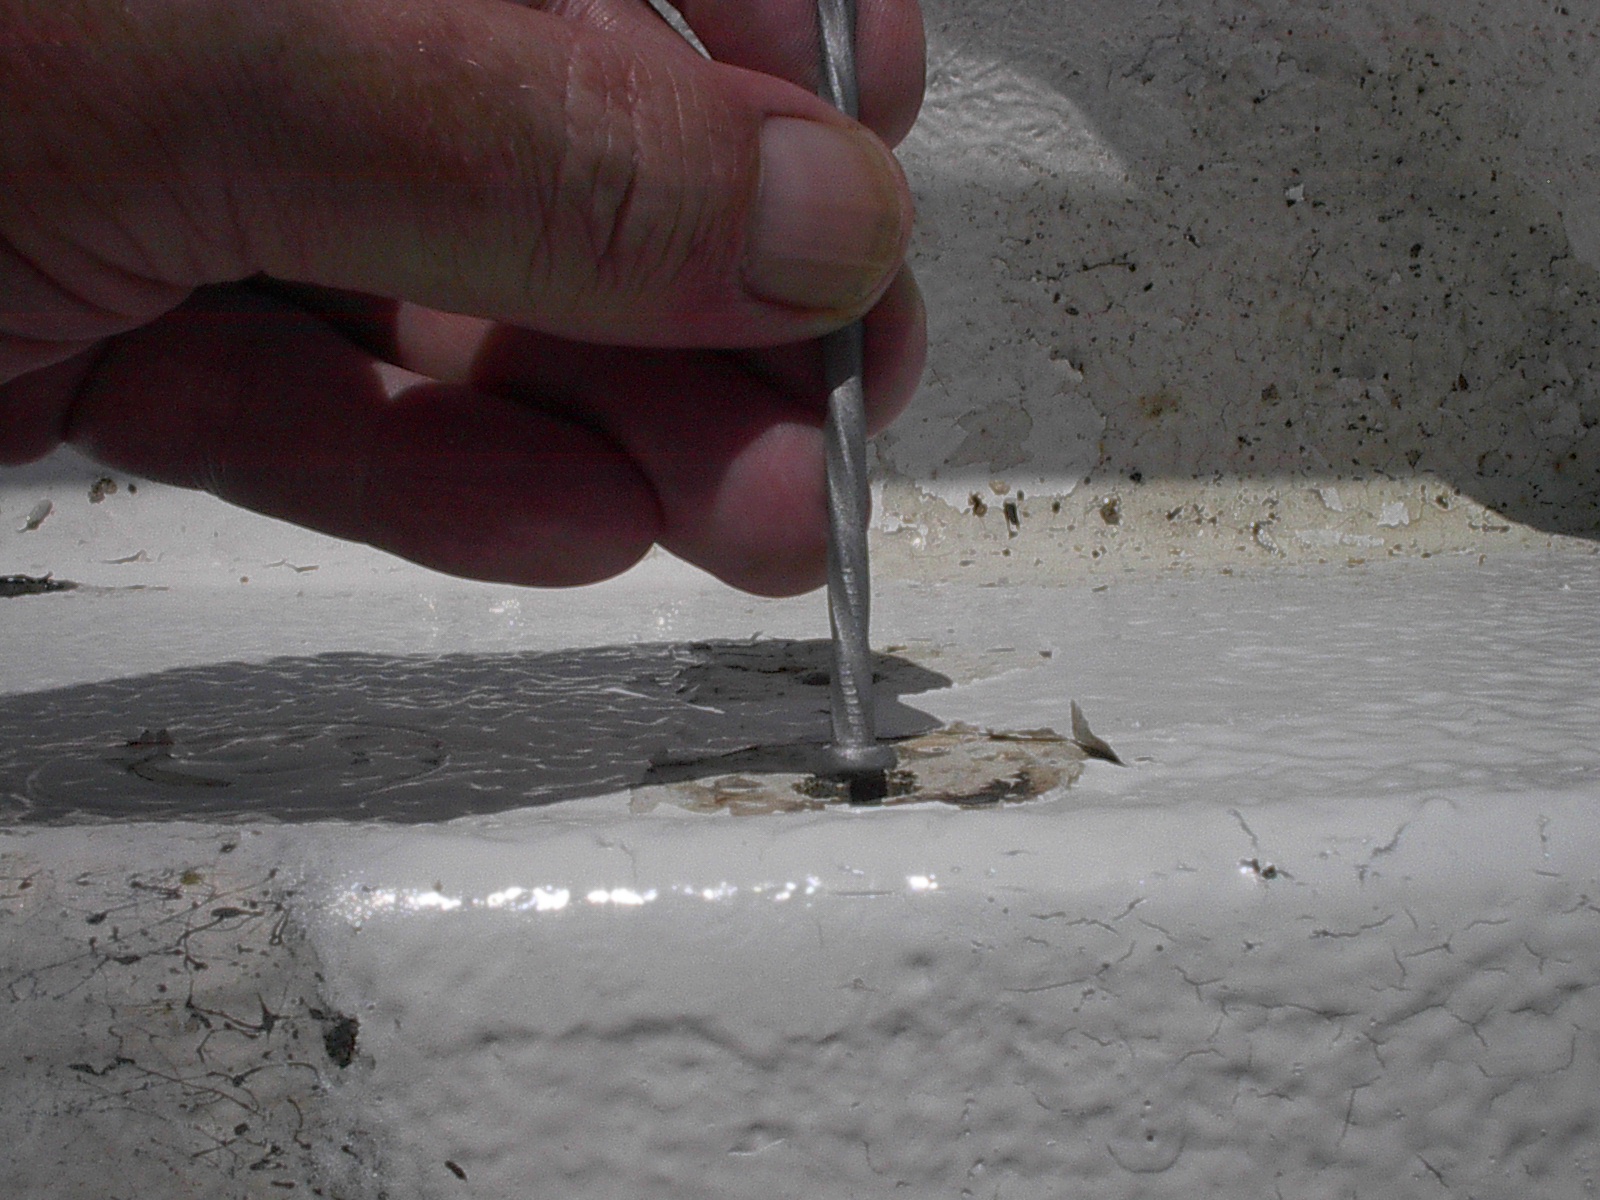
Then using the head of a 16d nail from the splashwell I packed the putty against my thumb and worked it to fill the oddly shaped hole.

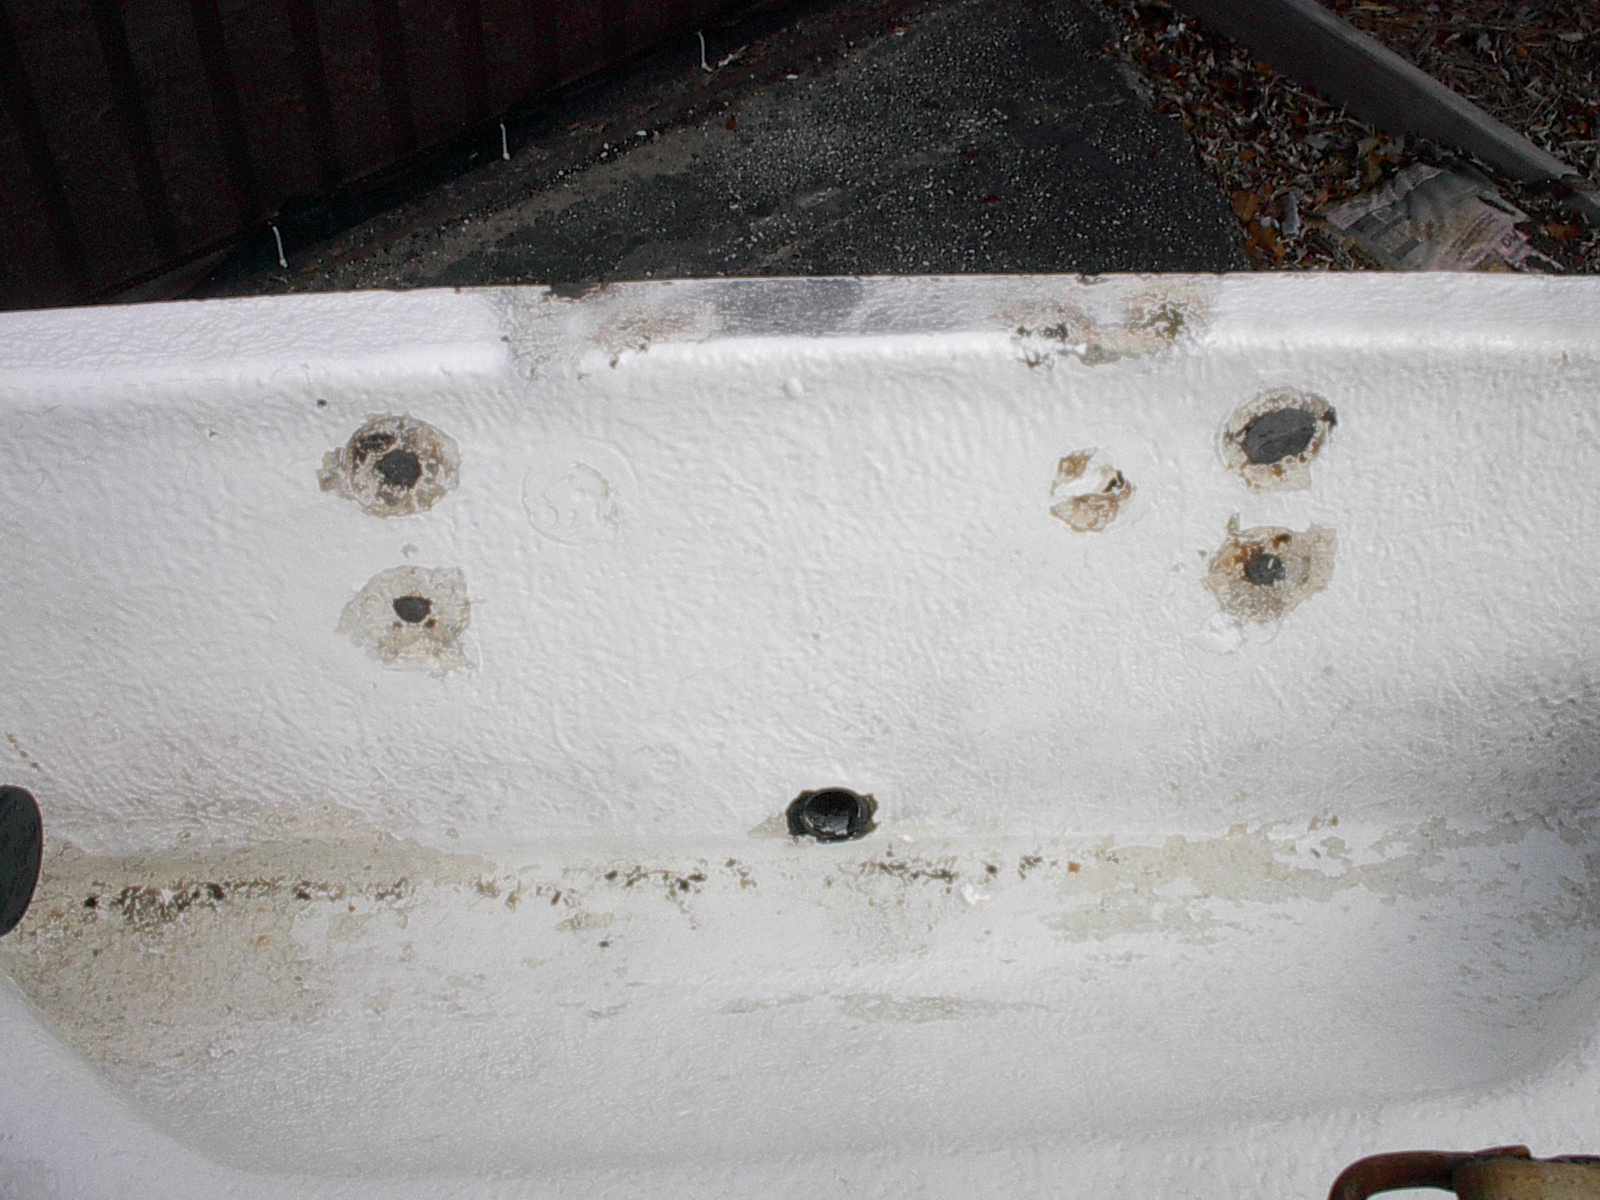
After filling all the thru holes about 1/3 of the way and some other holes over 1/4" deep, let cure overnight and it looked like this.

The next day I filled the rest of the holes flush with the slashwell. Using the nail head to pack the putty into the hole. Don't try to fill the hole with one piece of putty, multi marble size piece of putty will pack better. The splashwell side.
Attachments:

Please Log in or Create an account to join the conversation.

Re:1968 16' Boston Whaler 10 years 9 months ago #90653

Very nice, it worked out well.

Bob

Please Log in or Create an account to join the conversation.

Re:1968 16' Boston Whaler 10 years 9 months ago #90655

That's good stuff. I have been using it this winter on my aluminum boat. Had way to many holes driled in it. I chamferred the holes inside and out, squezed the putty into the holes from both sides. When hard I sanded the "good" side flat and left the extra on the inside. Strong fix on holes 3/8 and under.

Please Log in or Create an account to join the conversation.

Re:1968 16' Boston Whaler 10 years 9 months ago #90657

  • CAT*FIN*k
  • CAT*FIN*k's Avatar Topic Author
  • Offline
  • Gold Boarder
  • Gold Boarder
  • Posts: 620
  • Karma: 35
  • Thank you received: 0
Thanx guys, That epoxy putty is good stuff. Today I picked a tube of White Marine epoxy putty at the local tool store, never seen it in white before. One trick I've learned over the years working with this stuff. If you have a older or dryer tube of putty you can use it if it can be mixed. Before packing the hole with putty that might not stick well to the hole walls, wet the walls of the hole with some JB Weld then pack in then putty and it will stick and cure hard.

Please Log in or Create an account to join the conversation.

Re:1968 16' Boston Whaler 10 years 9 months ago #90658

  • CAT*FIN*k
  • CAT*FIN*k's Avatar Topic Author
  • Offline
  • Gold Boarder
  • Gold Boarder
  • Posts: 620
  • Karma: 35
  • Thank you received: 0
Skim Coating the Transom;

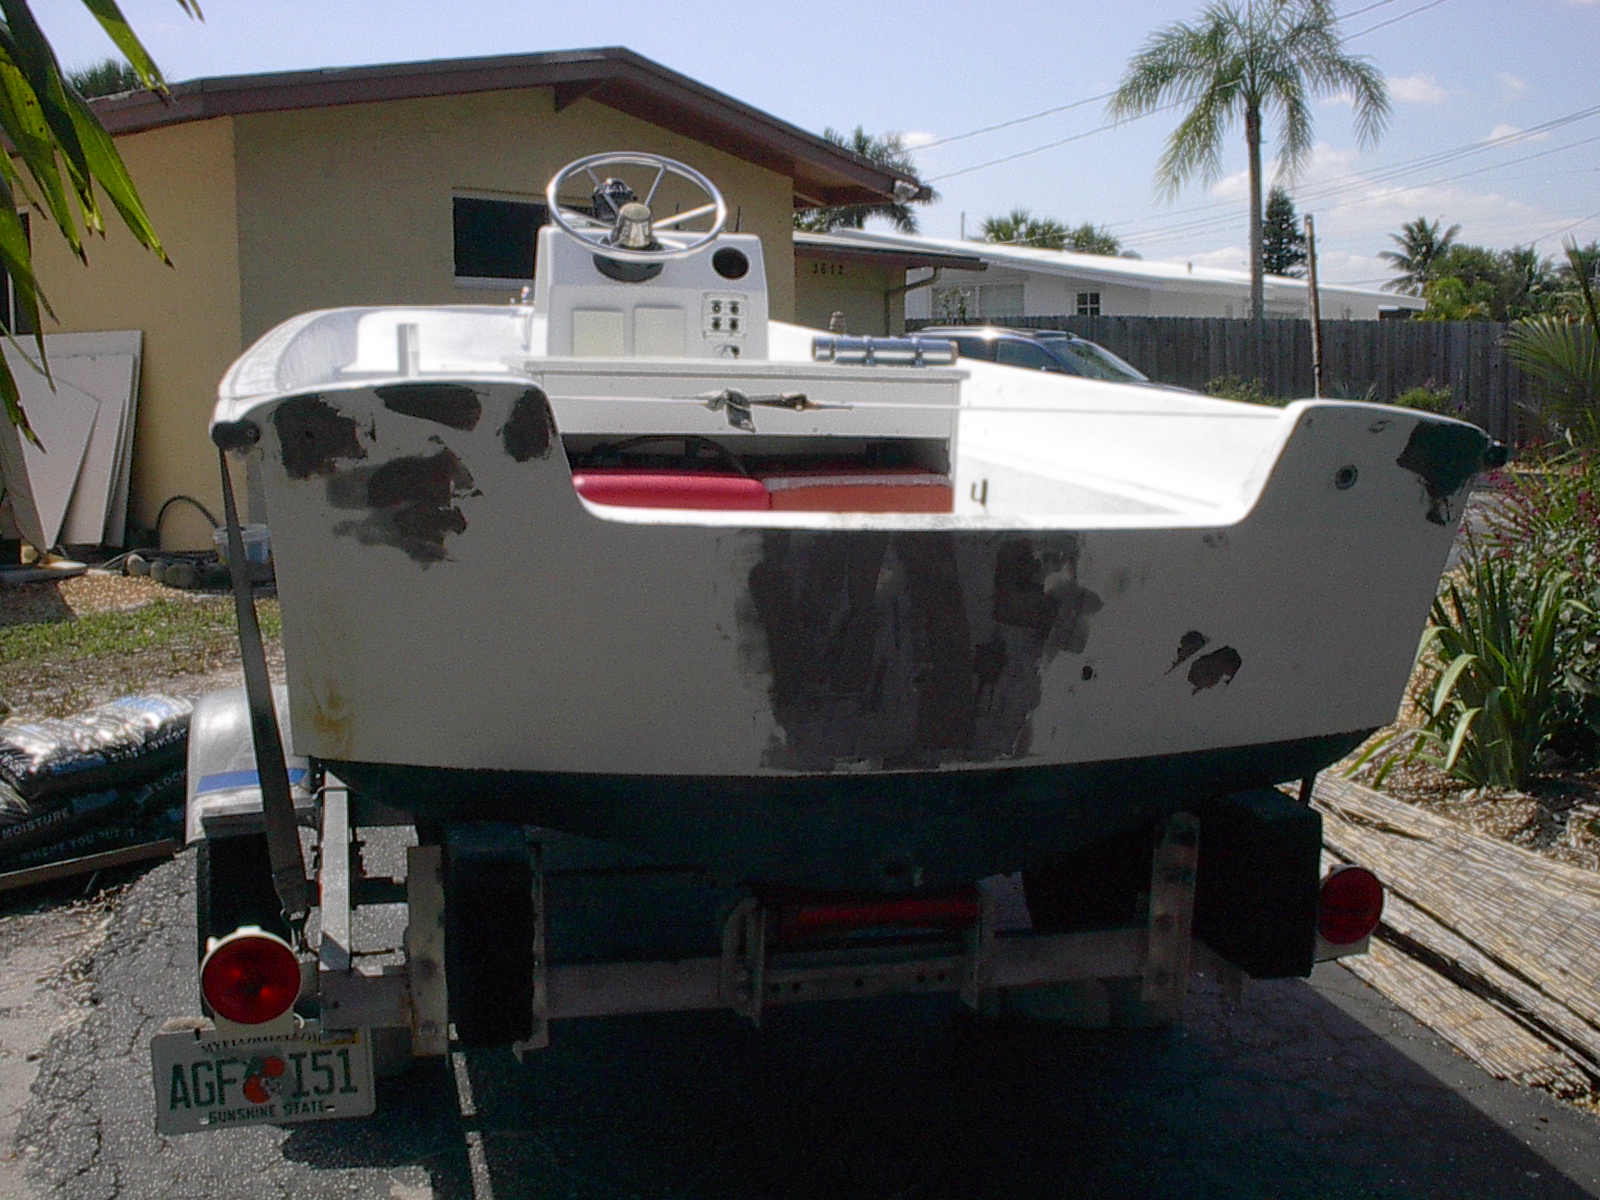
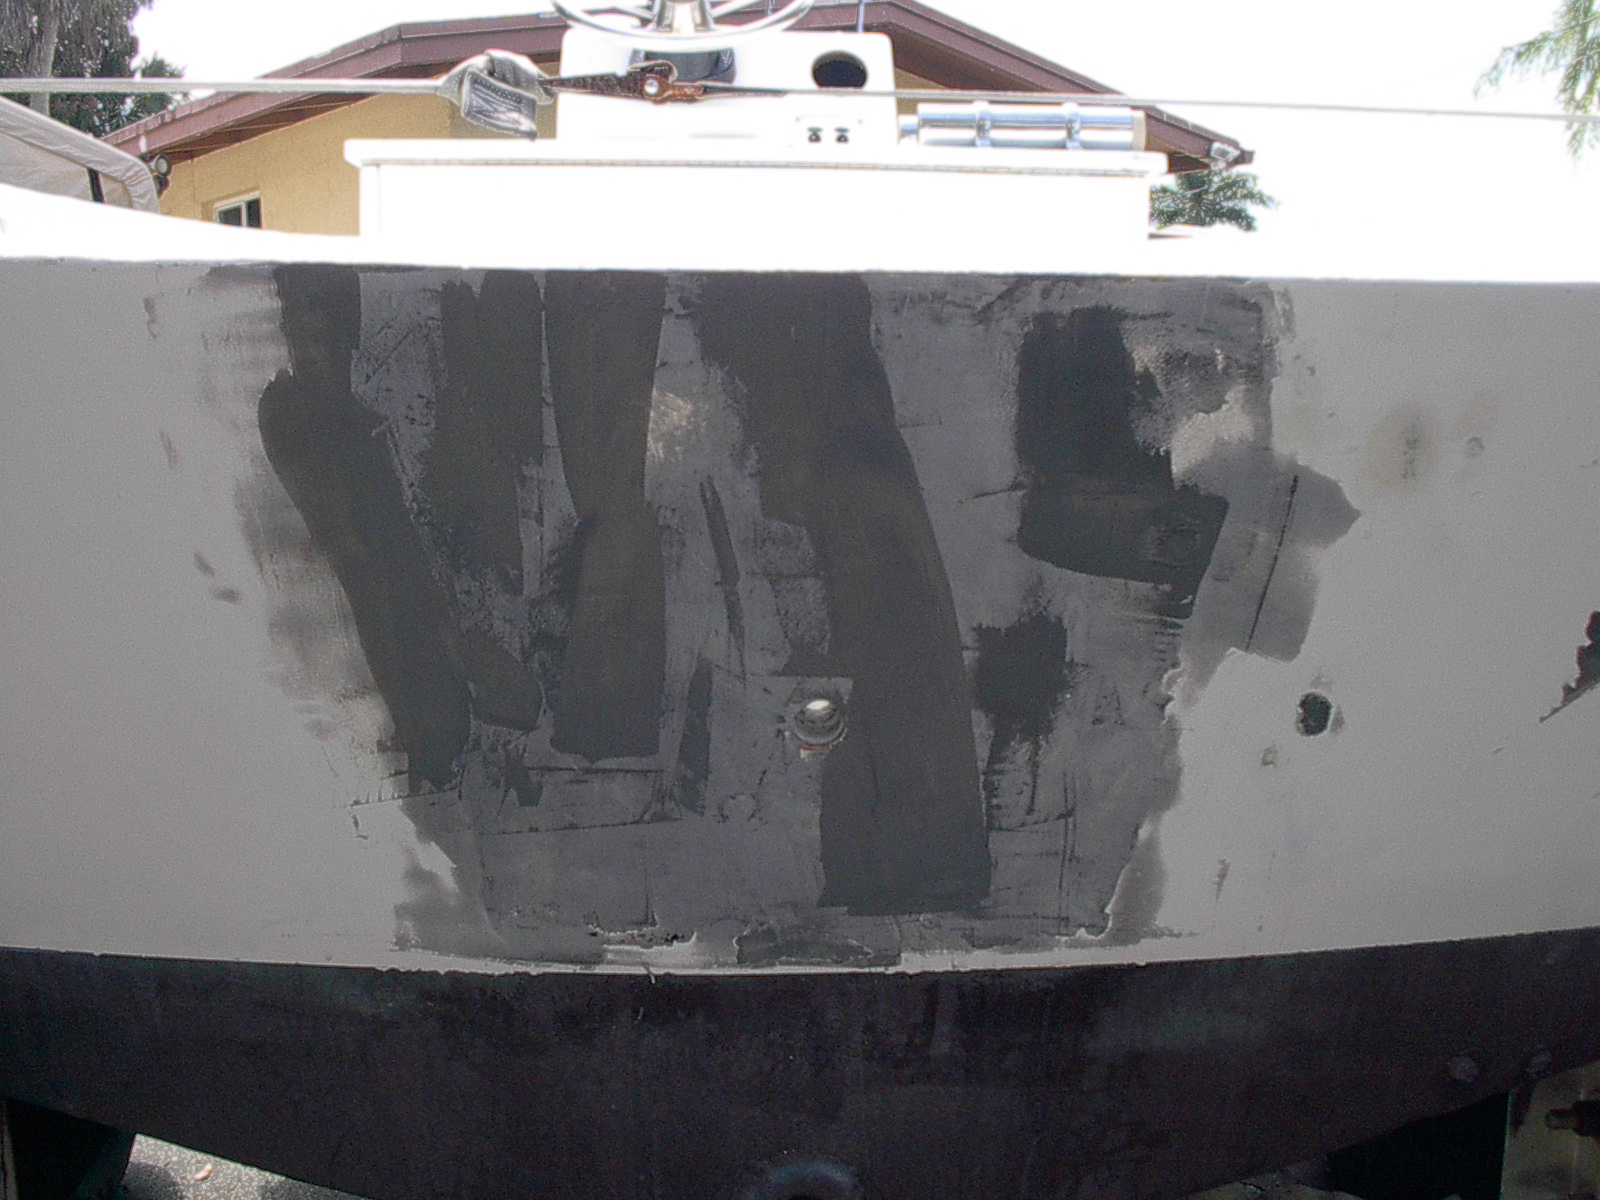
I sanding the area with 80 grit sand paper on a DA sander. The next step was to level the area with JB Weld epoxy. I like the JB Weld because it flows out smooth. I don't like how long it takes to cure, 15+ hours, it can sag if to thick. A pick with the first skim coat applied. I'll block it out with 80 grit sand paper, there may be a couple sots that will need a 2nd coat.


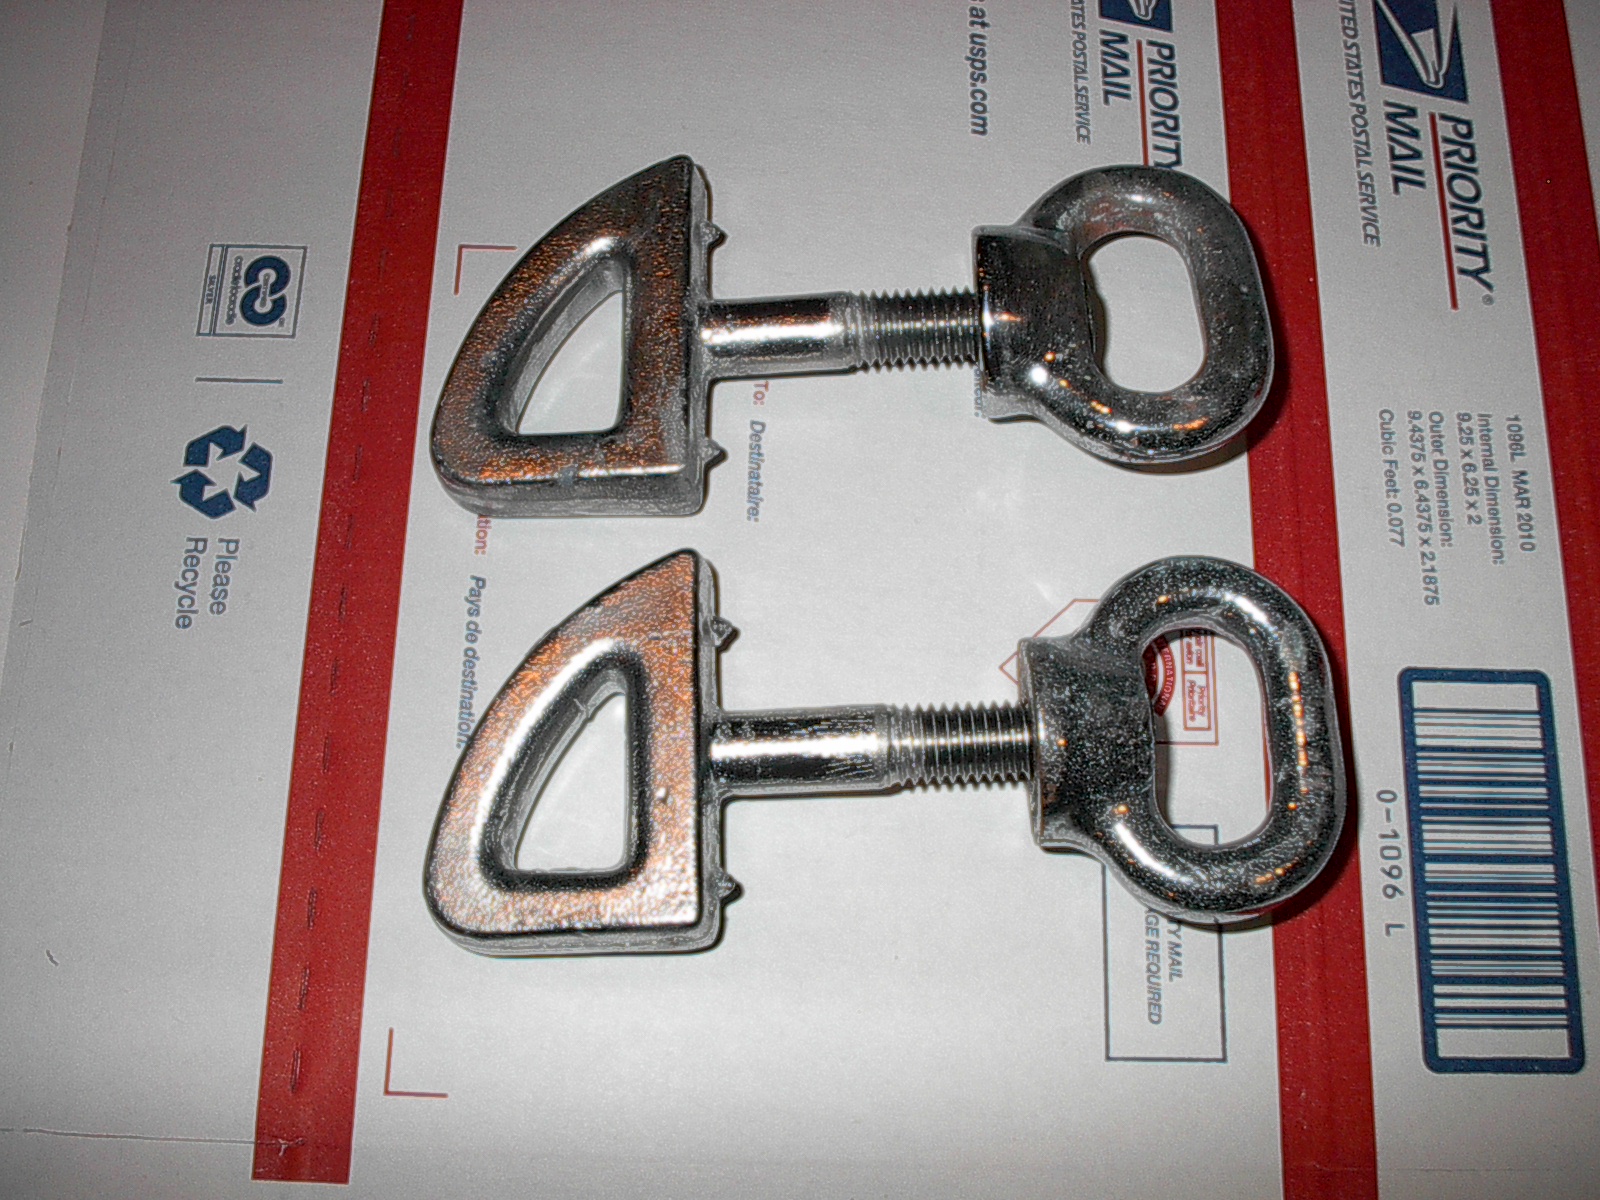
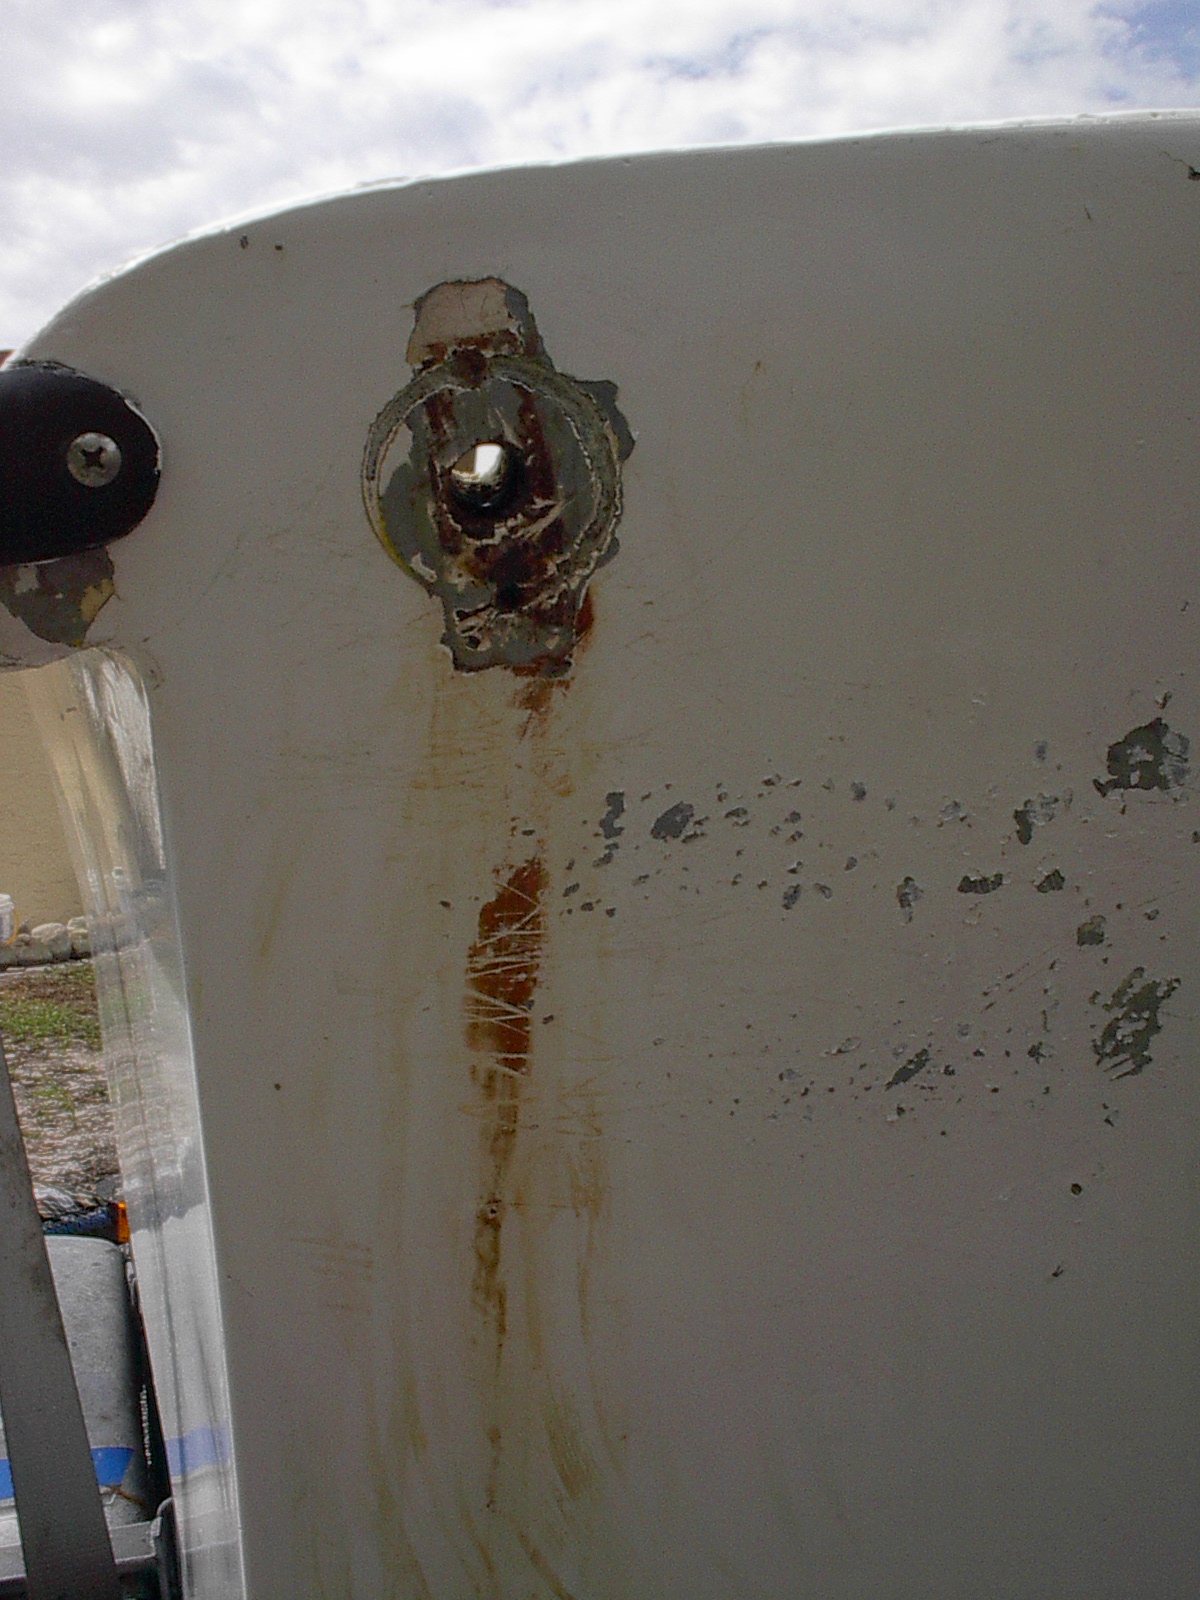
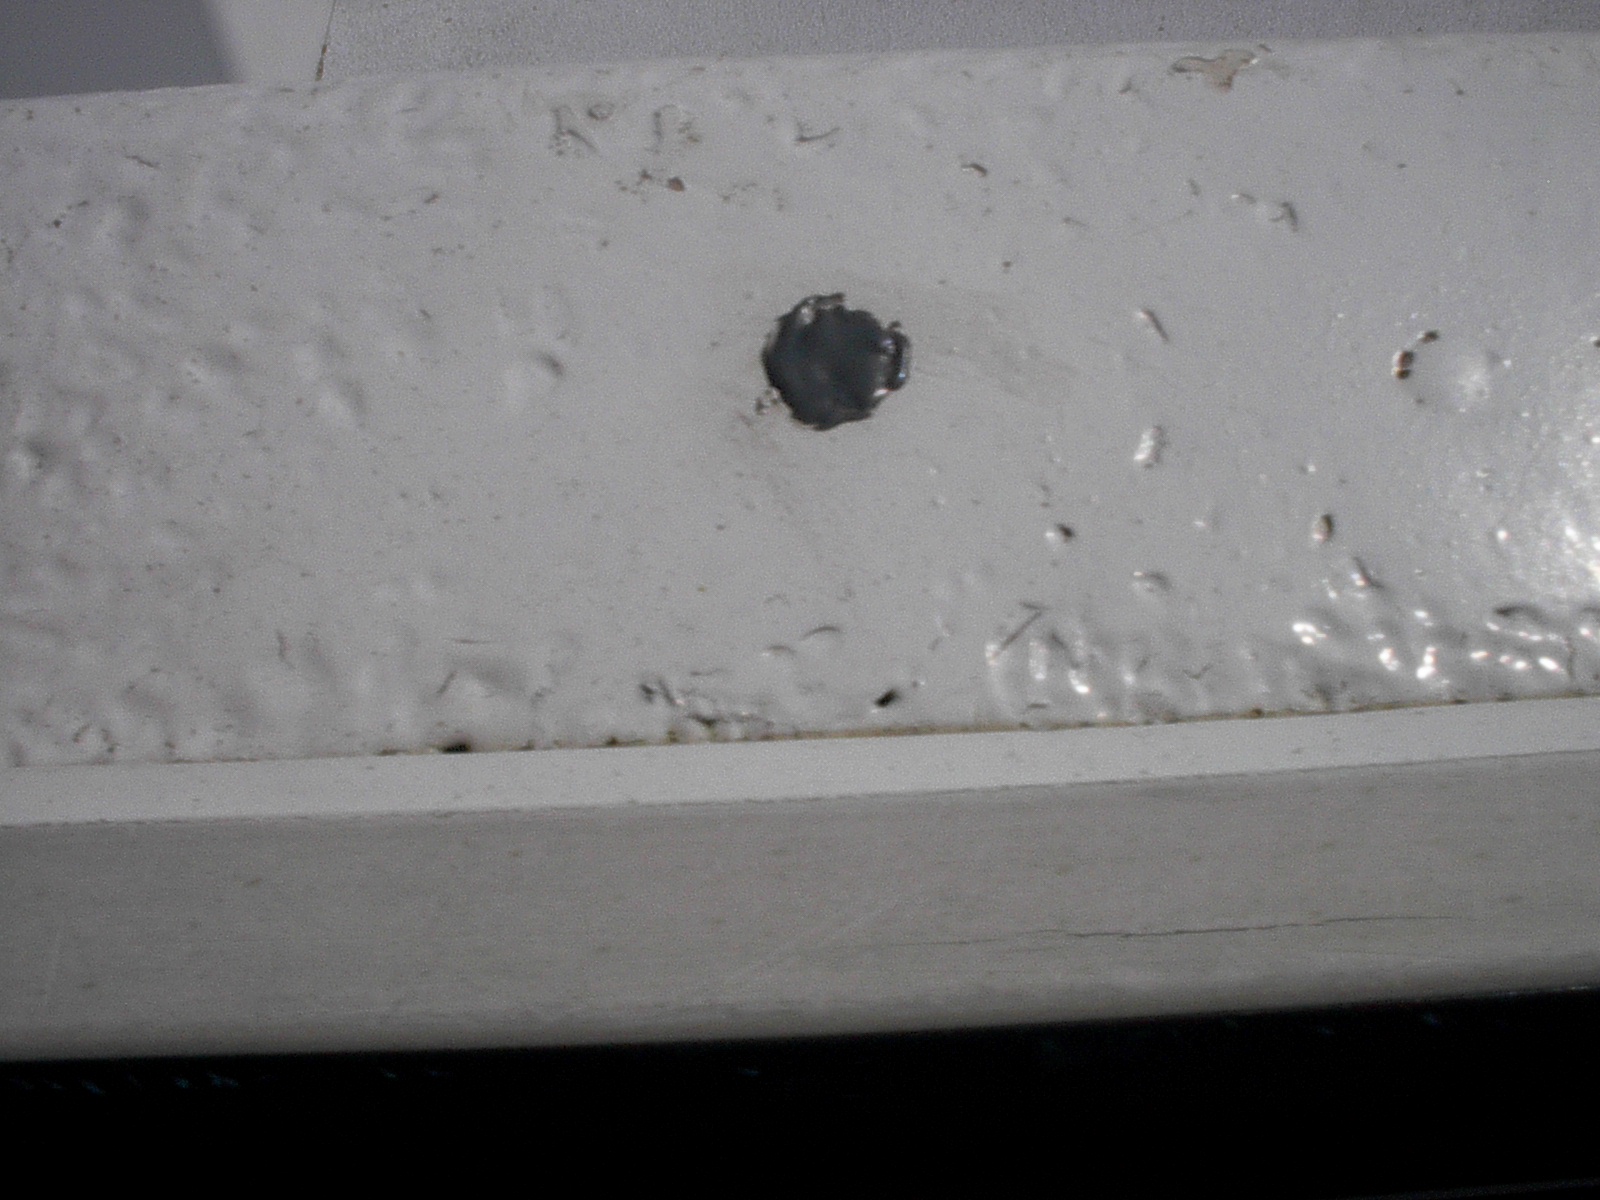
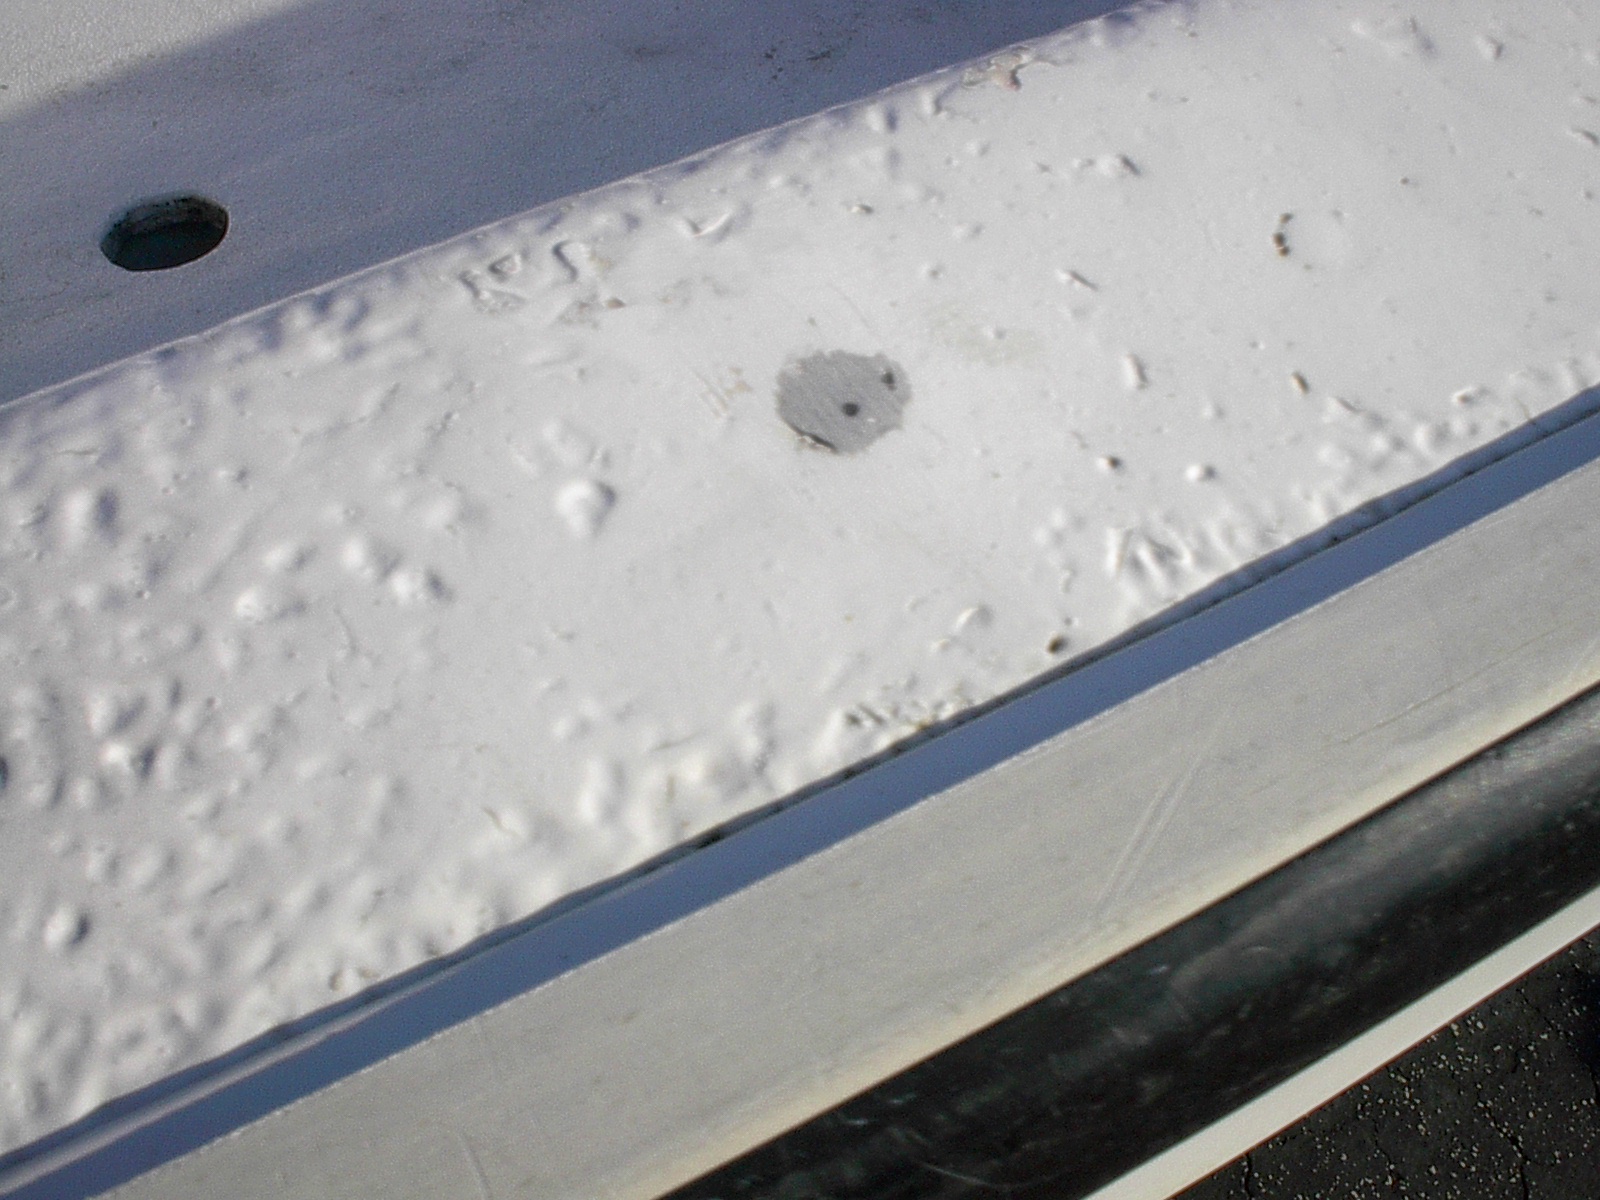
This pic of a D-ring hole is what I mean about sags. The D-rings on the transom has spikes to hold in place when tight. These D-rings where allow to be loose for a while and had cut a groove circle about 2" in diameter into the fiberglass. I smeared some extra JB Weld on this one, it will take a few coats and sandings to fill flush.


After sanding the epoxy filler down There were still a couple low spots. I used a second coat of JB Weld to fill in the low spots.
Attachments:

Please Log in or Create an account to join the conversation.

Re:1968 16' Boston Whaler 10 years 9 months ago #90661

  • MarkS
  • MarkS's Avatar
  • Offline
  • Moderator
  • Moderator
  • Posts: 5348
  • Karma: 118
  • Thank you received: 5
Good looking Whaler CAT*FIN*k, nice score! Thank you for sharing your repair procedure with us, looks like you've got it under control.

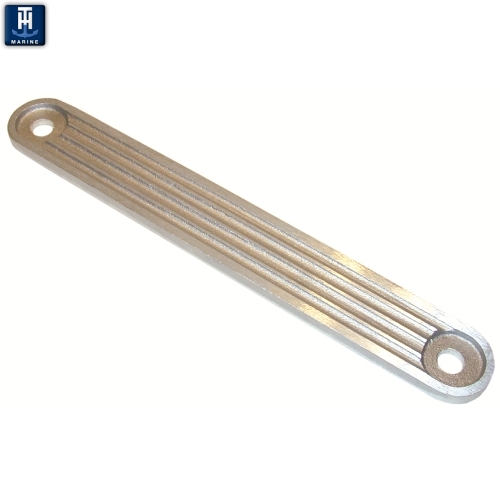
The transom scarring you're dealing with is the very reason I put a (1/8"Alum.) plate on the outside of mine before installing the outboard. I figured the chances of me having to change out motors eventually made it a good idea cosmetically, especially since I painted instead of re-gel coating the hull. Just a thought......... ;)

Please Log in or Create an account to join the conversation.

Mark

Re:1968 16' Boston Whaler 10 years 9 months ago #90664

  • CAT*FIN*k
  • CAT*FIN*k's Avatar Topic Author
  • Offline
  • Gold Boarder
  • Gold Boarder
  • Posts: 620
  • Karma: 35
  • Thank you received: 0
Thanx for the good words Mark. I've had transom plates on some boats before. Not sure if I'll use one on the Whaler. The aluminum one from the Manta Ray will fit, I think I'd go for stainless on the Whaler tho. I was thinking to use this style on the inside.


The boat has been re-painted several times. Each time the motor was left mounted. You can see in the scar pic the original red stripe and below the light blue bottom paint. The last time the hull was painted with a very good epoxy paint, Awlgrip I think. If they would have removed the motor and done what I did before the last painting, there would be no scar...maybe a few scratches.
Attachments:

Please Log in or Create an account to join the conversation.

Re:1968 16' Boston Whaler 10 years 9 months ago #90745

  • CAT*FIN*k
  • CAT*FIN*k's Avatar Topic Author
  • Offline
  • Gold Boarder
  • Gold Boarder
  • Posts: 620
  • Karma: 35
  • Thank you received: 0
Bow Light;

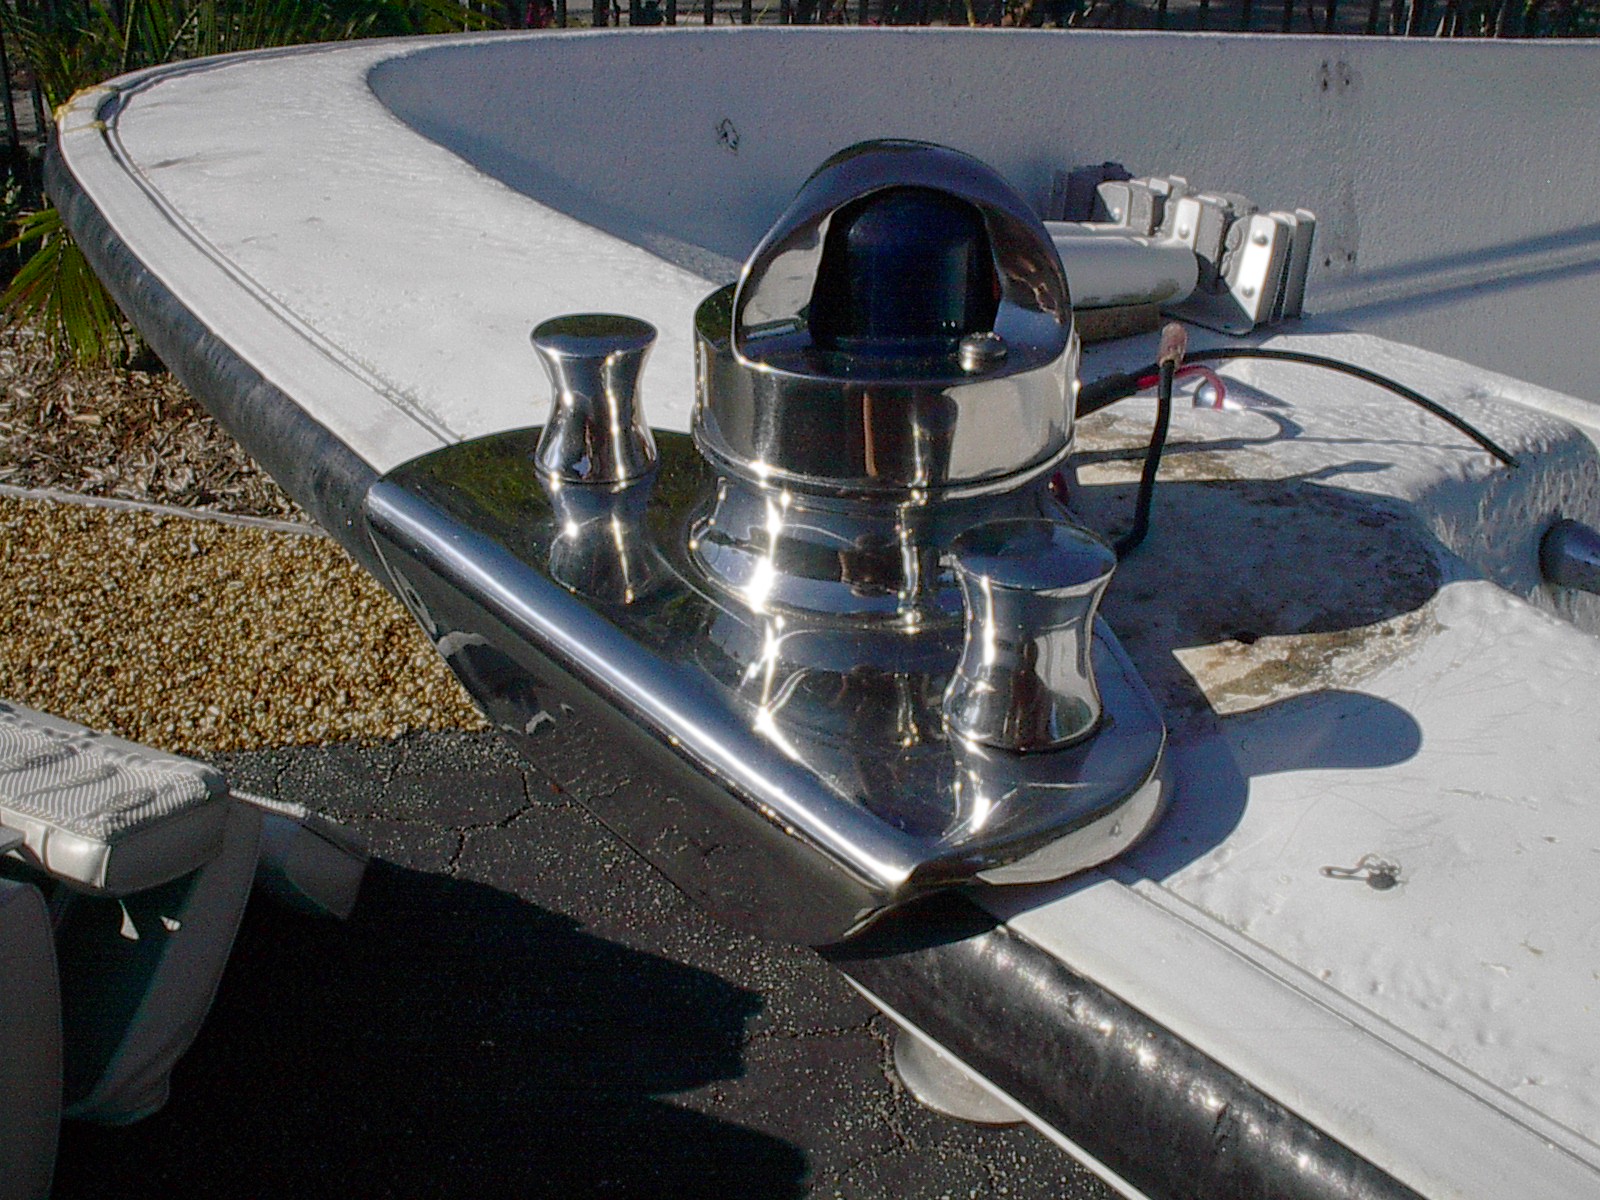
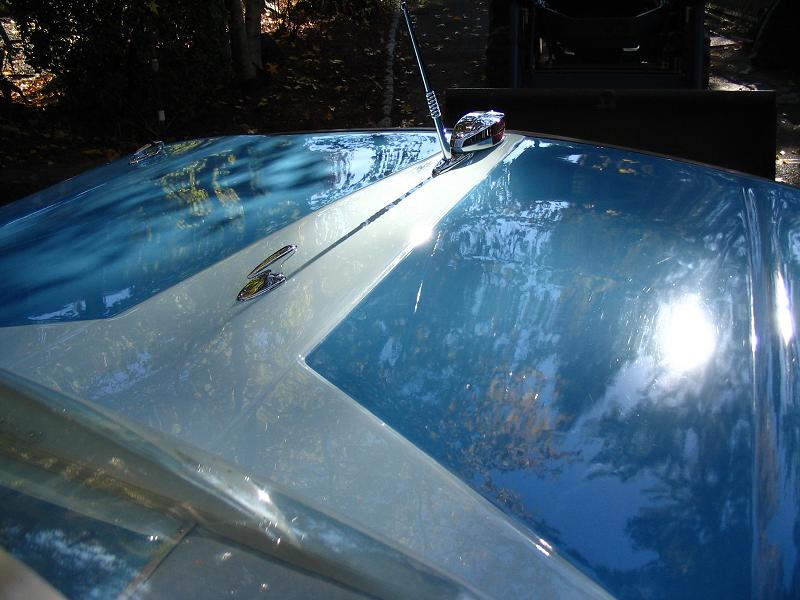
The bow light mounted when we got the boat was not original. It was plastic and the chrome was bubbling. Between the light and the boat was a dried out cracked round piece of mahogany. Itook a close up pic before starting but it did not turn out, this is a before pic from when we bought the boat.


I installed a new Boston Whaler LED light with chocks. Will need to get some smaller washers these were the only stainless I had on hand.
Attachments:

Please Log in or Create an account to join the conversation.

Re:1968 16' Boston Whaler 10 years 9 months ago #90746

  • CAT*FIN*k
  • CAT*FIN*k's Avatar Topic Author
  • Offline
  • Gold Boarder
  • Gold Boarder
  • Posts: 620
  • Karma: 35
  • Thank you received: 0
Transom D-Rings;

The original D-Rings were still on the transom, they thru-bolt to lifting rings on the inside of the transom. The lifting rings had been painted over when the interior was painted. I thought they were going to need replaced due to the amount of rust I could see. Thinking the worst I expected a hard time getting them off. To my surprise they came off easy. I thought I'd give saving them a shot. I sprayed them with Goof Off Rust Remover and put in a small plastic container and re-sprayed a few more times that day. The next morning I went over them with a light wire brush and they started looking good. Back in the container they went with some more rust remover, then covered with water and let set 24 hours. Hit again with the brush and picked off the silicone and they really looked good. Next I gave a heavy coat of Nevr Dull let dry and wiped off. I'll give them a few coats of clear before they get re-installed. I forgot to take a before pic but this is the after. Oh yea all the paint came off the lifting ring, no wonder they are pricy.


The outside of the hole on the outside transom was ruff. Poor maintenance in the past allowed the D-Rings to spin, he spikes cut a nice circle groove.


The inside of the hole was nice, I just gave it a thin coat of JB Weld.

It looks like 2 coats of JB Weld will get it filled. Using epoxy gives me a solid surface again.
Attachments:

Please Log in or Create an account to join the conversation.

Re:1968 16' Boston Whaler 10 years 9 months ago #90805

  • CAT*FIN*k
  • CAT*FIN*k's Avatar Topic Author
  • Offline
  • Gold Boarder
  • Gold Boarder
  • Posts: 620
  • Karma: 35
  • Thank you received: 0
Filling Screw Holes Into Foam Core;

The boat came with 13 rod holders, only 2 are in a place good for me. I wanted to re-locate these to fit my use. This means filling the old screw holes to prevent water from entering. There were also some other items relocated. All n all about 40 holes into the foam core. To fill the holes I mixed some epoxy putty. Pinched off what I need to fill a hole and rolled it like a worm.

Holding the "worm" in my left hand I pinch off about 1/2". With my right hand and roll it between my thumb & fore finger to taper 1 end, like a carrot. The carrot fits easy into the hole, point first. Then I use the flat tipped punch to pack it in. Not much force to pack it as you'll just crush the foam. Repeat until the hole is almost full. I like to leave it a little low and top off with a little JB Weld.

Then hit it with the Dremel and sand it down to match the surrounding area as best as possible.

I also toped off a bunch of old holes that were not filled completely and just collected dirt.

I really like the light blue interiors of the old whalers. Having a white interior looks more modern but is very bright...snow blinding bright. Also the interior paint is starting to look shabby. It's a hard paint but will soften if allowed to stay wet. I sponged up some water that was sitting in the splash well about 24 hours and the paint came off like the water was striper. I picked up some Pettit Easypoxy Bikini Blue this morning to paint the inside. Sanding the interior will be interesting as it is not smooth. I do not want to spend all the time it would take to fill and sand out smooth like the trailer queens.
Attachments:

Please Log in or Create an account to join the conversation.

Re:1968 16' Boston Whaler 10 years 9 months ago #90847

  • CAT*FIN*k
  • CAT*FIN*k's Avatar Topic Author
  • Offline
  • Gold Boarder
  • Gold Boarder
  • Posts: 620
  • Karma: 35
  • Thank you received: 0
Rub Rail;

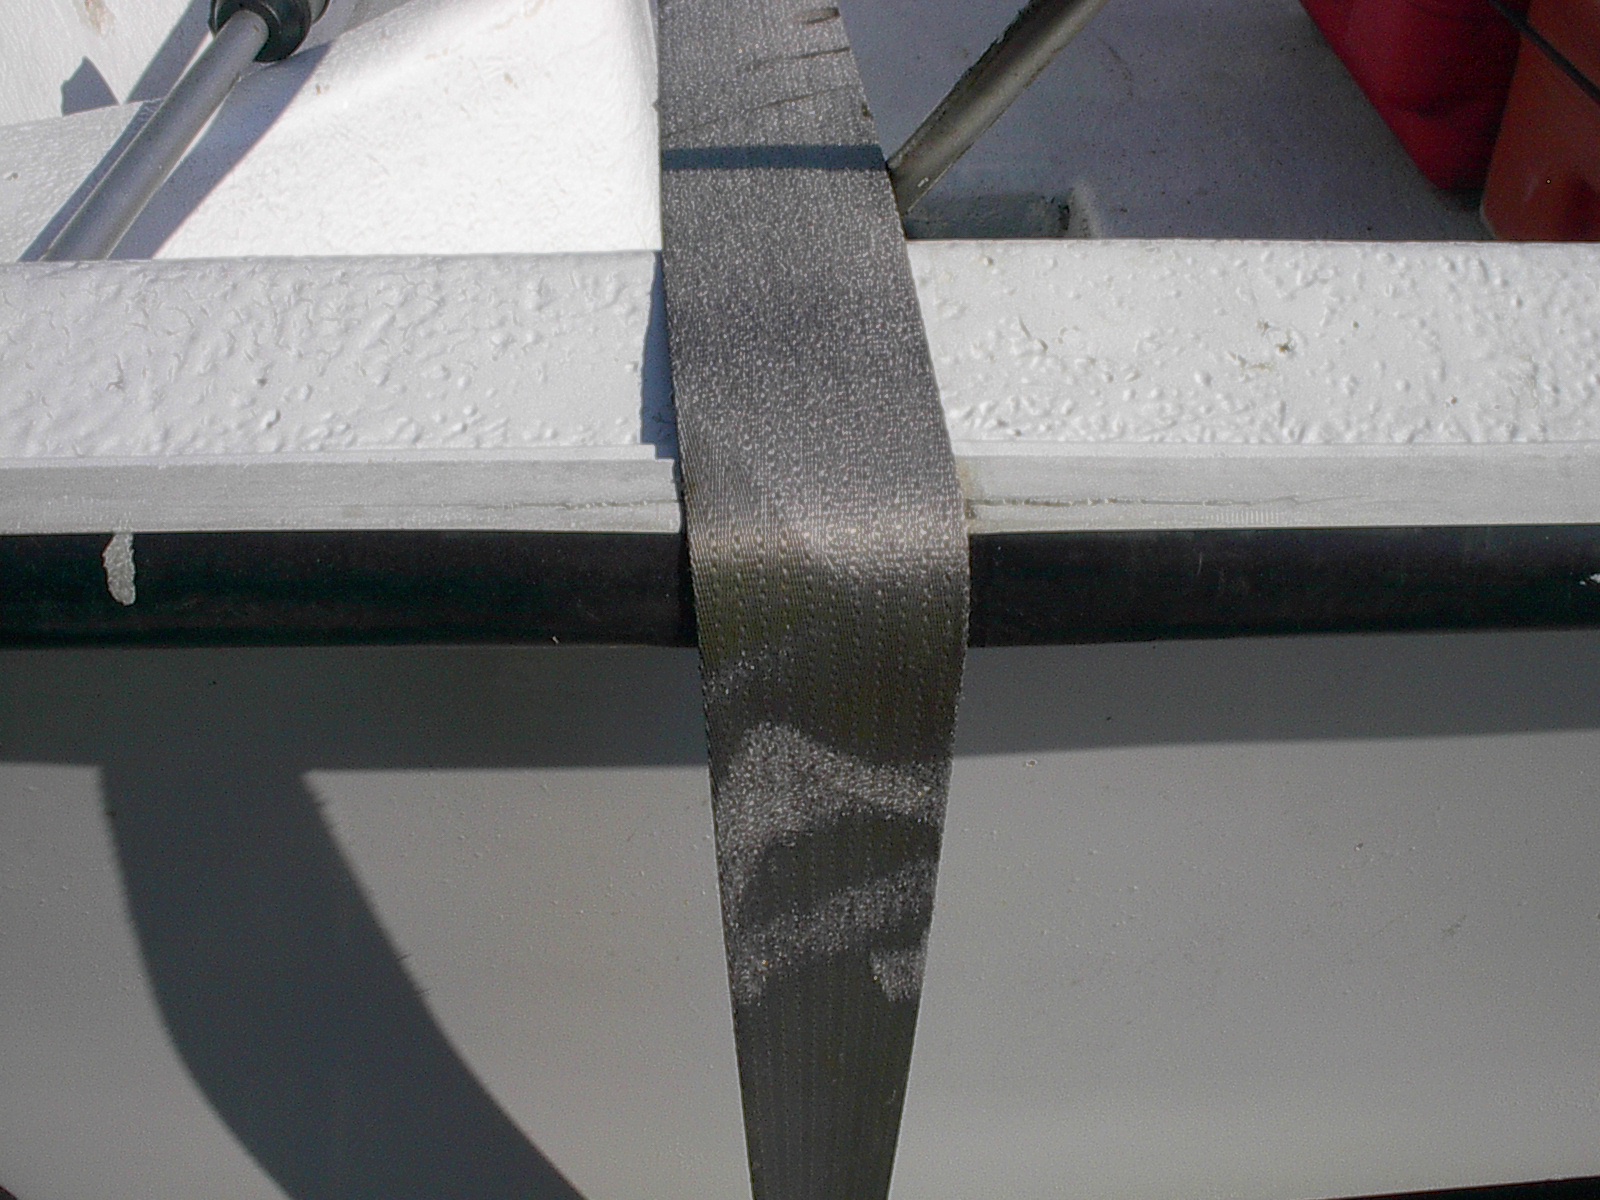
First let me start by saying, I cringe every time I see a boat with a gunwale strap holding it in a trailer. The gunwale strap that was on the Whaler had cracked and crushed the rub rail on both the port & stbd sides, top & bottom of the rub rail.


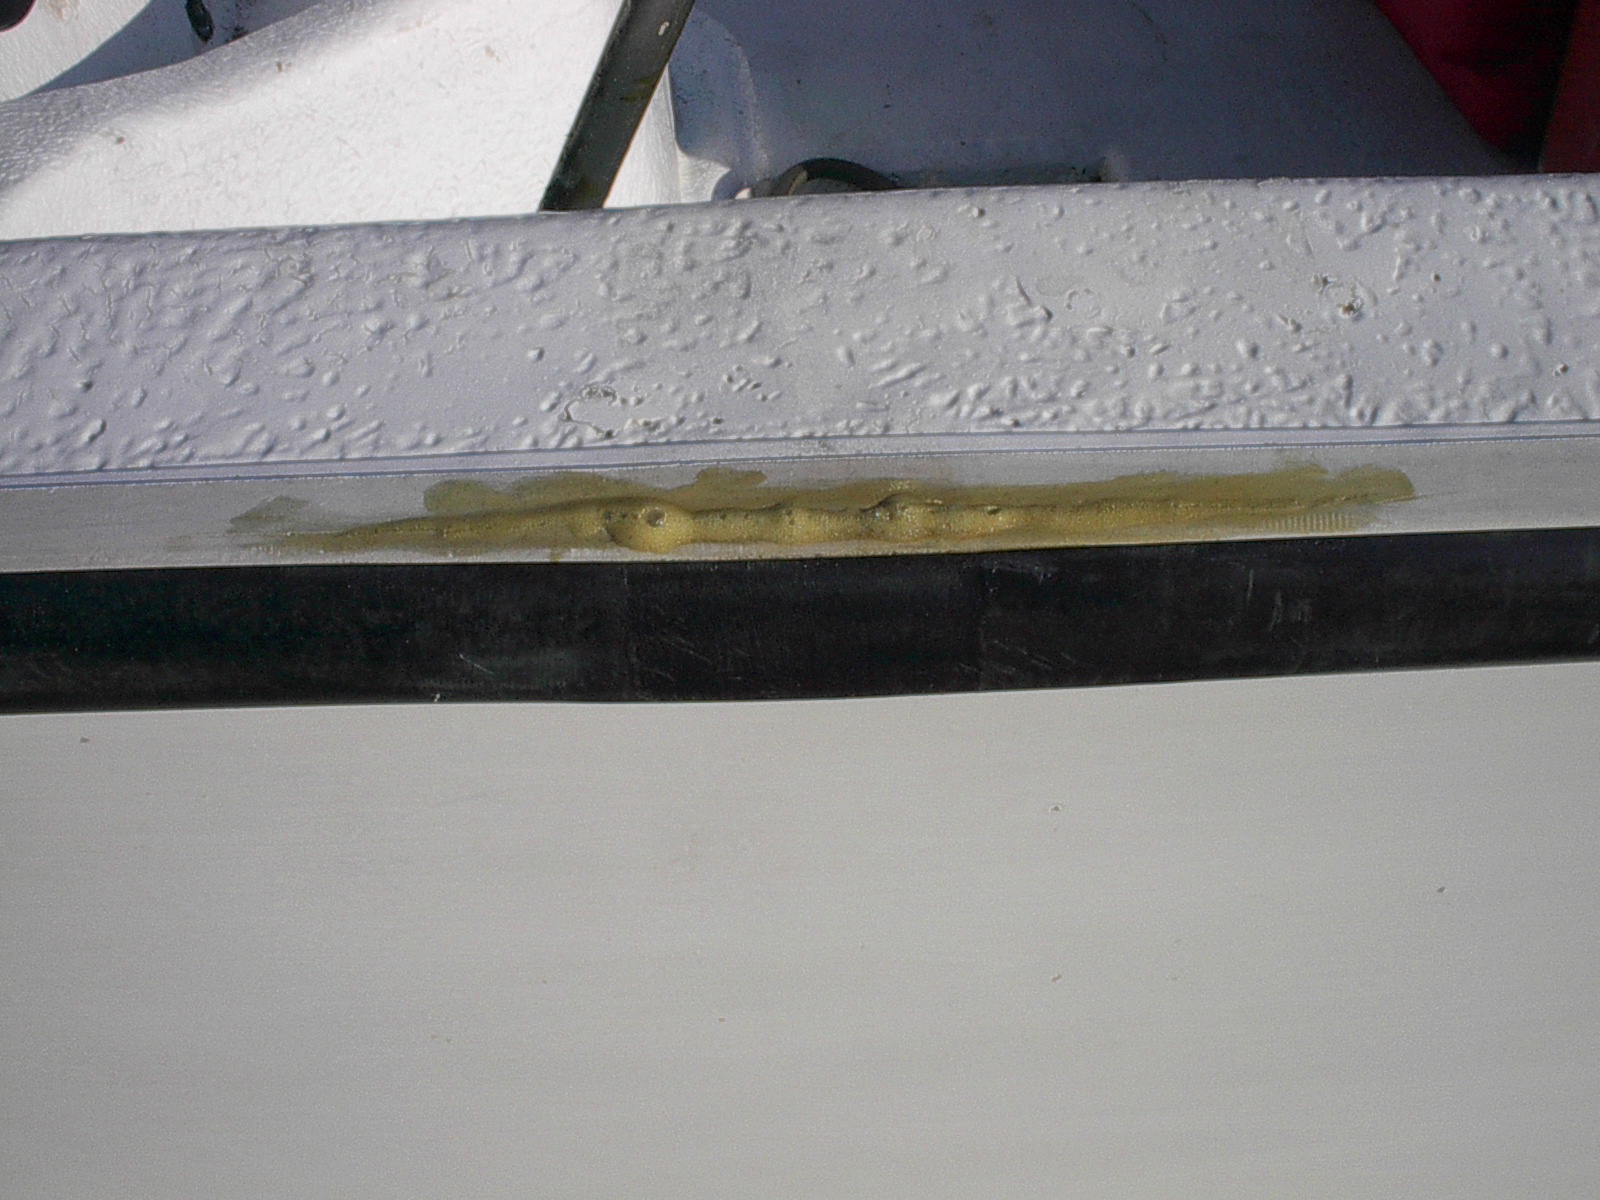
Using a utility knife I spread open the crack and let some Gorilla glue flow in. The glue expands when curing and pushed out the crushed rub rail almost to where it should be.


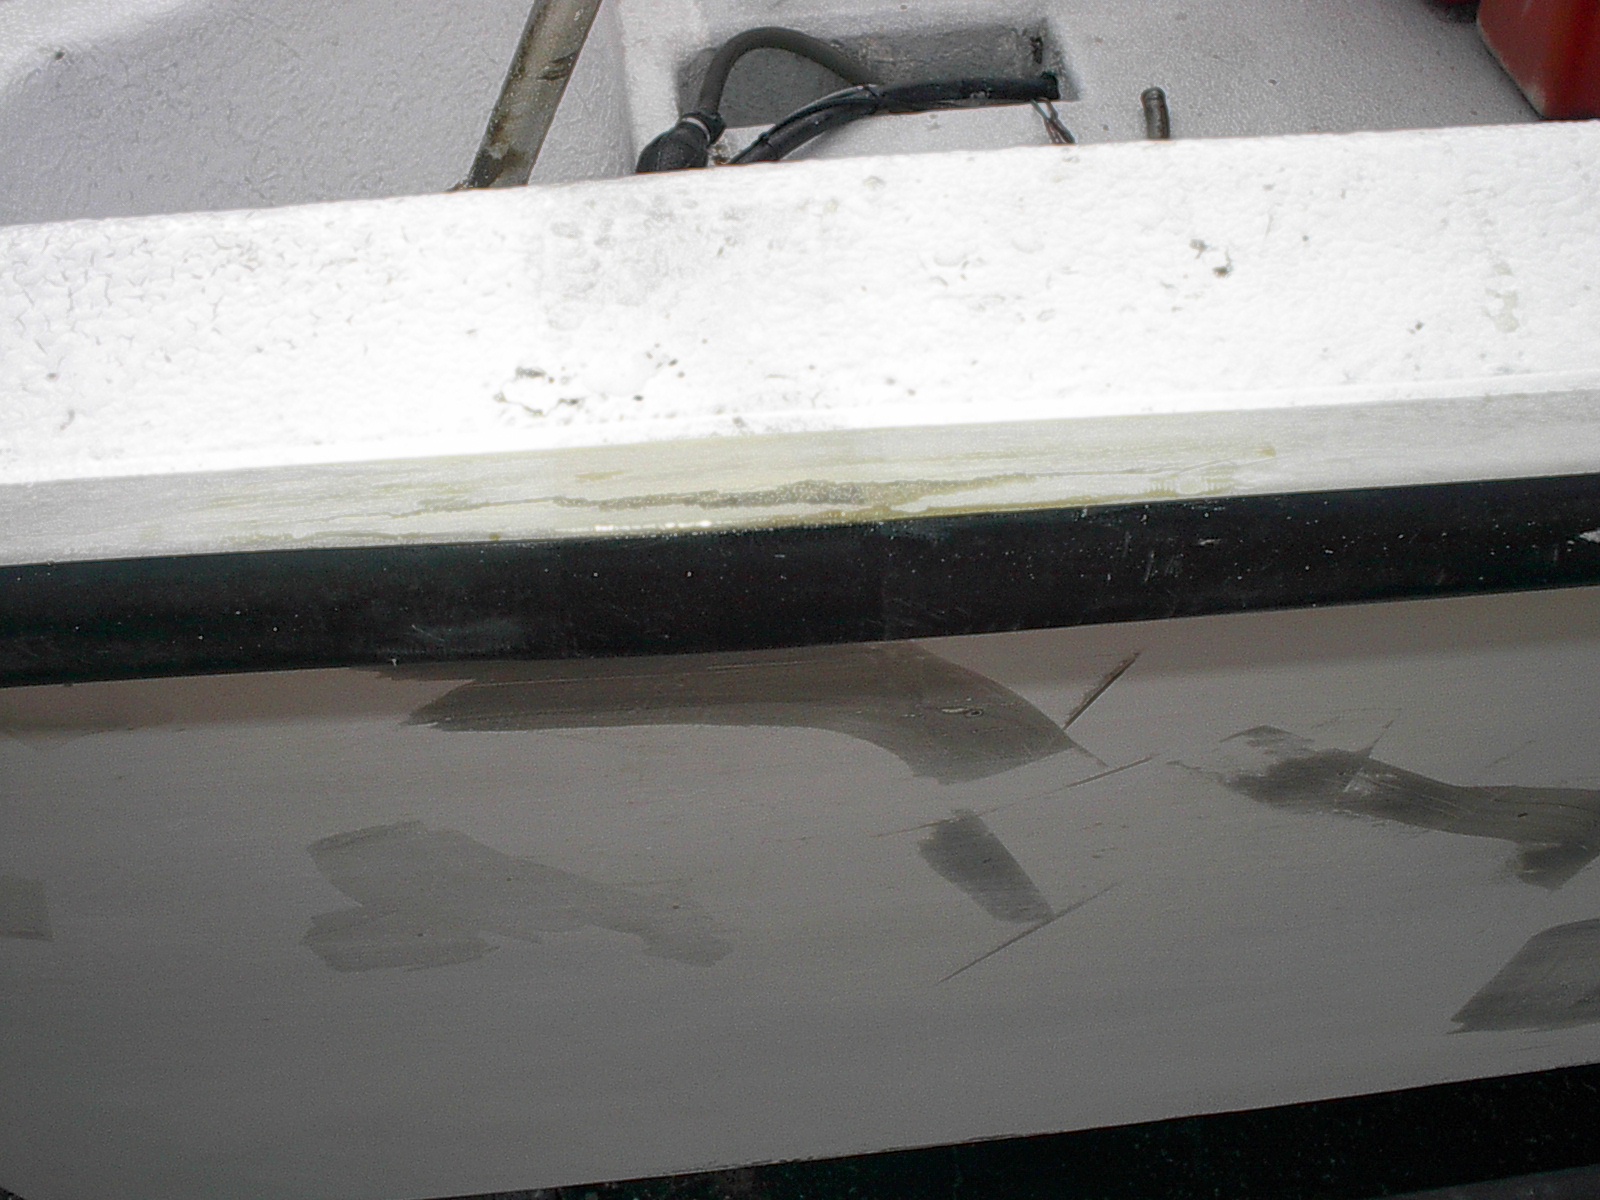
When the glue was fully cured I trimed off the excess with a utility knife. This should prevent further cracking and give me a few more years before it needs replaced.


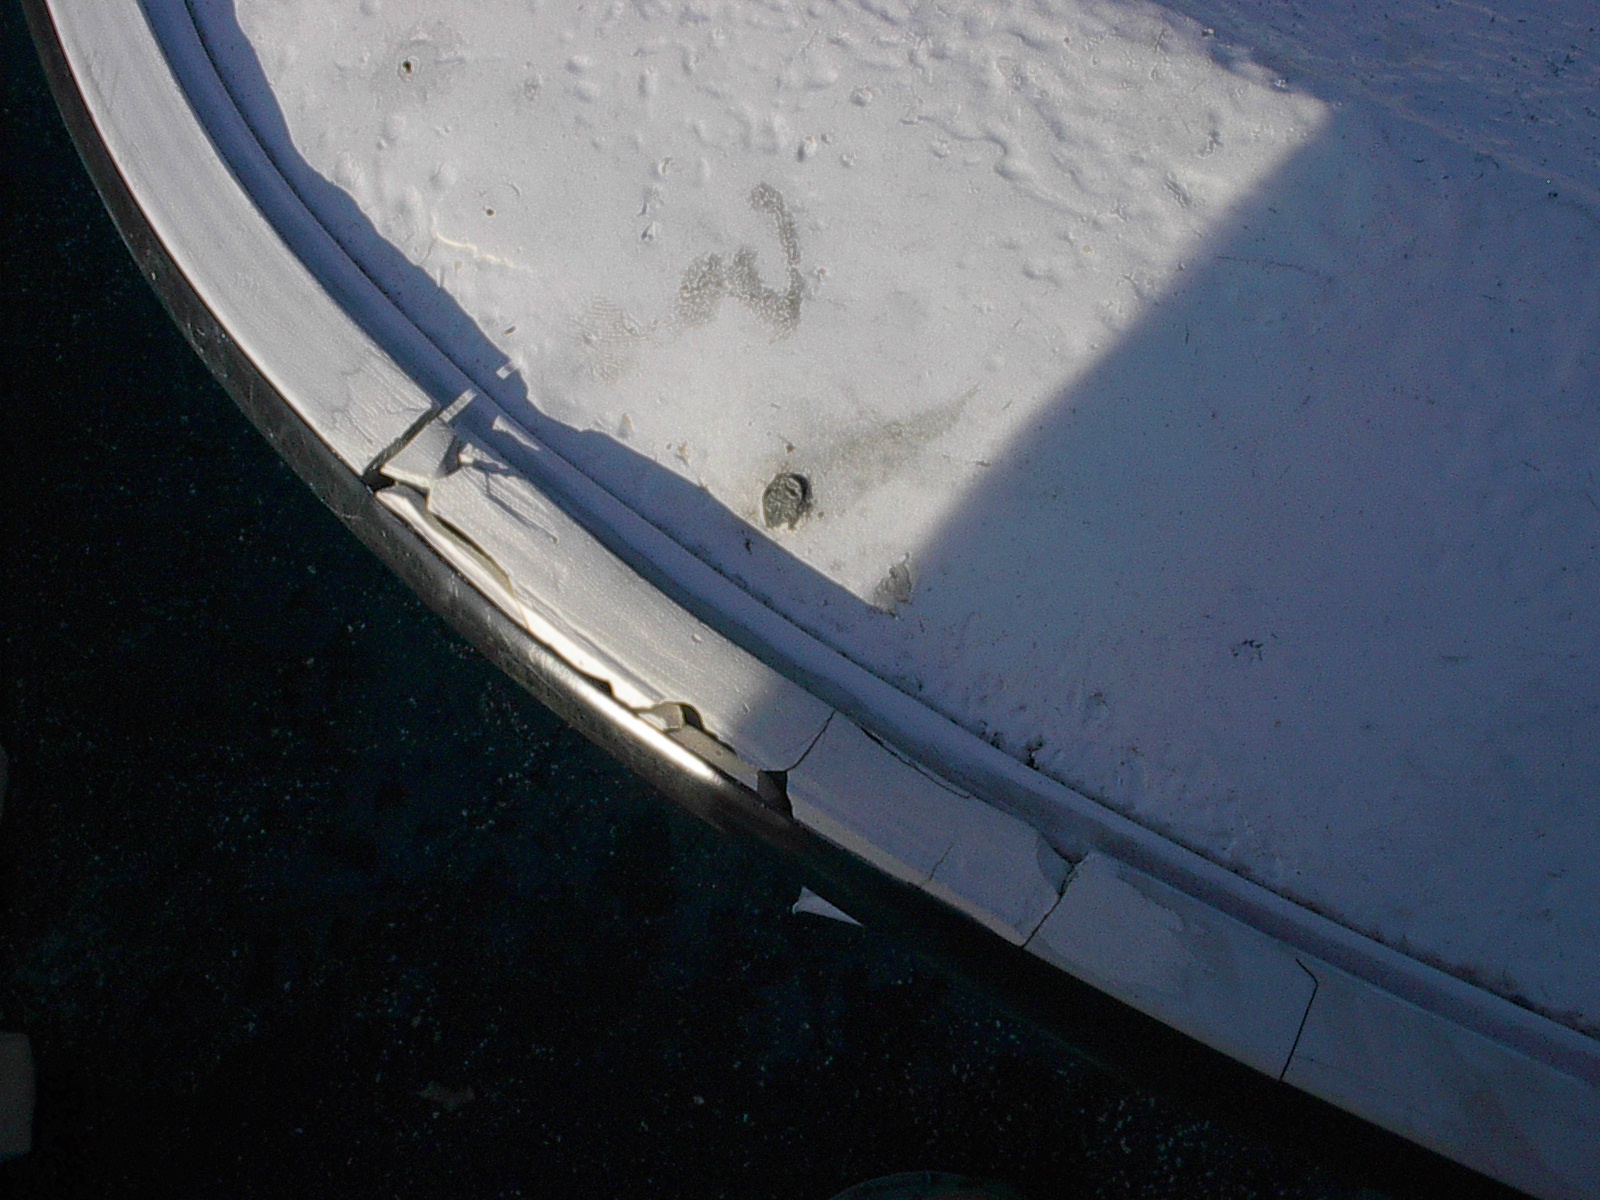
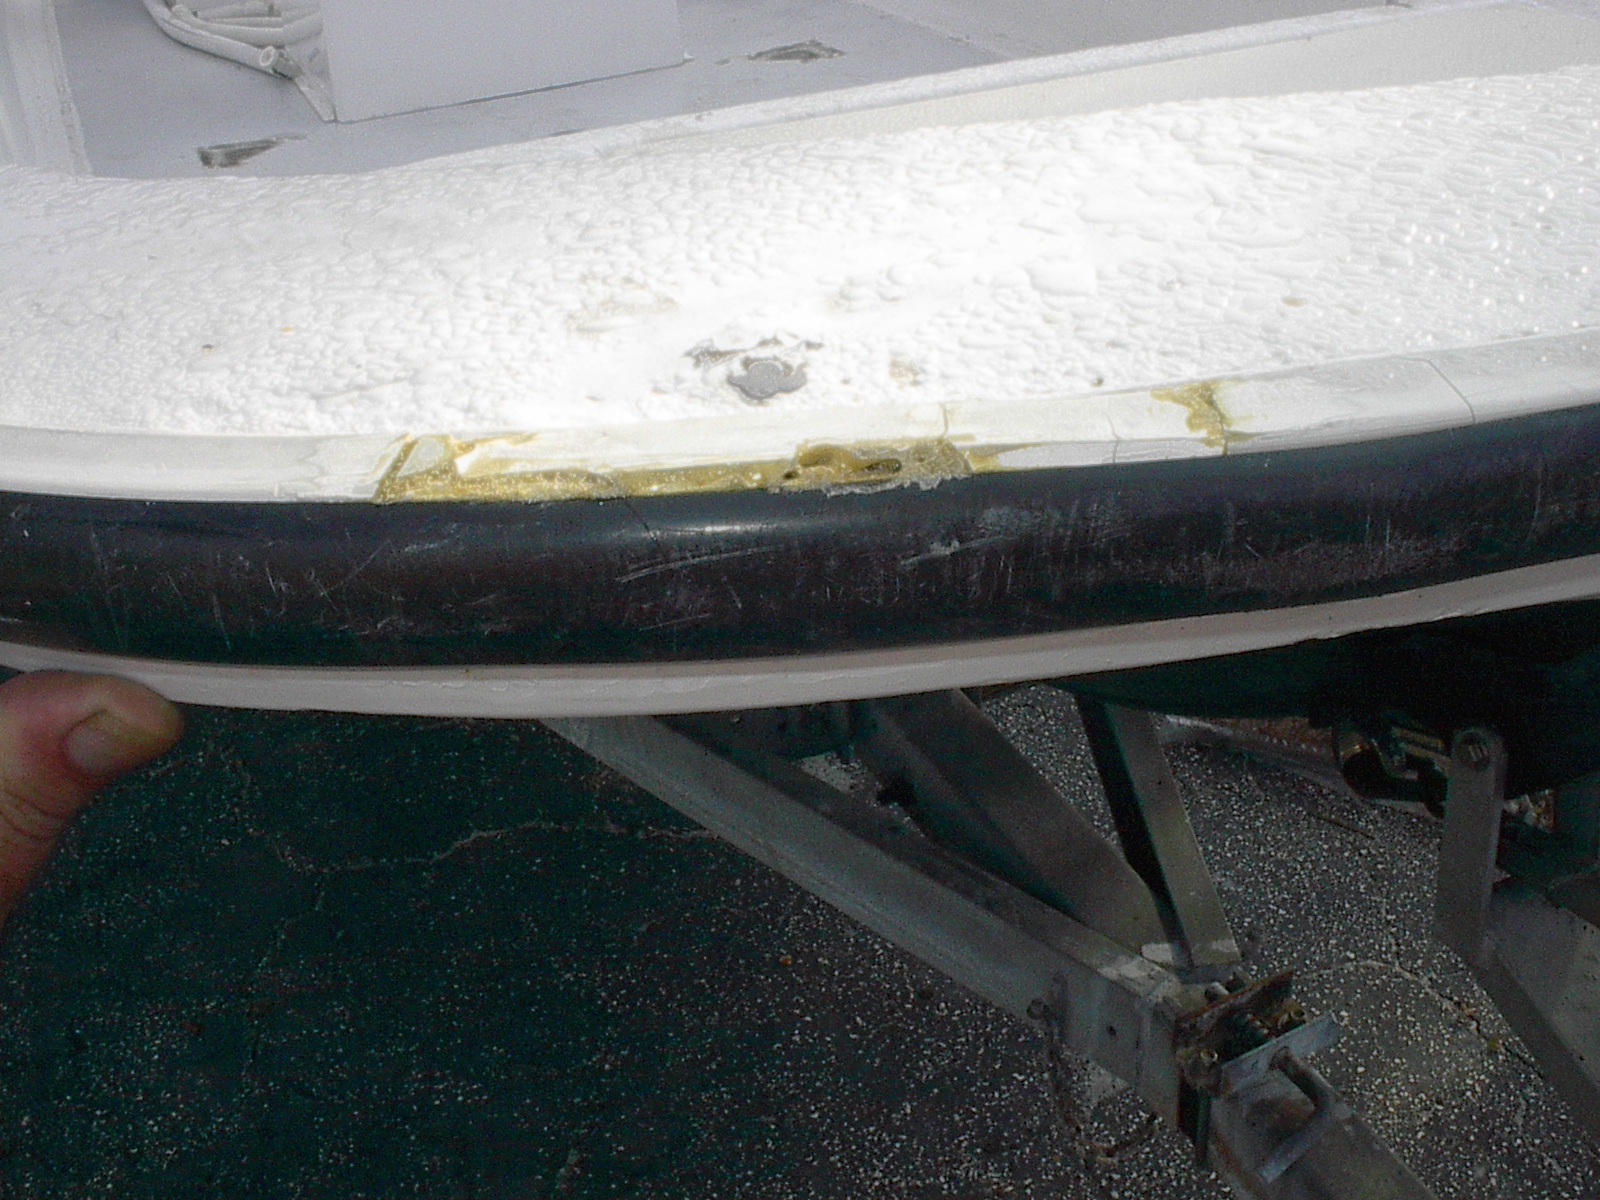
A crunch in the rub rail at the bow from PO.


After filling with Gorilla glue twice and trimmed.

I'll finish it off with a little gray epoxy.

Please Log in or Create an account to join the conversation.

Re:1968 16' Boston Whaler 10 years 9 months ago #90932

  • CAT*FIN*k
  • CAT*FIN*k's Avatar Topic Author
  • Offline
  • Gold Boarder
  • Gold Boarder
  • Posts: 620
  • Karma: 35
  • Thank you received: 0
Prepin' The Hull For Paint;

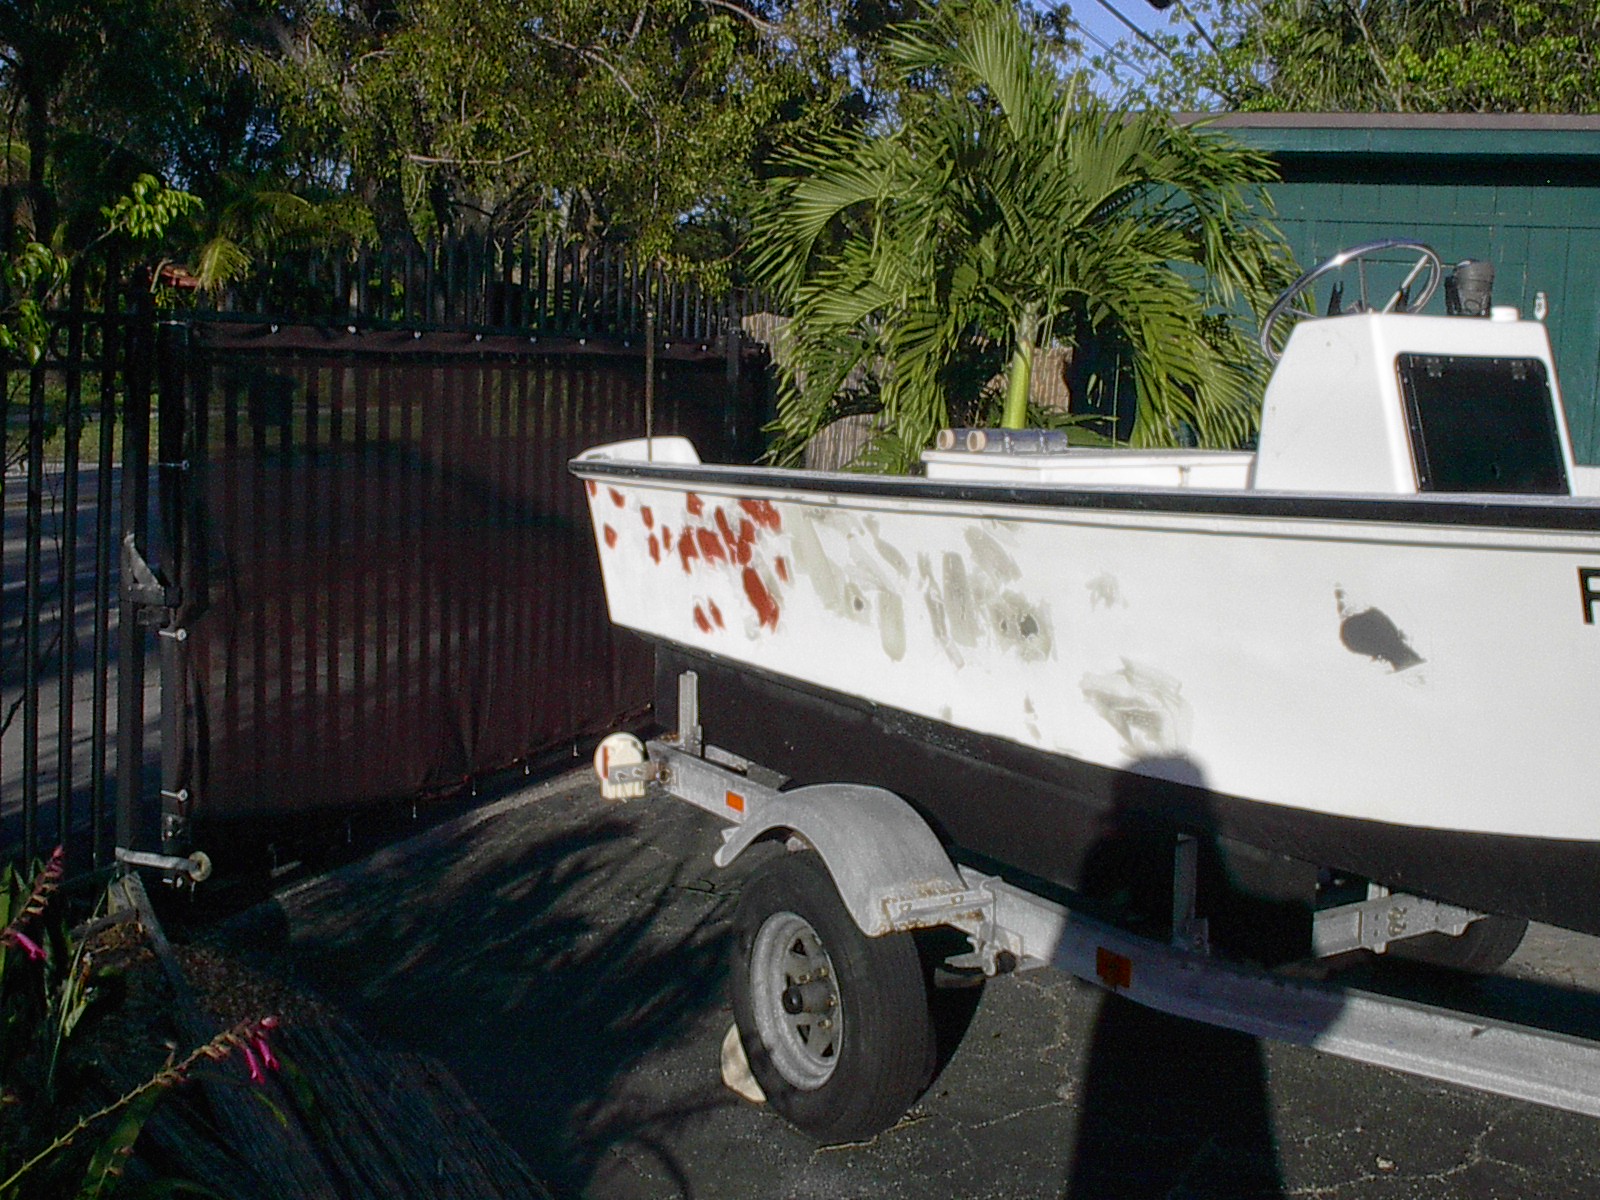
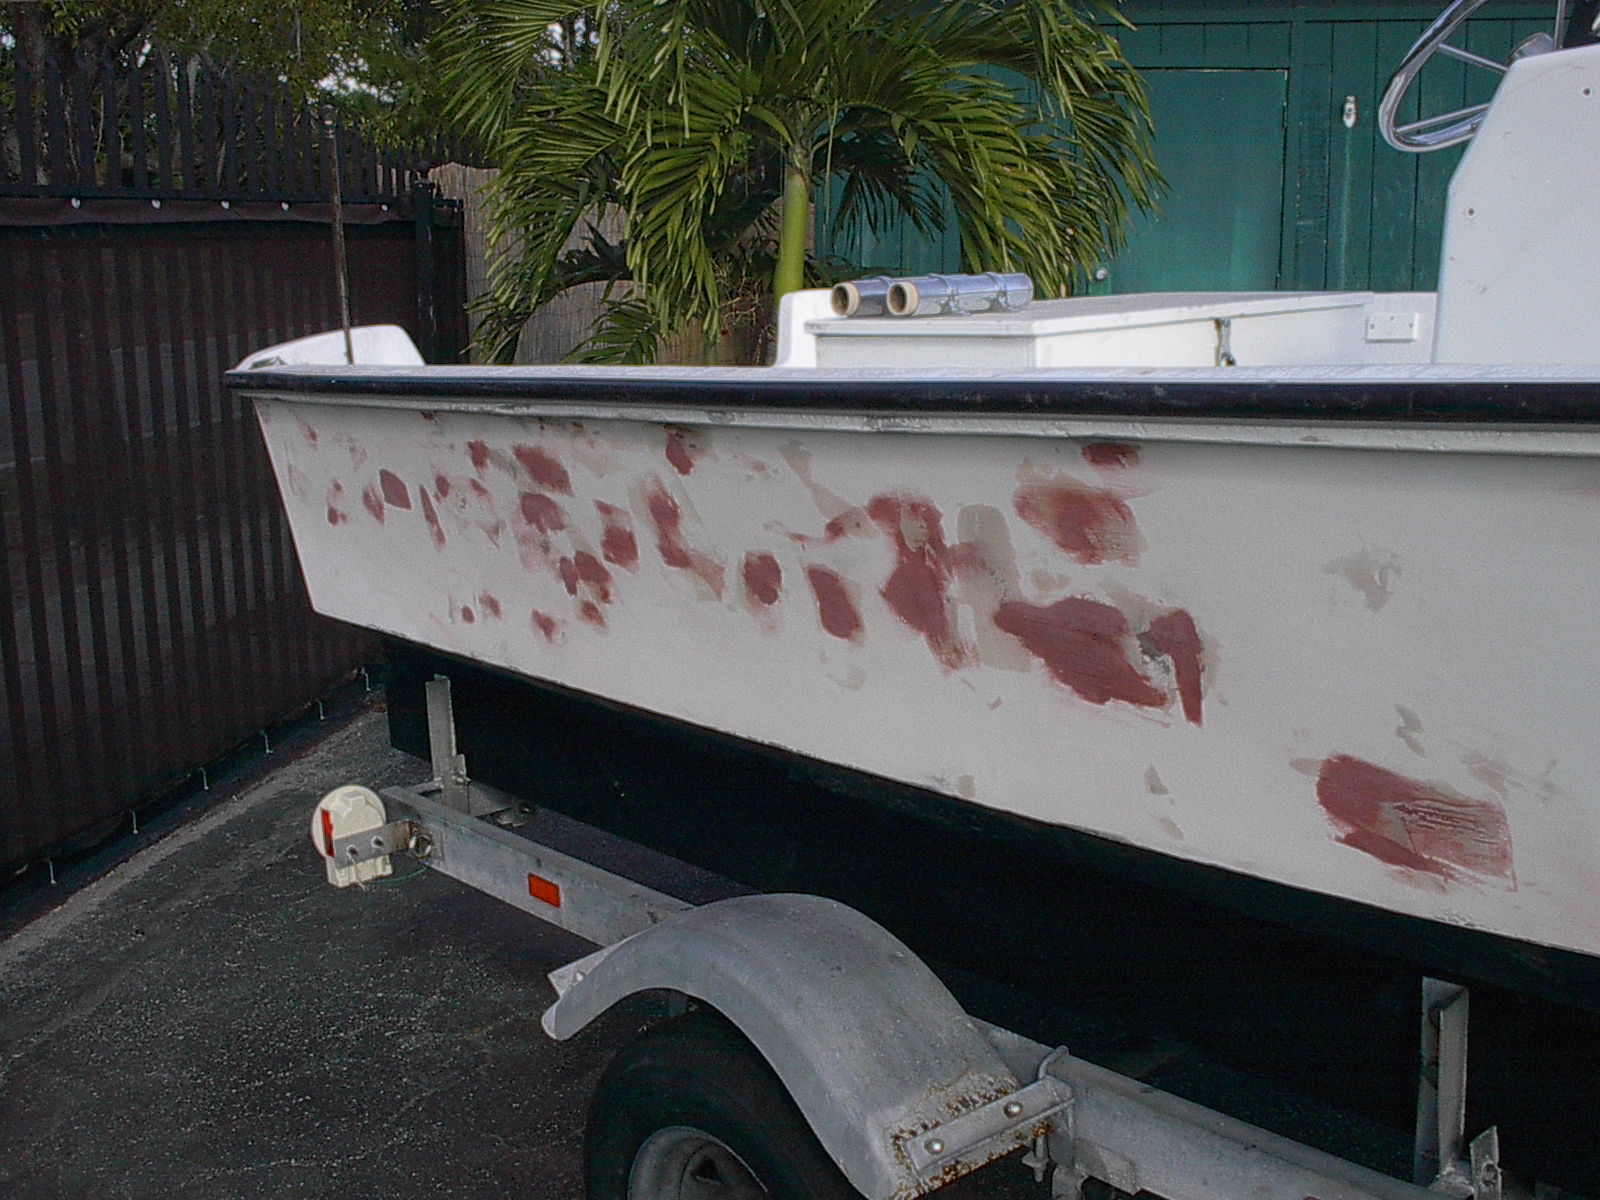
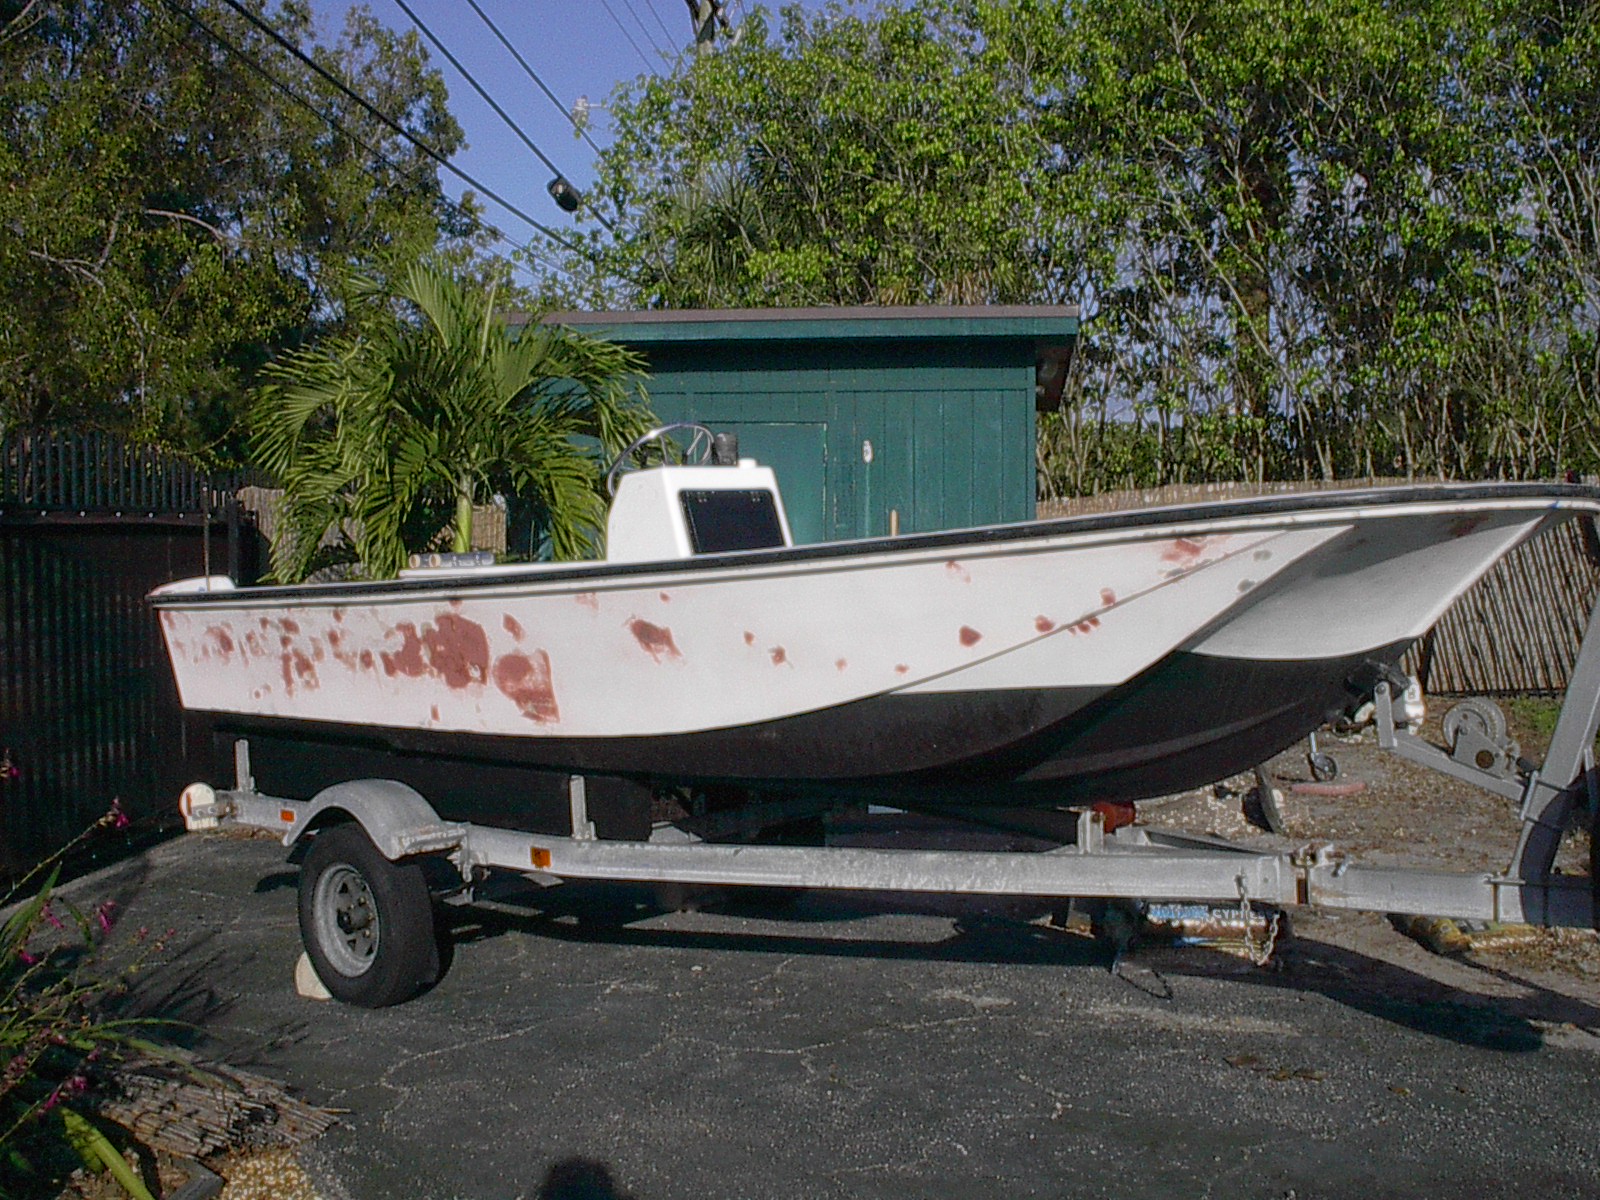
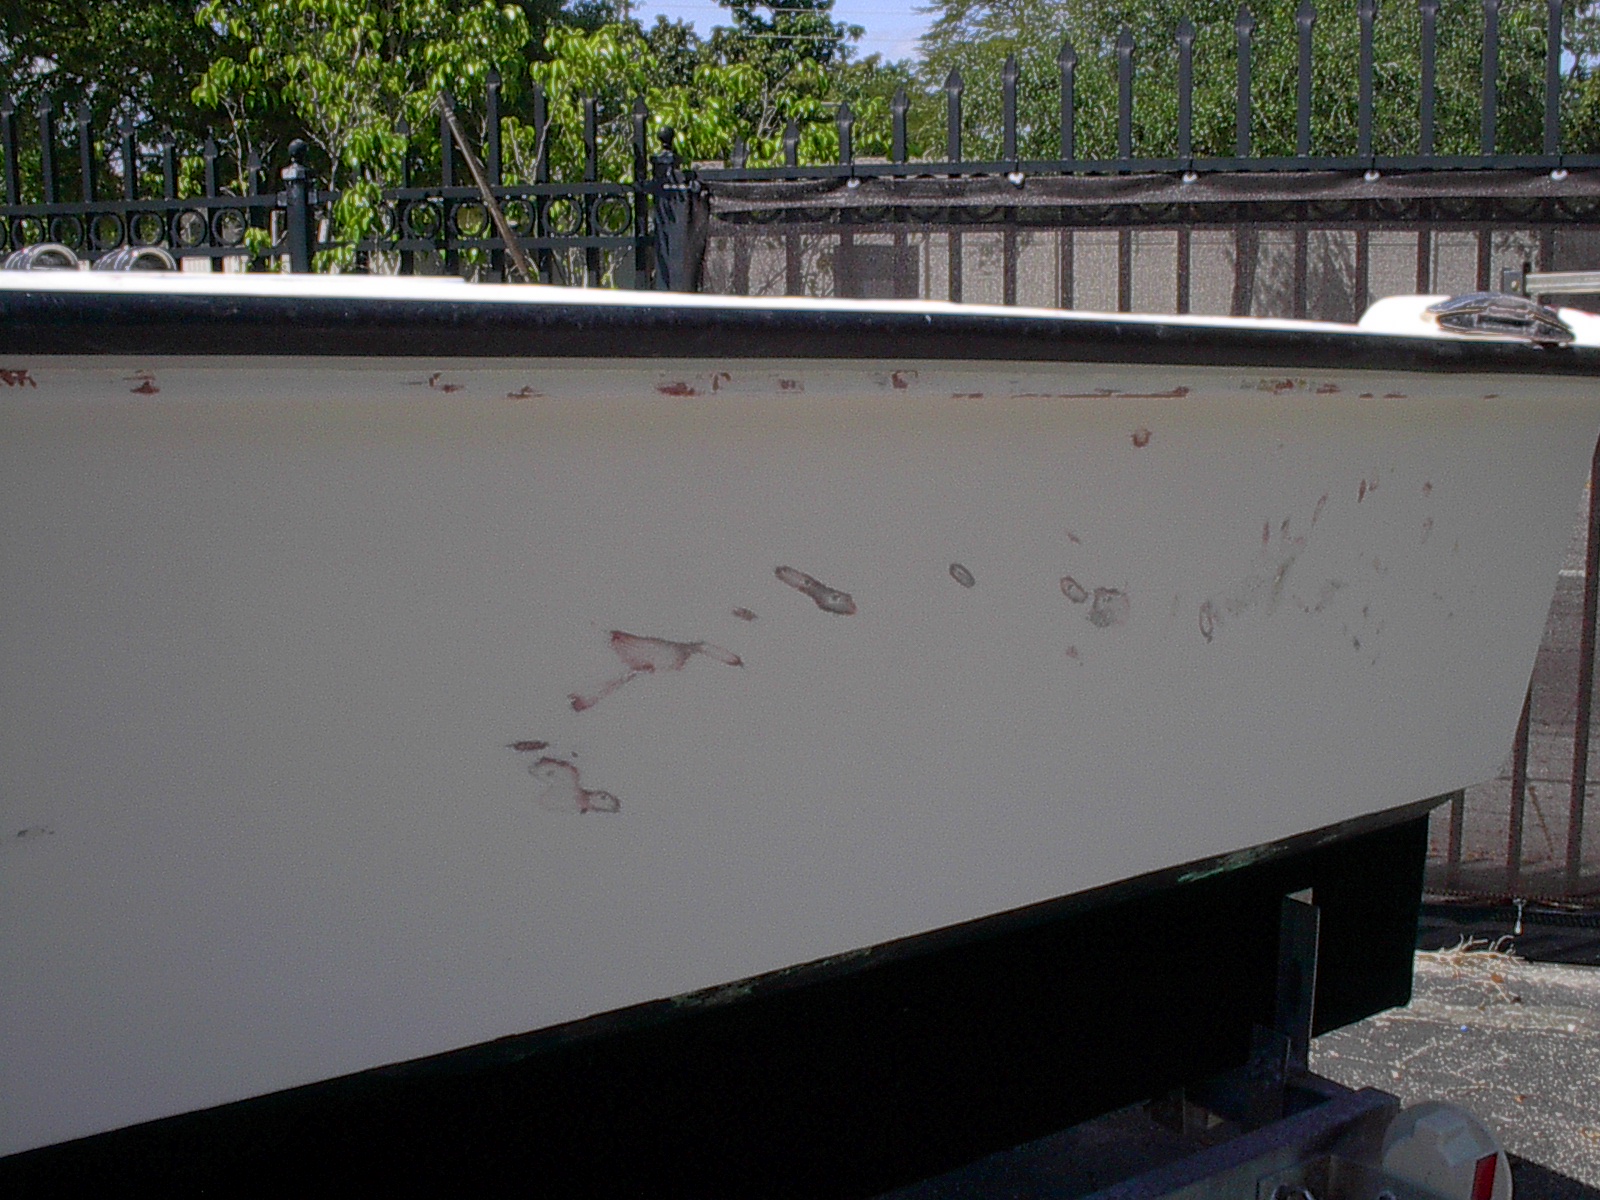
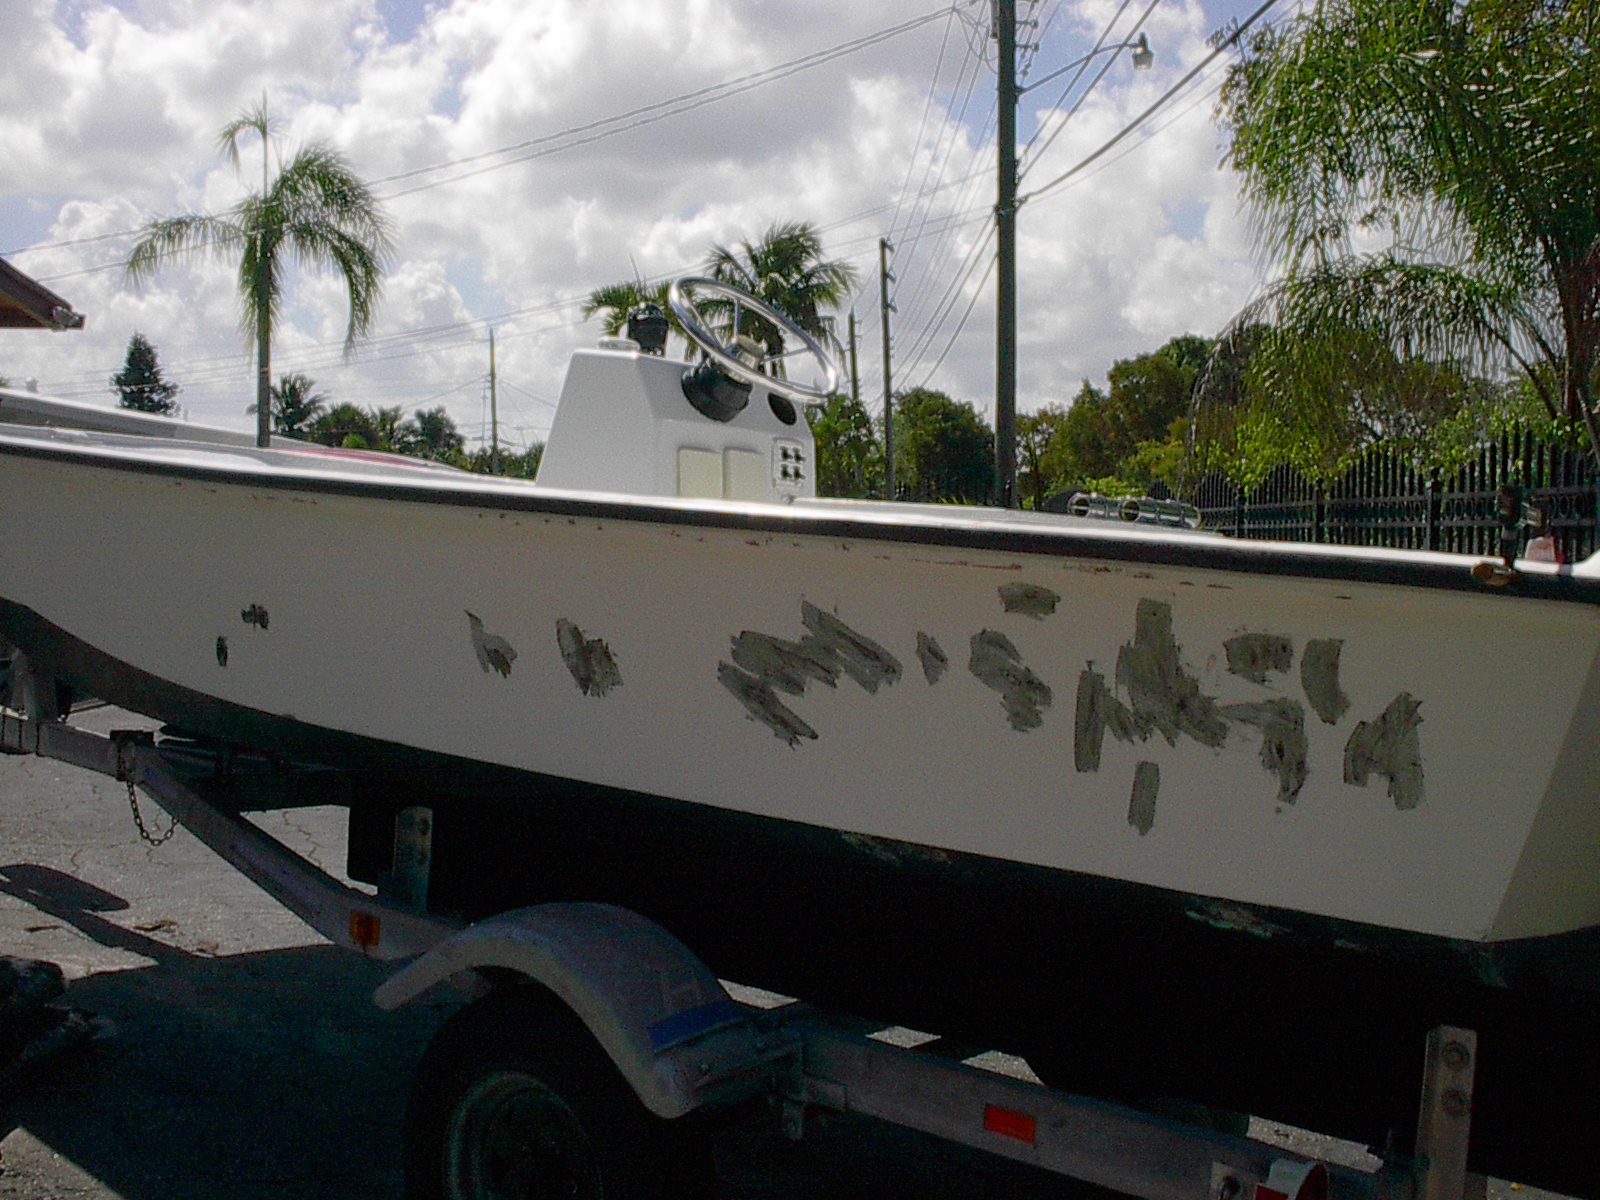
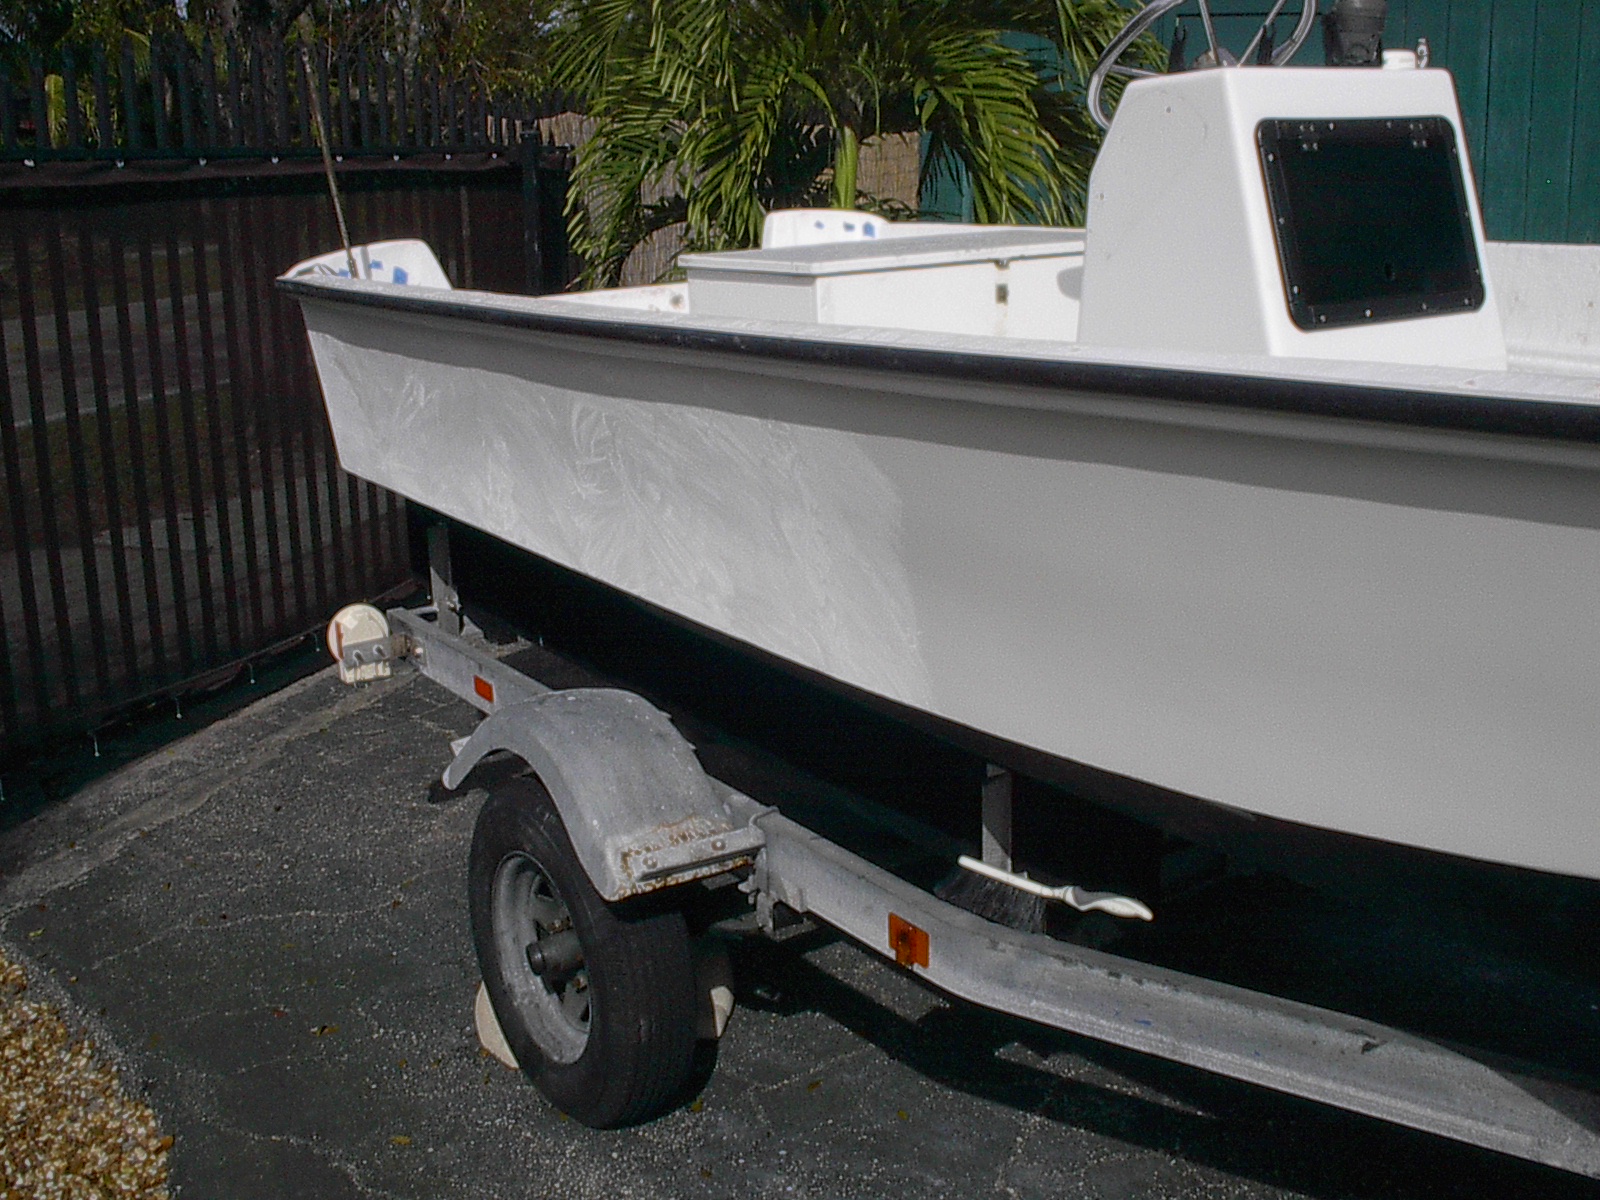
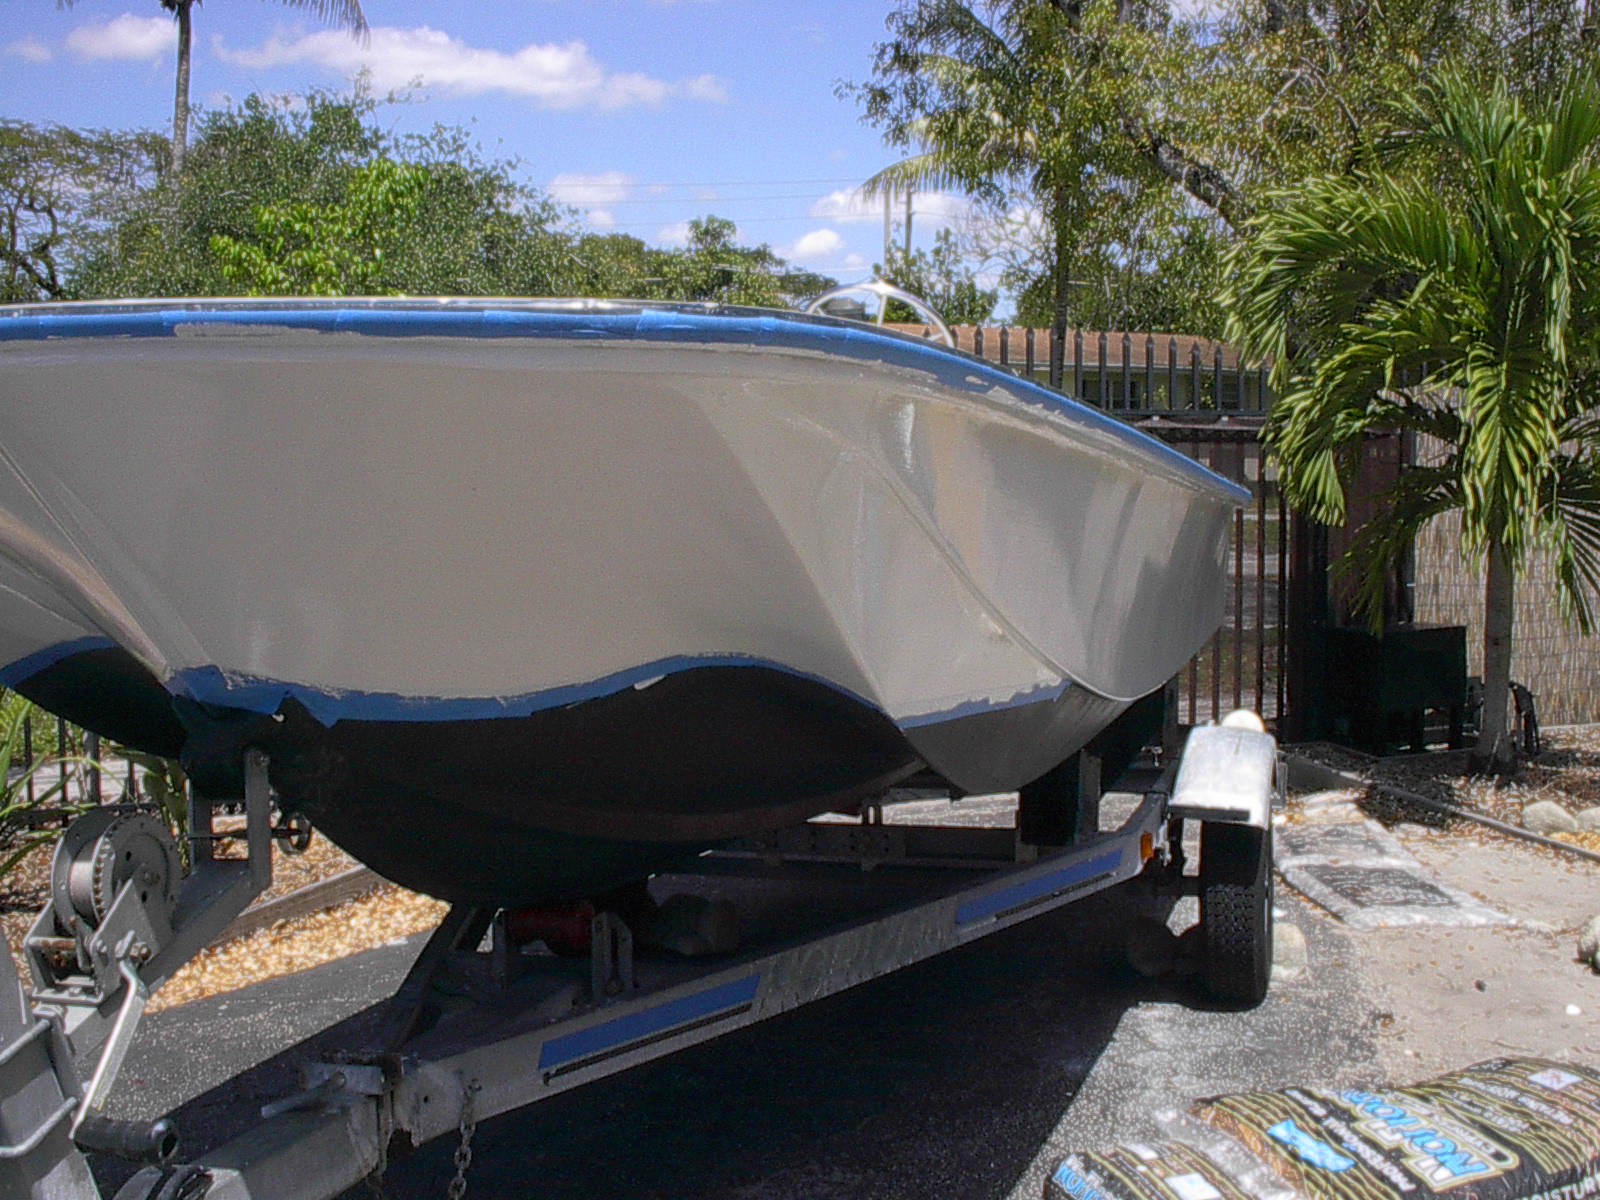
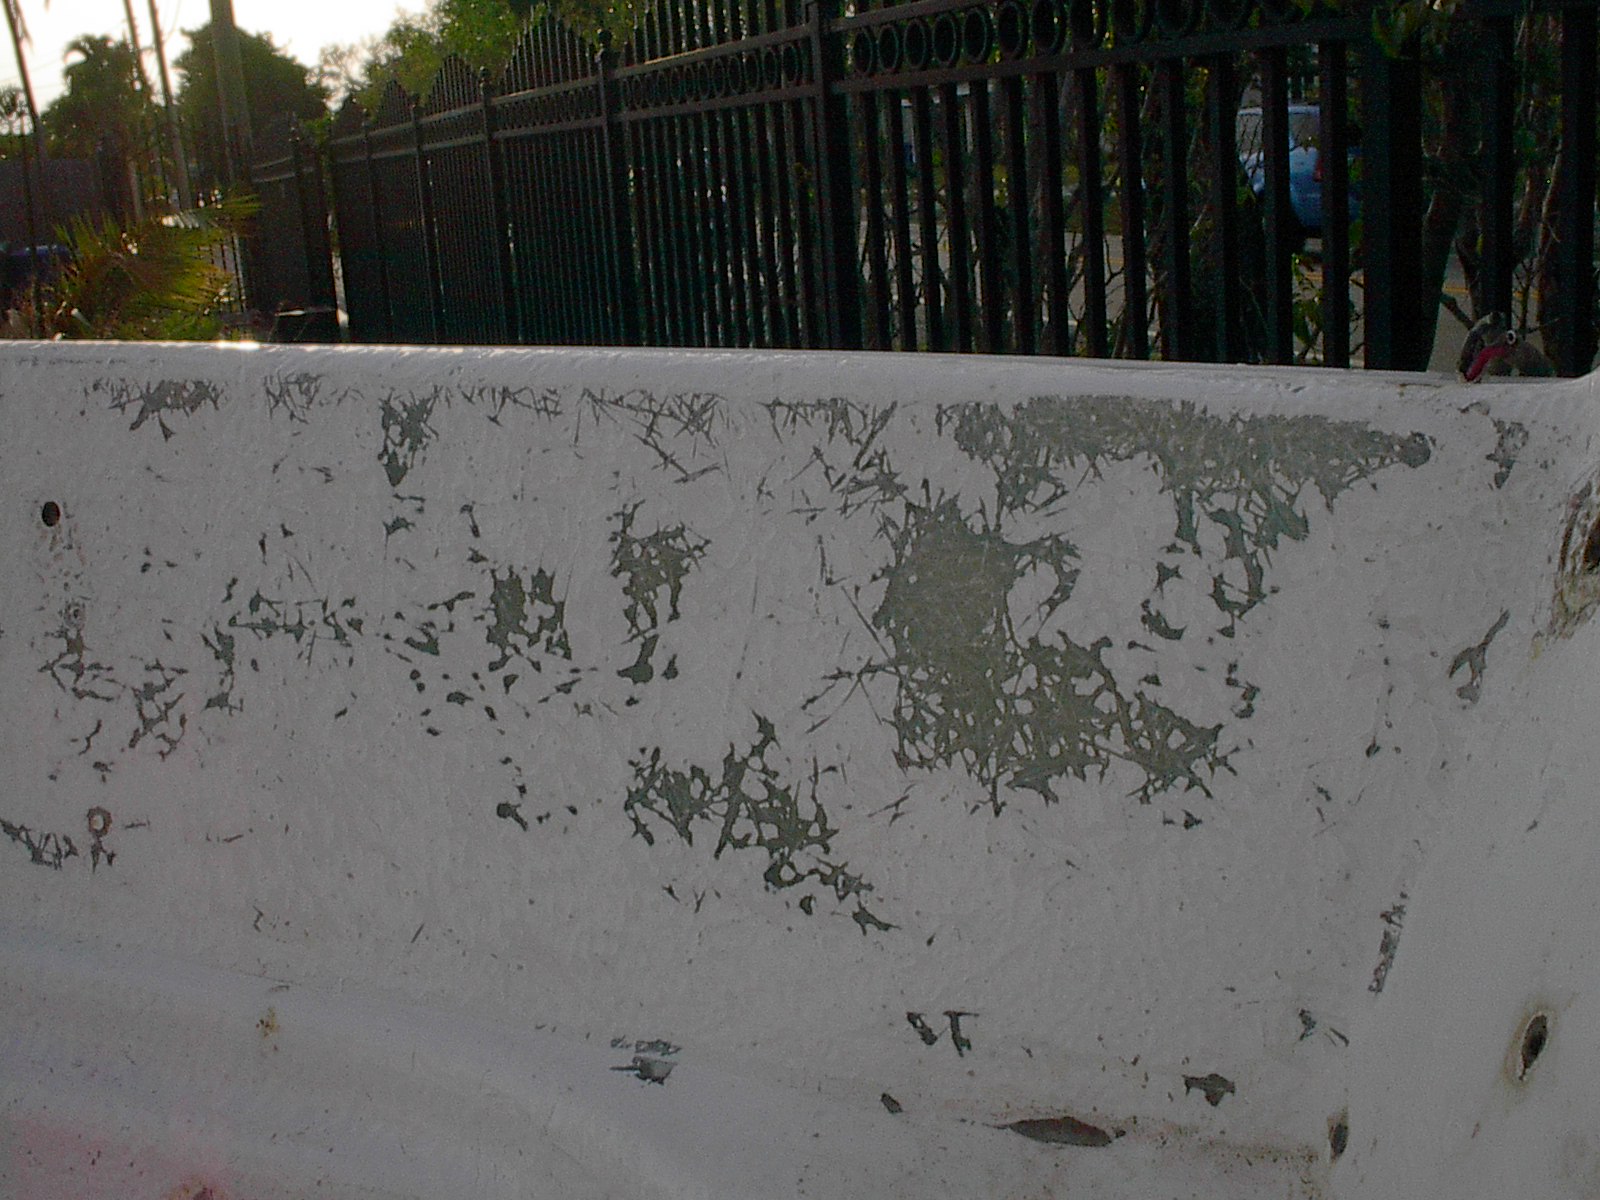
The hull didn't look to bad from a distance, it was shiny. There were 2 scrapes, PO, that exposed fiberglass. There were lots of bubbles in the paint. Looks like what I've seen when a water separator was not used while spraying. Some bubbles still had some liquid inside. I used a 5-in-1 tools point to open all the bubbles and the chipped away any loose paint, and scuffed with 80 grit. Degreased, dried and started 'skimming" with epoxy.

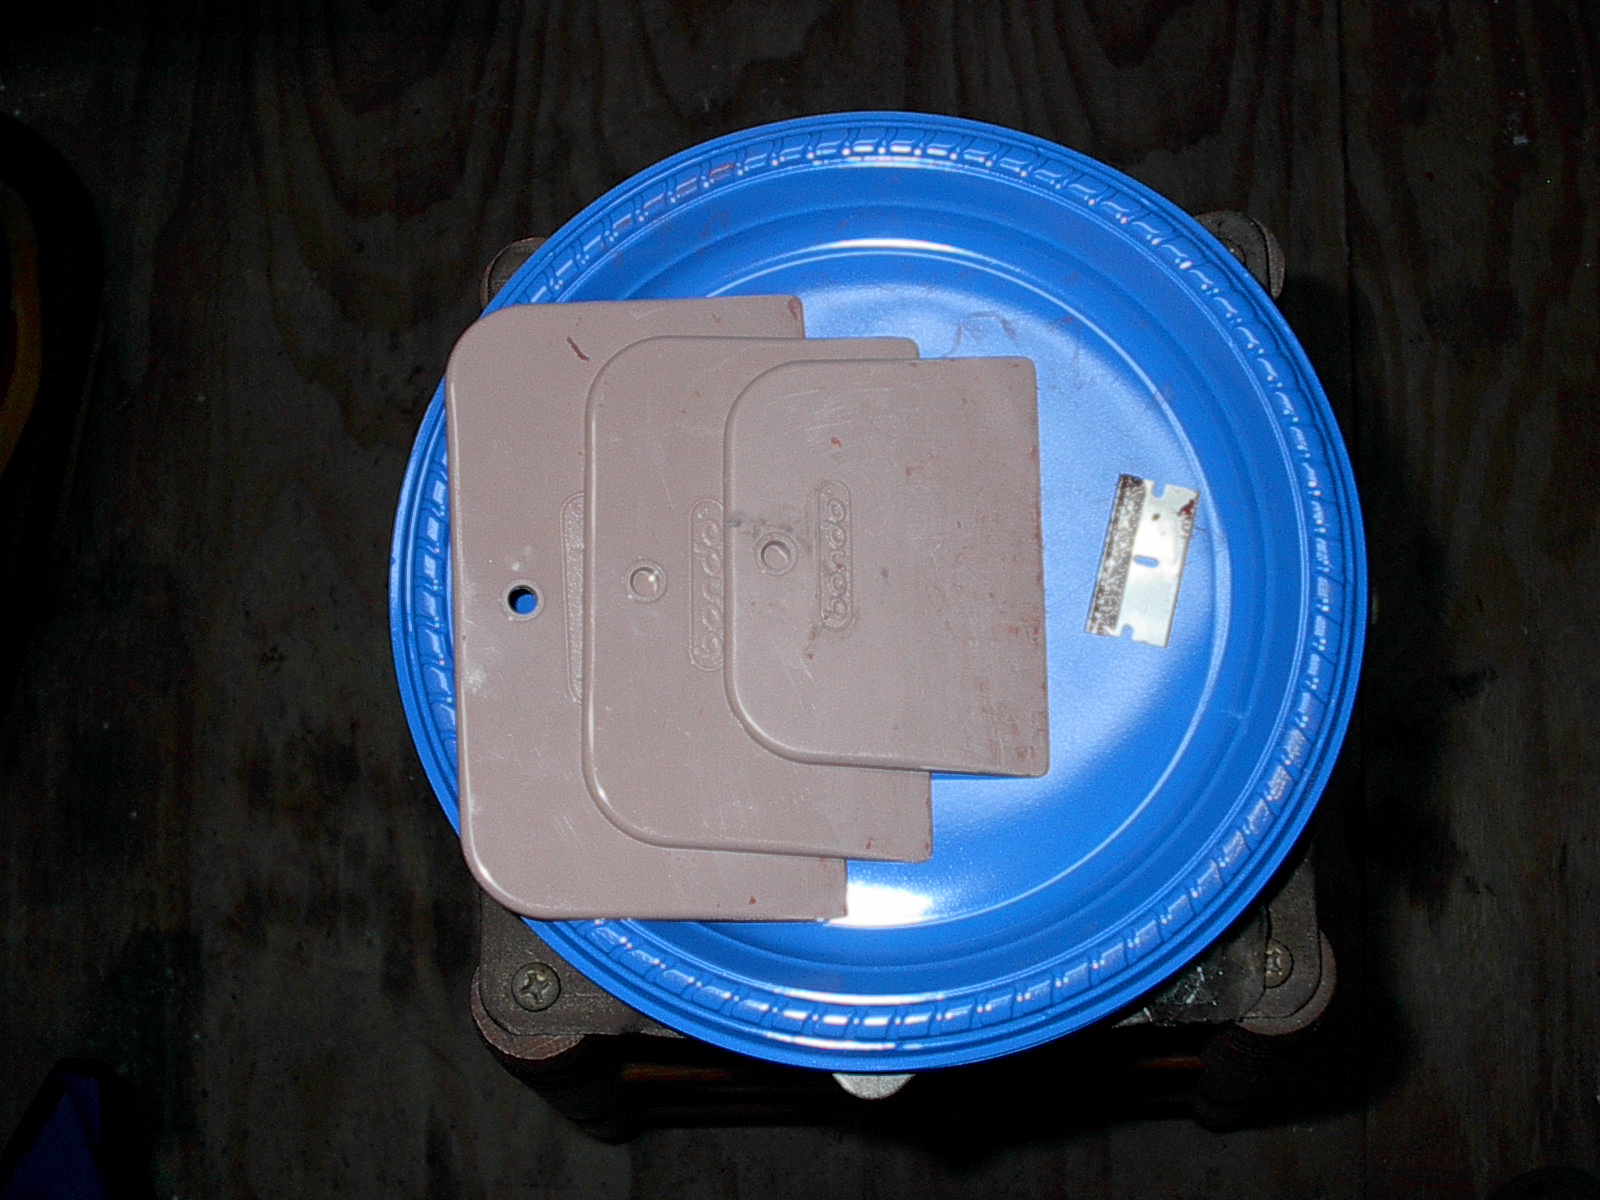
Skimming is picking up a little epoxy on the edge of a spreader and smearing over an area like butter on bread. It's going to seal and secure the damaged area. The spreaders I'm using.

I start with the single edge razor blade at work the epoxy over the area in multi directions. Then smooth the area over with the small plastic spreader, and let cure overnight


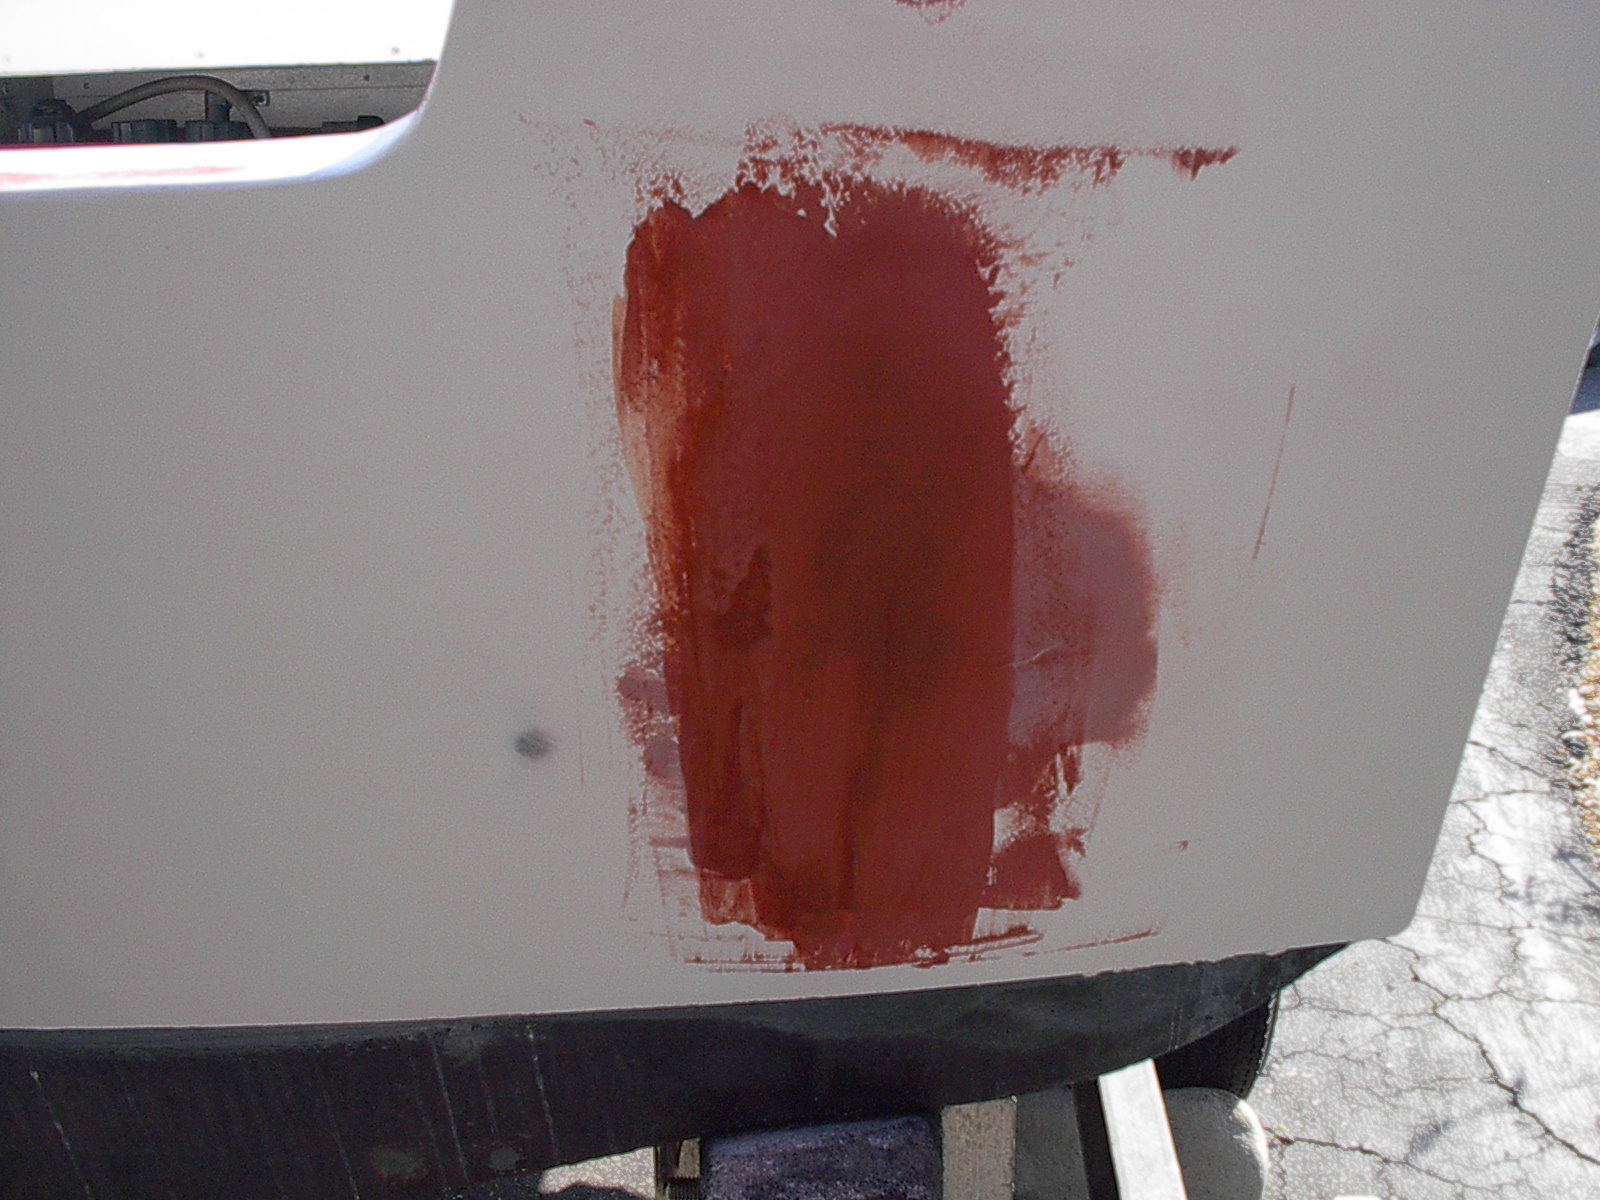
You can see in this pic that the epoxy I started using aft-fwd, is almost transparent. It's from a generic epoxy kit I've had laying around. It was way to thin for this, but it did stick well and dried very hard. I think everthing is sealed and secure. As I sand it down I'm skimming with some red glazing putty. Glazing putty hardens quickly, I squeeze it out of the tube onto the edge of the spreader, just squeeze out what you'll need for the swipe.

I planned to get a couple hours smooth out the epoxy with the power sander yesterday. The sander had other ideas...it lasted less than 10 minutes. I hand sanded the epoxy with a hand sander & 80 grit paper, 4 hours sanding time and my arms ache! I did get to skim all with glazing putty as the sun was setting.

My neighbor was working in his yard so I stayed away from the boat. Spent most of the day looking for a Bismark Palm. I did pick up another power sander also. After dinner I knocked down the glazing putty with some 150 grit paper on a small sanding block. The glazing putty should be spread in thin layers, to thick and it will crack. The glazing putty sands off easier that the paint around it. Leaving it a little high now will even out when blocking. Next is to start "blocking out" the hull.


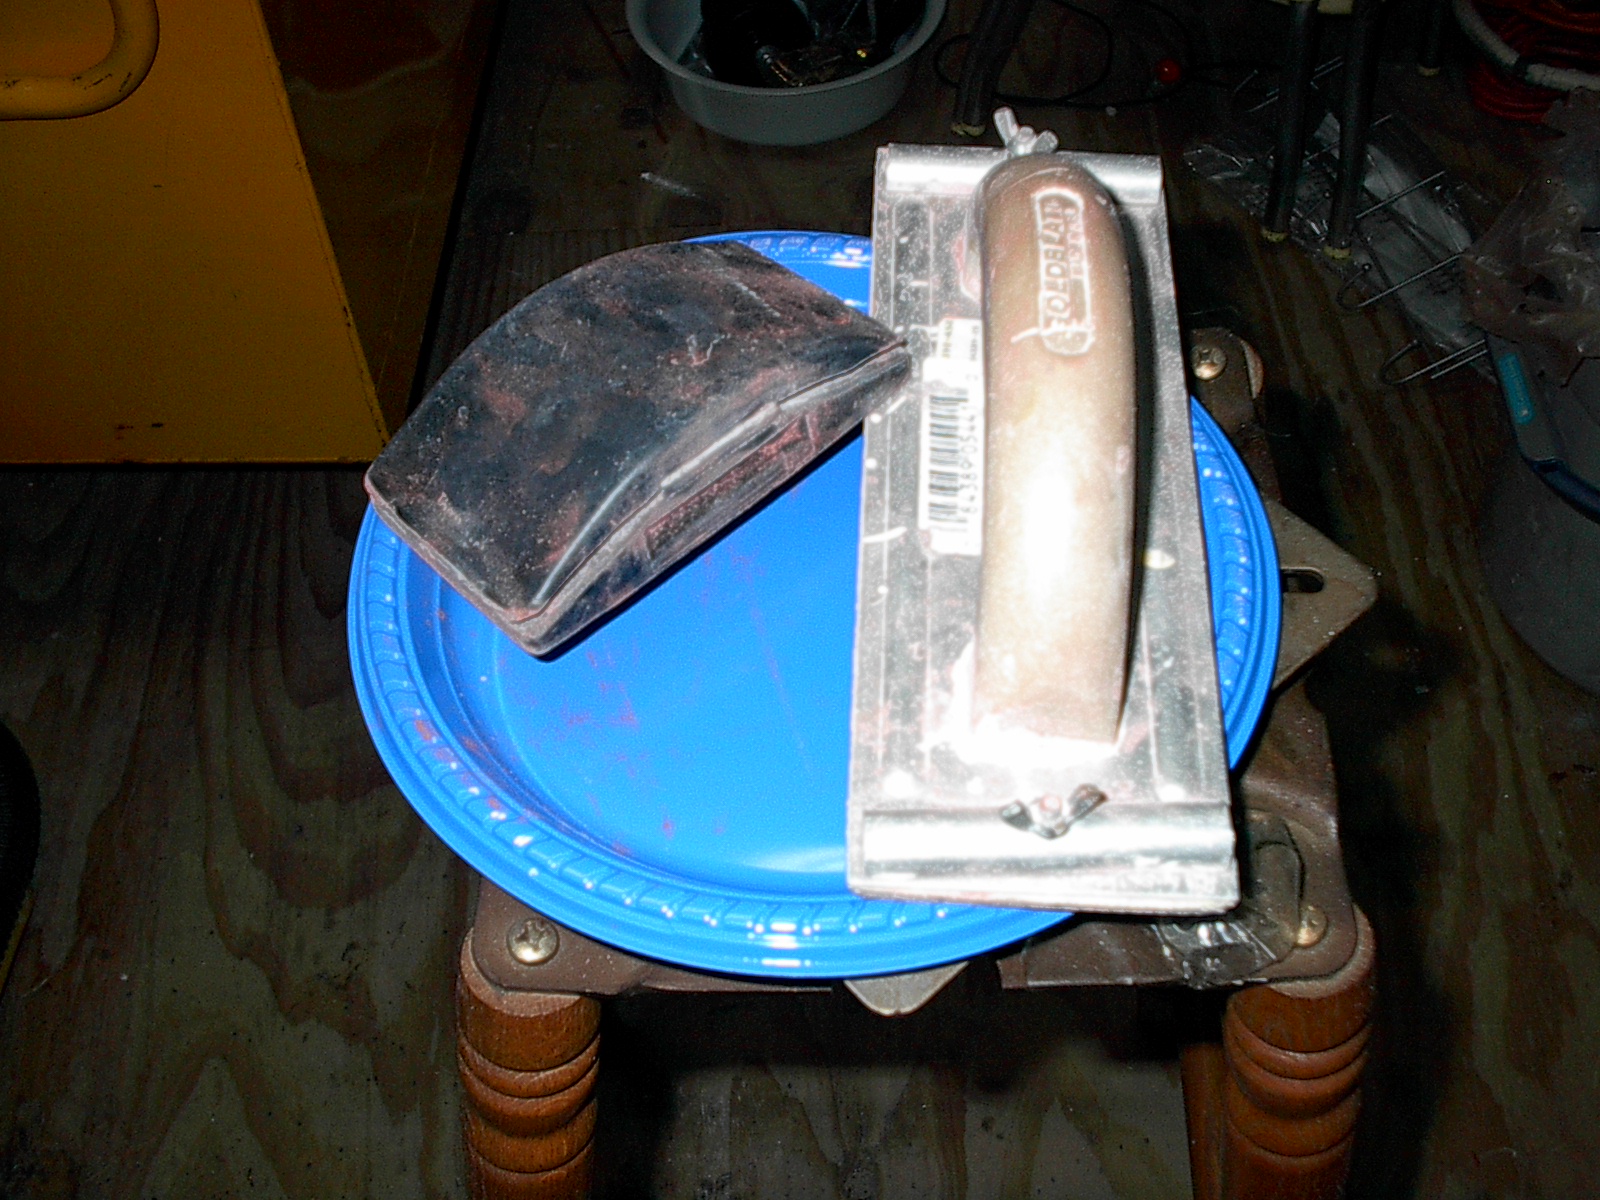
Blocking comes from the old days when sandpaper was wrapped around a block of 2x4 to sand a large area smooth. If the area is flat you'd want a sander with a large surface area. If the area is contoured a long narrow sander works best. I'm using a 3"x9" hand sander with 150 grit paper to start blocking. Starting aft holding the sander lengthwise with the boat. I sand 1 stroke top to bottom at a 45 degree angle forward and 1 backtrack stroke to the top keeping with same 45 degree angle.. It is very important to keep even pressure and the sander flat to the surface. I like using a hand sander for this because I can feel the high and low spots better. High spots get worked down and low spots get remembered for some more glazing putty after. I'll work forward to the bow, reverse and work back to the transom. Sanding at a 45 degree angle down and away and up and back to you, both direction in an X pattern really smooth's things out. This is how you get the neon lights to reflect from 1 end to the other without ripples. The bow area had tighter contours. I used the smaller sander to block and did an X pattern.

The 2 hand sanders I've been using.


Hope to give it a coat of primer Monday.

She's blocked and ready to prime now. Looks pretty good I'll see how close I got with a coat of primer. The weather forecast for the next 2 days is rain. After that looks to be a few days I can get it painted. There's lots to do to get the interior ready between showers.

The rain was a no show today, windy, very humid and sure looked like rain. I spent some time on the boat tho, nitpickin' spots on the hull. I'm chomping at the bit to get a coat of primer on and see how it looks. It's been a few years since I've done body work but it came back quick.

Well it has rained this morning pretty hard and is very humid. As soon as the weather clears I can get started again. The material list so far to prep the inner and outer hull above the bottom paint.

Fillers;
2 kits 2-tube JB Weld
2 sticks Locktite epoxy putty
2 tubes of Bondo glazing putty

Sandpaper;
9 dics 80 grit 5"
3 sheet 150 grit paper

Other;
1 roll 1 1/2" 3M painters tape
6 plastic picnic plates
4 single edge razor blades
Attachments:

Please Log in or Create an account to join the conversation.

Re:1968 16' Boston Whaler 10 years 9 months ago #91139

  • CAT*FIN*k
  • CAT*FIN*k's Avatar Topic Author
  • Offline
  • Gold Boarder
  • Gold Boarder
  • Posts: 620
  • Karma: 35
  • Thank you received: 0
Primer Coat;

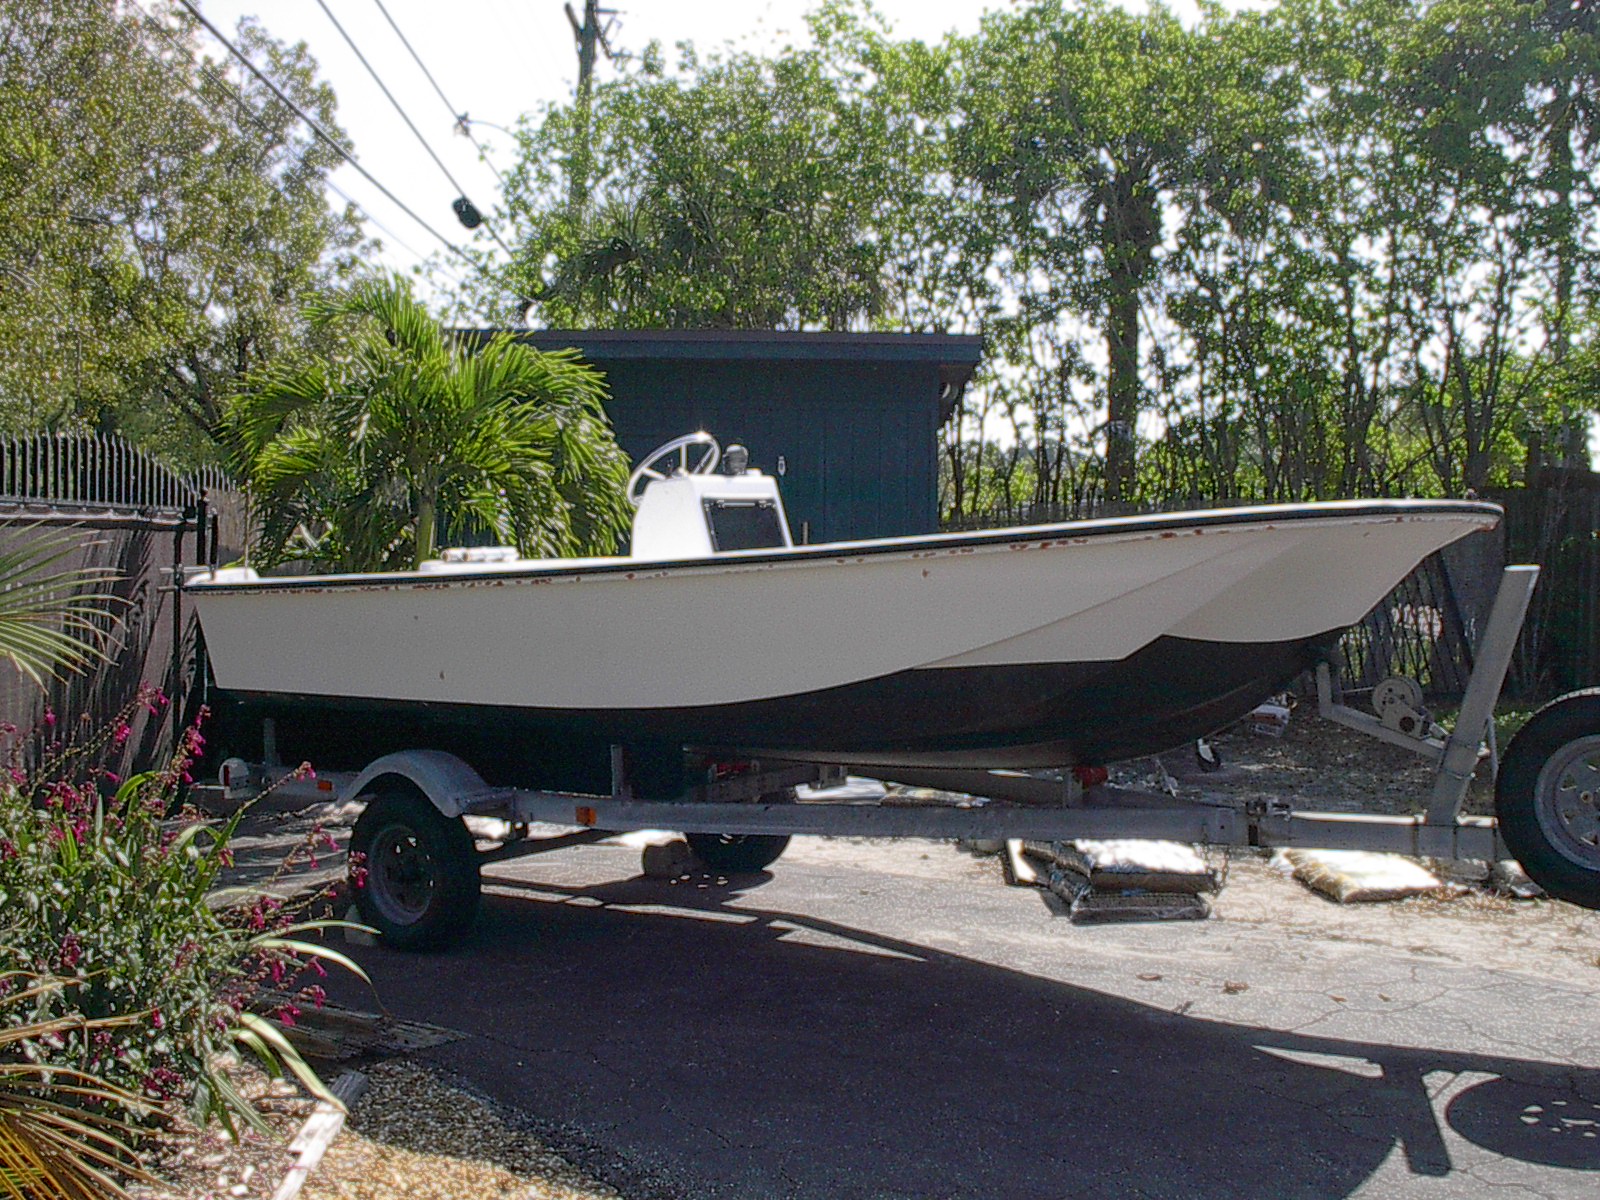
Well here she is blocked out ready for primer.


Well this is the lesson plan, I'll add pics as I go.


A primer coating is applied before painting, over the sealer coat if a sealer is used. I like to use the same brand primer and paint. I’m using Pettit products for this, EZPrime 6149 Gray High-Build Undercoater for the primer and EasyPoxy 3175 Gloss White for the finish coat.

Primer has better adhesion than normal paint giving you a good foundation to build on. The finish paint will bond better to the primed surface.

Primer is needed when a barrier is needed to prevent a chemical reaction between incompatible old and new paint, like lacquer over enamel.

Primer gives you a uniform color of the paint applied over it. Without the primer coat it would take many more coats of white paint to cover the dark repaired areas. Primer will also save many finish coats when changing color In this case white will be the finish color so I’ll be using a light gray primer. The light colored primer will reflect more light thru the finish color making it brighter. If the finish color was going to be a dark color like dark blue, I’d use a black primer. A dark primer reflect less light giving you a deeper color. Primer comes in a few colors and can be tinted to match the finish color. The EZPrime comes in white but for me it’s easier to see the surface with the gray in the sunlight, a snowblind effect.

Primer has a better ability to fill minor imperfections than finish paints. Some primers are thin and some when sprayed can be almost as thick as a layer of glazing putty. The primer for the finish paint I’ll be using is a high-build. The surface is very smooth now. The thick layer of primer will help me not to sand thru the primer with the 220 grit paper.

I can’t wait to get it primed and see how my prep was, and a sign of moving forward after all the prep. With the surface all 1 color, imperfections can be seen better. When the primer is dry I’ll block it out with 220 grit paper. When blocking it’s easy to sand thu a high spot that was missed and on corners. Any spot you sand thru the primer will need re-primed. Blocking reveals the low spots as un-sanded areas. The low spots can be sanded filled with glazing putty, blocked, re-primed and blocked. It’s best to get the surface right before you primer it.

Well, we all know Murphy's Law, If anything can go wrong.... Yesterday morning I went to start with the primer. The trouble was somehow I ended up with a qt. of metal primer. I took it back and they had no EZPrimer on the shelf so I had to order a can. It came in late yesterday afternoon and white not the gray I ordered. Anyway, I got 2 coats of white primer on this morning, I used a 4" foam roller. You could still see the red & grey showing thru a little after the first coat. I did the 2nd coat right after the first. It was very humid, 75 deg. when cloudy but over 80 when the sun popped out, sure looked like rain. It rolled out nice, no goobers in the paint. So Far it looks like I did a pretty good job on the prep. There is still enough primer left to give it another coat if I need to touch up after blocking, I'm going to let it dry overnight tho.

The clamps aft are holding the rub rail. I took the screws off the ends of the rub rail to paint under them. Many rub rails are stretched on and trimmed. I just wanted to make sure the rub rail stayed put

I took the tape off about an hour after I finished, no problem. The primer didn't lift a bit. I gave it a good look over just before diner. The gunwales, transom and bow looked very good. They made the drip edge below the rub rails look bad. It had the same sprayed glass strand surface as the interior. I had sanded the vertical surface until fiberglass started showing and called it good. The concave horizontal surface had snaps at one time. Most of the snaps had been broke out leaving a big hole where the screw was. Anyway, it still looked bad. I used a razor blade & glazing putty and skim coated the vertical surface you can see. Plan is to finish the touch-ups and block it out tomorrow. Start the finish coats Saturday morn when it's cool out.


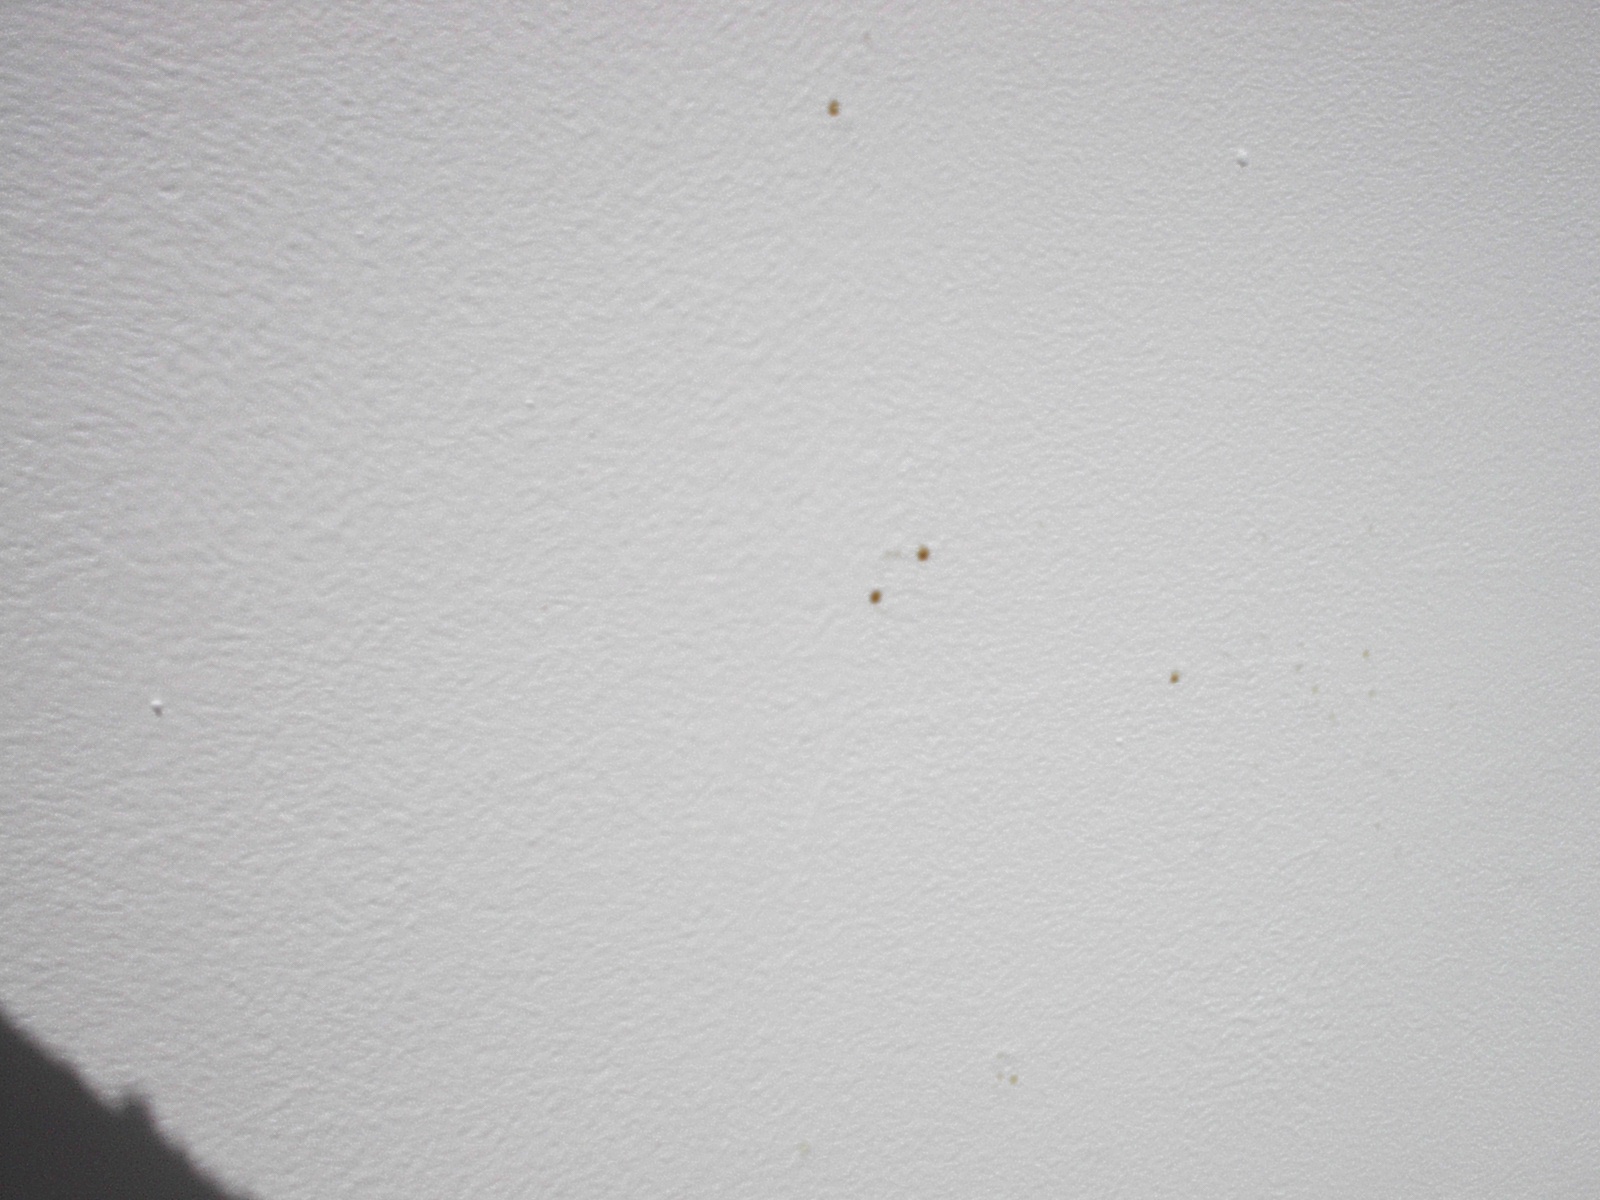
Strange morning, 65 deg. and very foggy, things dried up about 10am. As I was sanding down the glazing putty I noticed something strange. On the port side these brown spots where there were a bunch of bubbles in the original paint.

I think I'll sand them down to glass, seal with epoxy, fill and re-primer. I wonder if when the sun heats up the stbd side this afternoon if the same happens there. Something in there wants out. Well better to find out before the finish coats are on.

So I wrapped a used 80 grit disk around the dip of my finger and started diggin'. Most of them started to chip when I hit the old paint. Must have been spots of moisture that didn't show and started to leak with all the sanding thinning the paint.


I cleaned real good with thinner. Skimmed with some of the thin transparent epoxy I used on the other side.

I would have liked to have re-primed it today. Just need to block the bow and tape and she'll be ready for primer again. Hope to have enough primer left, it'll be close. Weather is calling for chance of showers tomorrow.

Well it rained most morning sure looked like it wanted to this afternoon. I did get the rest of the hull blocked out. This Pettit EZPoxy is some very tuff stuff. I started using 220 grit paper but the going was very slow. Then I switched to 150 grit and it was much faster and still got a nice smooth surface for the next coat of primer. I found a really good hardware store today. I picked up another tube of Bondo glazing putty, it was half the price I had been paying. They had the big tubes (=3 of the Bondo, $19.00) of 3M green spot putty I'd been looking for, and the red glazing putty. The green can be applied thicker than the red so you use less to sanding. Also it's light green and does not show thru like the red. I could have covered the green with one coat of primer, the red was still showing a little after 2 coats of primer. I just don't need that much now. I went back today for some stuff and saw they have the 3M glazing putty in white, never seen white before, I got a tube.

I left the dust on the area I did yesterday with the spots. I checked it out today and it looked good. No rain tomorrow so I can get the areas I worked on re-primed. I'll let it sit overnight and see what it looks like. I'm ready to move on to the finish coat.

I decided to fill a dent in the transom. It was not real noticeable, but I have the time now. At first I thought it was supposed to be part of the transoms contour, until I noticed the other side didn't have it. Foam core boats can dent, I filled a couple small ones on each side.

2 coats


4 coats and good enough, you can see the different layers.


All the areas I worked on got a couple coats of primer. This is some thick stuff and it was hot, I thinned it with about 10% Pettit Brushing Thinner. It rolled out much smoother yet still had good hiding over the red glazing putty. Just had enough primer, getting the last drop from the can with the roller tip. Right as I finished the wind was picking up and dark clouds moving in. No rain but it sure looks like it wants to. It's been about 3 hours since I finished and no spots yet...knock on wood, and really hope it'll be good come morning.


I checked her out this morn and no spots!!! YIPPIEE!!! I lightly sanded the new primer with 150 grit paper the blocked her all down with 220 grit paper. She's ready for the finish coat now. Only problem is we have rain forecast to start in about an hour, and rain all week till Friday, possible break on Wednesday.

Material list;

1 quart Pettit EZPoxy
2 4" foam roller sleeves
1 sheet 220 grit sandpaper
1 tube Bondo glazing putty
1 quart Pettit Brushing Thinner
(Some things I used that are not on this list were left-overs from the prep list.)

Please Log in or Create an account to join the conversation.

Re:1968 16' Boston Whaler 10 years 9 months ago #91450

  • CAT*FIN*k
  • CAT*FIN*k's Avatar Topic Author
  • Offline
  • Gold Boarder
  • Gold Boarder
  • Posts: 620
  • Karma: 35
  • Thank you received: 0
I've been trying to update my progress daily. Yesterday and today has been raining. I did get my wife's desk lamp fixed. Still no brown spots showing up on the gunwales.

Please Log in or Create an account to join the conversation.

Re:1968 16' Boston Whaler 10 years 9 months ago #91460

ez poxy! same paint i used on the mantaray. great stuff! ron


1


1
Attachments:

Please Log in or Create an account to join the conversation.

Re:1968 16' Boston Whaler 10 years 9 months ago #91484

  • CAT*FIN*k
  • CAT*FIN*k's Avatar Topic Author
  • Offline
  • Gold Boarder
  • Gold Boarder
  • Posts: 620
  • Karma: 35
  • Thank you received: 0
vuyosevich wrote:

ez poxy! same paint i used on the mantaray. great stuff! ron

I've heard good things about it and can be found easy locally, should I botch it up. I think it's the same color combo you have, White & Bikini Blue. I'll be using the blue on the interior. I got the taping done just before dark, weather cleared. Hope to get started early with the finish coat in the morning before it gets to hot.

Attachments:

Please Log in or Create an account to join the conversation.

Re:1968 16' Boston Whaler 10 years 8 months ago #91503

Bikini blue and blue ice was my combo.

Please Log in or Create an account to join the conversation.

Re:1968 16' Boston Whaler 10 years 8 months ago #91512

  • CAT*FIN*k
  • CAT*FIN*k's Avatar Topic Author
  • Offline
  • Gold Boarder
  • Gold Boarder
  • Posts: 620
  • Karma: 35
  • Thank you received: 0
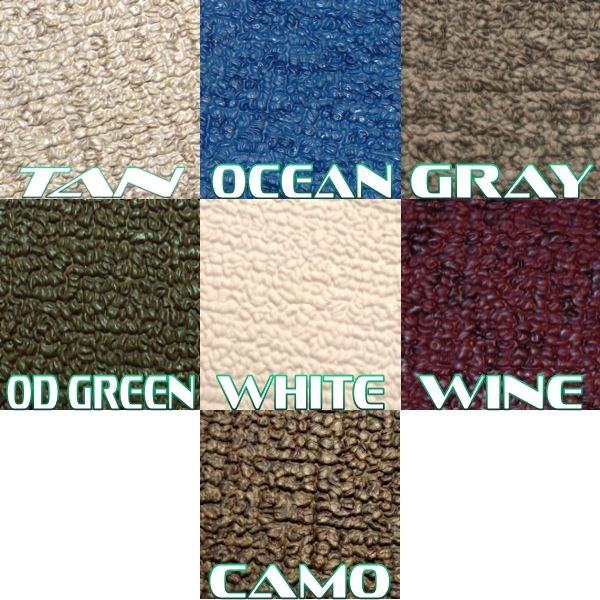
Wow I thought it was white, bet that's a better contrast in person. I thought about going with the Blue Ice for the interior. The guy in BOW told me if I wanted to get away from a white interior it might not be my best choice. I'll just be painting the vertical surfaces with the bikini blue. The horizontal surfaces will get MariDeck vinyl in ocean.
Attachments:

Please Log in or Create an account to join the conversation.

Re:1968 16' Boston Whaler 10 years 8 months ago #91528

  • CAT*FIN*k
  • CAT*FIN*k's Avatar Topic Author
  • Offline
  • Gold Boarder
  • Gold Boarder
  • Posts: 620
  • Karma: 35
  • Thank you received: 0
Finish Coat;

Woke up this morning grinnin' greased and gassed to get started. It was 52 deg.!!! by noon it was only 60. About 2:00pm it warmed up to 65 so I went out and got started. I tacked it off 2 times, 2nd time was a new cloth and went the opposite direction. I've found that microfiber makes a great tack cloth. I picked up a bag of them at the dollar store. It had the normal microfiber cloths but this bag had some with a much more open weave, more like multi layer cheese cloth. They are even better tack cloths, they pick up everything. The second time around no dust was picked up. When I wiped down with thinner, twice, there was almost no white dust on the blue cloth.

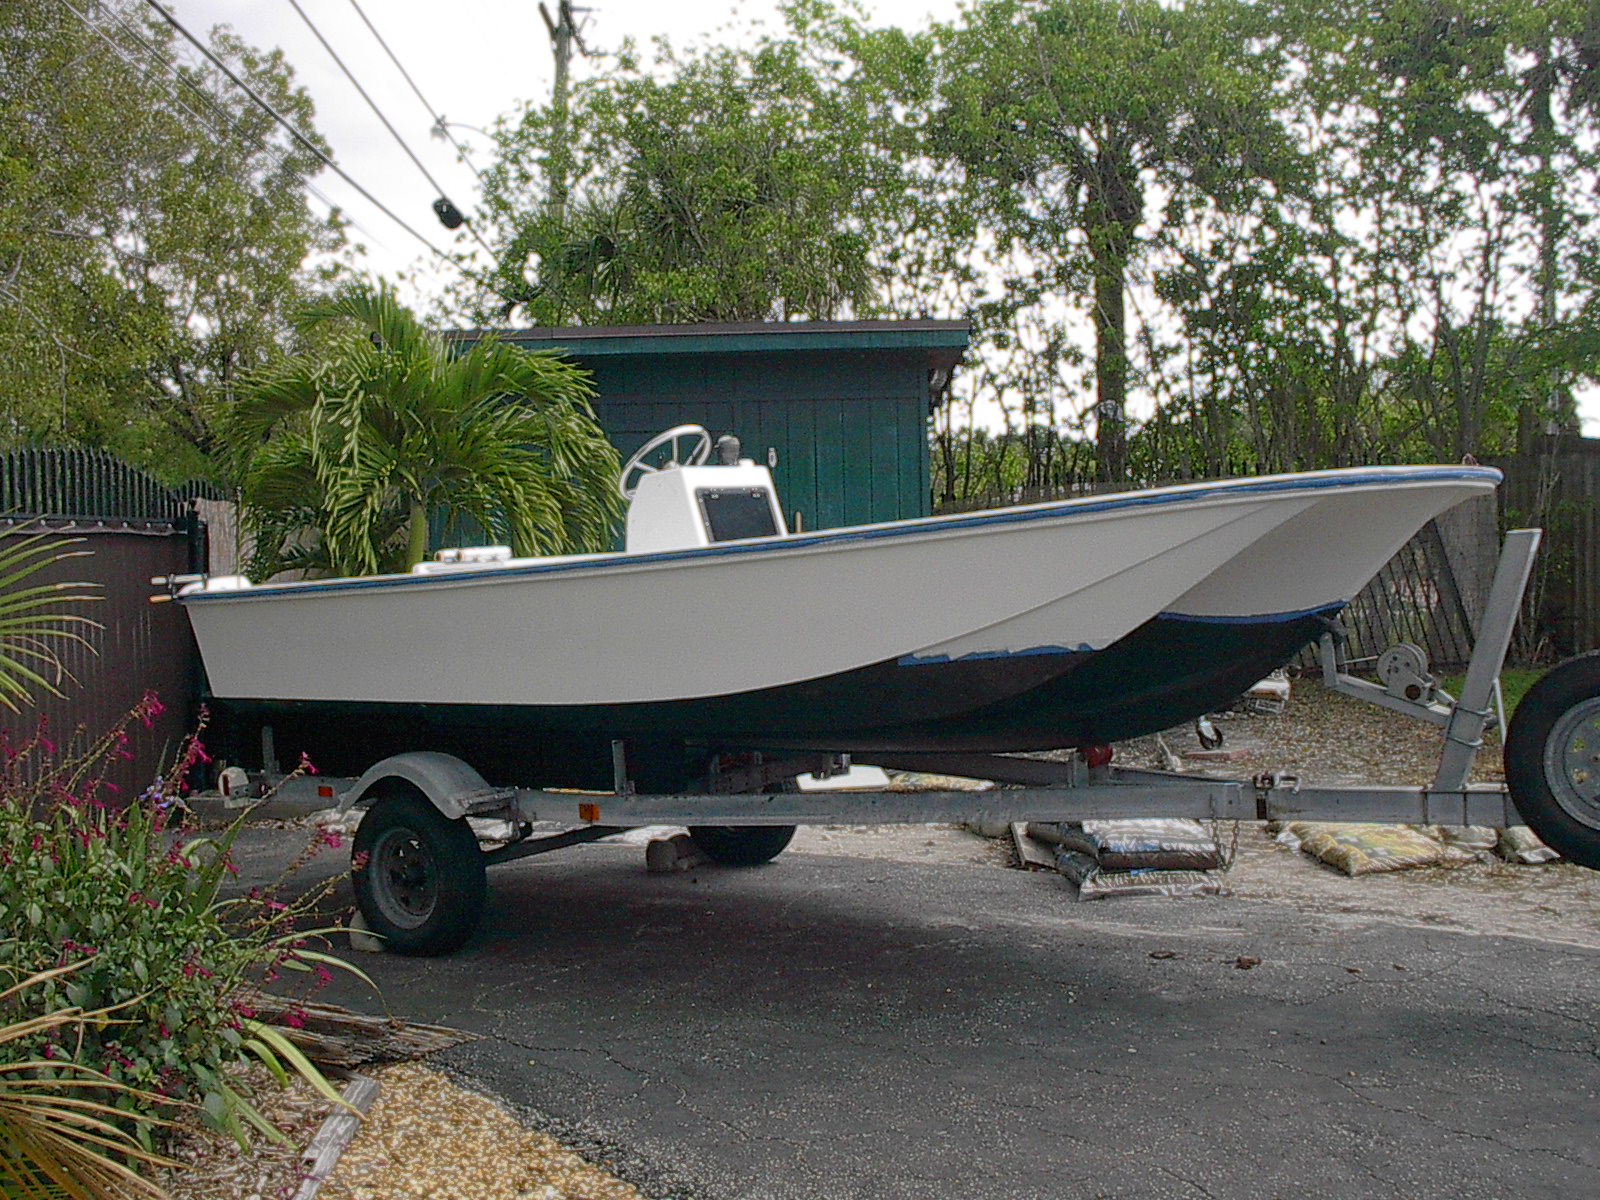
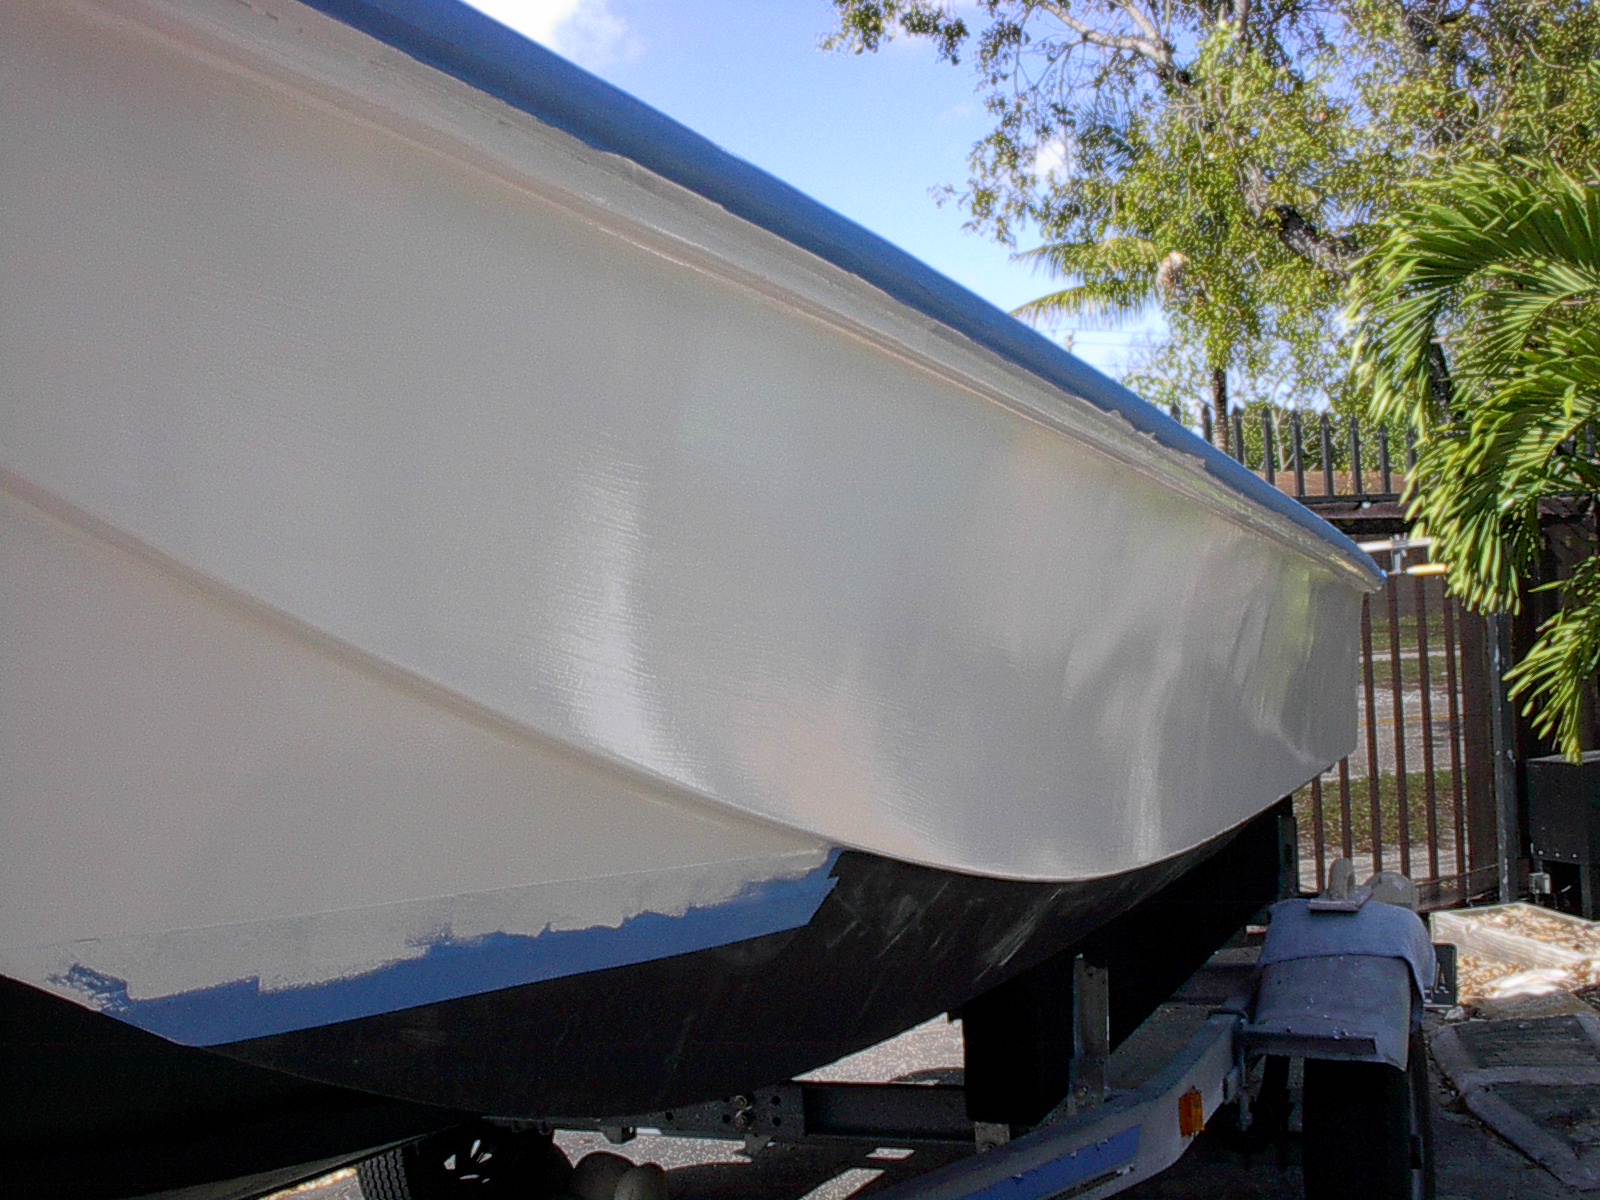
The finish coat is Pettit EZPoxy white. It's a topside paint meaning for use above the waterline. This is an important coat of paint. The finish paint protects everything under it from the sea, salt, water...etc. This is my 1st time doing roll & tip painting. I got started with a 4" foam roller to apply the paint and a 3" foam brush to tip it down. When I got done I was dreading all the sanding I was going to be in for. It was going to be 4 hours before the paint would be dry to the touch and dark 20 hours until sanding. I checked it before the sun set and it smoothed out a lot. I'll sand it smooth with 220 grit paper before the 2nd coat, 2 minimum recommended. I think for the 2nd coat I'll thin it a little. It was going on thick, 3 mil wet recommended. Also I'm going to use a much better brush. Today I used the paint on the foam brush, I'm going to use thinner on the brush for the 2nd coat. The paint was dragging while tipping like it needed just a little lubrication to flow just a little more. The quart should give me 3 coats, I got a couple more tries to dial it in.


Roll and Tip painting is a method using a roller to apply the paint and the tip of a paint brush to smooth. There are videos online and youtube. You start by rolling paint onto a small area, I did about 2 square feet. Finish by rolling all in one direction, I did up and down. Small bubbles form in the paint. Then very lightly drag the tip of the brush over the surface. Do this in the opposite direction you rolled and from dry side onto the wet in one stroke, for me it was left to right. Some recommend it be done by 2 people, 1 roller and 1 tipper. I did solo and went straight from roller to brush and back as fast as I could. It took about 30 minutes to apply the 1st coat.

The port side just after painting.


I started at the transom stbd side and worked in areas of about 2sq.ft., clockwise around the boat. This is a close-up of the transom 20 hours after painting.


The transom area flowed better than where I finished. A close up of the stbd gunwale near the finish, 20 hour dry time.


Same area with 2 hours drying time.


I went out this morning, 16 hours drying time @ 60-67 degrees, humid. I took the tape off and the paint was still not fully cured in the thick areas at the tape edge. I had wet sticky paint all over my hands, yet the surface was dry to touch. All the tape came off fine, no peeling paint. Pettit's time table has for a thinner coat drying time at about 20 hours before sanding. I'm going to wait another night and check it out. The weather is also not good, we had a couple sprinkles, same forecast for tomorrow.

So far drying time is a draw-back, operator error(coat to thick) don't help. It's a good option when spraying is not an option. Little voice was telling me to thin the paint after the first section I did. Right now it's a 6 foot paint job, and really that's not bad for the first coat. Looks like I'll get 2 more coats out of the quart to get dialed in.


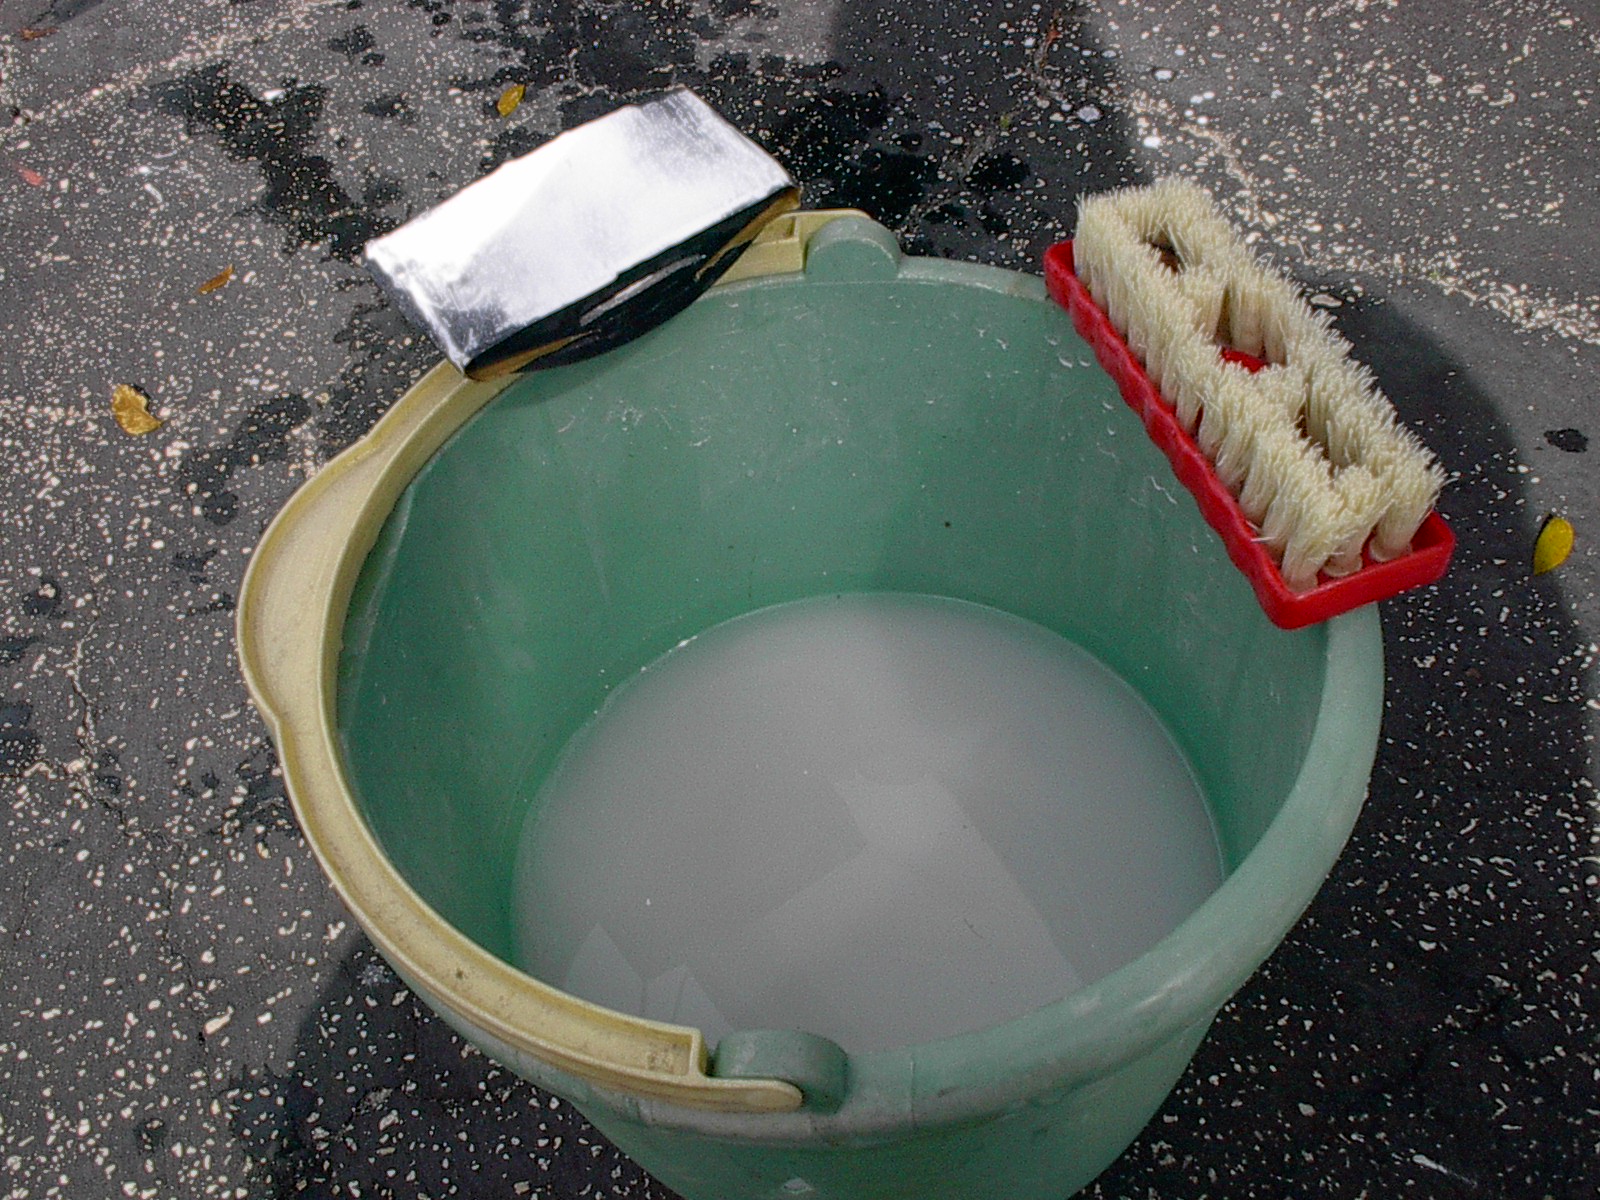
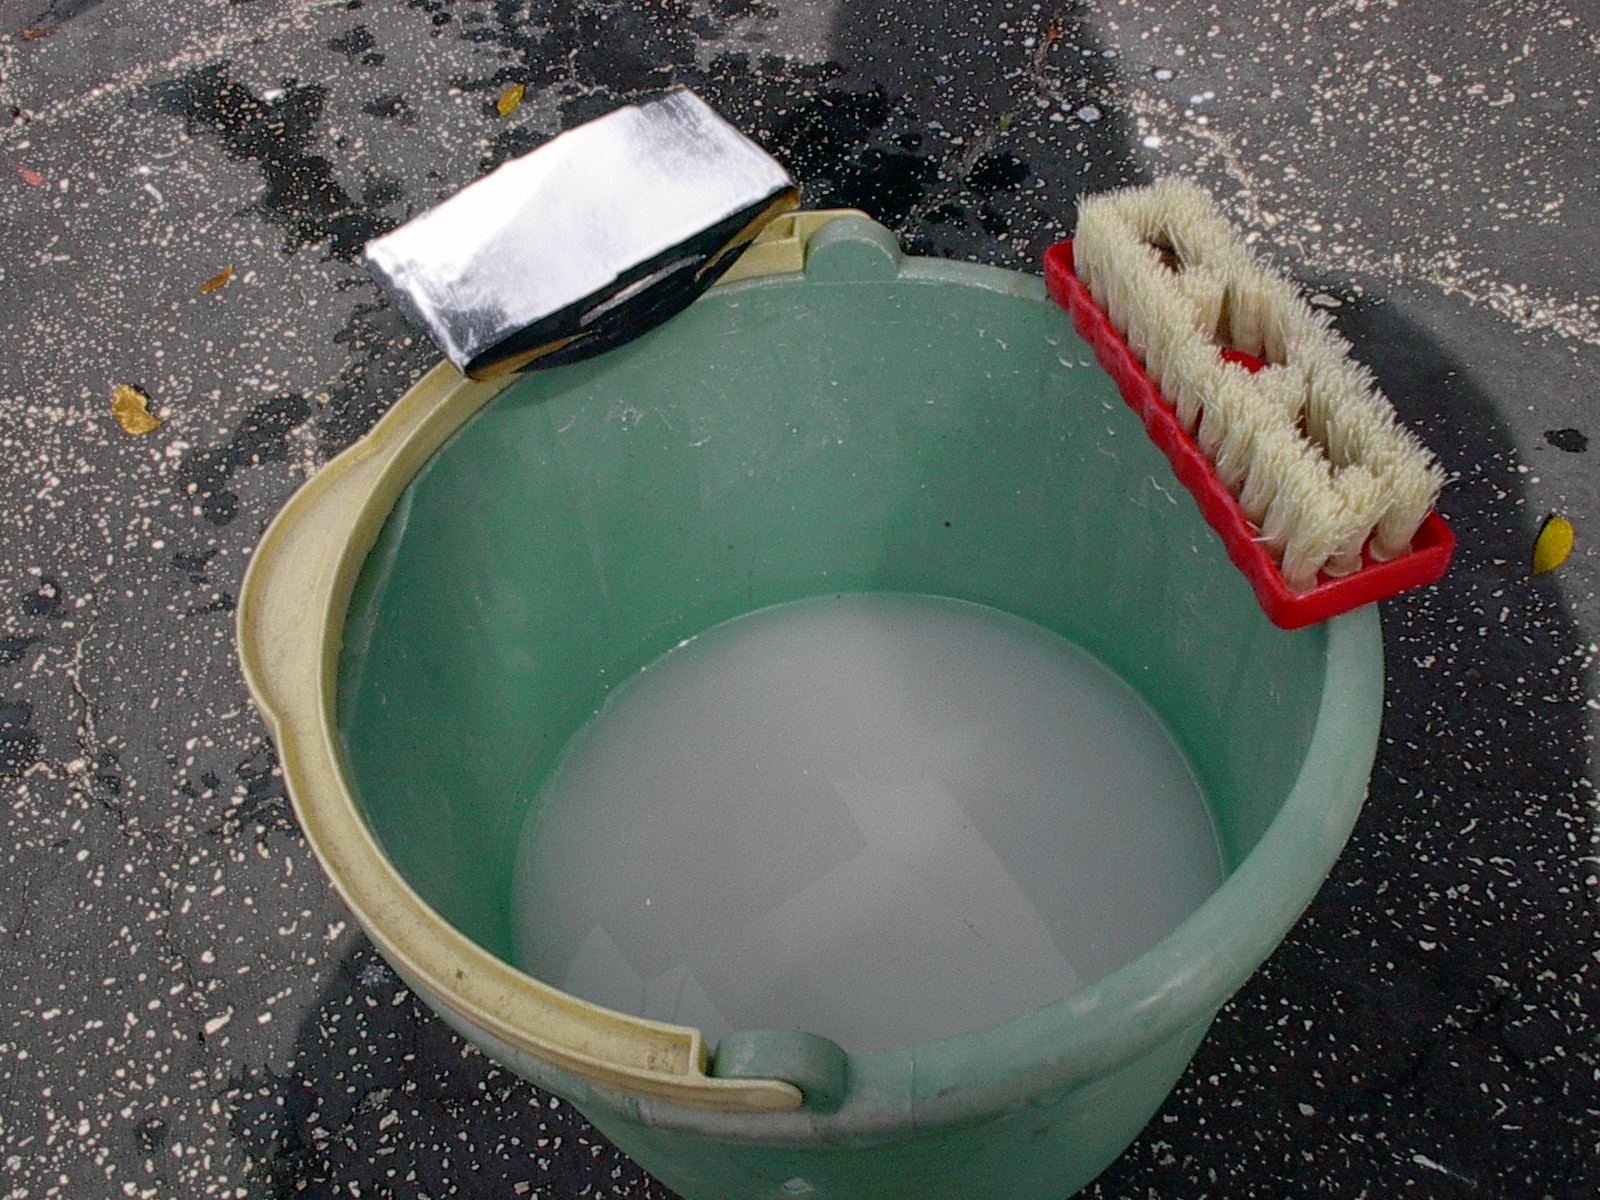
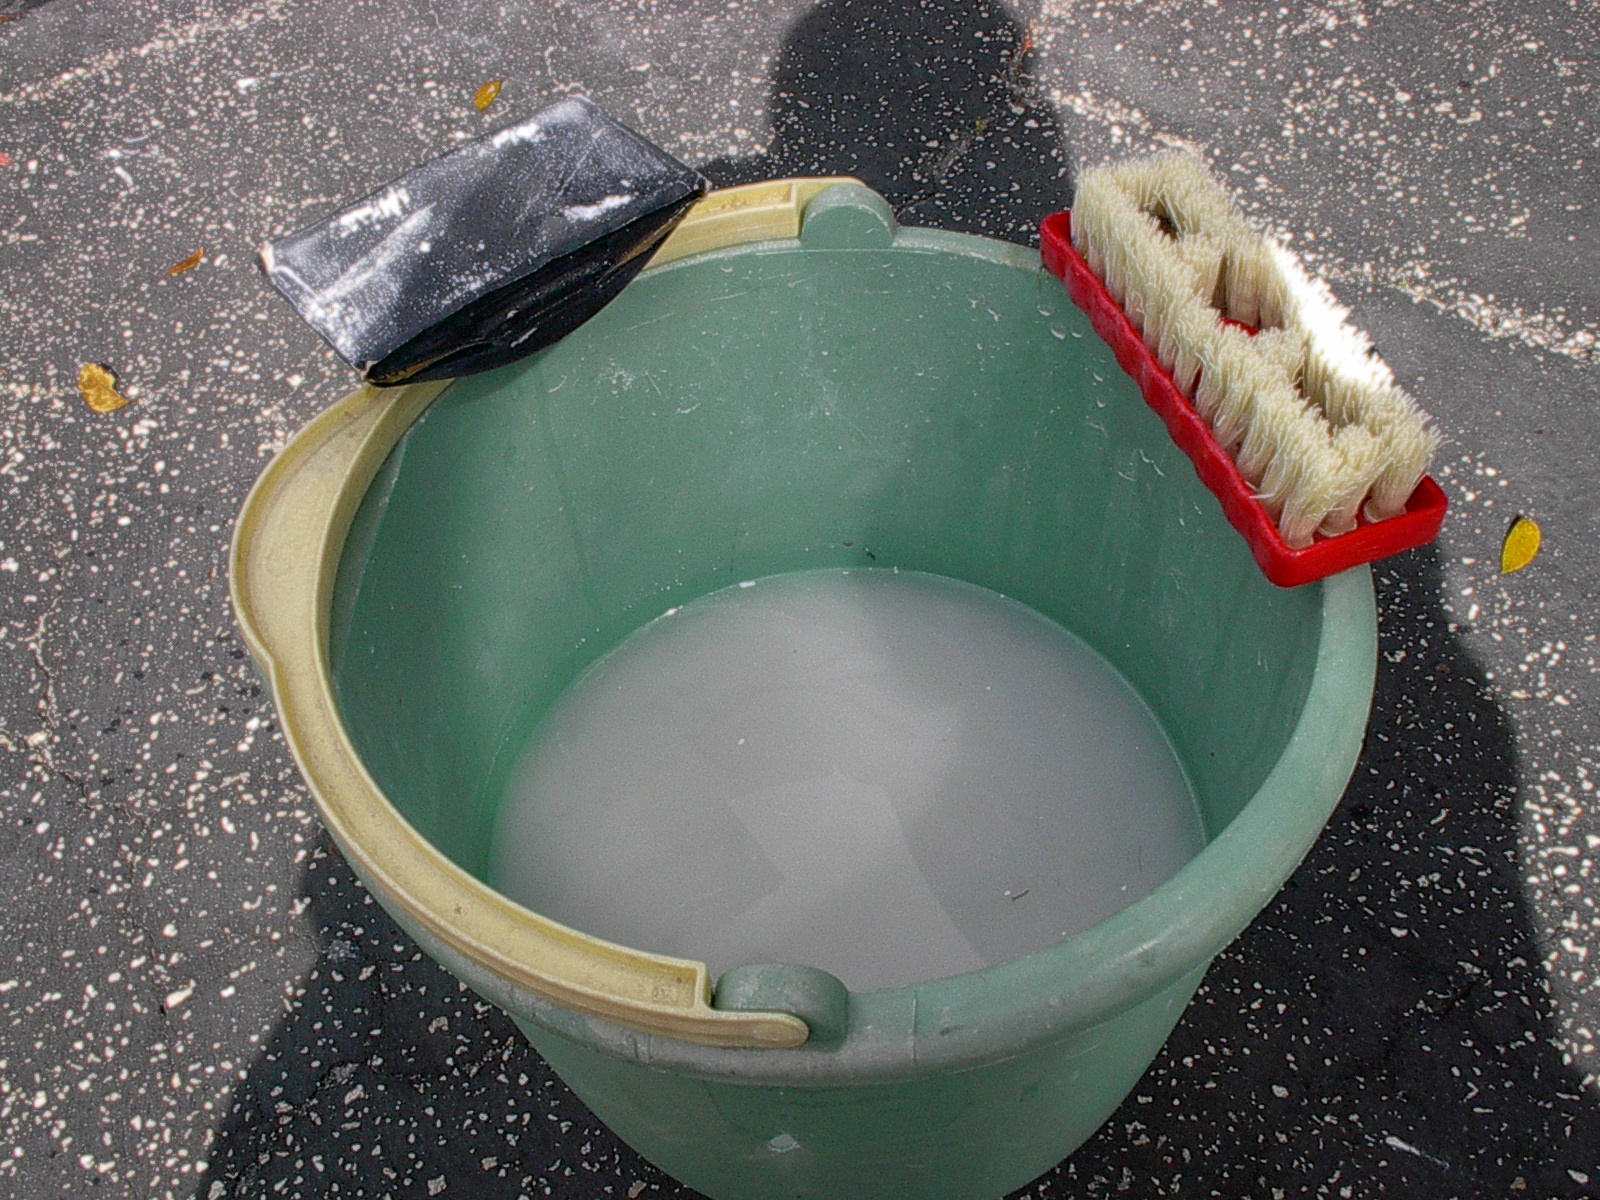
Now that the 1st coat has dried I want to sand it before applying the 2nd coat. Sanding between coats give the next coat something to bite onto and hold. The garnet sandpaper I was using before will not work well for this, it clogs up quickly. I'm sanding now with 250 grit wet & dry sand paper. Keeping the paper wet and cleaning with a brush helps prevent it from clogging.

Clogged wet & dry paper on sanding block.


After scrubbing with brush in the water.


The instructions call for a light sanding between coats. That's all the transom needed where I started and the paint was thinner. The stbd side where I finished took some hard sanding. On the 2nd coat not only will I thin it with thinner but will not put as much paint in the tray.


I applied the 2nd coat of paint today. At paint time it was 86 deg., max recommended is 90 and very humid. I was still wiping dew off the hull at 10:00am. I had to get it dry, clean the surface a few times with thinner and taped it off. I took a lot of paint off wet sanding. It took some scrubbin' to get clean. For the 2nd coat I thinned the paint about 10%, and wet the brush tip with thinner. There were some lumps in the paint. I didn't have a paint strainer but I ran it thru some screen I had. It got the boogers but the little clingons got thru. I think I removed all as I rolled it out, need to get some filters. It flowed out better then the 1st coat and is much more shinny. It'll be about dark when the paint will be dry to the touch and 20+ before sanding for another coat.


I'm not sure if there is enough paint for a third coat, my luck it would run out 1' short. I think I'll start working on the interior paint. It will give me some more practice and I can decide later if I'll get another quart of white for the exterior.

Please Log in or Create an account to join the conversation.

Re:1968 16' Boston Whaler 10 years 8 months ago #91531

  • MarkS
  • MarkS's Avatar
  • Offline
  • Moderator
  • Moderator
  • Posts: 5348
  • Karma: 118
  • Thank you received: 5
She's looking great CAT*FIN*k, you're making nice progress there. I think you'll find thinning a little will help a great deal in the process, but you do have to be more careful about watching for runs on vertical surfaces. (I've only done one roll-n-tip job, but you do learn a lot with each coat as you go.) It also amazed me how much the paint "laid down" or "flowed out" overnight, looking much smoother the next day than it did right after application.

Almost everything I read doing research on the roll-n-tip method mentioned that it really was easier with two people, one to roll and the other to tip. I learned to do smaller patches at a time but they were right, you have to hustle to get it tipped out before it starts to get tacky. (A little thinner on the tip brush may help this out as well - great idea!?)

Great choice on the colors and flooring, she's going to be a knockout when you're done. ;)

Please Log in or Create an account to join the conversation.

Mark

Re:1968 16' Boston Whaler 10 years 8 months ago #91581

  • CAT*FIN*k
  • CAT*FIN*k's Avatar Topic Author
  • Offline
  • Gold Boarder
  • Gold Boarder
  • Posts: 620
  • Karma: 35
  • Thank you received: 0
Thanks Mark, plugging away as I can. I started posting last night but there was some glitch preventing me editing.

You bring up some good points, I think I'll get it fine tuned in the next coat or two. It's not a show boat, just an old fishing boat. When I start getting nit-picky I have to check myself and move on. There is still a lot to do inside the boat, roll n tip the blue. The original color is a little lighter and a touch of green compared to the bikini blue. The flooring I got a good deal on a roll a few years ago but never used. I have 2 gallons of the glue for it also, could do 3 Whalers. I think the contrasting blues will make it easier for my brain to tell my foot where to step. When the sun is strong and everything is white it all looks the same.

Please Log in or Create an account to join the conversation.

Re:1968 16' Boston Whaler 10 years 8 months ago #91942

  • CAT*FIN*k
  • CAT*FIN*k's Avatar Topic Author
  • Offline
  • Gold Boarder
  • Gold Boarder
  • Posts: 620
  • Karma: 35
  • Thank you received: 0
Interior Paint Prep;

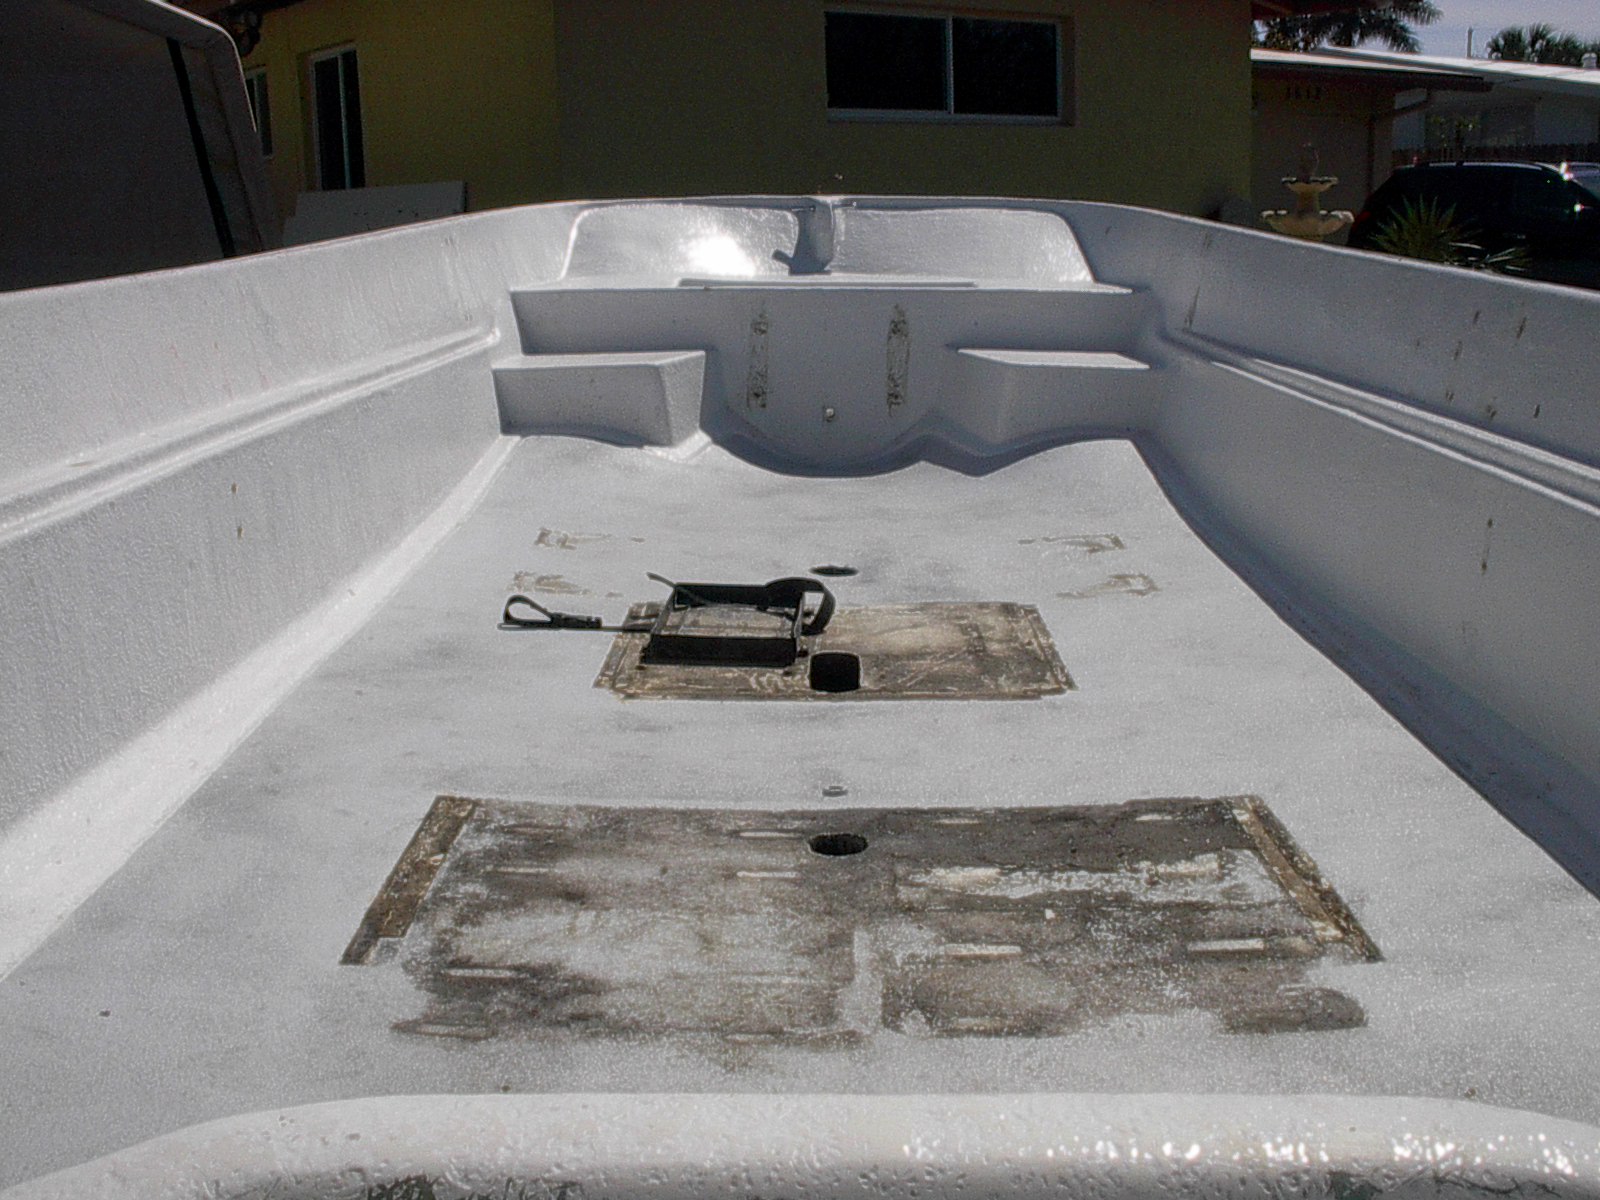
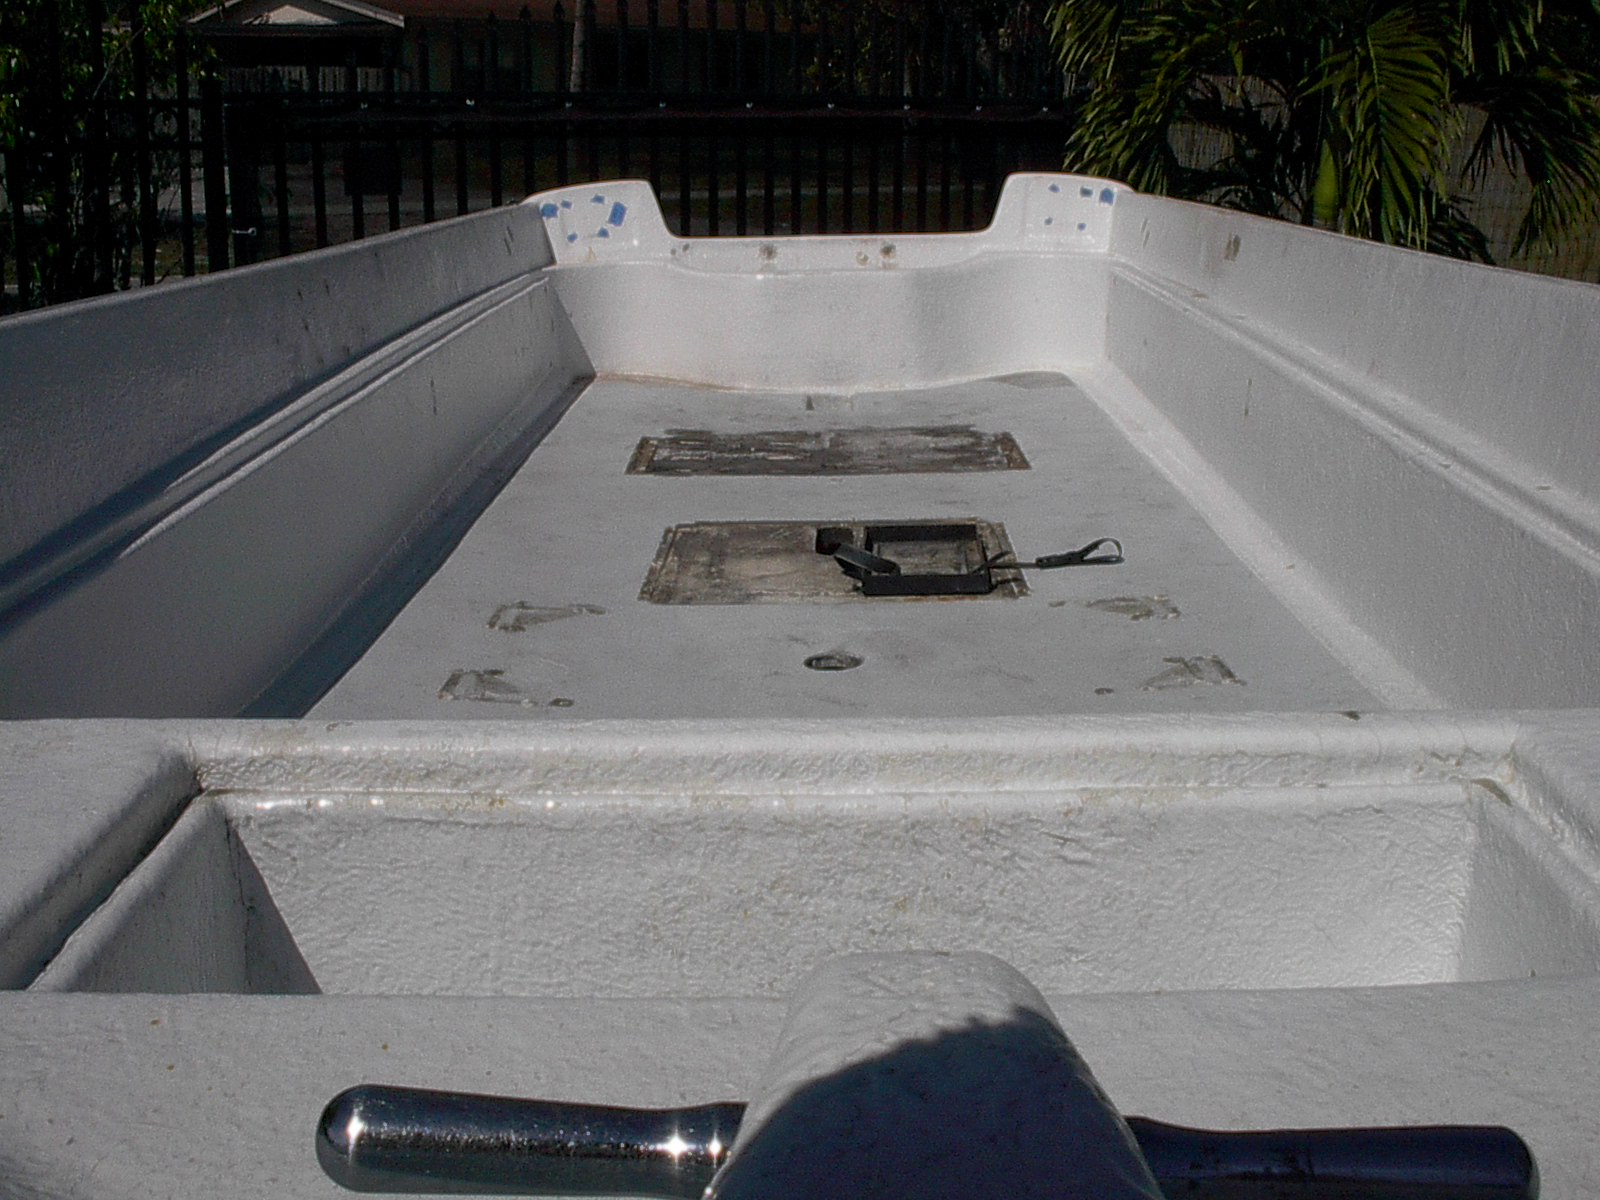
I filled most of the holes while prepping the exterior. Now I've pulled the rest of the interior there are a few holes in the floor I won't use and need to fill. There is also a lot of silicone to remove as the paint will not stick to it. Only a couple of the 24 holding the console down came out. The rest had to be drilled and ground down.


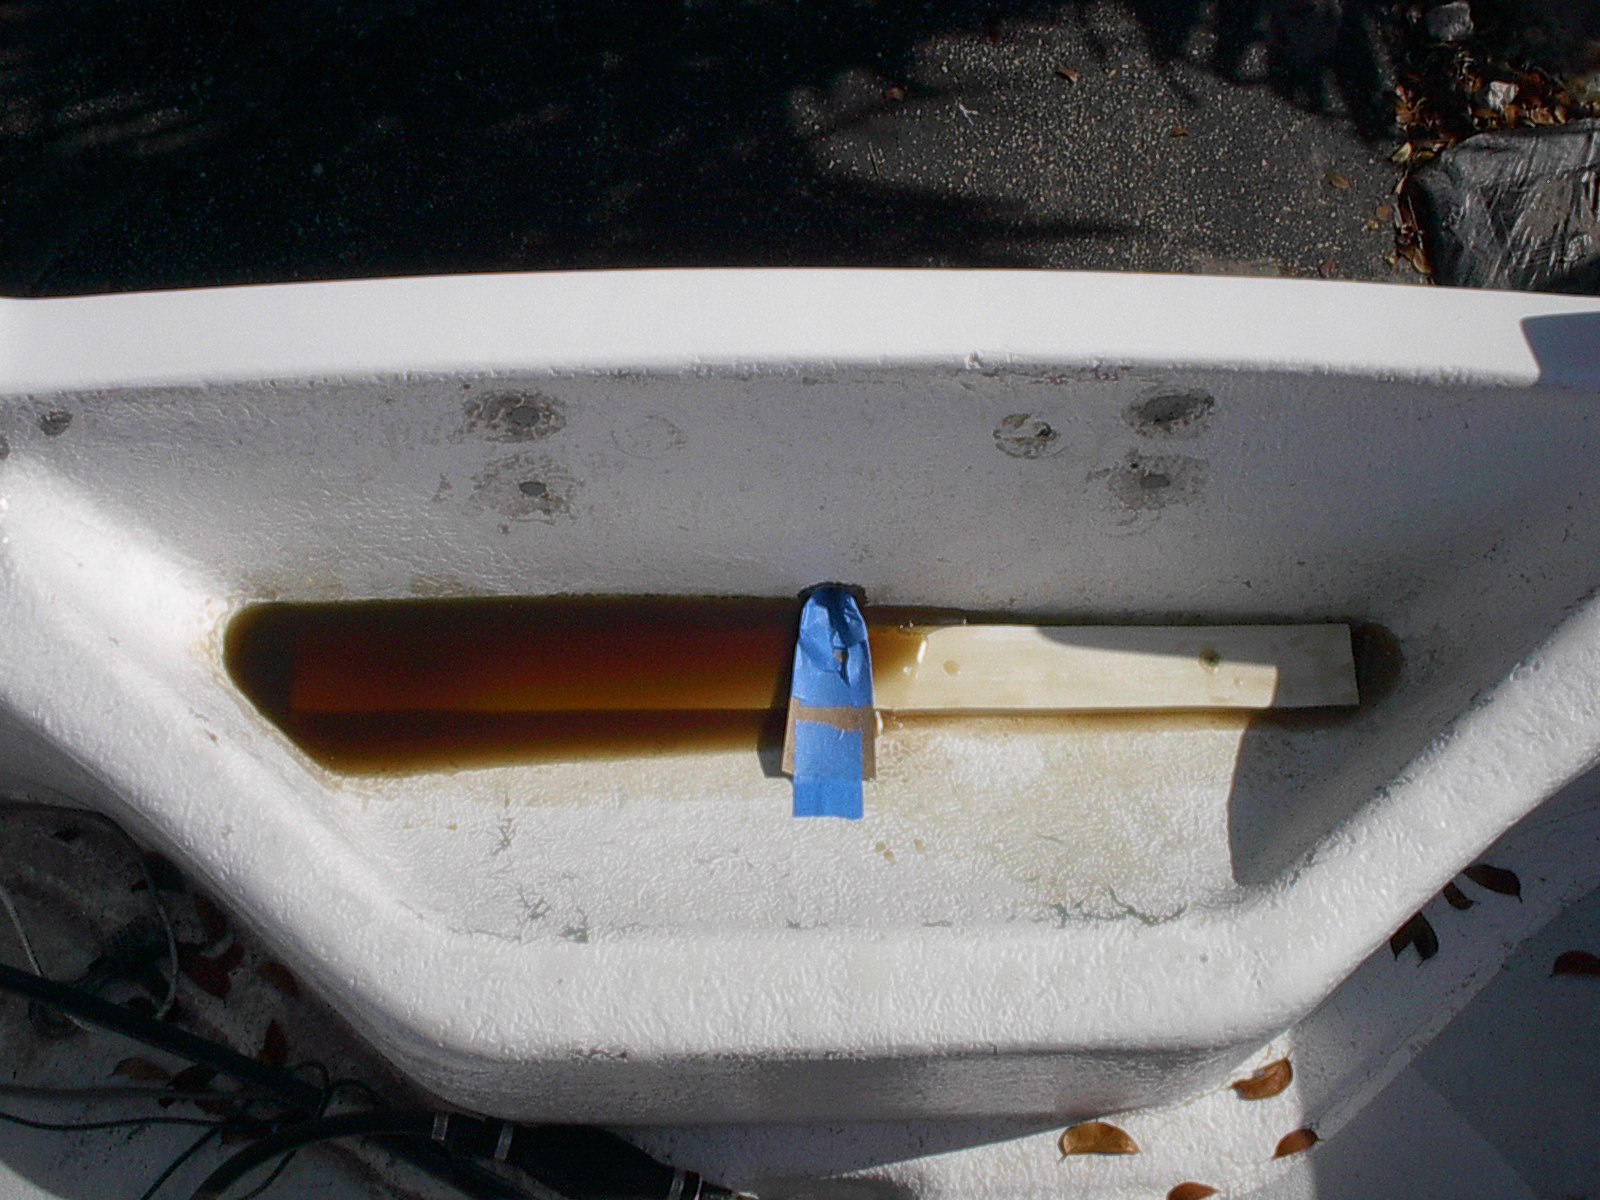
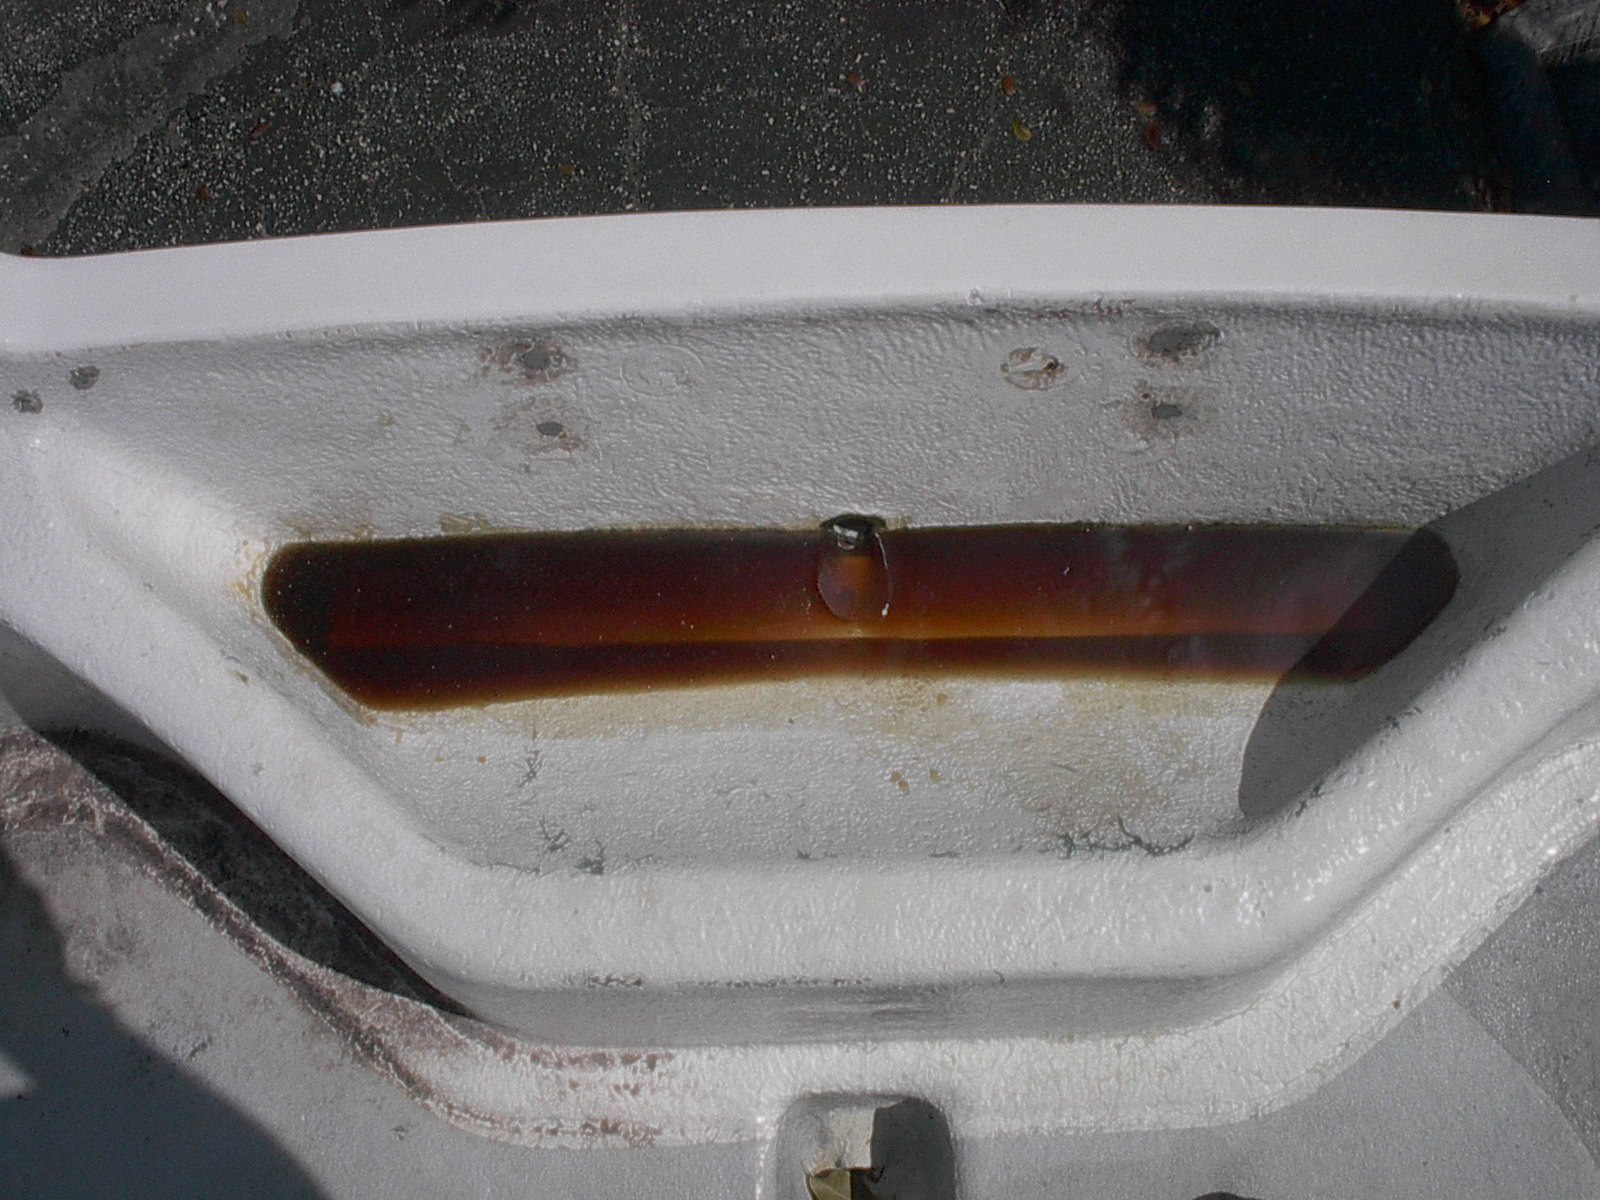
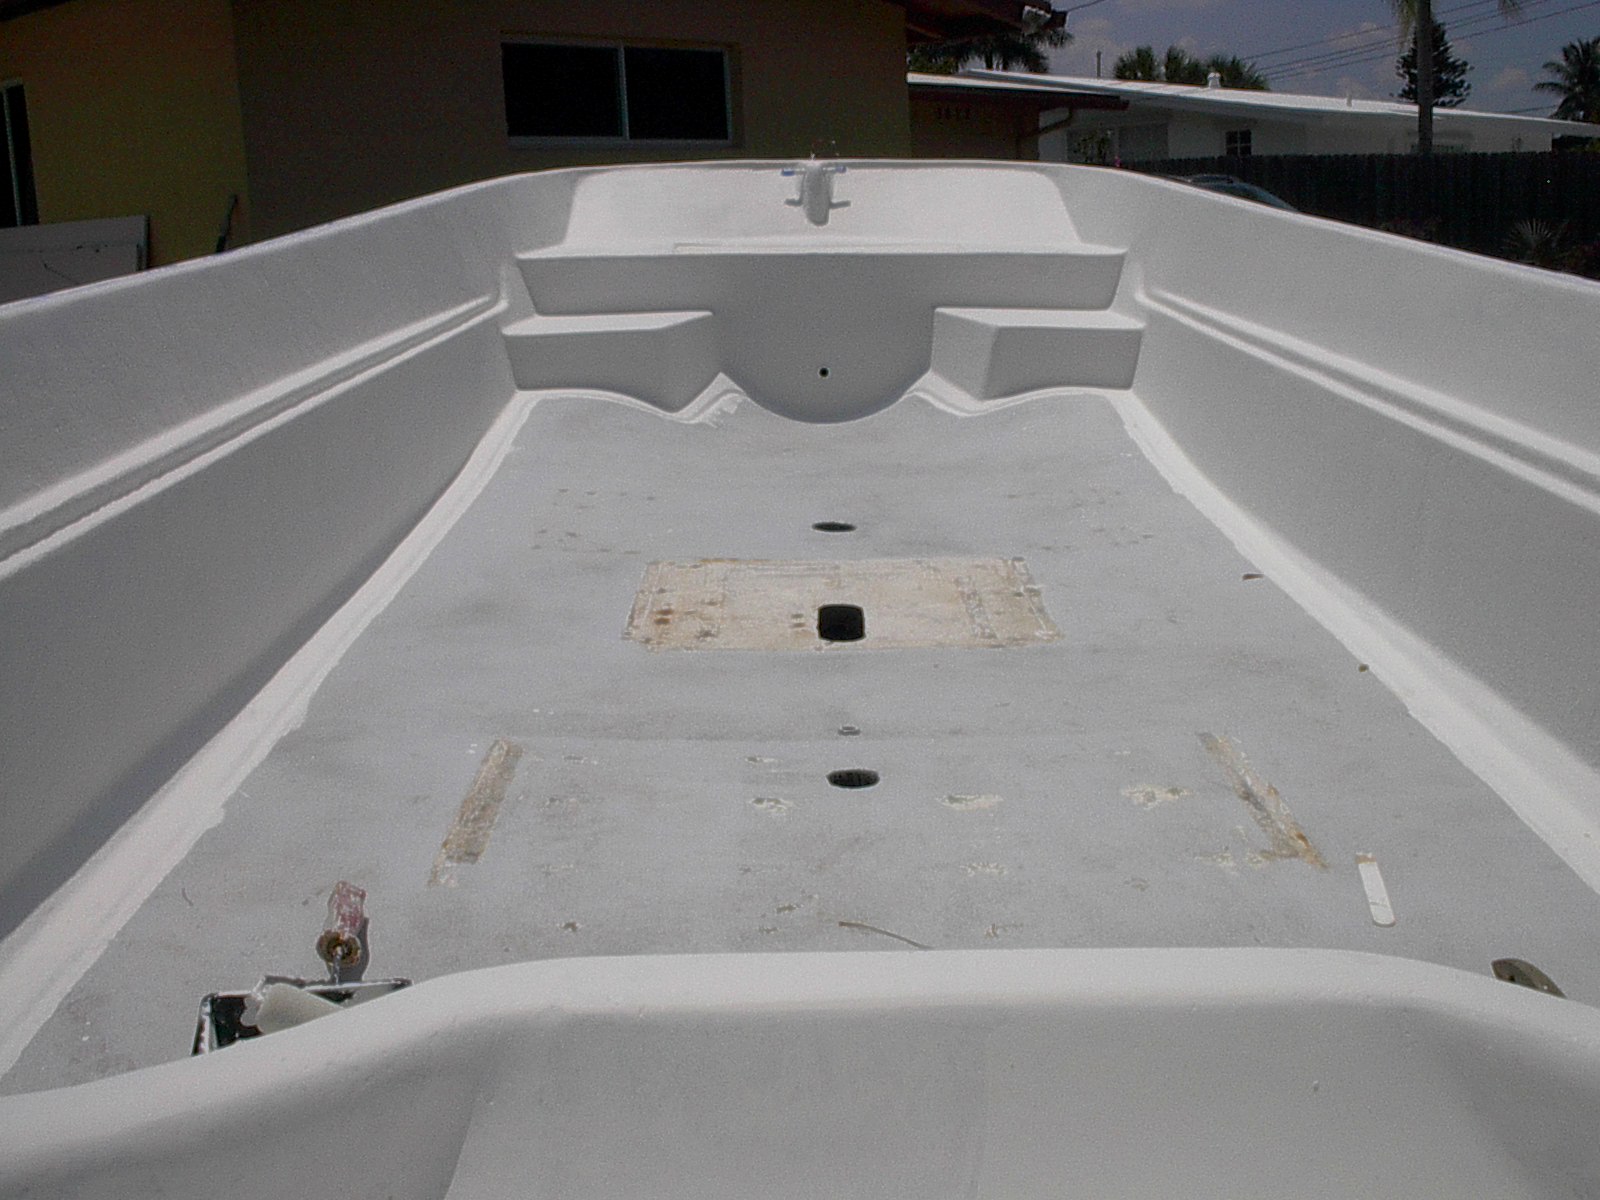
One thing I always do is make sure the drains work. In the splashwell the drain was almost 1/2" above the bottom. I screwed & glued a piece of 3/8" PVC sheet in the bottom and filled with resin. I leveled the boat length ways. It's parked at the most tilted it can be on the property and I filled the low half in layers of resin.


I'll jack the trailer up on the low side up to get the same tilt and fill the other side. When level the bottom of the splashwell will be V shaped. Water will flow to the center channel formed by the cardboard and out the hole. With the Johnson covered the drain hole before and nothing drained. I sure hope the Merc don't block the drain. I'm doing the same with the bow hatch drain, it's only 1/4" high. There are three areas on the boat that may hold water, the inside of the splashwell, sump and bow hatch will be painted with bulge paint. Topside paint can soften if allowed to stay wet a few days and will then start to flake off when it dries.

A little sanding now and I'm puddle free.


I decided to smooth out the areas that will get painted with bilge paint.


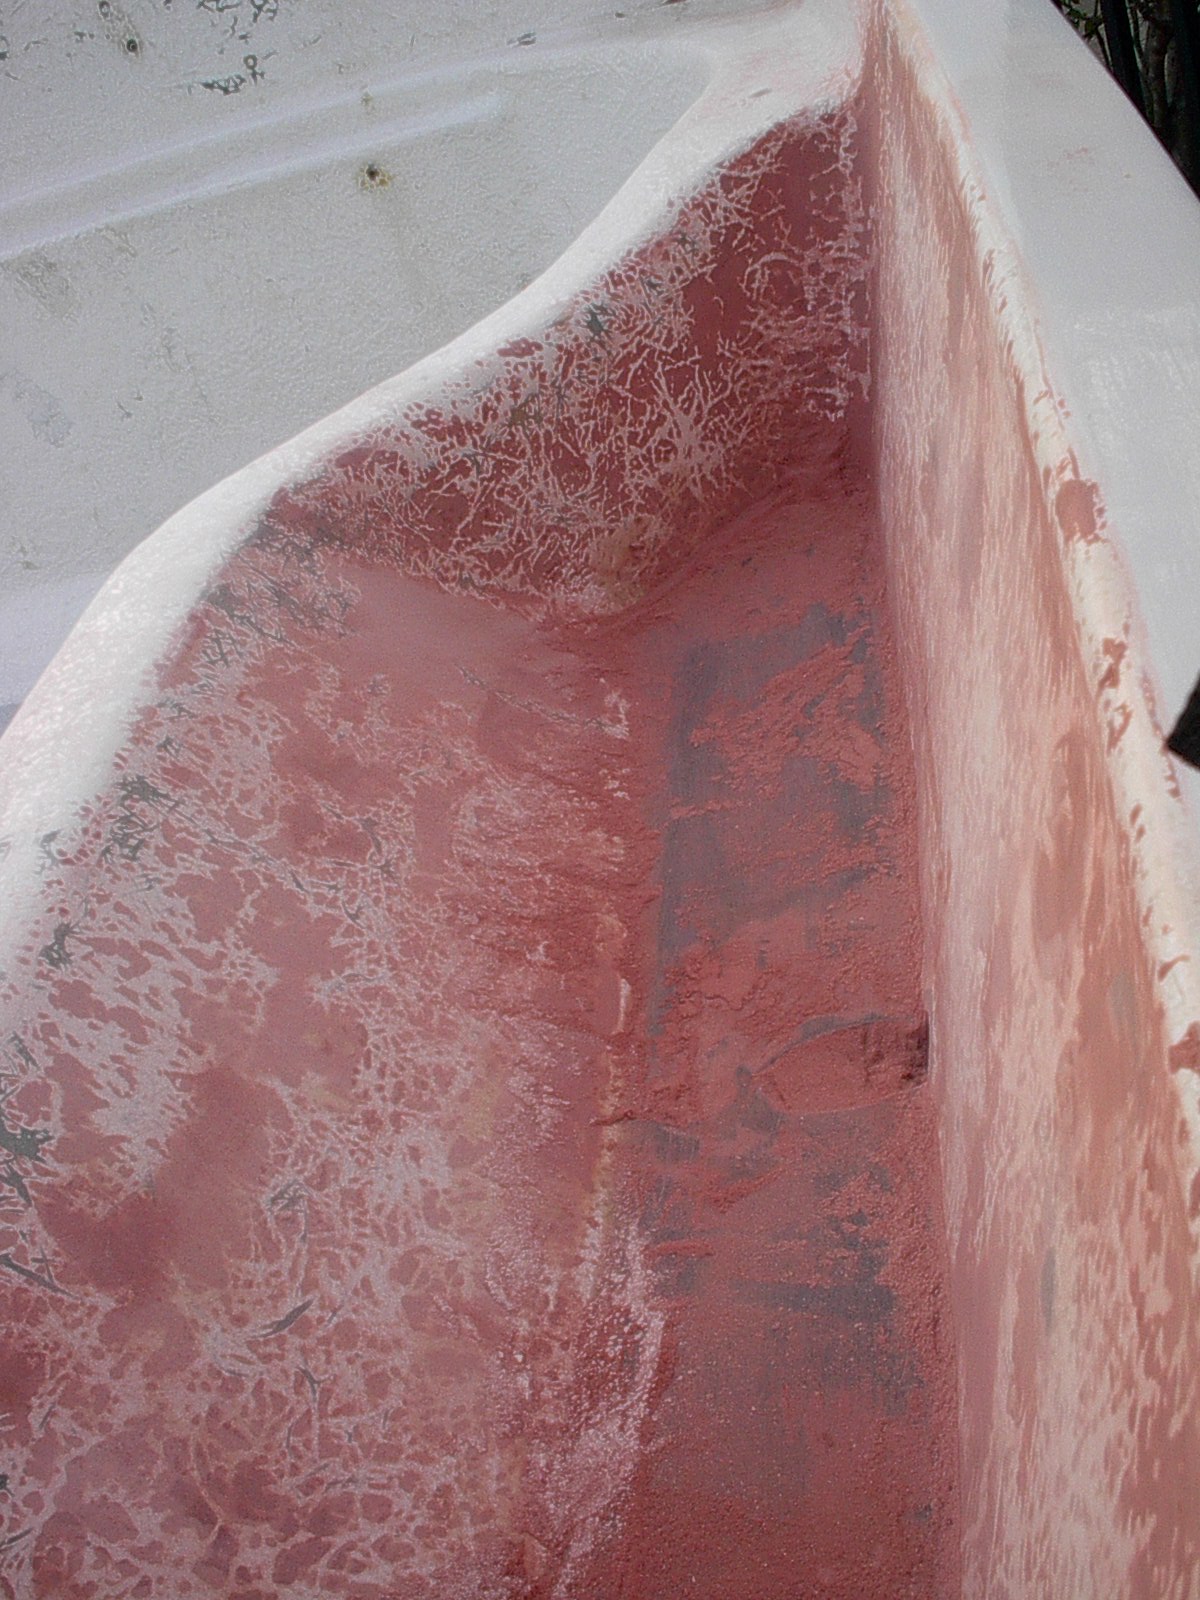
There has been a lot of sanding going on. Lucky me the friend that I gave the Johnson to volunteered to sand for some of the parts I'm not going to use. Everything is getting sanded until resin shows.


Sanding with 80 grit paper is almost done. There are a couple areas that the 80 grit can barely scratch the paint. There has been something mounted in these areas before and patched. I'm going to hit it lightly with the grinder and scuff it up a bit before primer. I think I'll finish up the sanding this weekend. When my friend come by Monday to finish I'll ask him to help get the motor holes drilled. He would much rather do that.

Mounting the 115 Merc is a bit different than the boat was designed for. The upper bolt holes of the Merc are the only ones I've access to in the splashwell. I'm going to use the top and bottom hole in the upper section. In the lower holes I'll use the top and bottom holes also but will need to use anchors for the bolts. It might be a bit of overkill but there are lot of shallow oyster beds here.

Please Log in or Create an account to join the conversation.

Re:1968 16' Boston Whaler 10 years 8 months ago #92560

  • CAT*FIN*k
  • CAT*FIN*k's Avatar Topic Author
  • Offline
  • Gold Boarder
  • Gold Boarder
  • Posts: 620
  • Karma: 35
  • Thank you received: 0
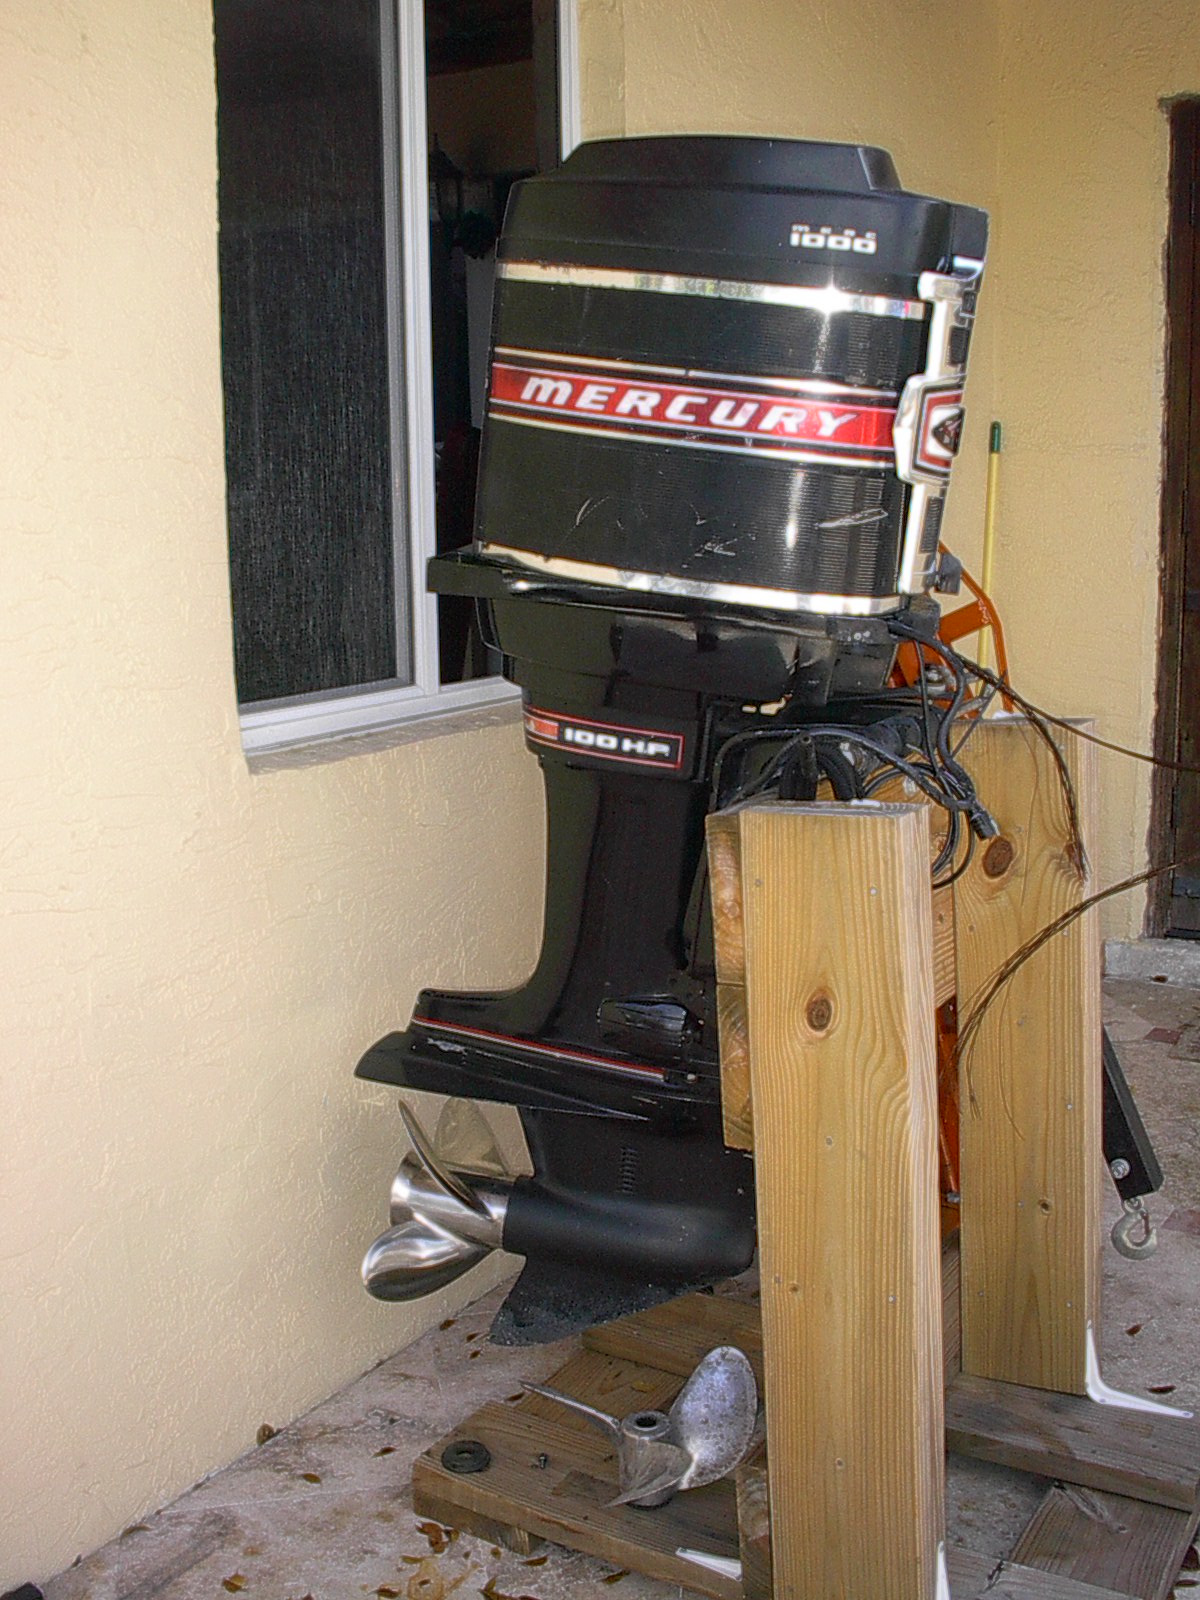
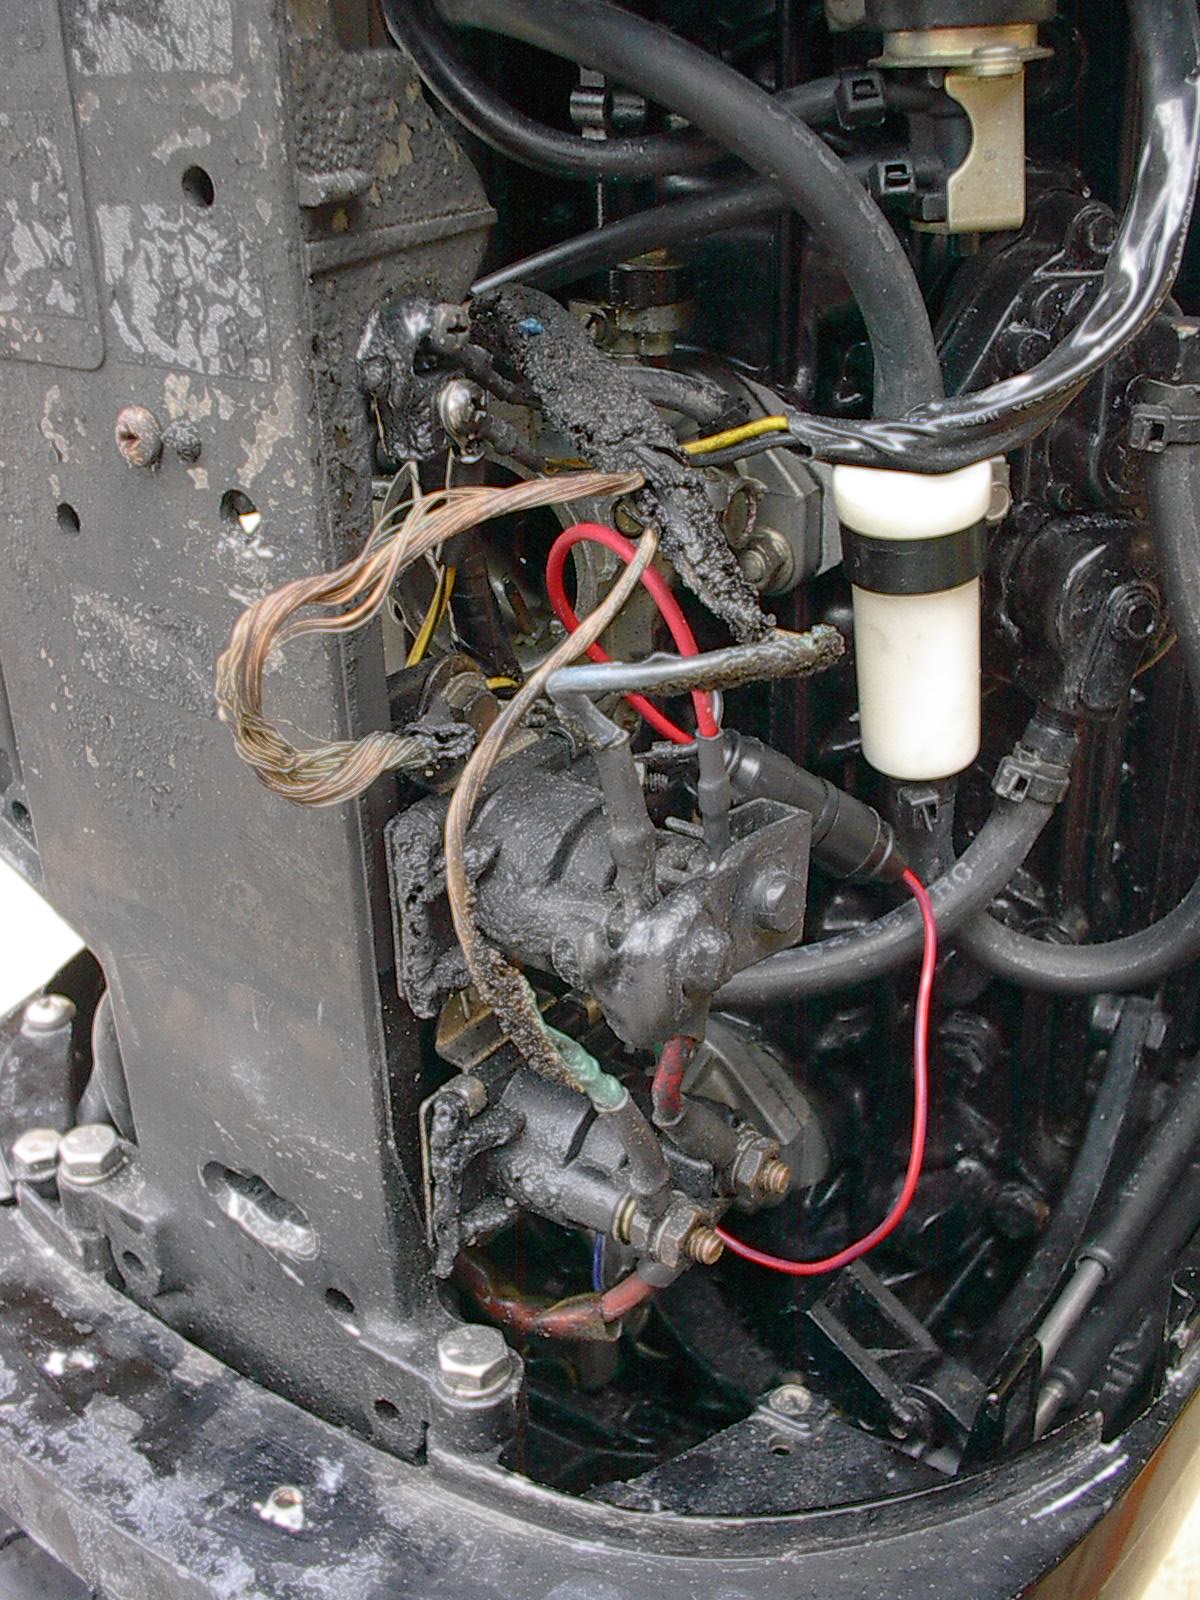
The interior is ready for a coat of primer now but rain is in the forecast all week. My attention this week is going to be on the motor. The motor is a 1986 Mercury 1150 that came off a 1986 Allison. It had about 150 hours on it but had been sitting for 20 years. The PO restored the boat in his body shop. The motor he had gone over by one of the top mechanics in town. He only had it running about a month, 15 hours when he came back for boating, parked it in his drive and went for lunch. Somehow the boats helm caught on fire just before he got home.

I've replaced all the wiring on the motor, any wires, cables that went into the boat had melted. The faceplate was even a little saggy. I back-dated its look by replacing the top, faceplate and lower cover with 1969 Merc 1000 parts. The cowl wrap is from a 1968 Merc 1250, with a few battle scars. I have a nice one from a 1000 but it's not tall enough. I hoped to get it on the back and drill the holes today but ran into trouble with my drill.


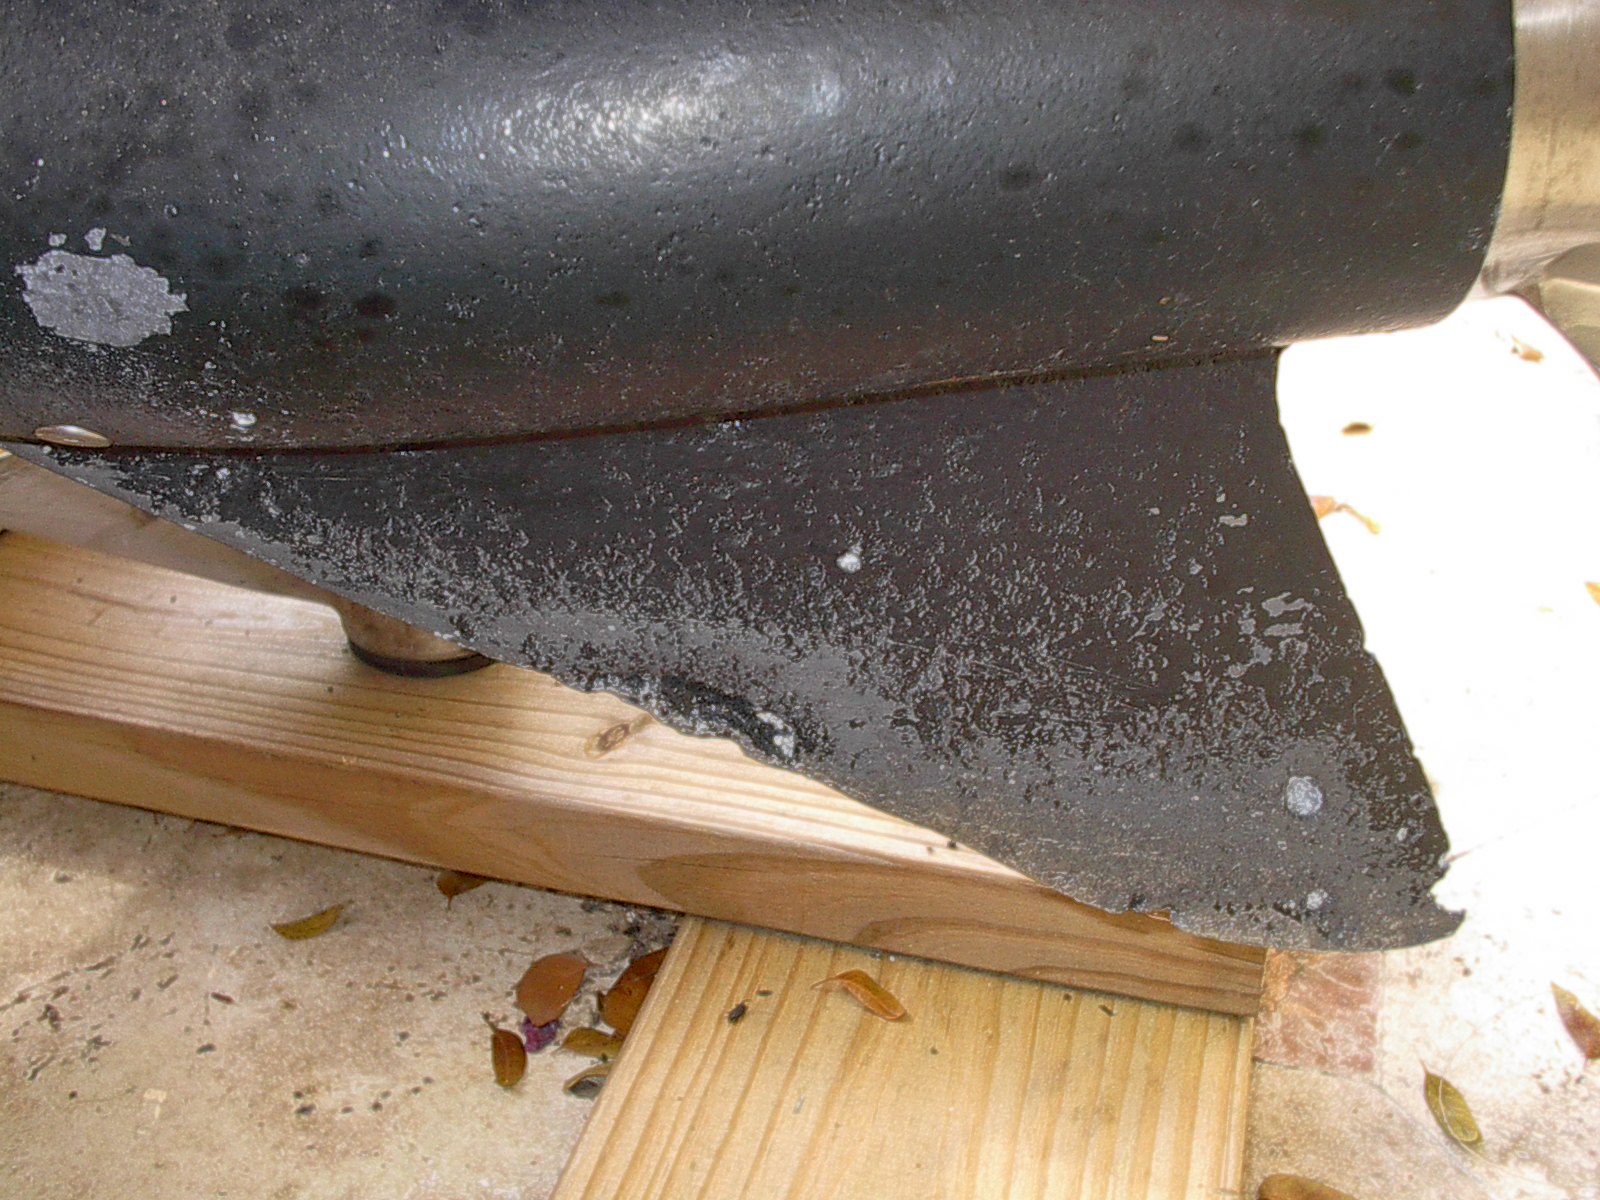
When the PO had it gone over they found out why the boat got parked. The low end was bad. 2 gears had broken teeth, all the dogs were 45 degrees, prop shaft was torn up along with the carrier. The PO got a 1984 Merc 115 from his uncle with less than 10 hours. They used the boat twice got sea sick and parked it. The low end from the '84 was but on the '86. The insides are good but the skeg is ruff. After a couple weeks in the salt water with worn out zincs.

I plan to rebuild the broken lower end and put back on it's original motor. I've picked up the parts over the past few month and the case is in very nice condition. I'm not sure if I'll repair or replace the case on to go back on the '84. Around here they use epoxy with cab-o-sil to fill the holes and sand to shape them.

I used the Mercury prop calculator then checked some prop shops they all recommended the same size/type prop. They recommended a 23-25 pitch cupped 4 blade prop, the one I found is a 24 pitch. It should run 50 mph @ around 5100 rpm. If not it was cheap and will be a good emergency get me home prop. The other prop in the 1st pic is a 23 3-blade, it's ruff but free.

We've had a lot of rain the past week. Between showers I spent some more time with the motor. The wires coming into the motor got a little warm.


I've been looking for the 3 wire from the trim motor to the relays with no luck. Looks like I'll have to make one. The only other parts I've not found is a bottom cowl spacer and the shift/throttle boot. The cowl spacer was blackened and I tossed it. I'll keep using the boot that's there until I can locate another, it's just a little deformed.

I've also been designing a console and seating. While doing the dash layout I discovered there's no sending unit available for a trim gauge on this Merc. I think I'll still install a trim gauge anyway on the dash. I may be able to figure something out later.
Attachments:

Please Log in or Create an account to join the conversation.

Re:1968 16' Boston Whaler 10 years 8 months ago #92574

Great motor that should push her along quite nicely.

Bob

Please Log in or Create an account to join the conversation.

Re:1968 16' Boston Whaler 10 years 8 months ago #93044

  • CAT*FIN*k
  • CAT*FIN*k's Avatar Topic Author
  • Offline
  • Gold Boarder
  • Gold Boarder
  • Posts: 620
  • Karma: 35
  • Thank you received: 0
I hope your right Bob, that Johnson just pushed my buttons.

Please Log in or Create an account to join the conversation.

Re:1968 16' Boston Whaler 10 years 8 months ago #93176

  • CAT*FIN*k
  • CAT*FIN*k's Avatar Topic Author
  • Offline
  • Gold Boarder
  • Gold Boarder
  • Posts: 620
  • Karma: 35
  • Thank you received: 0
Interior Primer;

I put a coat of EZPrime on all the surfaces to get painted bikini blue. It took almost a quart of primer. I took full advantage of the primers fill ability. There were hundreds of pin holes I filled with primer.


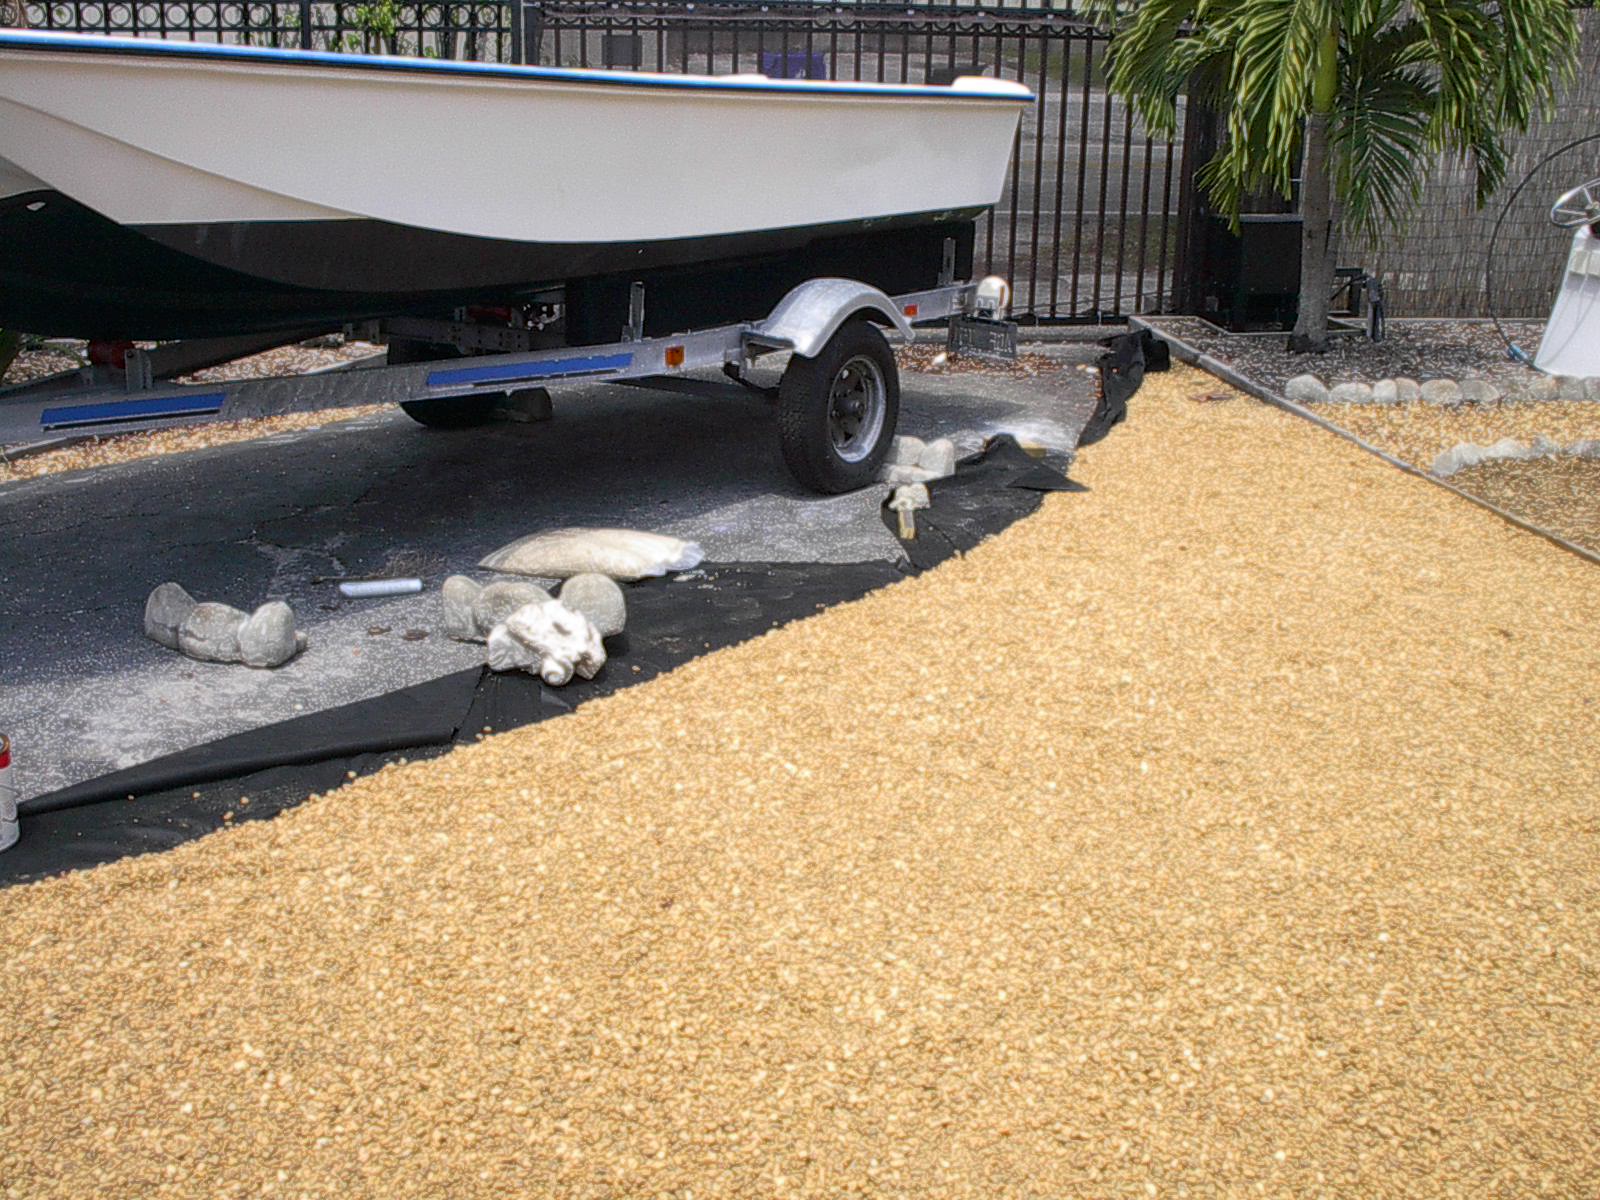
Ya never know what unseen problems may arise. My wife pointed this one out to me. Turns out I was tracking a lot of sand in when I worked on the boat. The ground port side was sand and weeds, I was getting sand in my shoes all the time. I put on my landscapers hat for a couple days and put down 40 bags of pea stone.


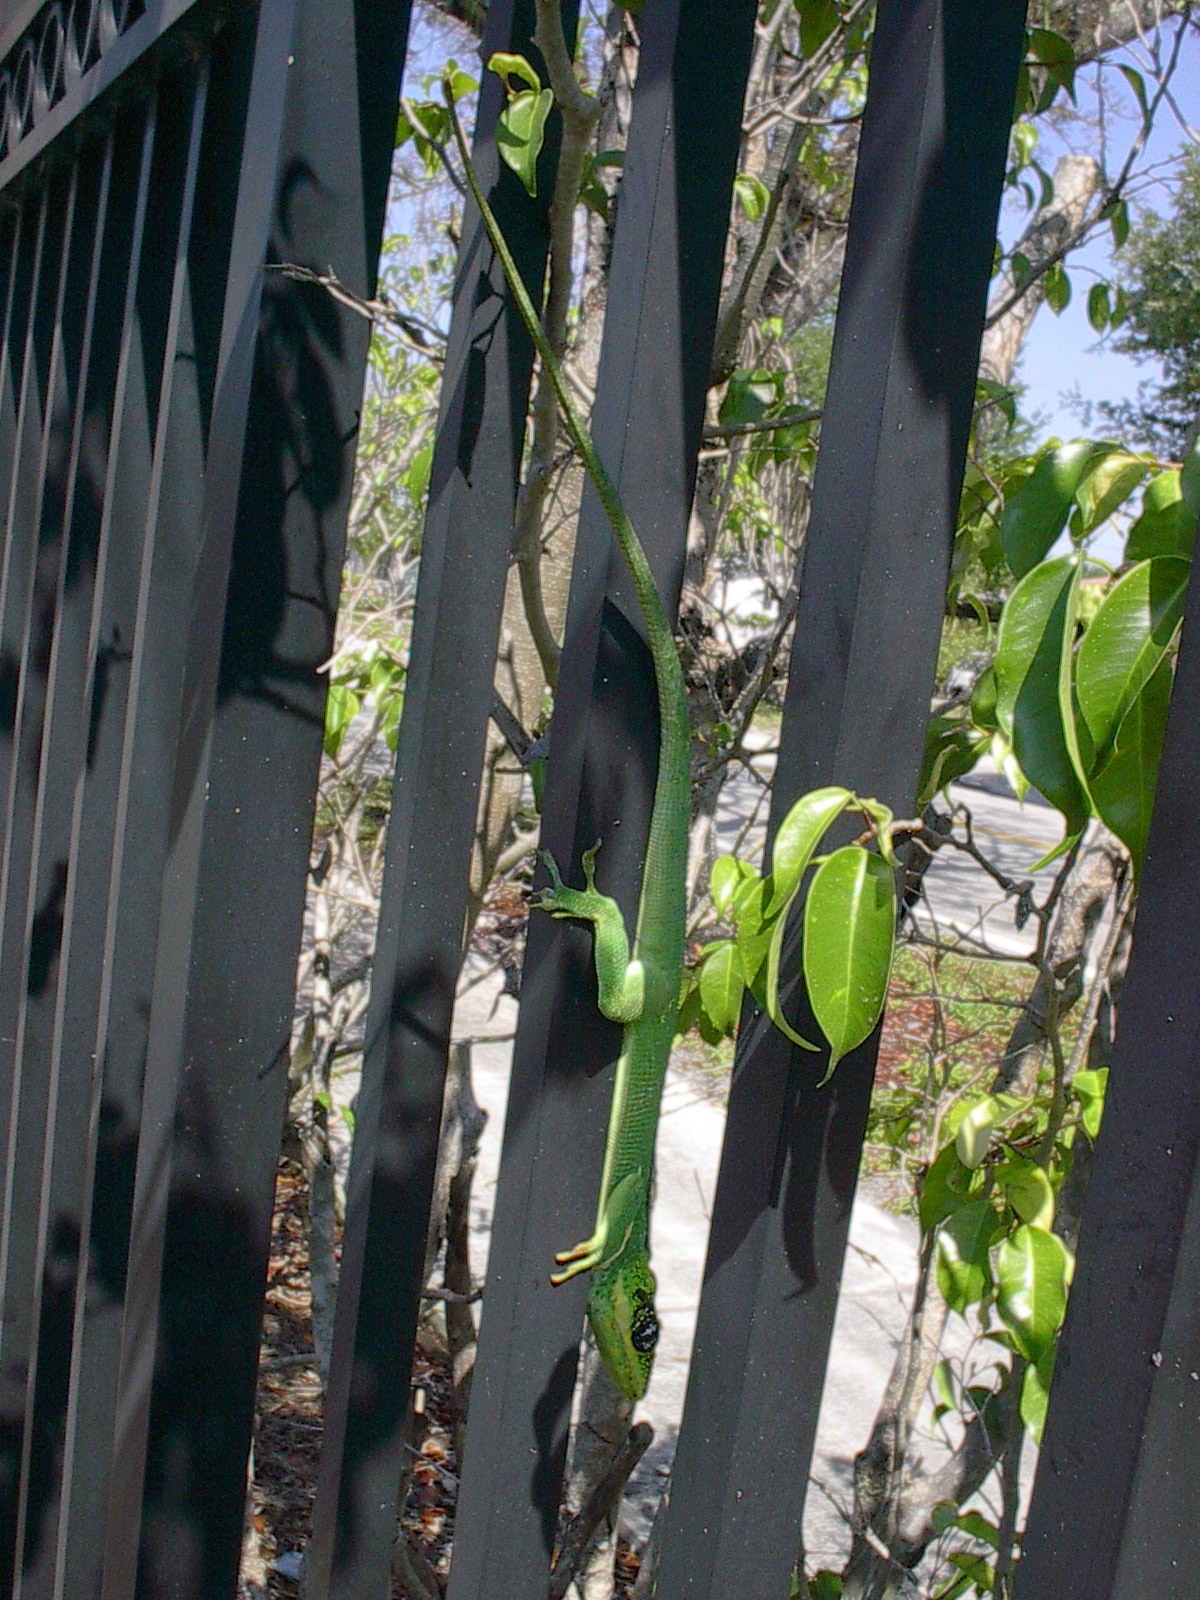
This little guy has been hanging out the past couple days. It's a Cuban Knight Anole lizard. They came to the US from Cuba in the pet trade. They get pretty big, have a bad attitude and nasty bite.
Attachments:

Please Log in or Create an account to join the conversation.

Re:1968 16' Boston Whaler 10 years 5 months ago #98342

  • CAT*FIN*k
  • CAT*FIN*k's Avatar Topic Author
  • Offline
  • Gold Boarder
  • Gold Boarder
  • Posts: 620
  • Karma: 35
  • Thank you received: 0
Wow, I’ve been busy. My wife had not been to Brazil to visit family in a few years. Since the World Cup was going on she decided this would be a great time for a long visit. It gave me the chance to get a couple large honey-do projects off my list. I’ve got the honey dos pretty much knocked out, time to get back to the boat.

The weather has been getting in the way with working outside lately, so I’ve been looking at things I can do indoors. My favorite area is the helm station, so I started there. For an electronic display I’ll be using a Raymarine E-120 system I bought a few years ago to go on the King Cat. The 12” display takes up a big chunk of the 21” x 35” dash board. The radar, sonar, Sirius, VHF radio and GPS / chart plotter are all good to go. I have a thru-hull transducer but will need to get a transom mount transducer for the sonar. The auto pilot is for a boat with inboard engines so I’ll need to change a couple parts there. Selling the un-needed parts should really cut back on out of pocket expenses.

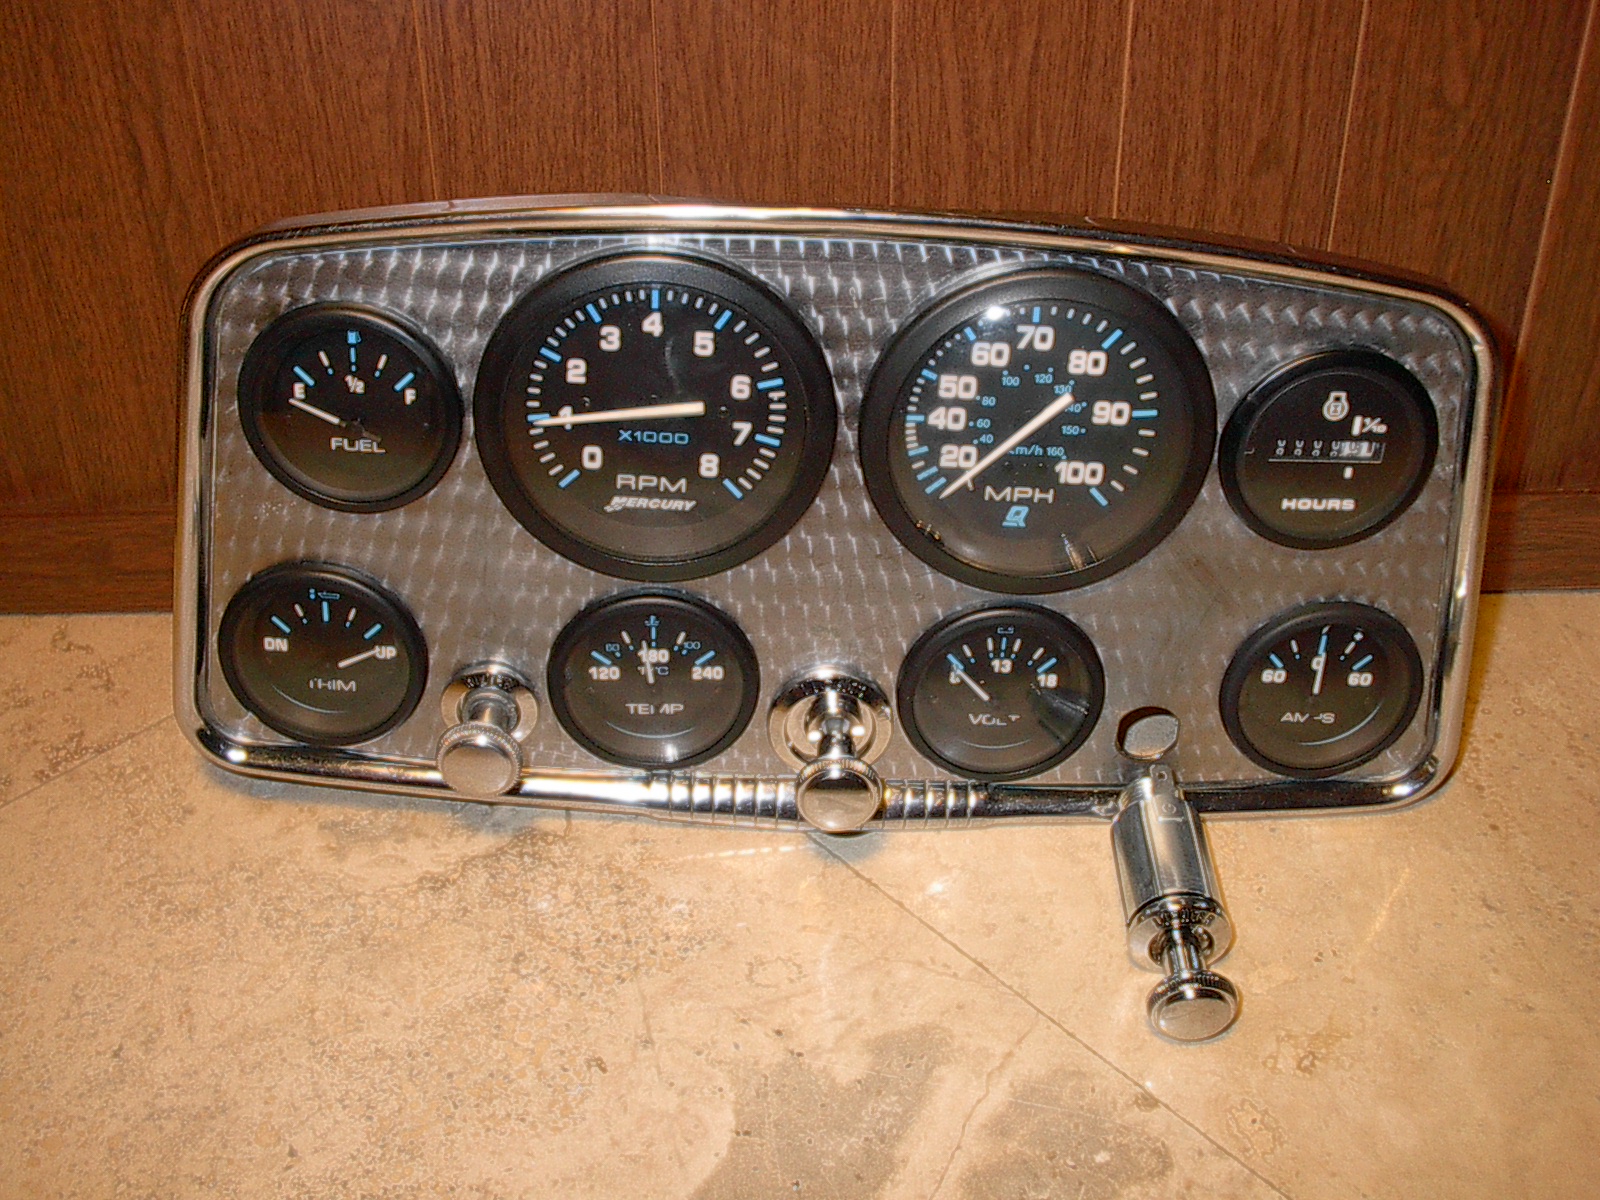
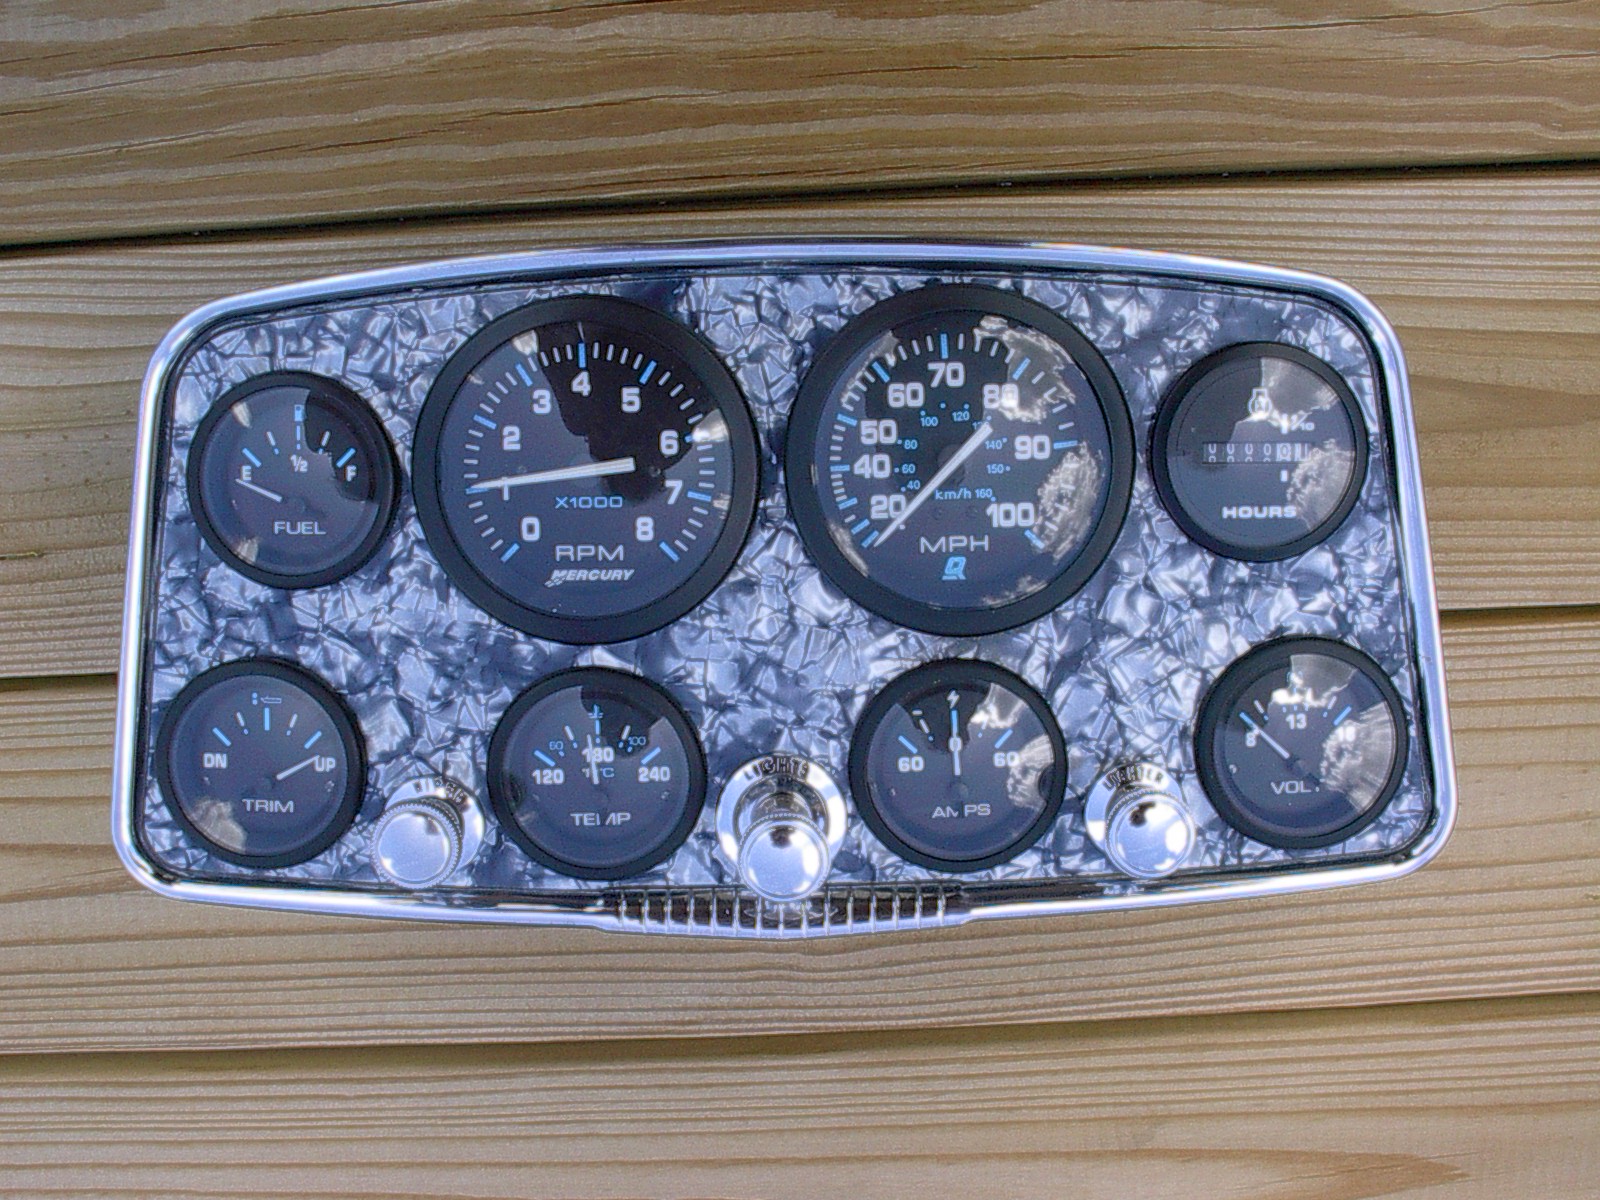
For the engine gauge panel I have a Stewart Warner Master or Hollywood panel. The engine turned panel insert is ruff, looks like a PO cleaned it with steel wool. The speedo & tach are Mercury/Quicksilver. It would be better to get a 65 MPH speedo but I had this NOS on the shelf. The rest of the gauges are Teleflex Eclipse Series. The wiper & light & lighter are ’64 Impala and the bezels are ’65 Mustang. The light switch knob will work like in a car, pull 1st position for anchor light and all the way adds navigation lights. Turning the knobs adjusts dash lights and the click at the end will turn on the courtesy lights.


I still had quite a few switches and a 24 volt gauge for the bow motor to organize. Most of the switches had a panel; still, when laid out it looked hodge podge. I thought it would look better to have all mounted on 1 panel. I did have a Stewart Warner Navigator panel with no insert. I’ve had it a long time but never came across an insert for it. I needed something strong enough to support switches that would be mounted in the panels gauge holes. Trying to go with what I have around the house I found a piece of leftover silver pearloid pick guard material I had that was just big enough.

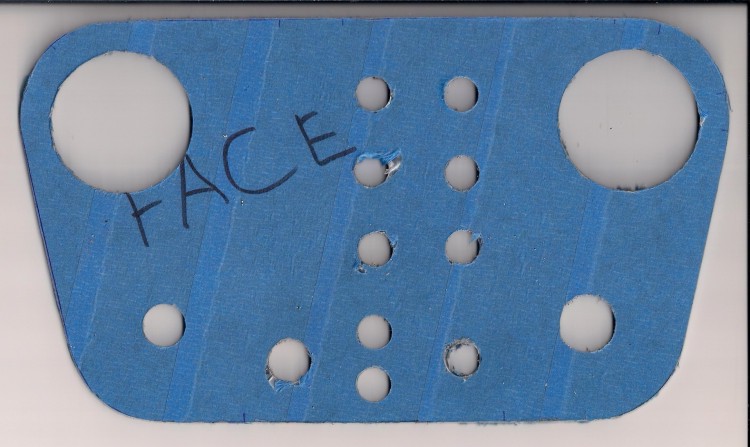
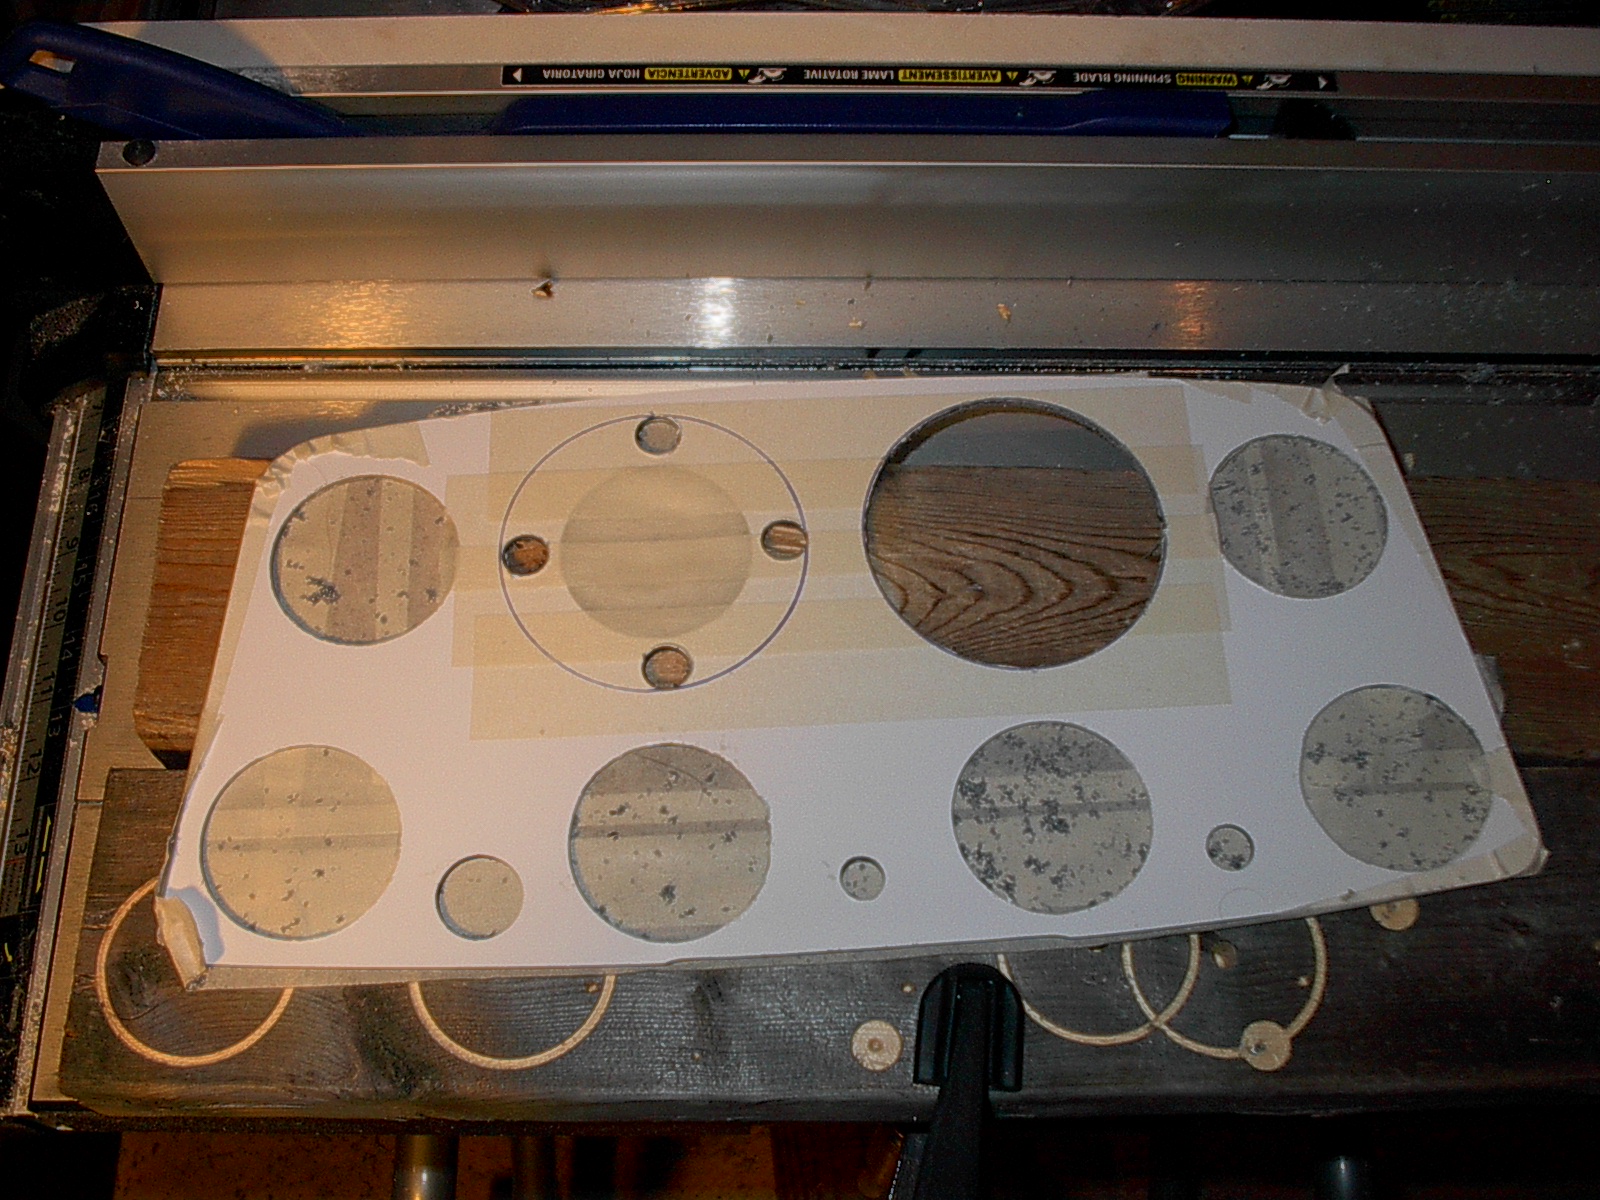
Not having an insert to pattern off of I had to make a pattern. To make a pattern I taped the long edge on a piece of printer paper to the front upper inside edge of the panel, lucky it was straight. Then I trimmed the paper with scissors to the outer edge of the panel. Using a plastic spatula and starting from the taped side I pushed the wrinkles in the paper to the lower edge and creased the corner. Then I did the same working to the sides. This is why you must trim the paper close to size, the more extra paper the harder the corners are to form. Next using a ball point pen I traced the crease in the paper. Then I went over it back and forth a few times with the pen to wear thru the paper. When I removed the paper the pattern tore out very easy.


The pearloid comes with a clear protective film but I covered both sides with masking tape to draw on. I traced the pattern onto the tape and cut with a jig saw and a fine 25 tooth blade. A jig saw with variable speed is nice. Start slow and work up to a speed that clears the material from the blade and advances easy. I used an orbital sander with 220 grit paper to sand the edges. Doing the flat sides first until it fit the panel then sanded the corners. It’s good to keep moving while sanding so as not to get the plastic to hot and burn it. All that was left was to drill the holes. I used forstner bits for the switch holes and a hole saw bit for the gauge holes.


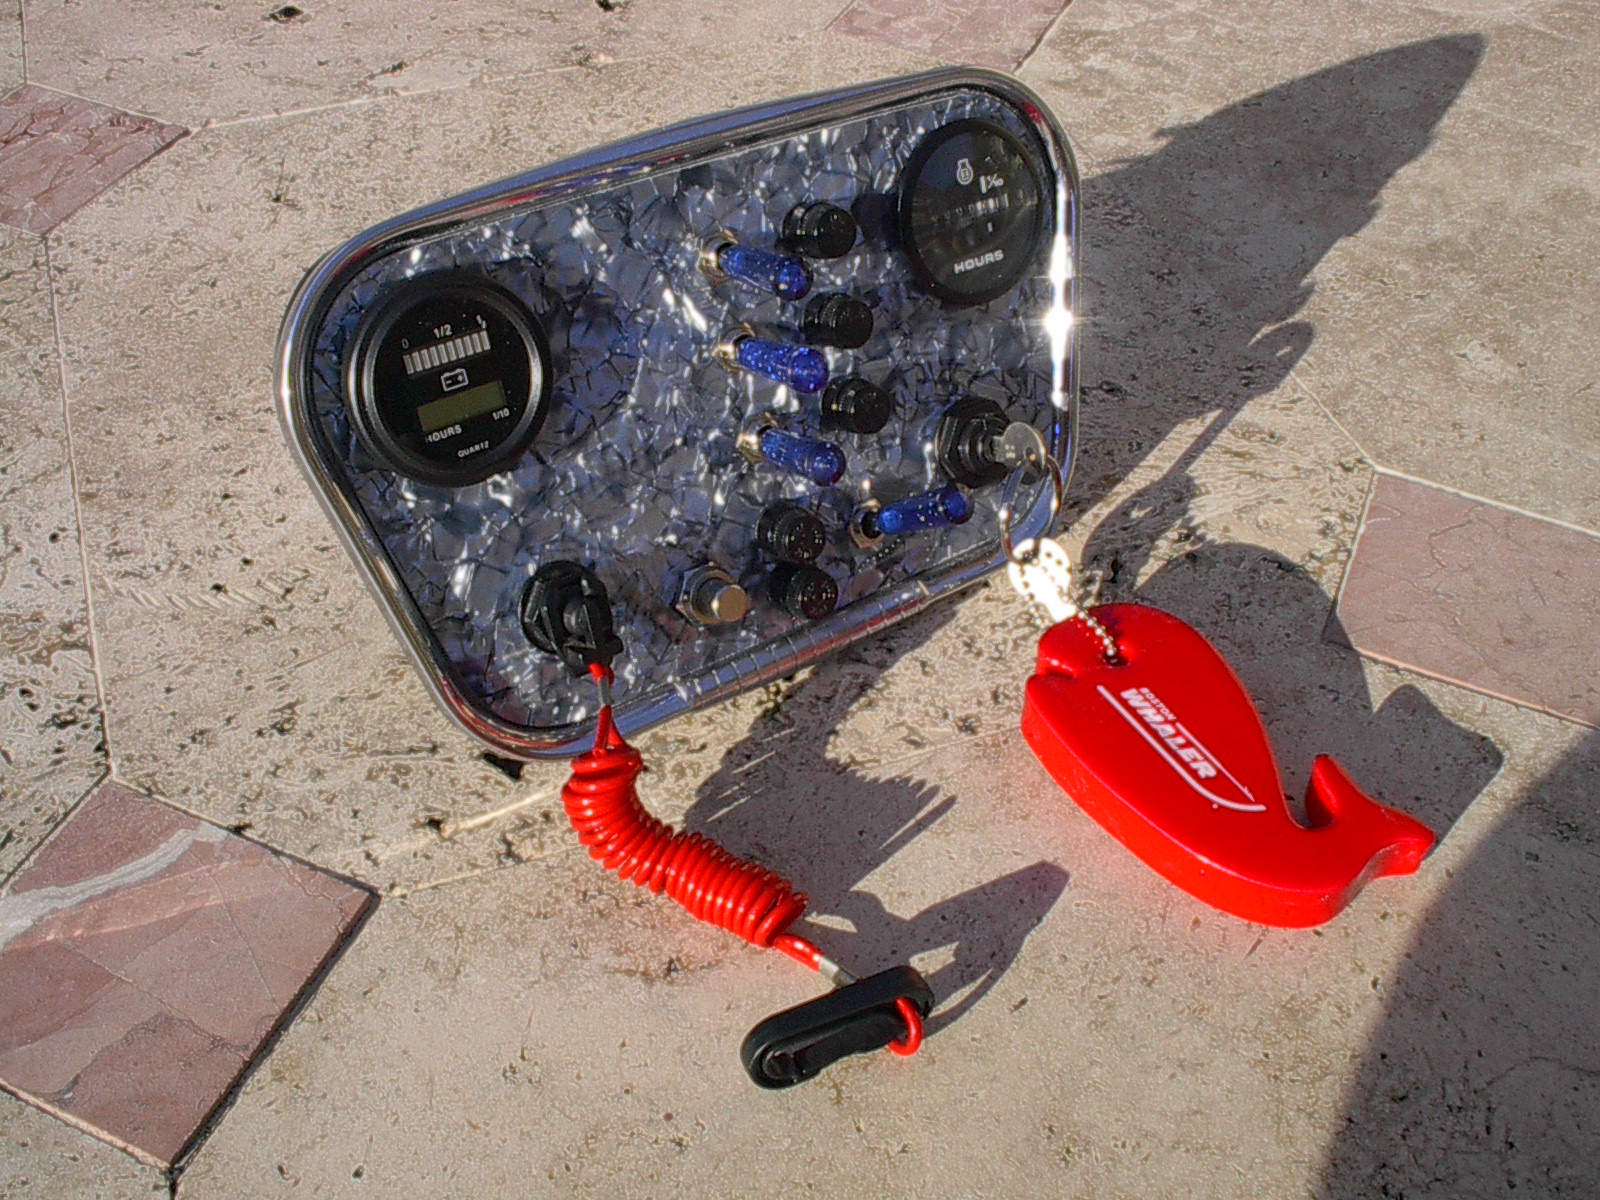
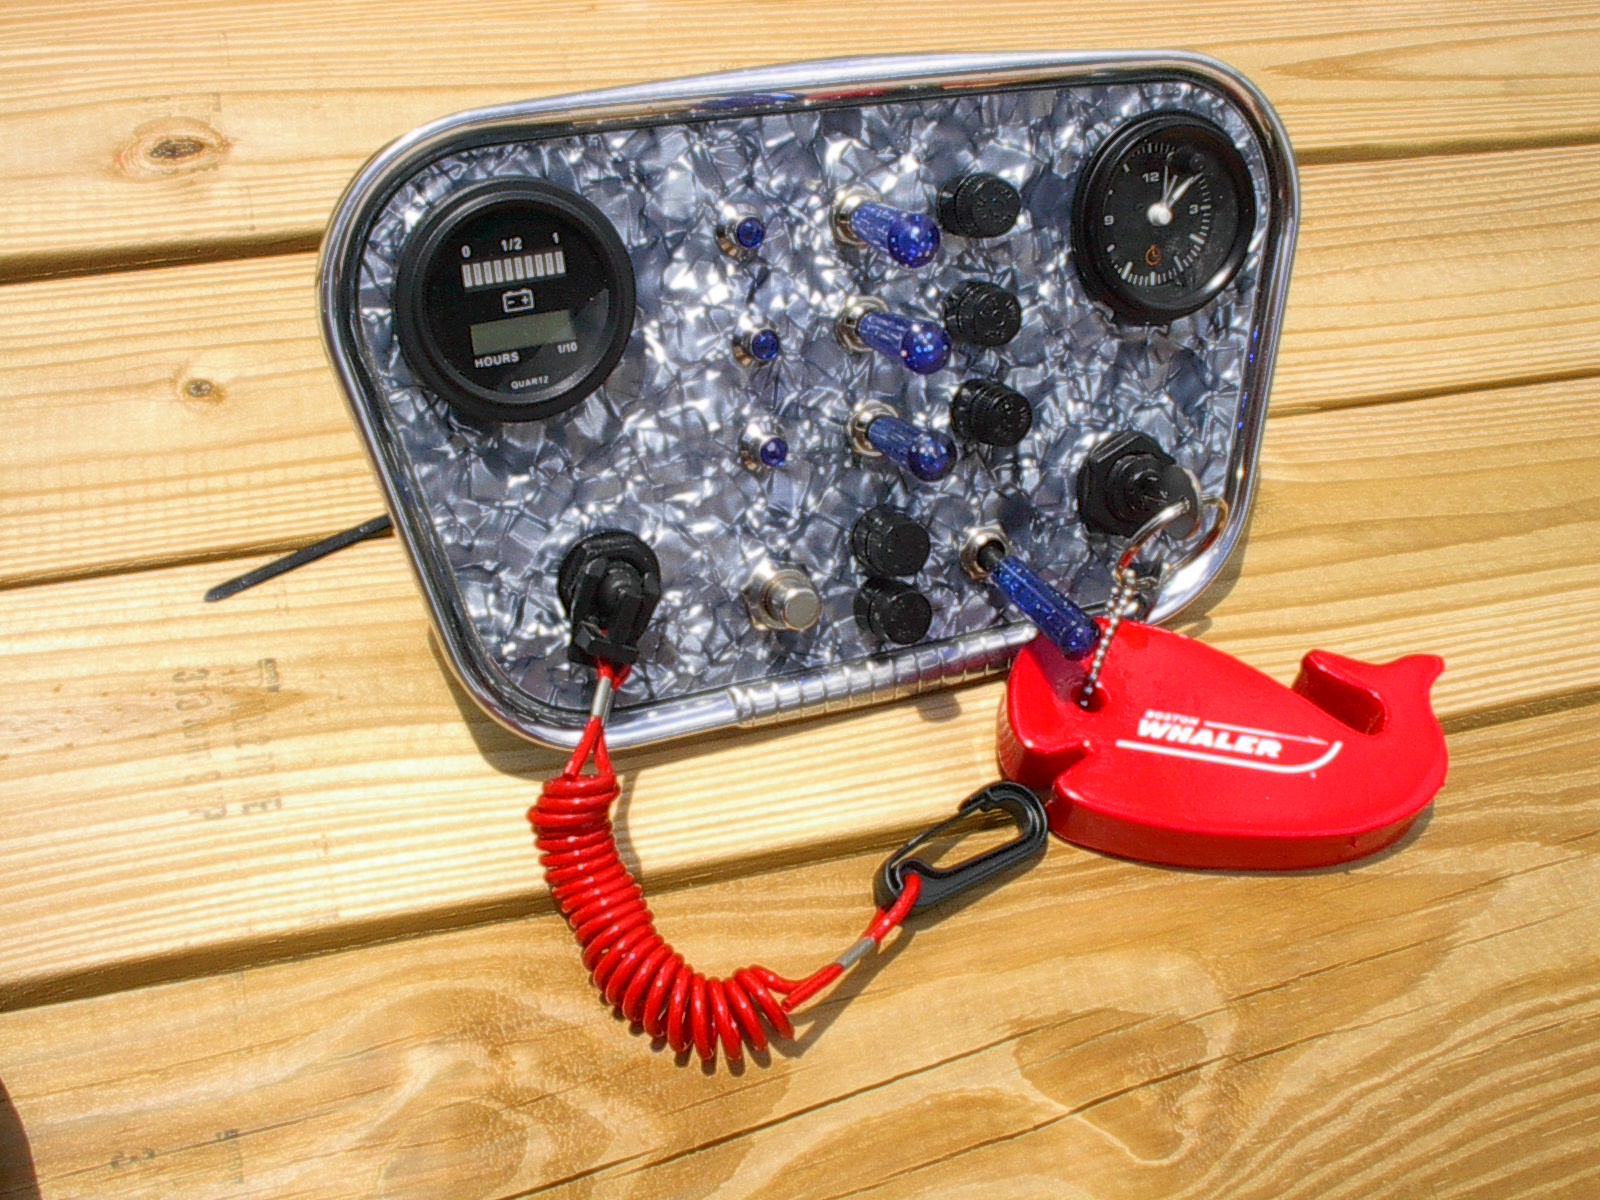
The gauge in the upper left is a 24V battery & hour gauge for the bow motor. Next to the right are 3 auxiliary light switches, top is docking, mid is spreader and the bottom is for transom lights. I left a space between the gauge and switches for engraved light switch ids. Turns out no one around here can do the engraving I wanted on the panel. Plan “B”…I’ll get 3 indicator lights to fill the space. These switches are lit and will light up the transparent blue metal flake switch extensions. To the right of the switches are the fuse holders for them. The gauge hole on the upper right will be filled with a clock I have coming. The clock is a close match to the 24 volt gauge. The lower left gauge hole has an emergency shut-off switch. To the right of that is the horn button and bilge switch with the fuses between. The bilge is an ON/OFF like the lights and it looks like I’ll wire it to the manual side of the pump and auto to the battery. I’ve been trying to find an illuminated ON/OFF/ON Momentary with no luck. The lower right gauge hole has the ignition switch.

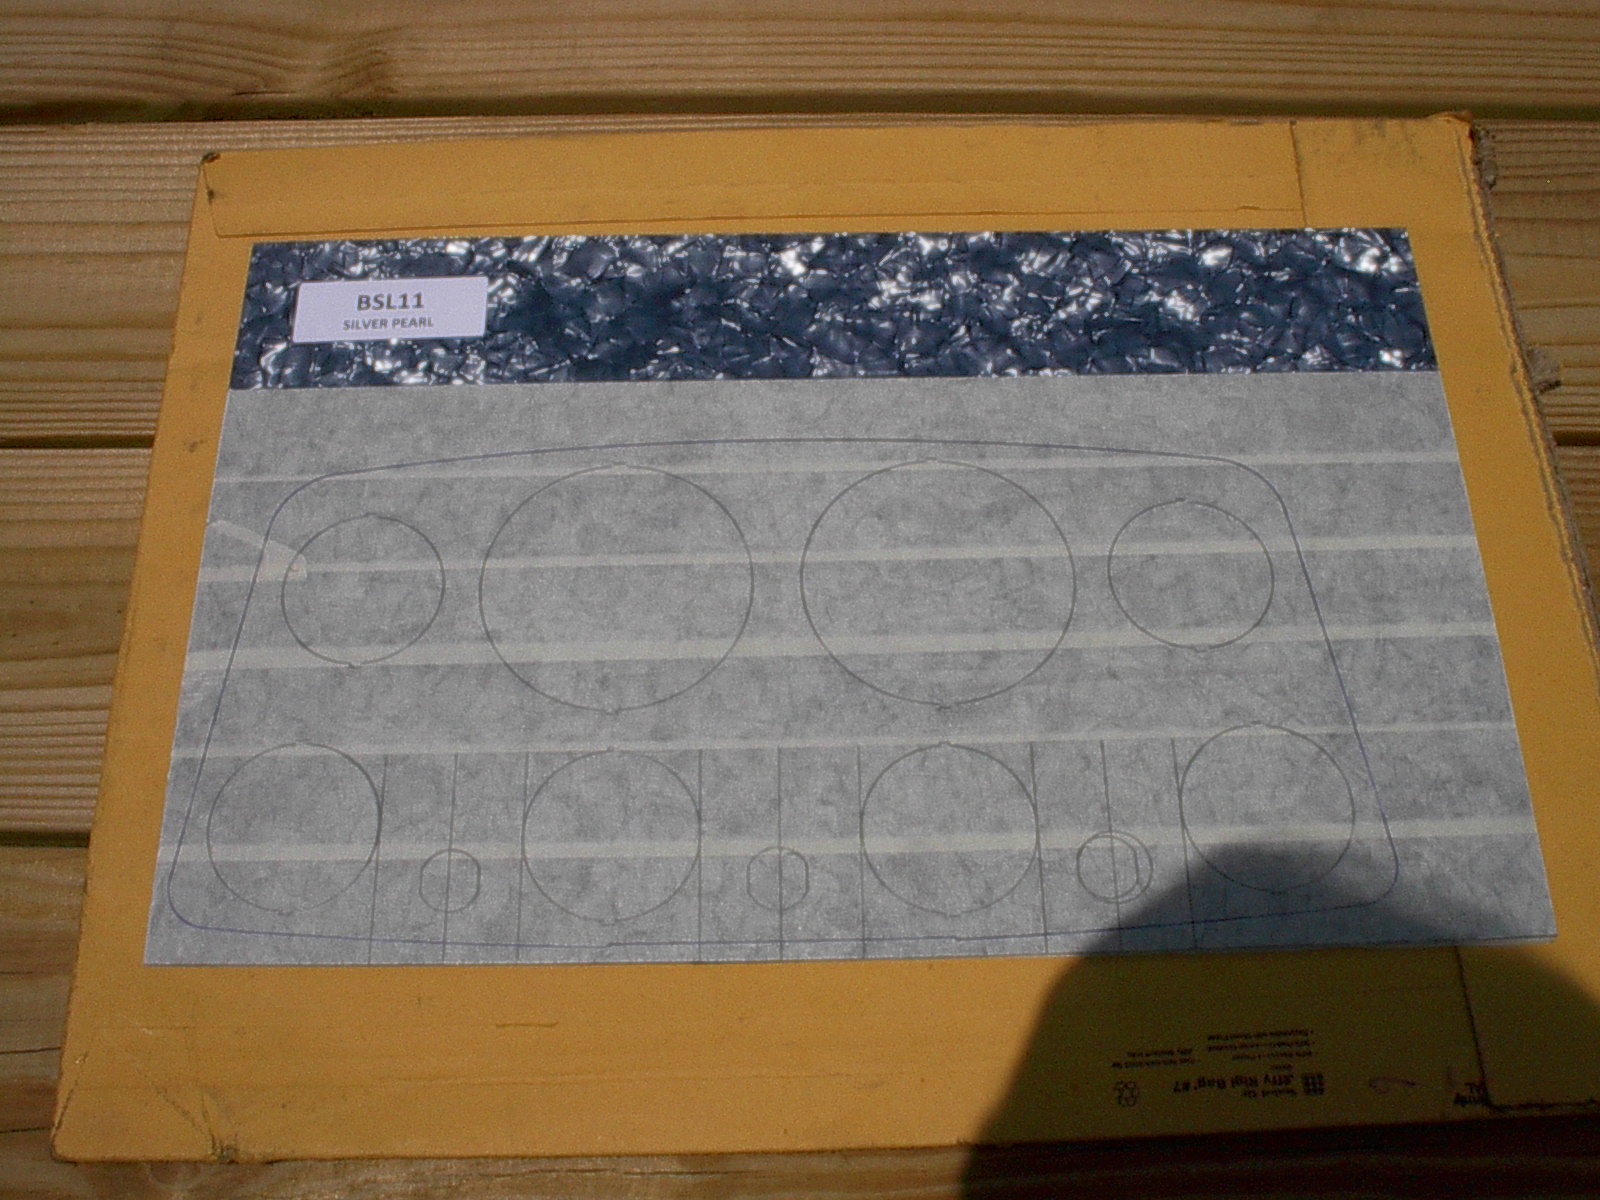
The pearloid insert on the switch panel really makes the engine gauge panel look tired. I ordered another sheet of silver pearloid for the engine panel. I need a sheet of blue shell for a custom Fender Jazz bass I’m also working on and a bevel bit, so I’ll save on the shipping. I bought the material from Warmouth, they’ve been around forever and IMHO have the best quality material www.warmoth.com/Blank-Stock-10-x-16-C862.aspx .

The switch panel with indicator lights and a NOS Quicksilver clock.


Engine panel;
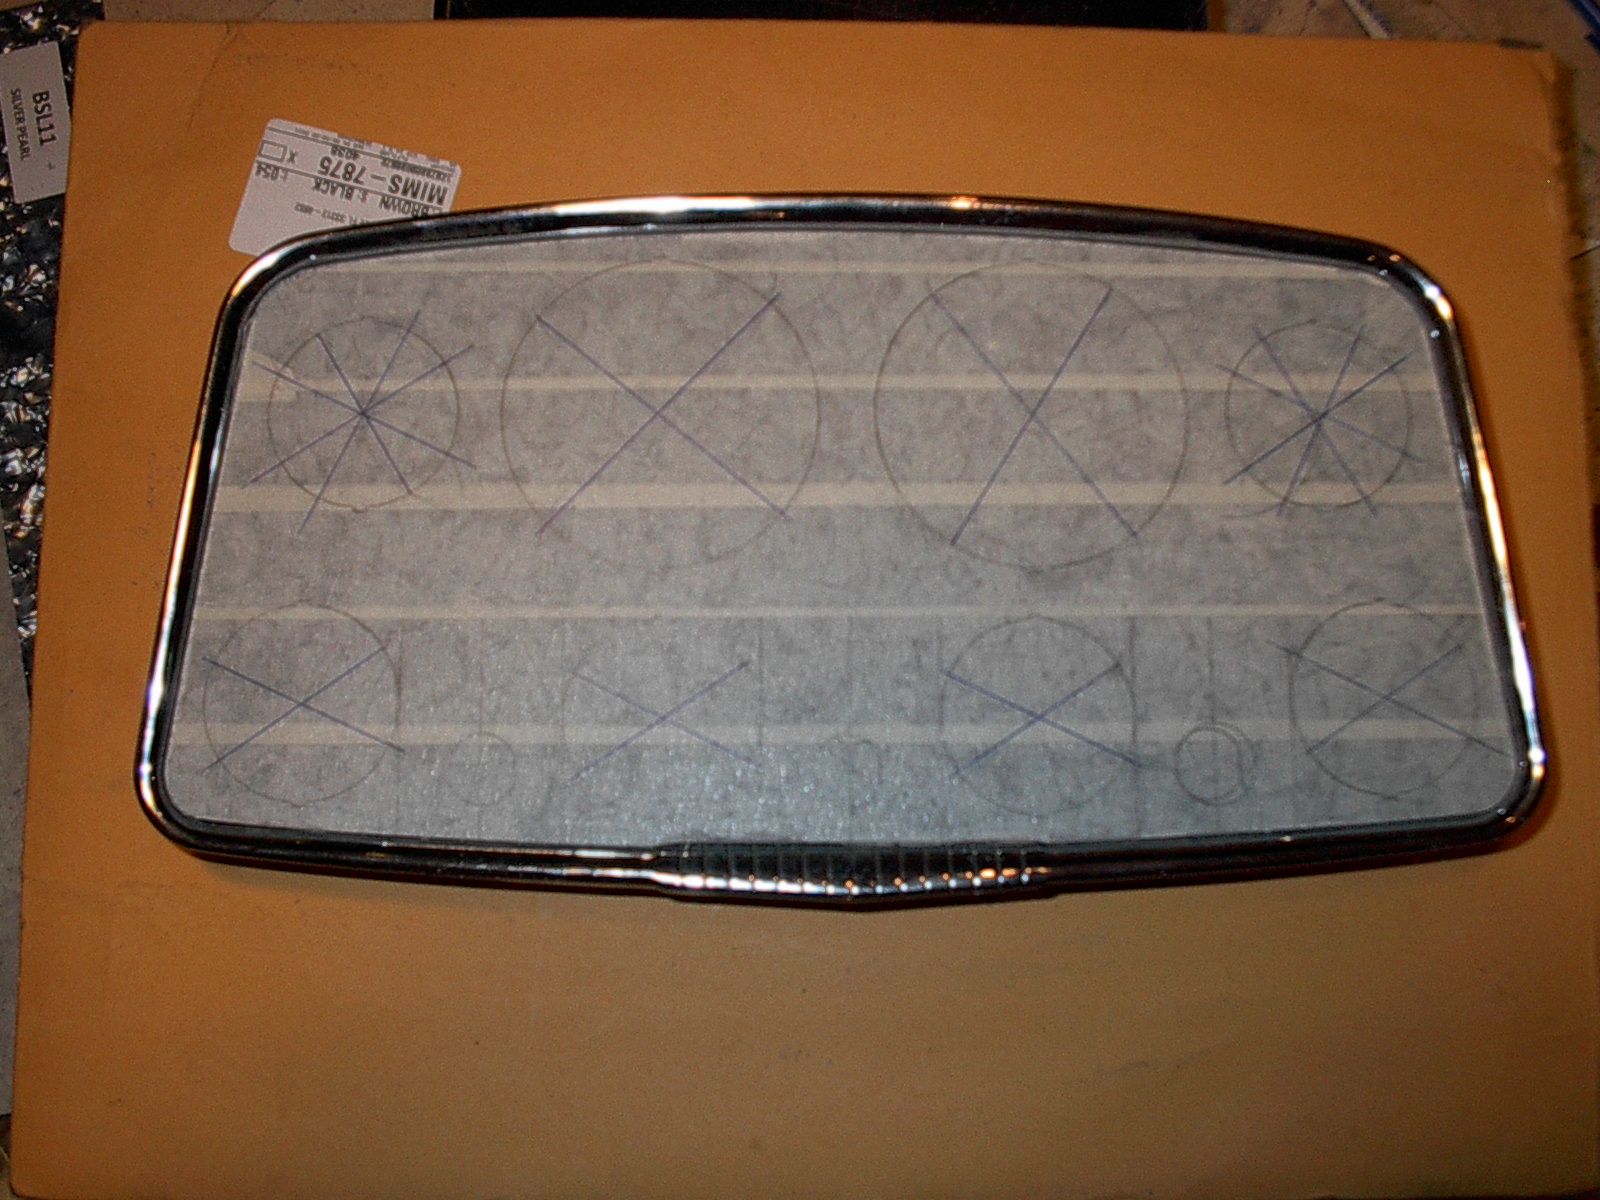
The first step I taped of the face and back to draw on.


Using the old insert made it easy to trace out onto the taped surface. Normally I'd just trace the outside first and not the holes until the insert was cut out and fitted. While test fitting the switches I noticed the hole that would be used for the lighter was not centered between the gauges. It was off by over 1/16" very noticeable, see pic above. Using the straight edge on the bottom center I positioned the insert ¼” from the bottom of the pearloid sheet. Now with the insert parallel to the material I used a square to get the vertical lines with the gauge holes. Then I measured between the lines to find center and made a vertical line for center. Next I used a compass to find center on the gauge holes. I cut out the outline with a jig saw. I taped the insert pattern to the face and sanded the edge of the pearloid down to the edge of the metal pattern. It fit the panel 1st try :)


Drilling the holes is pretty straight forward. I drilled small pilot holes on center, 2” hole saw for the gauge holes and forstner bits for the switch holes. The larger holes for tach & speedo were cut out with a jig saw, I did use a 2” hole saw on them just to get the disk.


I cleaned up the hole edges with a file and all fit nice. There were some minor details left with the switches, drilled holes for a pin on the switch bezels. I needed to inlarge the hole for the lighter on the panel. Normally I’d use my jig saw and the blade like a small file to remove the metal. Instead I tried this new fangled tool called a Dremel, it took forever. Things worked out and it came out nice. I see I’ll need to move the wiper switch over a touch to center, for now it goes in the ready to install pile.

Please Log in or Create an account to join the conversation.

Re:1968 16' Boston Whaler 10 years 5 months ago #98366

  • MarkS
  • MarkS's Avatar
  • Offline
  • Moderator
  • Moderator
  • Posts: 5348
  • Karma: 118
  • Thank you received: 5
Love the engine panel CAT*FIN*k, very nice!

Please Log in or Create an account to join the conversation.

Mark

Re:1968 16' Boston Whaler 10 years 4 months ago #98521

  • CAT*FIN*k
  • CAT*FIN*k's Avatar Topic Author
  • Offline
  • Gold Boarder
  • Gold Boarder
  • Posts: 620
  • Karma: 35
  • Thank you received: 0
Thanx Mark :) The pearloid for the gauge panel should arrive in a couple days. I'm having a lot trouble getting on the FG site, will update when I can. The heat index outside is triple digets so I'm working inside on the helm seat base now. Got to get it done and cleaned up before my wife gets home. :laugh:

Please Log in or Create an account to join the conversation.

Re:1968 16' Boston Whaler 10 years 4 months ago #98523

  • MarkS
  • MarkS's Avatar
  • Offline
  • Moderator
  • Moderator
  • Posts: 5348
  • Karma: 118
  • Thank you received: 5

I'm having a lot trouble getting on the FG site, will update when I can.

Same here, she seems especially "finicky" lately.

I checked out the link you provided for the pearloid stuff, pretty sweet!

Please Log in or Create an account to join the conversation.

Mark

Re:1968 16' Boston Whaler 10 years 4 months ago #98881

  • CAT*FIN*k
  • CAT*FIN*k's Avatar Topic Author
  • Offline
  • Gold Boarder
  • Gold Boarder
  • Posts: 620
  • Karma: 35
  • Thank you received: 0
MarkS wrote:

I'm having a lot trouble getting on the FG site, will update when I can.

Same here, she seems especially "finicky" lately.

I checked out the link you provided for the pearloid stuff, pretty sweet!


The site finally let me in and I got my panel post updated. When I went to respond to you I got the boot.

Warmoths tortoise shell is also very nice. I have not used this source but have heard lots of good things, and they have a few more selections. pickguards.us/materialoptions.htm There are over 15 pearloid colors to choose from out there. Another source for larger sheets and other styles www.wdmusic.com/pickguard_material.html

There are pearloid sticker sheets. I have not really worked with them. A couple years ago I got some die cut guitar fret markers made from this. It has no depth, very 2-D. Up close it looks more like a faux paint in metal. From a distance you can still tell something is fishy. I would not buy again.

Real mother of pearl or other shell can be bought in thin sheets. I’ve always wanted to do something with blue paua.

Please Log in or Create an account to join the conversation.

  • Page:
  • 1
Time to create page: 1.342 seconds

Donate

Please consider supporting our efforts.

Glassified Ads

1956 Lonestar Meteor
( / Boats)

1956 Lonestar Meteor
12-24-2024

Mercury outboard
( / Engines)

noimage
11-03-2024

Classic Mercury Outboard Motors
( / Engines)

Classic Mercury Outboard Motors
10-18-2024

FG Login

FiberGoogle

Who's Online

We have 9731 guests and 2 members online