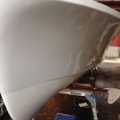
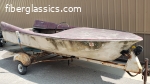
If you have ground the inside of the transom to clean it up I would do this:
Get a box of GOOD disposable gloves, paint stirrers, squeegees,chip brushes and some plastic containers.
To cover the holes in the transom, just get clear plastic shipping tape and tape over the holes on the outside. Pull the tape tight so it's flat over the hole. This will be pulled later, it leaves a tad of a sticky surface right where the holes are but that will block sand right off and be level with the existing outside of the transom. I'm glad you are using epoxy as it bonds superior to old polyester resin/glass. It doesn't smell and it is easier to control working time/cure.
I would get some stitched Biaxial cloth 25 oz per sq yard and apply a layer on the transom before you do any wood. It's better to reinforce the old glass now and also insure a good strong continuous layer of glass is there at the corners and to bond the wood to and KEEP MOISTURE OUT. Old polyester glass is POROUS and will slowly pass moisture to the wood. Epoxy is significantly better as it does not absorb water like polyester resin will. This is known as permeability. Back to the glass: Cut it big enough so it extends around to the bottom and sides, don't worry about the top, let it extend past the upper edge you can cut it later after cure with a razor knife using the old glass as a guide. Sometimes I just use a hacksaw blade just by itself, this single layer will trim easy.
A few hints: Precut your glass to fit. The Biaxial is superior for going around corners, it bends better because the fiber orientation and it's stitched rather than woven. The 45 degree fibers going in each direction will overlap across the corner. If you use 90 degree woven cloth only fibers in one direction actually will go across the corner the others run in the same direction as the corner so provide no strength....if you can imagine what I mean.
The next few steps should be done at the same time while the epoxy is still not cured. Pick your curing agent to allow time, what brand are you using?
Use thickened epoxy and put a generous fillet all the way around the corner formed at the bottom and sides with the transom. I would use a structural filler from WEST SYSTEMS so it adds strength as well as gives the right working consistency. It also makes the mixture more resistant to sag, it has special properties so it won't shear flow (sag) as readily. I go for a margarine like consistency, a little thicker than the frequently quoted peanut butter. This is because after you apply the fillet you are going to wet all the area to be covered by cloth with straight resin so the fillet will get a little less thick. The fillet of thickened epoxy makes sure the glass is fully bonded in the corners with no air bubbles.
So Now mix some plain epoxy up and wet the transom, the bottom and the sides with epoxy where the glass will cover, this will make it easy to apply the glass and have it stay put, I use cheap chip brushes for this. Place the cloth onto the wet surfaces use your chip brush to work it into the filleted corners, don't sorry about a perfect smooth rounded corner, just don't have air bubbles. Also use a squeegee to push the cloth into the resin on the flatter areas smoothing it out. You will start to see resin absorbing through. Now add more resin to the drier areas using the chip brush and then work the resin into the cloth using your squeegee.
Once you have got all the glass wet and smoothed it should look pretty transparent. Don't use lots of resin and let it sit, add what you need and work it in with the squeegee. Resin is not what makes it strong. Good bonding minimum air bubbles does.
Let this fully cure. Then think about wood. I use 3/8 real marine plywood and do one layer at a time and let it cure before the next layer goes on. It is so much easier to laminate up using thinner layers of ply. You can move up to 1/2 inch after first layer of ply is on. You will notice the transom is pretty stiff after just the first layer of 3/8 inch. USE 1/4 inch as first layer if the transom is curved!!! It will be easy to form it and keep the original contour. Let it cure then a second layer of 1/4 then move to 1/2 inch.
Cut wood to fit ahead of time. There will be a gap around the edges as you can't get it tight into the corners, don't worry this gap will be filled with more margarine thick epoxy when wood is laminated in. This really protects the wood edges and continues to tie the transom to the sides and bottom.
A few hints: YOU MUST lightly grind that recently installed biaxial glass to insure you get a good bond. Epoxy can get a blush
at the surface that needs to be removed for best adhesion of the next layer.
The side of the ply to be bonded should be wetted with plain epoxy so it has a chance to wet into the wood. I would also brush plain onto the transom. Then I use a mixture of epoxy and filler at about mayo consistency and smear it all over the wet plywood kind of finger paint it all over, this forms a good bonding layer. place the wood and push it into place, if transom is flat. If transom is curved you will need to make sure you have some way of keeping the layer in contact. Well cover this in another reply if that s the case as there are a few ways to do this and maintain the shape.
Use a small block and hammer to tap the wood to chase out bubbles. You can now do the edge gap filling as described above. Once cured sand the bare wood showing to make sure it's clean and then proceed with the next layer repeat until you get desired transom thickness.
Lastly put a layer of glass on to protect the last layer of wood. Extend this layer over to the sides and bottom much like that first layer.
Another thing I do if I know where holes will be, like for engine mounting or drain tubes or things screwed into the transom like eyes or handles or speedo pickups etc. At the time of wood fitting I cut that area out of the wood and then when installing I fill the hole with thickened epoxy till flush with the top of the wood. This way it is impossible for water to weep into the wood when a hole is drilled through. I also glass the top of the transom! Holes edges and transom tops are typically where water got in and destroyed the original transom.
Have fun!
Randy