Welcome, Guest
Username: Password: Remember me
  • Page:
  • 1
  • 2

TOPIC: transom replacement

Re:transom replacement 10 years 10 months ago #87007

Bellboy33, Welcome aboard. I am not a stickler for originality so the thicker the better for me. I would build it like a more modern boat and put a 1 1/2" transom in for myself. I'm not sure what power you will be installing or if the vintage clamp on motors can span a thicker transom though. I am certain that more thin laminations with layers of fiberglass mat between them are stronger than a thicker slab of plain wood.

Structurally the split won't matter once the new transom is bonded in. As far as the warp, when you bond in the new transom wood I would clamp it in with 2 X 4's on both sides for as much of the surface as I could reach. If it doesn't pull the warp out, you could use a few screws in the bulged area and fill the holes after it dries, but you may have to do some bodywork with a polyester or epoxy filler to get it as straight as possible.

The regulars with a lot more classic experience and better advice than me should be along shortly.

Nice job so far!

Bernie

Please Log in or Create an account to join the conversation.

Re:transom replacement 10 years 10 months ago #87008

  • Bellboy33
  • Bellboy33's Avatar Topic Author
  • Offline
  • Junior Boarder
  • Junior Boarder
  • Posts: 65
  • Karma: 2
  • Thank you received: 0
Ok thanks thanks for the advise I was thinking of putting a ventage motor back on it so I will check the thickniss.
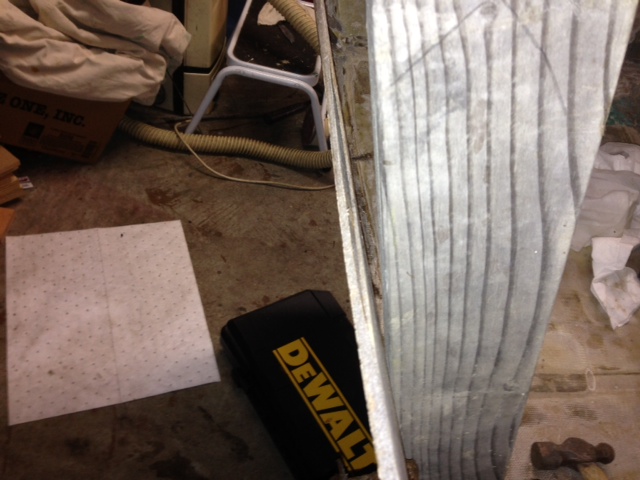
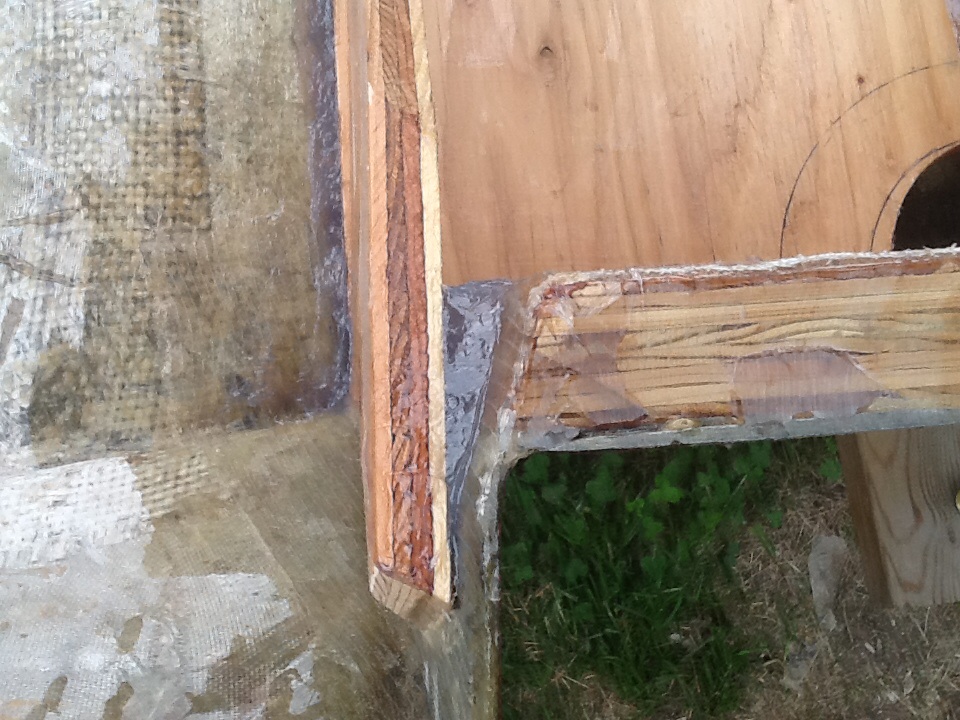
her is a photo of the split and the warp
I held a 2x4 flush with the inside glass you can see the warp at the top
Attachments:

Please Log in or Create an account to join the conversation.

Re:transom replacement 10 years 10 months ago #87009

  • Bellboy33
  • Bellboy33's Avatar Topic Author
  • Offline
  • Junior Boarder
  • Junior Boarder
  • Posts: 65
  • Karma: 2
  • Thank you received: 0
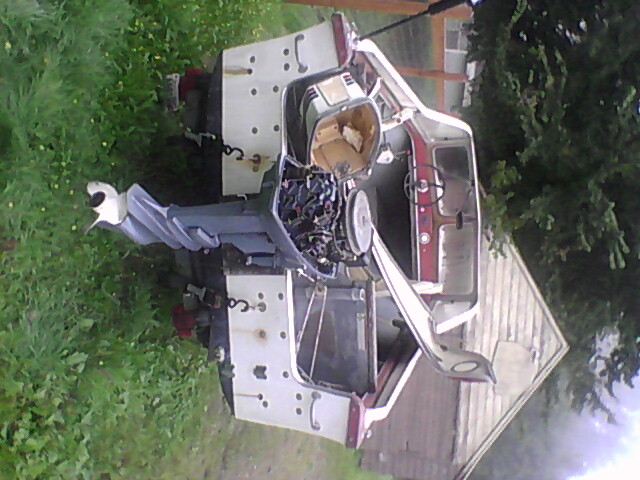
1959 Bell Boy
Attachments:

Please Log in or Create an account to join the conversation.

Re:transom replacement 10 years 10 months ago #87012

  • Nautilus
  • Nautilus's Avatar
  • Offline
  • Contributing Member
  • Contributing Member
  • Posts: 1577
  • Karma: 87
  • Thank you received: 58
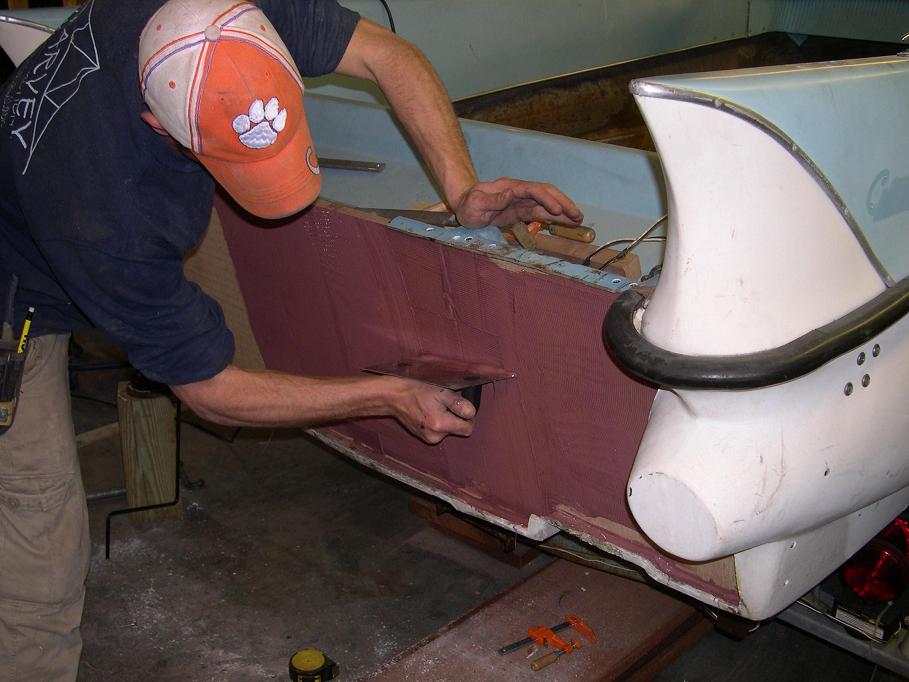
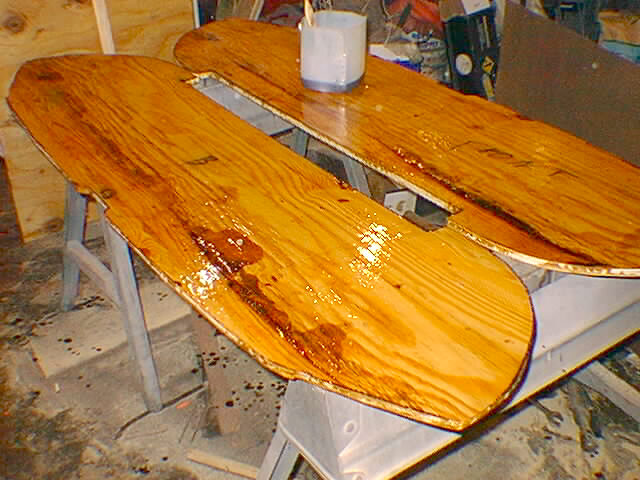
I would laminate two pieces of 3/4" marine ply (I like okoume) by sandwiching them together with a layer of 3M 5200. A 1-1/2" thick transom is the way to go. Use lots of 1-1/4" stainless steel screws. (Ace hardware has them in the decking screw section...fairly cheap, square head, aggressive threads.) The real trick is to make sure the new transom is securely fastened to the hull. You don't want to goose it in reverse and tear out the entire stern. Here's a shot of how we spread the 5200 before we add the second sheet of plywood. Good luck!
Attachments:

Please Log in or Create an account to join the conversation.

Website: NautilusRestorations.com

Mentor to the unenlightened!

"Never allow logic to interfere with a boat purchase." - J. S. Hadley
"Vintage quality beats new junk every time." - J. S. Hadley
"Anything supposed to do two things does both of them half-assed." - J. S. Hadley
"Success makes...

Re:transom replacement 10 years 10 months ago #87025

  • Bellboy33
  • Bellboy33's Avatar Topic Author
  • Offline
  • Junior Boarder
  • Junior Boarder
  • Posts: 65
  • Karma: 2
  • Thank you received: 0
Thanks I will plan on using 2 3/4" pieces makes sence to me. Do you leave the screws in and glass over the screws? Thanks

Please Log in or Create an account to join the conversation.

Re:transom replacement 10 years 10 months ago #87032

If you use stainless screws you could leave them in assuming the plywood doesn't shrink a little with age. If it does, there may be telltale bumps on the finish.I use plain old dry wall screws and pull em out and fill the holes. The bond of the fiberglass resin is strong enough that the screws would be redundant if you get good clamping contact.

Please Log in or Create an account to join the conversation.

Re:transom replacement 10 years 10 months ago #87034

Sorry..double post.

Please Log in or Create an account to join the conversation.

Re:transom replacement 10 years 10 months ago #87044

Oldskier wrote:

I use plain old dry wall screws and pull em out and fill the holes. The bond of the fiberglass resin is strong enough that the screws would be redundant if you get good clamping contact.


I agree w/ the screws being redundant after you laminate the sheets together, install them to the transom & run some glass over the plywood.

Besides, leaving the screws also means you run a chance of hitting one when you thru drill to mount anything to the transom: OB, OB mount bracket, tow eyes, handles, drain tubes, etc. Slim chance, but still possible.... Since they aren't NEEDED, why leave them.... IMHO........

Please Log in or Create an account to join the conversation.

Re:transom replacement 10 years 10 months ago #87071

  • Bellboy33
  • Bellboy33's Avatar Topic Author
  • Offline
  • Junior Boarder
  • Junior Boarder
  • Posts: 65
  • Karma: 2
  • Thank you received: 0
Ok great thank you for all the information. I just got done grinding and sanding more on the transom and I also cut the center stringer out ( main reason was I had my tyvac suit on, respirator, all my ppe and was already full of dust.

So like a dummy was cutting with a saw saw (center stinger) on side at a time and and cut a three inch slot threw the (keel)I grinned, sanded, and chiseled, all the, wood out and I was wondering two things,

Should I lay cloth in the v before I put the new center stringer back?
And is it ok to put resin in the voids in the keel under the center stringer as I'm sure I won't be able to cut a perfiict v on the bottom of the stringer when installing. Thanks for everyone's help.

Please Log in or Create an account to join the conversation.

Re:transom replacement 10 years 10 months ago #87072

  • Bellboy33
  • Bellboy33's Avatar Topic Author
  • Offline
  • Junior Boarder
  • Junior Boarder
  • Posts: 65
  • Karma: 2
  • Thank you received: 0
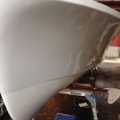
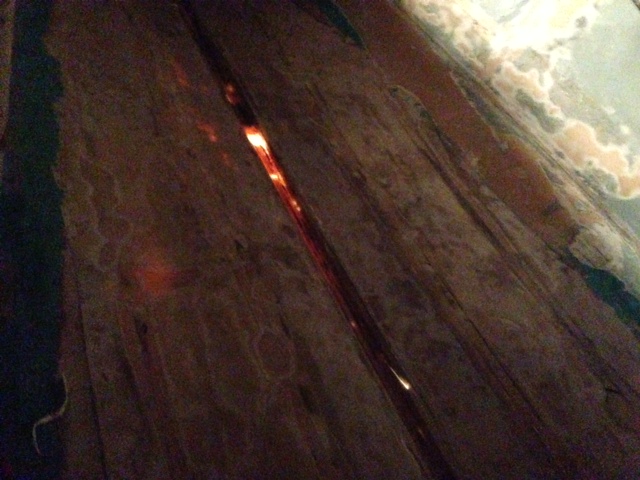
Ok here is a photo I put a light under the boat
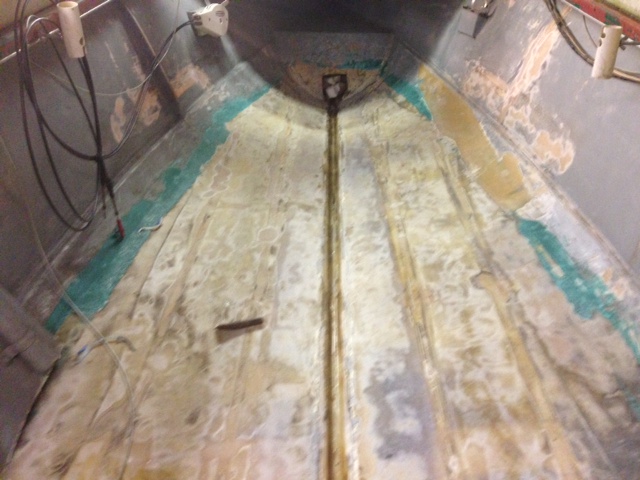
Looks like maybe I grinded a but much? This is about a 1 1/2 deep in the center

Please Log in or Create an account to join the conversation.

Re:transom replacement 10 years 10 months ago #87073

No pix

Please Log in or Create an account to join the conversation.

Re:transom replacement 10 years 10 months ago #87074

  • Bellboy33
  • Bellboy33's Avatar Topic Author
  • Offline
  • Junior Boarder
  • Junior Boarder
  • Posts: 65
  • Karma: 2
  • Thank you received: 0
Should have a pic soon not working from my iphone ill try my home pc

Please Log in or Create an account to join the conversation.

Re:transom replacement 10 years 10 months ago #87075

  • Bellboy33
  • Bellboy33's Avatar Topic Author
  • Offline
  • Junior Boarder
  • Junior Boarder
  • Posts: 65
  • Karma: 2
  • Thank you received: 0
pic
Attachments:

Please Log in or Create an account to join the conversation.

Re:transom replacement 10 years 10 months ago #87076

  • Bellboy33
  • Bellboy33's Avatar Topic Author
  • Offline
  • Junior Boarder
  • Junior Boarder
  • Posts: 65
  • Karma: 2
  • Thank you received: 0
pic center
Attachments:

Please Log in or Create an account to join the conversation.

Re:transom replacement 10 years 10 months ago #87082

  • MarkS
  • MarkS's Avatar
  • Offline
  • Moderator
  • Moderator
  • Posts: 5348
  • Karma: 118
  • Thank you received: 5
Don't feel too bad Bellboy33, quite a few of us have done the same thing. (Gotten over zealous with the grinder or saw and blown through the hull.) I would definitely repair the damage before laying the new stringer in place! Multiple layers of mat and cloth increasing in size, there's and excellent tutorial in the Research/Restoration section of the site you might want to check out.
www.fiberglassics.com/restoration/fiberglass-repair-pictorial
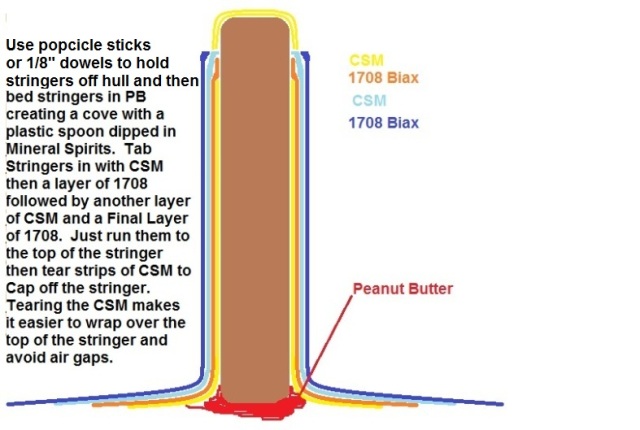
Lots of folks use thickened resin (peanut butter) under the stringers, I think it's probably the most common practice. While doing my last project I was given the advise to avoid "hard spots" inside the hull, so I opted to use PL Premium adhesive to bed the stringers in. (Gave it a couple days to cure fully before proceeding with 'glassing in the stingers.) Others can also give their preference, just the way I chose to go about it. ;)

Here's a drawing that member MyFlamingo did to help others understand his layup, also very helpful;
Attachments:

Please Log in or Create an account to join the conversation.

Mark

Re:transom replacement 10 years 10 months ago #87084

I would put a layer of Bi-Axial cloth with mat over the entire bottom of the hull. You'll be fine. Looks like it could stand a little more strength anyway.

Please Log in or Create an account to join the conversation.

Re:transom replacement 10 years 10 months ago #87098

  • Bellboy33
  • Bellboy33's Avatar Topic Author
  • Offline
  • Junior Boarder
  • Junior Boarder
  • Posts: 65
  • Karma: 2
  • Thank you received: 0
Ok great how thick can I put PL in the 2" v in the center
There is some hard glue in there I chiped a little away

Will the PL fill the saw zaw 3" cut on my oops cut?
Thanks
Thanks for the information

Please Log in or Create an account to join the conversation.

Re:transom replacement 10 years 10 months ago #87099

  • Bellboy33
  • Bellboy33's Avatar Topic Author
  • Offline
  • Junior Boarder
  • Junior Boarder
  • Posts: 65
  • Karma: 2
  • Thank you received: 0
Should I glass the 2" center also or just up to the center stringer?
Thanks for your help

Please Log in or Create an account to join the conversation.

Re:transom replacement 10 years 10 months ago #87100

Bellboy, Most of us have cut through the hull when rebuilding. Its really an easy fix. Remember when glassing to old ground fiberglass that fiberglass mat adheres much better than cloth. Take some 1 1/2 oz. Mat and lay over the cut. Saturate with resin and wait a couple of minutes for the resin to soak the mat and make it pliable. Then take a putty knife or something thin and push the mat down into the cut. Then cover with another layer of mat. When hard, sand the outside of the hull to remove excess glass.

It is always good to put saturated mat between old glass and new wood, be it transom, stringers or whatever. It adheres well to both. If I am glassing anything needing strength I use stitchmat (mat and cloth stitched together). The only place cloth has an advantage over mat is when glassing over a sharp angle (like over the top of a stringer) and that's because it drapes over sharp bends easier.

When glassing in new stringers, lay in a layer of mat underneath, wet with resin, wet the wood stringer and lay it into the wet mat. Same for your center keel. Then lay cloth over the top of the wood and saturate with resin. I use 2 layers of cloth for strength. The goal is to completely encapsulate the wood in fiberglass. The strength is in the fiberglass, not the wood. The two together is much stronger than fiberglass or wood by themselves.

Hope this helps, Bernie

Please Log in or Create an account to join the conversation.

Re:transom replacement 10 years 10 months ago #87105

That's so old school. Bi-Ax w Mat (or roving w mat)is so quick and easy and stronger.

Please Log in or Create an account to join the conversation.

Re:transom replacement 10 years 10 months ago #87106

50s Flash wrote:

That's so old school. Bi-Ax w Mat (or roving w mat)is so quick and easy and stronger.


Maybe, but have you actually tried to get biax (stitchmat) or (god forbid) roving to lay over a 1 inch stringer?

Please Log in or Create an account to join the conversation.

Re:transom replacement 10 years 10 months ago #87107

Not sure why, but I just got a new smartphone (Galaxie S3) and when I edit a post it double posts, apparently every time. Sorry again.

Is there a way to delete a post?

Please Log in or Create an account to join the conversation.

Re:transom replacement 10 years 10 months ago #87121

Oldskier wrote:

Maybe, but have you actually tried to get biax (stitchmat) or (god forbid) roving to lay over a 1 inch stringer?


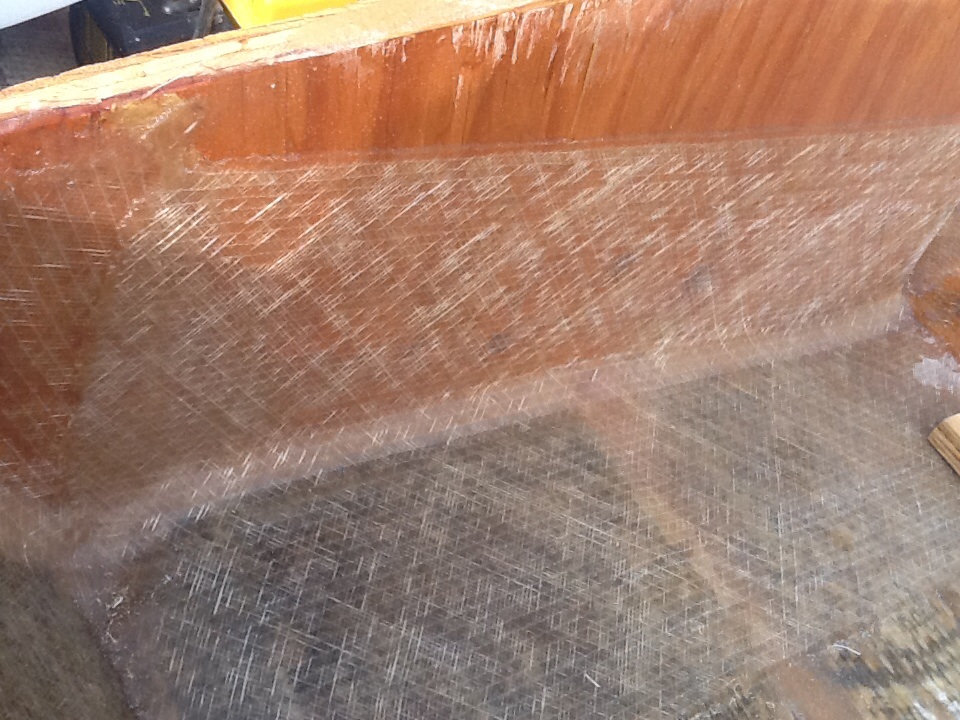
Yes many times. It makes inside corners just fine. You have to staple it to the stringer on outside corners and remove the mat. Your staple gun is your friend, and third hand, USE IT!
Attachments:

Please Log in or Create an account to join the conversation.

Re:transom replacement 10 years 10 months ago #87124

Like I said...

Oldskier wrote:


The regulars with a lot more classic experience and better advice than me should be along shortly.

Bernie


Thanks Flash.

P.S. If you remove the mat from stitchmat, isn't what you have left a lot like cloth?

Please Log in or Create an account to join the conversation.

Re:transom replacement 10 years 10 months ago #87127

  • Bellboy33
  • Bellboy33's Avatar Topic Author
  • Offline
  • Junior Boarder
  • Junior Boarder
  • Posts: 65
  • Karma: 2
  • Thank you received: 0
Thanks for all the replies, I have lots to learn and finding out there's allot more to learn.
Putting 1708 or cloth in the keel may a challenge as there is a v then flat on the very bottom, then a small 90 degree angle (ledge half inch down the keel) that I think would be a challenge to keep the air bubbles out.
So just putting PB in the 2" keel under the center stringer would be ok? Then glassing in?
Thanks again

Please Log in or Create an account to join the conversation.

Re:transom replacement 10 years 10 months ago #87128

Oldskier wrote:

P.S. If you remove the mat from stitchmat, isn't what you have left a lot like cloth?


Yes and no.
You only need to remove the mat in the bends, or across the top. It's still bi-axial cloth and much stronger than regular fiberglass cloth.

Please Log in or Create an account to join the conversation.

Re:transom replacement 10 years 10 months ago #87131

Hi Bellboy,
You're like me... tons of questions that need answers, and tons of questions you don't even know to ask yet ? Great folks here, with tons of experience and knowledge. Most times with folks with that much knowledge they leave out starter basic stuff that was learned many years ago and it is so second nature to them they fly right past that step.
This missing information is not ommitted on purpose ? It's more like a reflex, you don't think about it, it just happens.

The research tab with tutorials are a great start here, but even with those tutorials, I started asking even more questions, mainly because, when you start researching materials, it's not buy this cloth, this mat ? There are so many different cloths and mats and epoxies, and polyesters....etc.
With all this being said, and still not knowing how to ask some specific questions, I went back to the internet to try to find more information, and stumbled across a website called boatworkstoday.com
There are a lot of video tutorials to explain, and see the techiques, that fill some of the question gaps, to get results you may be looking for ?
Everything that is posted on this site is dead on, but it also makes a beginner like me try to visualize something I've never seen or done, just by reading what is posted, and looking at some still pictures.
There is a 7 part series on that web-site called "There is a hole in my boat" that goes from start to finish on a fiberglass repair. Like everything, even on the series he did, it was done on a flat panel, with easy access all around, unlike a boat, where there are blind areas, impossible access areas, sharp corners, tight compound curves,and angles... etc.This is where a sites like this work well. It's how did you get around this problem ?
But for the basics and theory that 7 part series is well done and worth watching.
THEN ask the boat questions here.

I'm sure I lost you with this long winded post, but check it out ?
boatworkstoday.com I doubt you'll be disappointed ?

Please Log in or Create an account to join the conversation.

Re:transom replacement 10 years 10 months ago #87134

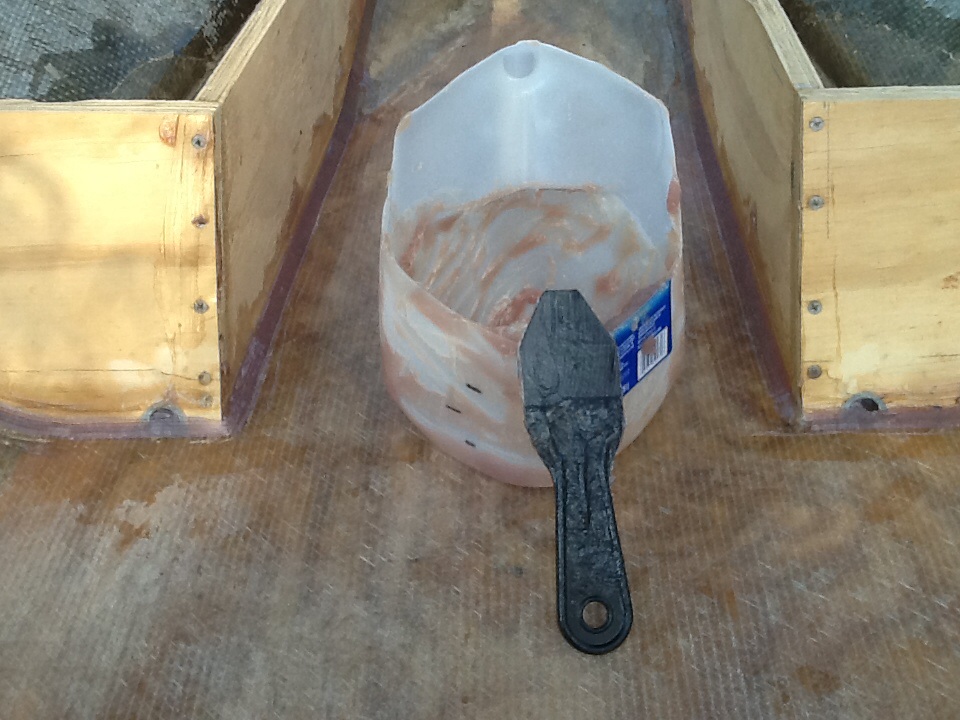
Hello Bellboy, the guys are pretty much on point here. I did my transom the same way, not to mention piercing my hull with an air chisel (twice) lol ! Consider it a rite of passage. Pl glue would be easier but can take a few days to cure. 2 tips I'd like share with you : 1, assuming you have (transom) template made, take your 2 pieces of plywood, oversized and glass a layer of 3/4 oz chop strand on each, after a day or 2 bond (glassed side) together. After it cures, use your template and rip the edges to size. Ripping at 20/25 degree angle makes glassing those 90's much easier. 2, I modded this plastic scraper and spackled my PB @ 45 degree angles. I have no air bubble problems....good luck
PS with convex 90's, rounding (sanding) the corners a little will help you ALOT when glassing.
Attachments:

Please Log in or Create an account to join the conversation.

Re:transom replacement 10 years 10 months ago #87135

Overkill.
Cut your two pieces of plywood (Regular exterior grade, DON'T SPEND $$$$$ ON MARINE PLYWOOD YOU GAIN NOTHING) coat both pieces on both sides with resin and acetone 50-50 (double the amount of MEKP) let it dry a day, then coat the two sides that are going to be glued together with resin (no acetone) 3% MEKP and screw them together with deck screws. I use 8- 1 1/4" run in from both sides (Don't put them where you might drill for a motor mount or drain hole) we did a test years ago to get two pieces of plywood apart with just resin the plywood would break before it came unglued. That's the way they laminate plywood in the factory.
Attachments:

Please Log in or Create an account to join the conversation.

Re:transom replacement 10 years 10 months ago #87142

All this reminds me of the joke "How do you get to Carnegie Hall? PRACTICE, PRACTICE, PRACTICE! "

Please Log in or Create an account to join the conversation.

Re:transom replacement 10 years 10 months ago #87143

  • Bellboy33
  • Bellboy33's Avatar Topic Author
  • Offline
  • Junior Boarder
  • Junior Boarder
  • Posts: 65
  • Karma: 2
  • Thank you received: 0
Awesome!!! Thanks again this is really helping me out!!

Please Log in or Create an account to join the conversation.

Re:transom replacement 10 years 10 months ago #87148

  • Bellboy33
  • Bellboy33's Avatar Topic Author
  • Offline
  • Junior Boarder
  • Junior Boarder
  • Posts: 65
  • Karma: 2
  • Thank you received: 0
Ok great yes something I don't want to practice much of but sure it would not hurt.
Ty

Please Log in or Create an account to join the conversation.

Re:transom replacement 10 years 10 months ago #87150

  • Bellboy33
  • Bellboy33's Avatar Topic Author
  • Offline
  • Junior Boarder
  • Junior Boarder
  • Posts: 65
  • Karma: 2
  • Thank you received: 0
No I did not get lost thanks a big help!!

Please Log in or Create an account to join the conversation.

Re:transom replacement 10 years 10 months ago #87157

Bellboy, just get in there and give it your best shot. If it doesn't work out you can try again. The way I look at any improvement over what you started with can be considered a success. Everyone doesn't have the same skill level or budget.

Please Log in or Create an account to join the conversation.

Re:transom replacement 10 years 10 months ago #87170

  • Bellboy33
  • Bellboy33's Avatar Topic Author
  • Offline
  • Junior Boarder
  • Junior Boarder
  • Posts: 65
  • Karma: 2
  • Thank you received: 0
Yes I have been jumping in I'm going to make sure i at least do it correct, before moving on
So i only have do this one time on this boat . Ill keep reading till Im confident before moving on.
Everyone's input has been appreciated.
It's also 32 degrees and my shop is not heated but I do have shop heaters.
Thanks for your input.

Please Log in or Create an account to join the conversation.

Re:transom replacement 10 years 10 months ago #87171

I sent you an email. any questions call me
Jerry

Please Log in or Create an account to join the conversation.

Re:transom replacement 10 years 10 months ago #87216

A few comments about some statements of others, before I get started. It's never advisable to thin resin with acetone. It's a misconception that by thinning it it will help it penetrate the wood and thereby aid in the overall waterproofing of it. It actually degrades the properties of the resin and lessens it's strength and adhesion characteristics. I have spoken with some of the leading Technical advisors for the Resin MFG's in the U.S. and they all concur. And Yes I KNOW all About "ROT DOCTOR" Another statement that you should take under consideration and caution is when adding more than 2% MEKP to your resin. This again can severely mess with the Chemical properties of the mix. The Curing of resin is ALL About the chemical reaction!!! In Summer 1 to 1.5% is normally used and in Cooler temps 2%. Any more than this will get the resin COOKING and I have actually seen Smoke and Fire in a hot shop!!! Ok, Rant Over!!!

I've posted this on another well known forum so I thought you could benefit from it here too!

My Recommendations on how to fabricate Decks, Stringers and Transoms. These drawings are based on my experiences and the vast amount of information I have gleaned from all the Pros and Skilled Amateurs I have dealt with over the years. These are NOT set in stone, only Recommendations. It's your boat, so you can do as you see fit.

Decks - Marine Plywood IS the best and the most expensive. A very good alternative is the new Arauco Plywood. It is Really Good stuff. It is 7 ply, has very very few voids, and uses 100% waterproof glue for it’s laminations. I recommend it now for Deck, Stringers and Transoms unless you want to pay the extra. My opinion is if the glass layup is done correctly and Proper care and maintenance is done the Arauco will last many decades.

Best way to remove the deck is to use a Circular saw set to about 5/8" and cut around the edge. then cut multiple cross cuts to cut the deck into sections and then use pry bars and chisels to lift each section out. Then use a 4 1/2" grinder with 24/ 36 grit resin coated sanding discs and a rubber backup pad to grind the lip off the hull sides.

To fabricate your deck you first fill any voids in the edges of the plywood and low spots on the flats with thickened resin especially in the edges and sand smooth. Then coat top and bottom surfaces with a good coat of resin. Once it Tacks up lay a layer of CSM on the Bottom of the Deck wood and let it cure. Now install the deck wood. There should be a minimum of 1/4" gap between the deck and hull sides. Fill this gap with thickened resin and cove the fillet. Then Tab this fillet with a 6 - 8" piece of 1708 Biaxial Cloth. When applying 1708 biaxial cloth I recommend placing the CSM side down. This allows the CSM to react with the Styrene in the Resin and bond much better. Once this Tacks up, install your first full layer of CSM on the deck running it 3" past the 1708 tabbing. Once this tacks up install another layer of CSM and extend it 3" past the prevous one. Finally you can install one more layer of CSM or substitute a layer of 6 oz Cloth. Deck is finished. I call thickened resin “Peanut Butter”. It’s made by adding Cabosil and ¼” milled fibers to resin until it reaches the consistency of Creamy Peanut Butter. Used for Filleting and filling gouges and cuts.


FILLETING: Once you have your PB mixed, dump it in a Ziploc bag, cut off a corner then use it like a pastry bag to squeeze the pb along the edge where you are filleting. Then use a large plastic spoon dipped in Mineral spirits to form the cove. Being neat here will save on sanding later prior to laying the CSM and 1708. The big key as with all glass work is to ensure there are NO air bubble in the lamination. If they form they must be ground out and glass patches applied.


***NOTE*** For I/O motor mounts, It's normally recommended to double the layup. i.e.4 layers of 1708. Again, I always recommend laying the 1708 with the CSM layer facing down so the Styrene in the resin can dissolve it and create a stronger bond. This gives more strength and bulk to the mounts where most of the weight is. The stringer that runs parallel to the mounts and sometimes attached to the mount gets the normal layup.


Note: When using screws as clamps, it's best to predrill the holes a bit oversiized on one piece of the transom. This keeps the piece from catching the screw threads and allows the other piece to be drawn up tight against the pre-drilled piece.


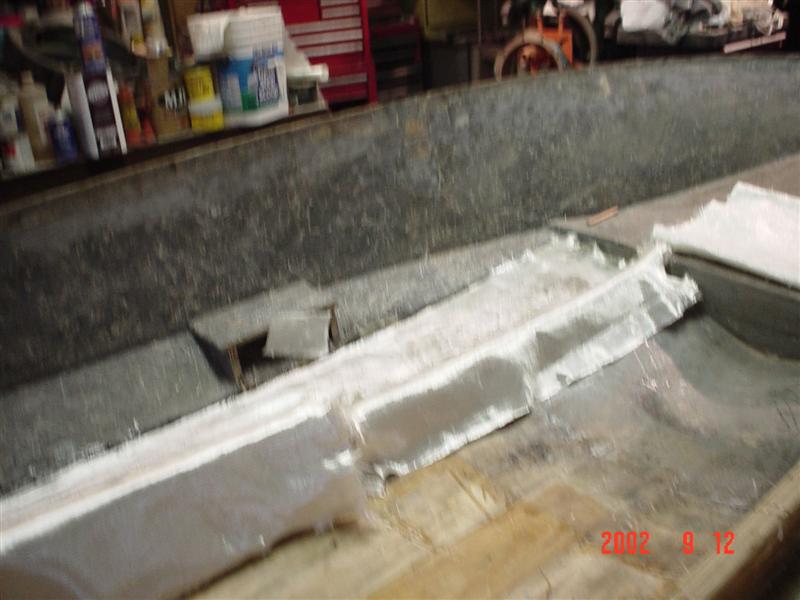
Pics of clamps I recommend for clamping an Outboard Style Transom when the top cap of the boat has been removed. I modified the construction of them just a bit using bolts instead of all thread. Takes a bit longer to build em but I like em better. Doing it this way I can use my 3/8" air drive ratchet to tighten em down which make is a lot faster to clamp em down. You need to be as fast as possible when you are using that much PB. Don't want it to set up on you before you get it clamped in place. Speed is of the essence!!!!


Hope this all makes sense! The Clamps really make installing the transom a breeze but doing some dry runs with em IS advisable so you can get used to em. Remember tighten the lower bolt and loosen the upper to make em work right.

Please Log in or Create an account to join the conversation.

Re:transom replacement 10 years 10 months ago #87217

WOW!
You do your boats, I'll do mine.
(Edit by moderator)

Please Log in or Create an account to join the conversation.

Re:transom replacement 10 years 10 months ago #87228

Thanks BlueFlamingo, sounds & looks like great advice. Pix & graphics help it make more sense. Appreciate it

Please Log in or Create an account to join the conversation.

Re:transom replacement 10 years 10 months ago #87230

  • Nautilus
  • Nautilus's Avatar
  • Offline
  • Contributing Member
  • Contributing Member
  • Posts: 1577
  • Karma: 87
  • Thank you received: 58
Flamingo...your post is what this forum is all about: knowledge and experience shared for the benefit of others. There is a lot to be learned from your post, not all of it technical. Thanks!

Please Log in or Create an account to join the conversation.

Website: NautilusRestorations.com

Mentor to the unenlightened!

"Never allow logic to interfere with a boat purchase." - J. S. Hadley
"Vintage quality beats new junk every time." - J. S. Hadley
"Anything supposed to do two things does both of them half-assed." - J. S. Hadley
"Success makes...
  • Page:
  • 1
  • 2
Time to create page: 0.309 seconds

Donate

Please consider supporting our efforts.

Glassified Ads

TEE NEE TRAILER W/BEE BOAT
( / Boats)

TEE NEE TRAILER W/BEE BOAT
09-11-2024

FG Login

FiberGoogle

Who's Online

We have 5418 guests and 2 members online