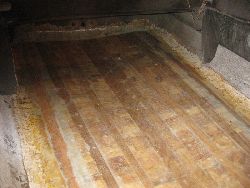
I did a balsa core replacement but in a 74 Hydrostream.
After cleaning the hull down to the outer glass I felt it would be wise to thicken up the hull lamination before bonding in the new core. I used a Biaxial cloth with chopped mat stitched on one side, this is compatible with the use of epoxy resin. I chose epoxy because it has superior adhesion and is a much better moisture barrier than polyester based resins. Another benefit is you can use different hardners to slow down the cure for longer working times...which you will need! AND it does not SMELL nearly as much as polyester.
I glassed one side at a time, overlapping the first side about 6 inches down the centerline. Have your glass PRE CUT to fit.
I could work from the other side of the centerline so I was not kneeling in my work. I found that putting a TYVEK jump suit on was a pretty good barrier to epoxy so during inadvertant kneeling or elbows etc. getting on the wet areas it did not soak through to my cloths/skin, gloves are a MUST, have a lot of them as frequent changes seemed to help. I put this first layer of biaxial/chopped with the chopped side "up" in one continous piece. I used very slow cure hardner as I wanted to bond on the balsa before this layer of glass cured. The chopped side "up" gave a good resin rich layer to bond the balsa to and the biaxial cloth gave a lot of strength, both layers provided good thick protection from water intrusion to the new core.
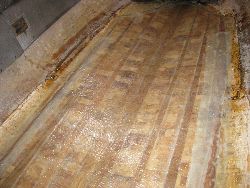
Have your balsa already cut to size ready for install. I also beveled the outside edges so the future top layer of glass would not have to conform to the step down from the core, the balsa ended before reaching the sides on my boat so I had to do this.
When putting the balsa in, it is important that it get resin impregnated between the blocks, this can be accomplished by drapping each piece of balsa across a saw horse or similar so the the parting lines between the blocks open up, I then liberally brushed on the resin, it soaked into the blocks and between them. LEAVE THE SCRIM SIDE DRY. To bed down the balsa I had another pot of thickened epoxy that I basicly fingerpainted onto this resin coated NON scrim side of the balsa, to do this,I layed the balsa panel flat onto a clean piece of plastic the NON scrim side is the side you want "down" so it will conform to the hull curves. I worked my panels the full length of the same side I glassed earlier. I now let it all cure, and once cured, this bare balsa side gave me the area to work on to do the other side in similar fashion.
A side note is the initial layer of glass overlapped 6 inches across the centerline is where the second side of new hull glass has to bond onto it. Cured epoxy gets a blush that must be removed (water) for correct bonding so make sure this overlap area is cleaned and sanded for good adhesion of the second side. This is another reason to work continuosly on each side so you are always laminating and bonding onto fresh yet to be fully cured epoxy so blush is not an issue.
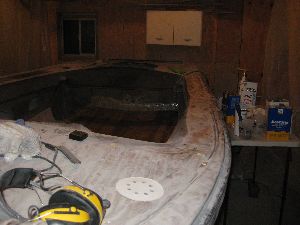
Once both balsa sides are installed and CURED, the final step is the top layer of glass. Again I used the same Biaxial/chopped glass this time the chopped layer "down" to the balsa for resin rich bonding layer. After a quick clean sanding off epoxy foot/hand/elbow prints from the balsa surface, I brushed on a liberal resin coat onto the balsa and onto the chopped side of the glass as I moved down the length, botht he balsa and this chopped/biaxial need lots of resin to wet out so applying to both worked well. Again the first layer overlapped the middle 6 inches. Once cured I did the other side, this one, I could also overlap 6 inches so there was a double glass layer up the middle.
Don't forget to clean the blush off the first side before doing the second side overlap.
It took 4 days to do all this, the hard days are the first two, doing the first glass layer in combo with the balsa. The last two days are pretty easy where you are just putting on the final glass layer.
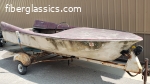
Super strong when done! Stringers etc went in next per usual, clean that blush off that top glass when cured before doing so!
Godo luck!
Randy