Welcome, Guest
Username: Password: Remember me
  • Page:
  • 1

TOPIC: Sea Cast

Sea Cast 13 years 7 months ago #24996

  • thetudor
  • thetudor's Avatar Topic Author
  • Offline
  • Platinum Boarder
  • Platinum Boarder
  • Posts: 1204
  • Karma: 33
  • Thank you received: 2
A friend of mine has a very cool 22ft prototype boat that he bought and redid. (The boat was built by Pearson yachts in RI and was never put into production. It is along the lines of a Ray Hunt Surfhunter - If he ever sold it, I would love to buy it.) The original transom was built for a 20" motor, but along the way was built up for a 25". They never properly capped the built up area, so water got into the wood and it has started to rot. He has considered re-doing the area with Sea Cast and was wondering if I knew anyone who has worked with it. I figure someone out there has worked with it and would appreciate any input I could pass along.

Please Log in or Create an account to join the conversation.

Todd (aka thetudor)
1964 Custom Craft Aqua Ray
1959 Glastron Seaflite
1959 Tomahawk Spirit

Re:Sea Cast 13 years 7 months ago #25004

todd....Gary Simpson (mtdoragary) from eustis, fla. i'll send you his email adress.

Please Log in or Create an account to join the conversation.

Re:Sea Cast 13 years 7 months ago #25005

  • Mr. 88
  • Offline
  • Gold Boarder
  • Gold Boarder
  • Posts: 547
  • Karma: 13
  • Thank you received: 0
Main page under research then to Transom,floor,stringers Jamil has extensive knowledge in this field.Or you can go to Iboats.com and go to there resto section and punch in pourable transom in the search icon.Sea-cast or Nida Bond which is made by Arjay.Arjaytech.com for info The big thing is surface prep and that makes or breaks the resto. 125$ for 5 gallons and thats the way they are sold.1 gal does 231 cub inches.Most transoms are in that 7-9 gallon area.Does it work? Yes quite well, I myself will be doing it in a month or so.Dig out rotted wood ,clean, and pour sounds easy but there is a little more to it.The material sets up quickly so everything has to be in place when you start.

Please Log in or Create an account to join the conversation.

cool runnings Mr 88

Re:Sea Cast 13 years 7 months ago #25041

There are a LOT of GREAT step by step projects and photos of transoms being prepped and poured with seacast on iBoats.com. Check it out!!! :woohoo:

Please Log in or Create an account to join the conversation.

Re:Sea Cast 13 years 7 months ago #25098

I also poured my transom on my Skagit 20. I have attached pictures of it just after the pour. These have not been capped or fiber glassed as you can see by the images. The thing is rock solid. It worked better than I hoped it would. I used Nida-Core pourable transom compound for this one. I also will be pouring the bottom section of my main bulkhead which will make the boat wood free below the deck.
I can give you the info from my pour if you would like via email or here if people don't mind.
Attachments:

Please Log in or Create an account to join the conversation.

Mike Russon

Re:Sea Cast 13 years 7 months ago #25158

  • Kerry
  • Offline
  • Gold Boarder
  • Gold Boarder
  • Posts: 675
  • Karma: 51
  • Thank you received: 2

Please Log in or Create an account to join the conversation.

Re:Sea Cast 13 years 7 months ago #25179

I am planning on pouring a transom for my 20ft Skagit. Any and all info will be greatly appreciated. This email address is being protected from spambots. You need JavaScript enabled to view it. Clint

Please Log in or Create an account to join the conversation.

Re:Sea Cast 13 years 7 months ago #25223

  • MarkS
  • MarkS's Avatar
  • Offline
  • Moderator
  • Moderator
  • Posts: 5348
  • Karma: 118
  • Thank you received: 5
Please share your experience with us Mike R, many of us would love to have the input. Ray (69Fabuglass) also had some tutorials posted on his site, I'll have to see if I can find it.......

Please Log in or Create an account to join the conversation.

Mark

Re:Sea Cast 13 years 7 months ago #25403

  • MarkS
  • MarkS's Avatar
  • Offline
  • Moderator
  • Moderator
  • Posts: 5348
  • Karma: 118
  • Thank you received: 5
I had "stashed" several links on the subject, just had to find them. Seacast has a good bit of info and some videos on their website:http://www.transomrepair.com/catalog/pages.php?pID=23

And Ray actually used "Nida-Bond" on his, here's the link:http://www.raylinrestoration.com/BoatStuff/MFG-Transom/index.htm

Please Log in or Create an account to join the conversation.

Mark

Re:Sea Cast 13 years 7 months ago #25404

Well I hate to be the "wet blanket" here. I have never used it, but I can tell you most of the "Rot" is at the bottom of the transom. You need to get that cleaned out. The best system I've seen is with a chain saw. (don't cut through)
It really isn't that hard, and a lot cheaper to cut the inner skin, remove the old plywood, and replace it with some good CDX and re-glass the inside.
I just throw this out for discussion. It's your boat, you have to do what you're comfortable with.
Jerry
Attachments:

Please Log in or Create an account to join the conversation.

Re:Sea Cast 13 years 7 months ago #25423

  • Mr. 88
  • Offline
  • Gold Boarder
  • Gold Boarder
  • Posts: 547
  • Karma: 13
  • Thank you received: 0
Well Flash is correct,in some applications. My one MFG has a curved transom which means replacing with wood is a whole lot harder.I also did not want to or need to take the deck off if I poured. My interior remains in stock color and condition by pouring and I never have to worry about rot for my grandkids or whoever,also a selling point.In my case the old wood is more like a wet cigar so there is not a lot of effort required. Some are not that far gone and as Flashman said it may be easier and cheaper! to cut and replace depending on how easy it is to get too vs using long picks chisels etc to clean out along with wire brush on rod to clean fiberglass for adhesion purposes.So each boat and person will dictate there own method based on above conditions.

Please Log in or Create an account to join the conversation.

cool runnings Mr 88

Re:Sea Cast 13 years 7 months ago #25427

Glasspars have curved transoms too. Just means you have multiple layers of 1/4". a little more time consuming.

Please Log in or Create an account to join the conversation.

Re:Sea Cast 13 years 7 months ago #25458

  • Mr. 88
  • Offline
  • Gold Boarder
  • Gold Boarder
  • Posts: 547
  • Karma: 13
  • Thank you received: 0
50s Flash wrote:

Glasspars have curved transoms too. Just means you have multiple layers of 1/4". a little more time consuming.

True but your still up against a sub floor and rear 'deck'.Along with having to leave about 3" of the inner transom in place so that you have a good section of FG in which to bond.With all that going on the 1/4" plywood would have to be cut into smaller sections to fit into those restrictions.Thats it for me on this!

Please Log in or Create an account to join the conversation.

cool runnings Mr 88

Re:Sea Cast 13 years 7 months ago #25459

a huge argument over this subject developed on a boating site a few years back. it resulted in someone being expelled from the site. it seems that the real purist in boat restoration would never think of replacing a transom with a foreign material. in this case it was seacast. myself, if i ever had to do it, it would be with a pourable material, only because its much easier,faster and i'm woodworking challenged. also an inner and outer skin is needed to contain the material.imo the only downside to pourable material is the weight it adds to the stern. i agree with 88, thats it for me on this subject.

Please Log in or Create an account to join the conversation.

Re:Sea Cast 13 years 7 months ago #26494

Mark,
Sorry for the late reply on this. I was busy with work there. I would be happy to describe my process that I used with Nida-Core and how it worked.

When I first picked up the Skagit, the transom was evidently damaged. I had fiberglass delamination all over the deck, transom and areas that I can't even describe. I knew at that point there was a serious problem. Since the boat was built in 1958 and was stored outside, I knew I was in trouble.

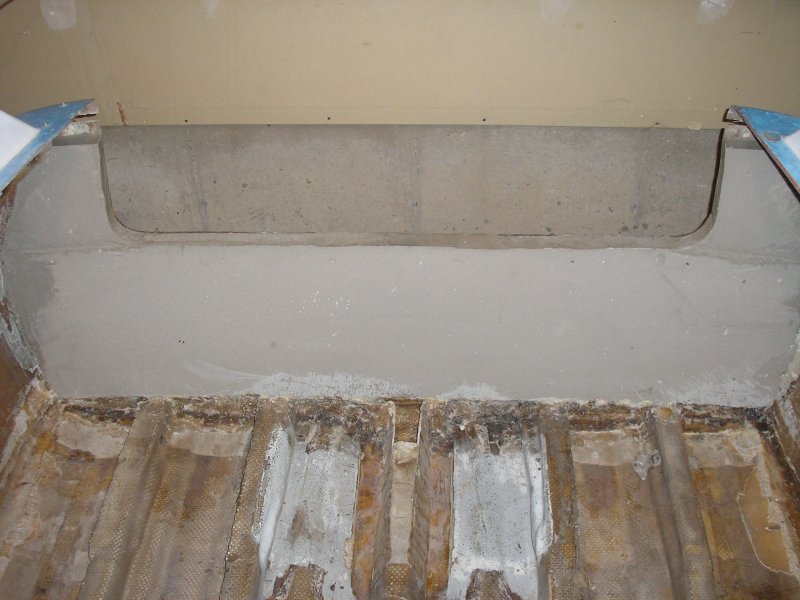
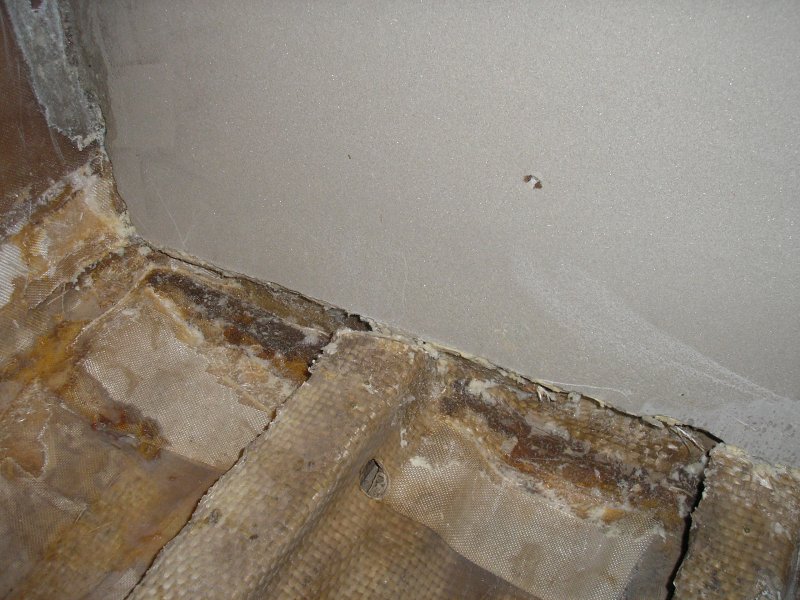
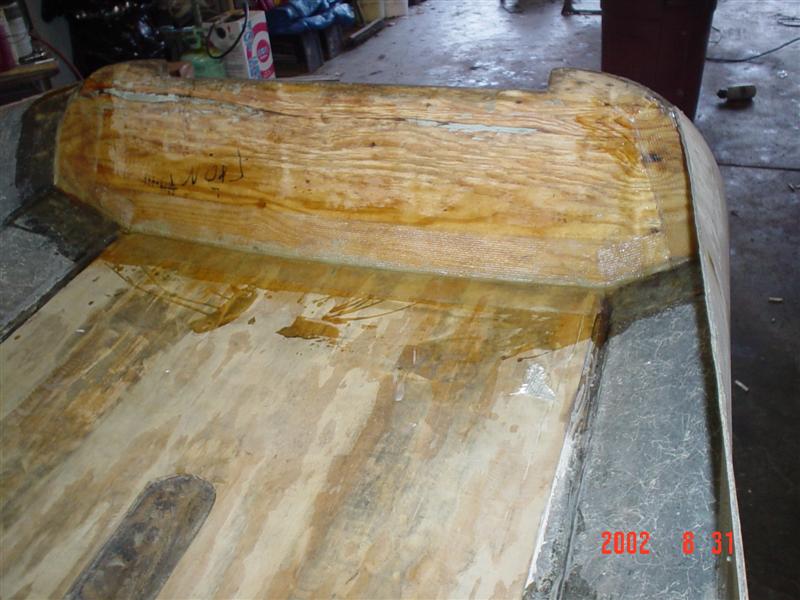
I got her home and gutted the boat all the way to the hull. This Skagit 20 has fiberglass stringers so that removes a rotted hull issue. The challenge comes when looking at the fact that the skagit has literally a 3/8 thick fiberglass skin on the exterior of the transom, but has no internal skin or bulkhead opposite the outer skin. As for rotted wood removal, that is GREAT! The problem comes when having to form an interior bulkhead to pour against on the interior side.

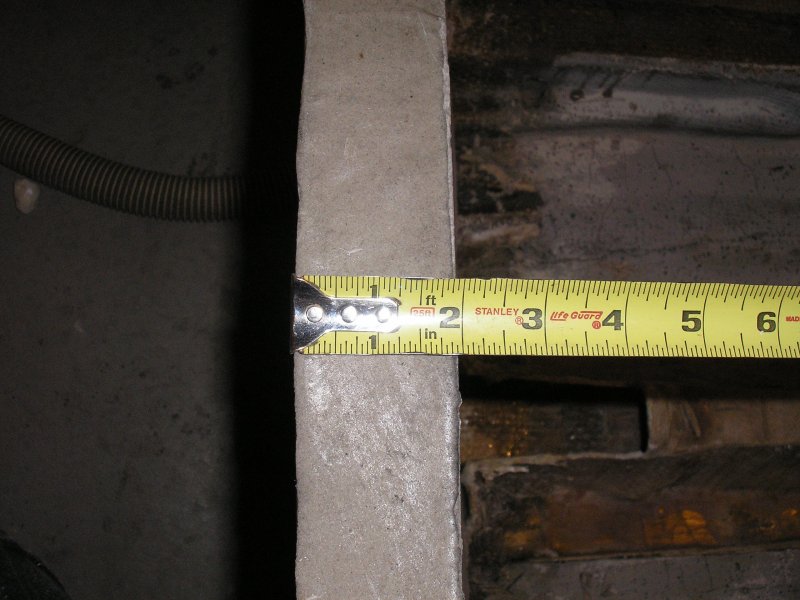
I went ahead and made a template of the interior side of the transom so I could transfer that template to a plywood piece. I went ahead and cut that template and fit it so I had a two inch gap between the outer skin and the new template. This would give me a two inch thick poured transom before adding any heavy roving or glass to the interior side.

Now for the hard part. Anyone who has every worked with liquids knows that as you fill a void or a container, you get a HUGE amount of hydrostatic pressure as the void fills. When not braced properly, that form or mold will literally explode. Think of concrete being poured into a box. If the box is adequately braced dimensionally on all sides, the box will hold the cement until it sets. If you pour into the box that is not supported or braced, you'll end up with a mess!

The same can be said for the pourable transom materials. My experience has been that your interior skin or template MUST be capable of handling the internal pressure of the liquid as it fills the void between your outer hull skin and your internal skin if you have one, or your template or "form".

I originally thought I would use 1/2 plywood to pour. This was "marginal" in support. The thicker the better. If your lucky enough to have a flat transom, I would form using 3/4 plywood as my interior form. It is tough and wont move. If your unlucky like me, and your transom curves, your faced with having to make a curved form to allow for a consistent 2" think pour across the entire width of the transom. I had to make the choice of whether I wanted to actually build a curved transom form using wood braces cut and screwed to the form, or whether I could do something else.

I elected to use braces running from the stringers in my hull, running into the form similar to what you would see on a house foundation. Once the forms are set, you often see braces leading to the ground on both sides in order to keep the forms set until the cement cures. I took this approach.

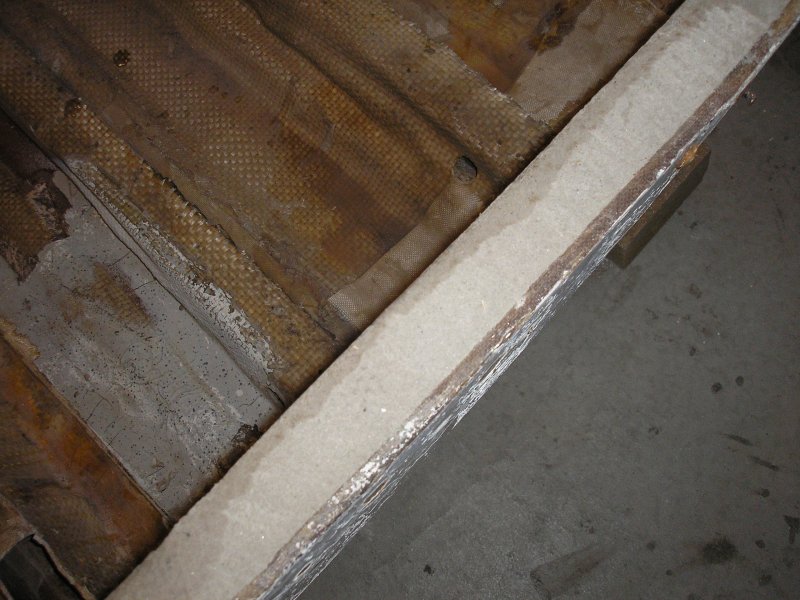
The second challenge after getting the form built, anchored and braced, was the method of sealing between the existing hull and the new form. Keep in mind that hydrostatic pressure will force that material out like a rocket, similar to a flood gate being opened at the bottom of a dam. I chose to use a method I had used before. I went around the perimeter of the form with expansion foam. This foam over the course of a few hours set hard and sealed the cracks around the form.

I then mixed my material as per the instructions and had my son help with a makeshift funnel so I could work my way across the transom. I also did one other thing. I was nervous that the form would move, so I ran screws through the form into the exterior skin of the boat, similar to a foundation form and the ties they use to hold the form together as they pour. This maintained a constant two inch thickness. I was going to glass the interior anyway, and the exterior needed to be glassed on the transom so a few screw holes didn't bug me. Remember, the pressure is huge and will pop an unsupported form.

I can't stress enough the need to be sure that there are no leaks around the form. Those lucky enough to have internal and external skins are in the best shape. Support those skins and your good. Those like me who had to make one, must look for leaks BEFORE the pour and fix them. I only had one small leak in one spot and lost maybe a cup full of resin before it set.

That brings me to my last point. This stuff is polyester resin, using peroxide as a hardener. It STINKS like the dickens and you MUST ventilate the area when working with it. The other issue is heat. When the resin cures as with many other resins, it creates what is known as an exothermic reaction. That puppy heats up more than you think. It heats hot enough that it's tough to touch and impossible to stop just as it's kicking. You MUST be sure that the heat it generates does not warp or bend your existing transom skin. When your good old gelcoat and fiberglass heat to that level, they will warp if not supported. Mine was 3/8 thick and I still worried about it. Take the time to set it up right with proper support and you'll be ok. if you don't, you may end up with a bigger mess than you started with.

Having said all this, I don't want to come across as trying to scare anyone away. The transom is solid and rot proof now. I would do it again and I certainly learned a lot. Hopefully you will feel comfortable using this type of repair since I'm confident that when done correctly, you will never need a transom repair again. Feel free to mail me at mrusson (at) gmail.com if I can help anyone out with questions. Sorry for the long post.

Please Log in or Create an account to join the conversation.

Mike Russon

Re:Sea Cast 13 years 7 months ago #26508

  • MarkS
  • MarkS's Avatar
  • Offline
  • Moderator
  • Moderator
  • Posts: 5348
  • Karma: 118
  • Thank you received: 5
Thanks for your input Mike, I appreciate you sharing your experience with everybody. I've got two transom projects coming up, and quite honestly haven't made up my mind yet which way I'm going to go on either. One of the things I HAVE figured out in life, is to make a good decision you have to gather as much knowledge and input on the subject as possible. Your tips and warnings are most helpful to those of us facing this "dilemma".

Please Log in or Create an account to join the conversation.

Mark
  • Page:
  • 1
Time to create page: 0.208 seconds

Donate

Please consider supporting our efforts.

Glassified Ads

Fenders - Tee Nee trailer
( / Parts / Miscellaneous)

noimage
09-30-2024

1958 Skagit Sportster
( / Boats)

1958 Skagit Sportster
09-25-2024

Winner Marauder - the classic 1970 runabout!
( / Boats)

Winner Marauder - the classic 1970 runabout!
09-16-2024

FG Login

FiberGoogle

Who's Online

We have 5866 guests and 2 members online