Welcome, Guest
Username: Password: Remember me

TOPIC: Progress on my Power Cat 14T

Re:Progress on my 14T 14 years 10 months ago #1357

  • MarkS
  • MarkS's Avatar
  • Offline
  • Moderator
  • Moderator
  • Posts: 5348
  • Karma: 118
  • Thank you received: 5
Coming along nicely, Frank. I know you're anxious to get back to the 14T, but at least you're getting some progress going where possible.

Please Log in or Create an account to join the conversation.

Mark

Re:Progress on my 14T 14 years 10 months ago #1360

Thank you Mark. Tomorrow morning I will be suspending the '63 Merc 1000 near my shop bench to get going on the LU stuff and get good coverage on areas that would be difficult to get with it on it's engine stand.

I can't wait to get my boat done!

Frank

Please Log in or Create an account to join the conversation.

Re:Progress on my 14T 14 years 10 months ago #1423

Frank, Your attention to detail is amazing. The work on the trim pump is great. I didn't even try on mine, it looks like it is, uh, 40 years old. Just too many nooks and crannys for me.

When you get back to the boat, I have just a humble suggestion. I would consider spraying the deck. The brush work is fine, but I wonder if you will ever get the level of perfection you strive for. Does Brian have a spray rig you could use? I just hate to see you redoing it again and want to see you IN THE WATER!

Good job. STAY HEALTHY!

Bernie

Please Log in or Create an account to join the conversation.

Re:Progress on my 14T 14 years 10 months ago #1427

Hey Bernie!

My attention to detail is driven by my physical ability to get some stuff done while I can. With an unheated garage, this is about all the damage I can do. Shop lately has been staying 50 and above. Days are getting longer too. Kind of exciting eh?

The really stupid thing about the trim pump is where it's gonna go no one will see it anyways!

Started cleaning the LU prior to initial sanding and did some other motor stuff today. I'm taking off the coil and starter brackets to clean, sand and paint and then replace my old starter with the freshly painted newly rebuilt one.

I have friends that tell me they're coming over with a spray gun this spring. I have an old fashioned one (not the gravity feed), but have never used it. Sometimes I think I should just give it a try and see what happens. Actually I am following the foam brush technique Brian uses. I don't believe he owns a spray gun.

There's a lot more to do than just paint. A small portion of the hull lip needs to be rebuilt for the rub rail to install correctly on the deck edge, then new rub rail needs to get fitted, and the interior box seam glassed. I figure it will need two more coats of primer, and then two or three of top coat.

I'm trying to stay healthy Bernie, trust me!

Frank

Please Log in or Create an account to join the conversation.

Compulsive behavior 14 years 10 months ago #1476

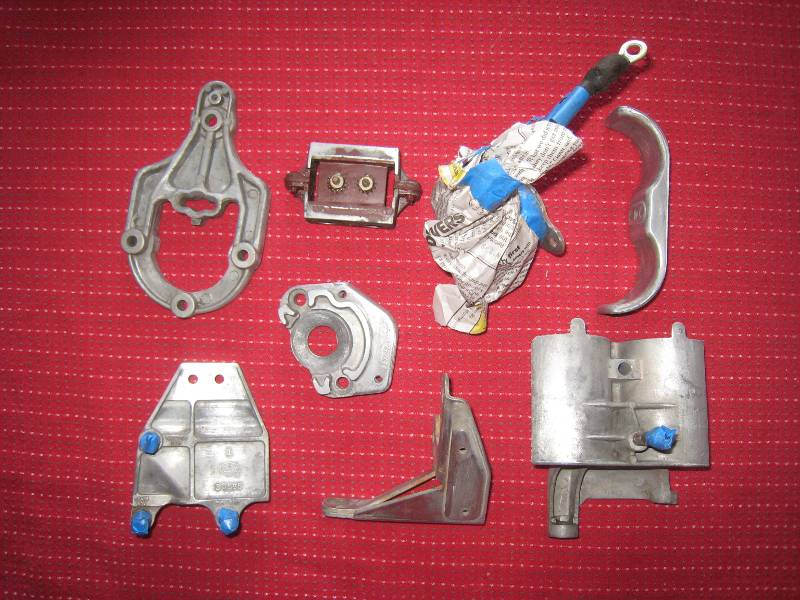
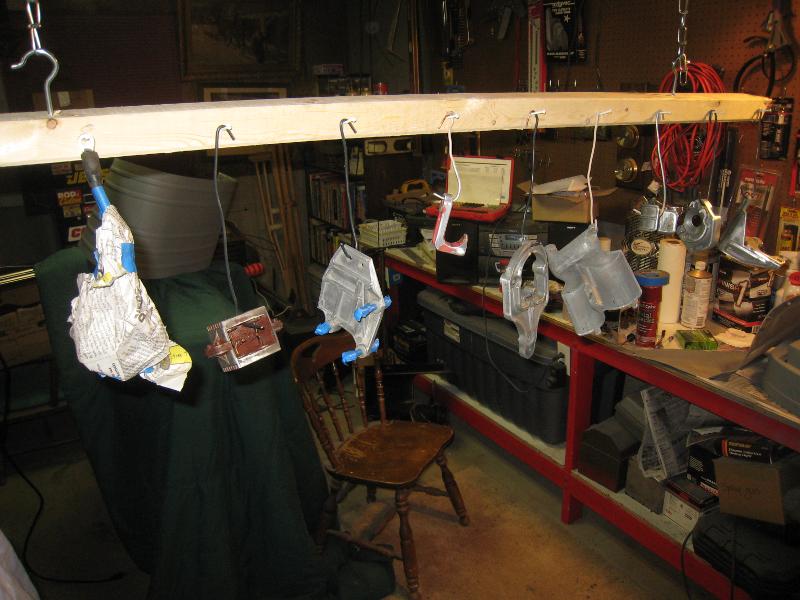
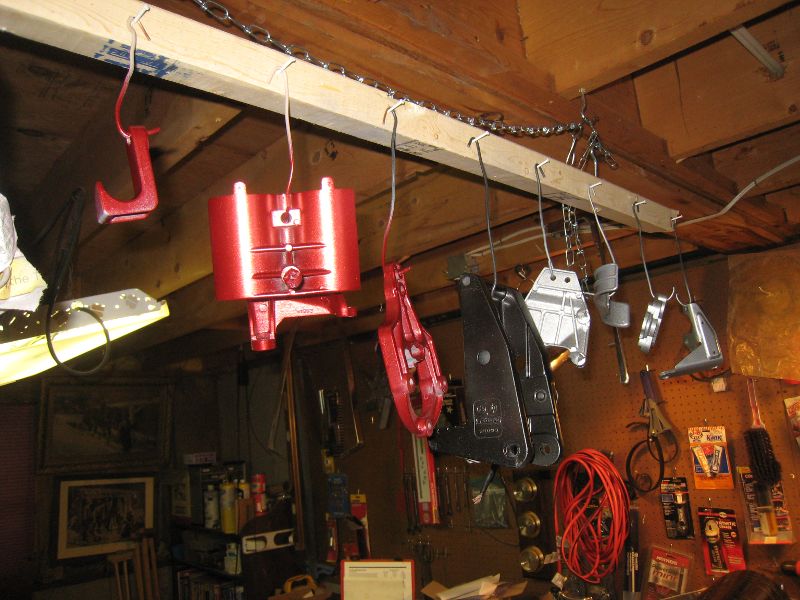
'63 Merc 1000 motor brackets (coils, rectifier, starter, etc.) Cleaned, sanded, cleaned again, and now primed. Hours of work, now it's just a few light coats of self etching primer, than mostly silver metallic and one or two red metallic.

Getting this done pretty much finishes paint I'm going to do "under cover." This frees me up to keep working below the middle cowl cleaning and sanding before primer. I may be done for the day, but I doubt it. Paint in the morning before we leave for work so vapors dissipate during the day.

Frank


Attachments:

Please Log in or Create an account to join the conversation.

First finish coat wrap-around cowl 14 years 10 months ago #1502

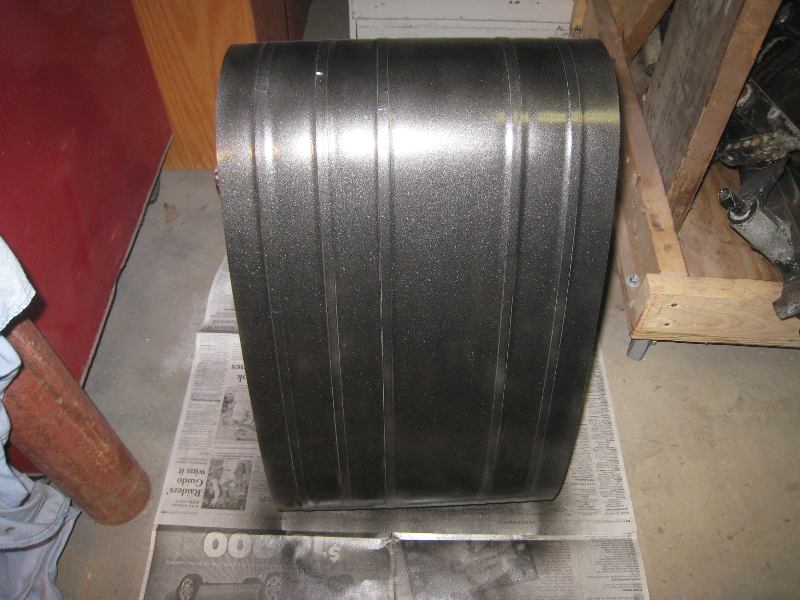
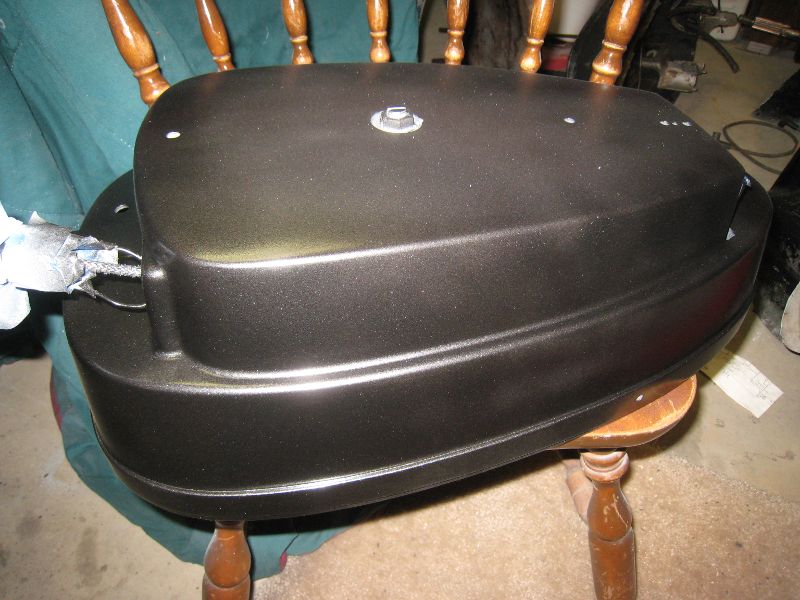
Doesn't look as black with this flash pic as I think it should. First coat anyways.

Frank

Attachments:

Please Log in or Create an account to join the conversation.

2nd finish coat on cowl, 1st on bonnet 14 years 10 months ago #1550

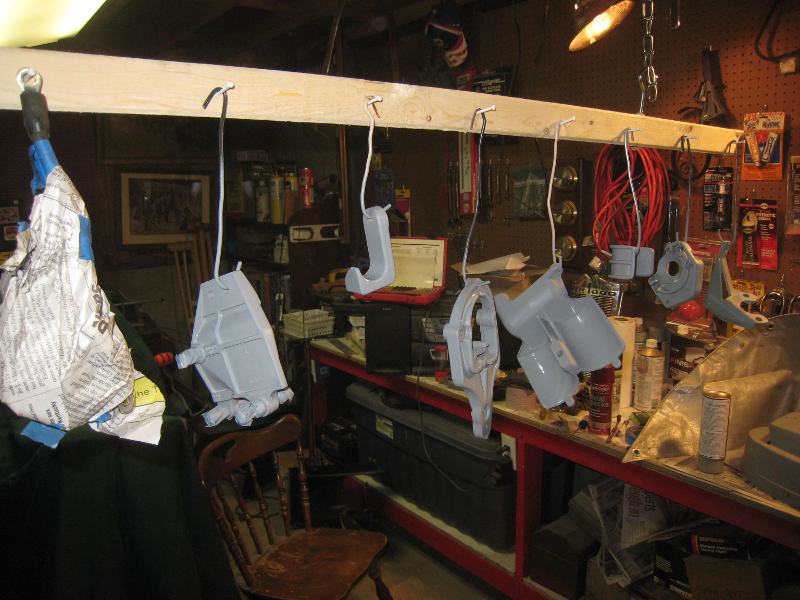
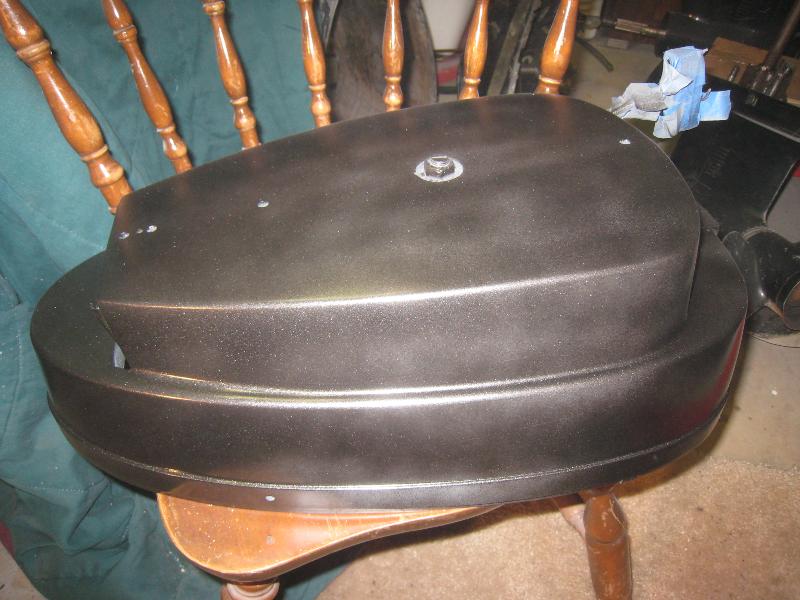
She's coming together. Also did 2nd coat of primer on brackets this a.m. Pics don't do this stuff justice.

Once the final finish coat is on the cowl, I'll pull the striping tape and see how she looks. Should be there by the weekend.

Frank


Attachments:

Please Log in or Create an account to join the conversation.

Re:Progress on my 14T 14 years 10 months ago #1551

  • MarkS
  • MarkS's Avatar
  • Offline
  • Moderator
  • Moderator
  • Posts: 5348
  • Karma: 118
  • Thank you received: 5
Morning Frank, lookin' good buddy. I can't wait to see this Merc when it's finished. I was about to ask about the stripes, but you mentioned the tape so that explains that. Have you got the decals for the motor yet? I remember seeing a thread somewhere that somebody has them available...

Hope you have plenty of fresh air coming into the basement, don't want you breathing in too many paint fumes and going goofey on us. :)

Please Log in or Create an account to join the conversation.

Mark

Re:Progress on my 14T 14 years 10 months ago #1552

Thanks Mark. I'm not sure if I'm going to put decals on. We'll see. I do believe they are still available.

I don't have a lot of fresh air coming into the basement, but I wear a mask when painting and often even when hand sanding. I'm goofy enough without paint fumes to add to it...

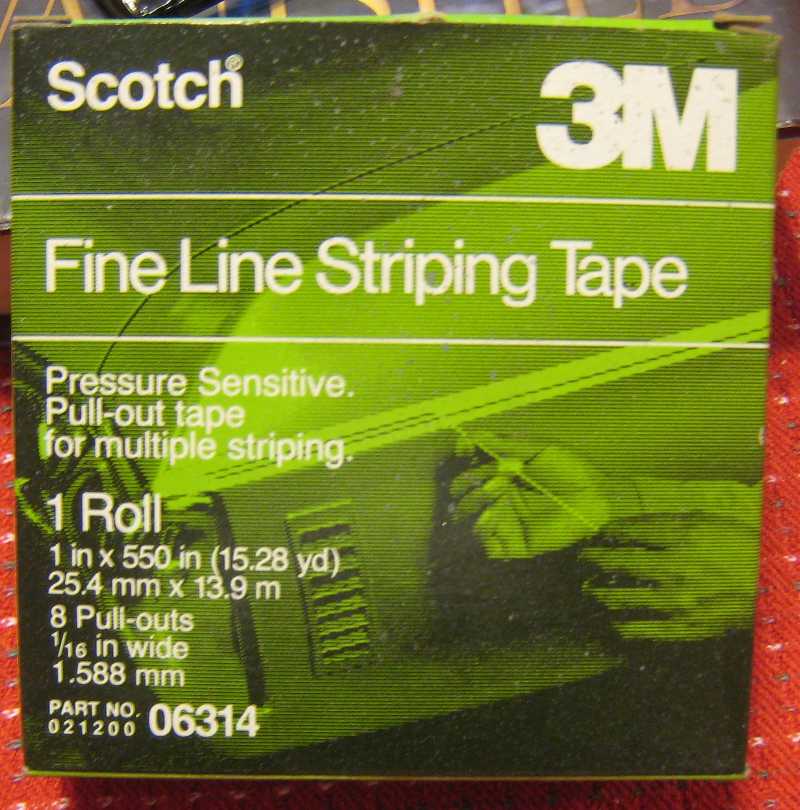
Here's a pic of the tape box. Neat stuff. It's 1" wide. Has a 1/4" strip on one side, a 3/16 strip on the other side, and 1/16 pull-outs in-between. The raised stuff on the cowl is 5/16, so I use one side with the 1/4" and one 1/16 pull out, then use the other 3/16 side and two 1/16 pull outs.

Enjoy your day!

Frank

Attachments:

Please Log in or Create an account to join the conversation.

Re:Progress on my 14T 14 years 10 months ago #1578

Hey Frank, if you are looking for decals this guy has 'em. I got a set for my 1957 Johnson 18 HP and they are REAL nice. He is in Canada so it took a couple weeks to get 'em (I was pretty nervous) but they are the real deal.

www.nymarine.ca/

Bernie

Please Log in or Create an account to join the conversation.

Re:Progress on my 14T 14 years 10 months ago #1579

  • MarkS
  • MarkS's Avatar
  • Offline
  • Moderator
  • Moderator
  • Posts: 5348
  • Karma: 118
  • Thank you received: 5
Hi Bernie, I believe Frank's Merc is a '63 model 1000. I'm sure he'll appreciate the heads up on the source for decals, if he decides to go that way.

Please Log in or Create an account to join the conversation.

Mark

Re:Progress on my 14T 14 years 10 months ago #1580

Mark, Thanks, I went back and reread the thread and saw it is a '63.

Here's his '63 decals


That motor is gonna deserve a set.

Bernie

Please Log in or Create an account to join the conversation.

Re: Decals 14 years 10 months ago #1583

Thanks guys, you're okay! I have that site bookmarked from a while ago. I need to take it easy on $ till we get our federal tax bill paid, then I'll probably get a set. No rush, motor is not done yet! Getting there though. Had a meeting late tonight, but should be able to move ahead substantially over the next few days. Pics soon!

Frank

Please Log in or Create an account to join the conversation.

More color 14 years 10 months ago #1611

Color this a.m for the brackets, some red metallic some silver metallic. 2nd coat for bonnet, 3rd (final) coat for big cowl.

Fixed my micro switch for the trim (I think!), still working on the motor LU, getting her ready.

Frank


Attachments:

Please Log in or Create an account to join the conversation.

Cowl done 14 years 10 months ago #1640

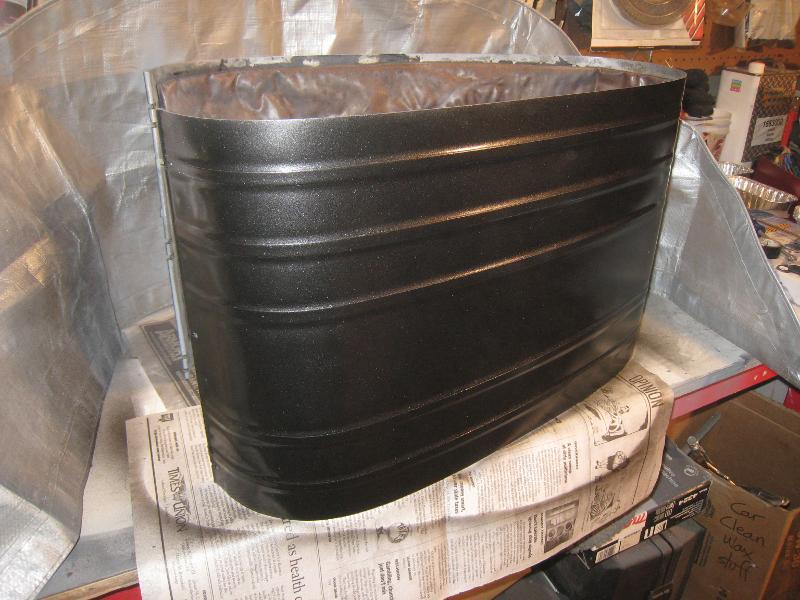
Need to put on latches & trim.


LU almost ready for 1st coat of primer. Spent many hours on it today.

Attachments:

Please Log in or Create an account to join the conversation.

Re: Cowl done 14 years 10 months ago #1642

Frank,

So you paint the cowl and then how did you get the metallic stripes on it?

Ken

Please Log in or Create an account to join the conversation.

Hello, World!!

Re:Progress on my 14T 14 years 10 months ago #1647

Ken, see posts #1551 & 1552 above.

Any questions?

Frank

Please Log in or Create an account to join the conversation.

Re:Progress on my 14T 14 years 10 months ago #1648

The tape is metallic? I just didn't see that on the box.

Please Log in or Create an account to join the conversation.

Hello, World!!

Re:Progress on my 14T 14 years 10 months ago #1651

kensikora wrote:

The tape is metallic? I just didn't see that on the box.


I'm pretty sure the striping tape Frank used is for painting. You lay it down, pull out the sections you want to paint and then spray your color, in this case silver metallic.

Please Log in or Create an account to join the conversation.

Some people are like slinkies... Not much good for anything, but they sure are fun to push down the stairs.

Re:Progress on my 14T 14 years 10 months ago #1669

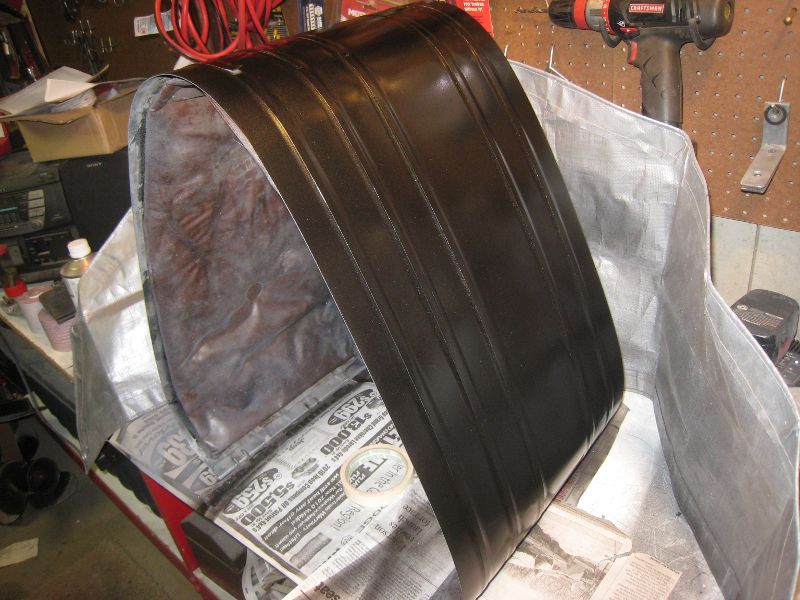
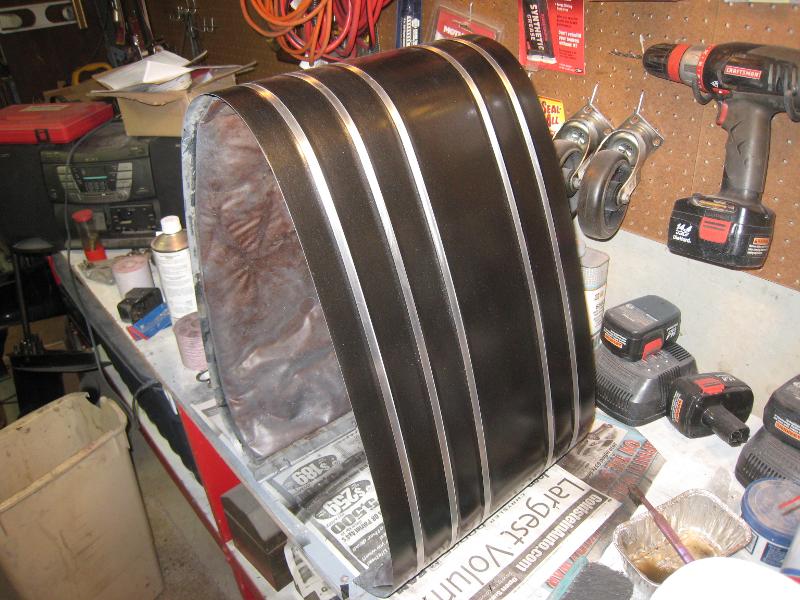
First I prepped the cowl. Cleaned it, wiped it down, sanded with 180 all the black. Did the raised stuff with 220, it was in bad shape, but cleaned up good. Once that was done, cleaned and wiped the whole thing down again, then using striping tape, taped off the raised strips. Three coats of self etching primer and three coats of finish (black metallic), pulled the tape off last night. Voila! Nice clean edged raised strips.

3rd coat of the bonnet this a.m., almost done. Tonight I need to finish prepping the LU for 1st coat of primer, then do that tomorrow a.m. before work. Spring's coming, or so they say...

Frank

Please Log in or Create an account to join the conversation.

Re:Progress on my 14T 14 years 10 months ago #1670

ok Frank.. now I'm confused. What are the silver stripes? Paint, tape? I thought you had sprayed the black, then taped off and sprayed the silver. Now I'm guessing you sprayed the silver first and then applied the fineline tape before spraying the black.. :unsure:

Please Log in or Create an account to join the conversation.

Some people are like slinkies... Not much good for anything, but they sure are fun to push down the stairs.

Re:Progress on my 14T 14 years 10 months ago #1673

Don't worry about being confused. That is my general state of mind...

I believe the cowl is stainless, but I may be wrong. Those so-called stripes are integral to the metal, i.e., they are metal, and I assume just raised stainless. They are on all these Mercs of similar vintage. Not paint, not tape, metal. They were badly corroded, but cleaned up very nice. Once I had the entire cowl sanded (black stuff as well as those raised metal stripes), I used that pull-out section tape and taped the stripes off. (The stripes are 5/16" wide.) Then once the painting was done, I pulled the tape. Worked great.

I will now shoot a couple of coats of clear over everything on the exterior of the motor, i.e. bonnet, cowls, and LU. For that, I wanted the stripes tape off.

Make sense? Please feel free to ask any questions. Questions help, as I've never done anything like this before.

Frank

Please Log in or Create an account to join the conversation.

Re:Progress on my 14T 14 years 10 months ago #1694

Gotcha Frank! Thanks!

Please Log in or Create an account to join the conversation.

Some people are like slinkies... Not much good for anything, but they sure are fun to push down the stairs.

All dressed up for primer 14 years 10 months ago #1704

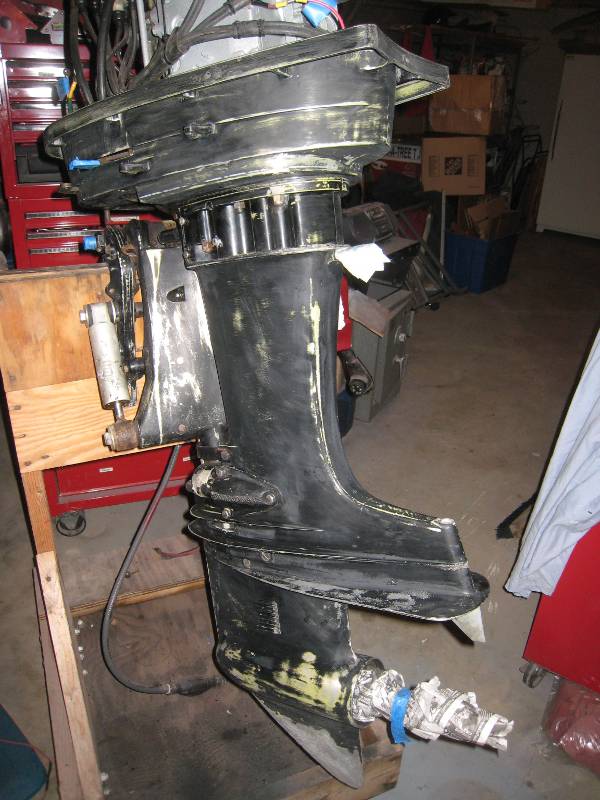
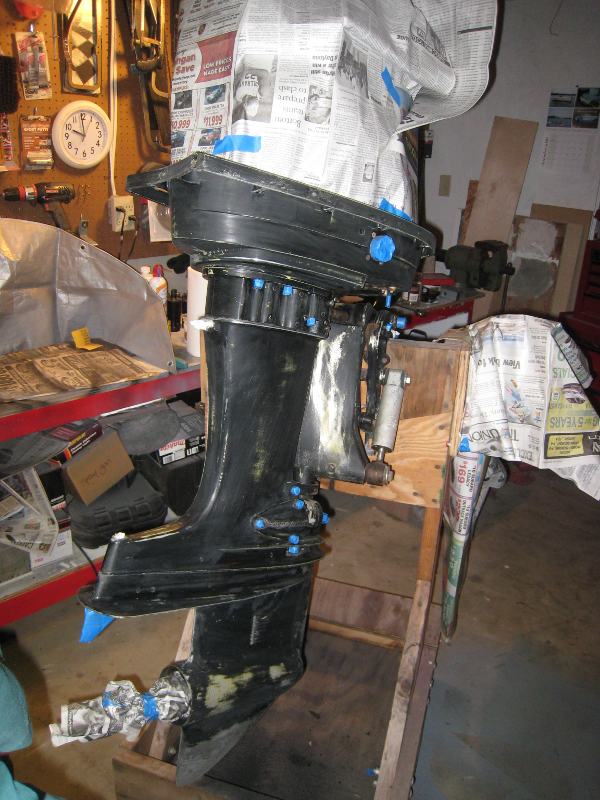
Finally got the prep done for the LU. With luck, prime in a.m. No luck, prime Saturday a.m.

Have decided to do at least a couple coats of clear on all exterior stuff, so it will be a while before assembly.

Frank
Attachments:

Please Log in or Create an account to join the conversation.

Re:Progress on my 14T 14 years 9 months ago #1899

  • MarkS
  • MarkS's Avatar
  • Offline
  • Moderator
  • Moderator
  • Posts: 5348
  • Karma: 118
  • Thank you received: 5
Frank, that joker is going to be BEAUTIFUL. Whatcha gonna do with the shocks? (Pardon my ignorance, possibly the PT&T cylinders replace those eventually?) Too much pain meds, maybe I should go to bed. :P

Please Log in or Create an account to join the conversation.

Mark

Re:Progress on my 14T 14 years 9 months ago #1902

Thank you Mark. Lotsa hours, but I'm fortunate to be able to do this while winter rages outside.

Yes, the trim cylinders replace the shocks. Originally they're black, but I re-did them in silver metallic.

I'm up early to go give that LU another coat of black metallic before work. Follow along here: www.fiberglassics.com/glassic-forums/mercury-outpost/progress-on-my-63-1000

Since they integrated the Merc forum over here, I've just been putting updates for the motor there.

Take care of yourself. I bet in another week you'll be able to lift 5#s, another couple more weeks and you'll be right back at it.

Frank

Please Log in or Create an account to join the conversation.

Re:Progress on my 14T 14 years 9 months ago #1927

  • MarkS
  • MarkS's Avatar
  • Offline
  • Moderator
  • Moderator
  • Posts: 5348
  • Karma: 118
  • Thank you received: 5
I finally figured out the twin threads, thought I was the one goin' goofey on paint fumes for a while there! In sunlight, the clear coat is going to make that metallic paint POP, my friend.

I'm guilty of "coveting thy neighbor's workmanship", not to sound sacrilegious I hope.

Please Log in or Create an account to join the conversation.

Mark

Re:Progress on my 14T 14 years 9 months ago #1934

I'm so enthused to be doing something for my boat it's not even funny Mark. Ever since I bought this boat, I've had major problems every year that have kept me from it. I've learned not to make predictions anymore. Everything I do now I do much slower. The amount of work (time?) necessary to finish the boat has become daunting. Ergo, I strike while the iron is hot.

I hope to at least start getting the motor back together this coming weekend. I need to re-wire some parts of the PT&T, then need to adapt it to my motor. More than enough to do!

Based on my prior experience, I assume you are doing better and better each day right?

Frank

Please Log in or Create an account to join the conversation.

Re:Progress on my 14T 14 years 9 months ago #1945

  • MarkS
  • MarkS's Avatar
  • Offline
  • Moderator
  • Moderator
  • Posts: 5348
  • Karma: 118
  • Thank you received: 5
Oh you are so right on, the enthusiasm continues as if we were still twenty something, but the physical restrictions of becoming older (and hopefully wiser) must be dealt with. "Allnighters" in the garage working on hotrods were a part of life, but now a few hours here and there as possible are a more realistic goal. :)

I think the progress on your project is commendable, I'm quite envious. Wiring has never been one of my strong suites, but after the harness repairs on my 700 FGS, I guess I've learned enough to get by marginally. The Glastron needs much work in this area, but I'm putting that off until the engine tune up work is completed.

Right now everything is on hold until the wounds from surgery heal, so the frustration factor is about a 9.5! I am feeling a little better every day, you're right on the money there. I should be glad it wasn't worse, laying in the hospital bed for three days waiting for an O.R. opening could have been tragic, since it turns out part of my intestine was trapped outside the abdomen! I'm going to try it today without the pain meds, they seem to be limiting my already minimal common sense. I did manage to go to work yesterday for a few hours to get some paperwork caught up, so we'll take it one day at a time.

Thanks, buddy!

Please Log in or Create an account to join the conversation.

Mark

Re:Progress on my 14T 14 years 9 months ago #1949

Ten years ago it wasn't a problem at all to be up all night working steadily on my hot rod Mark, a much more complicated project than this boat. The boat is taking a lot longer to get done. Therein lies my story.

Wiring is easy. Get a good wire crimper (my good one is a Craftsman), make sure your crimps hold (I tug hard on them to be sure), then get used to using Liquid Electrical Tape. The stuff is amazing. I drip a bit from the can top brush into the terminal end to cover the wire, then a bit on the other wire end to fill up the plastic sheath of the terminal, and it seals for all time. Well, I haven't tested that all time thing, but anything I've used it on over the last 15 to 20 years stayed sealed.

Good luck with coming off the pain meds. That's the first step. You'll be fine.

Frank

Please Log in or Create an account to join the conversation.

Paln for my Power Cat 14T 14 years 9 months ago #2525

I have a plan:

Integrate power trim & tilt (by end of March)

Box top lip on the hull on the starboard bow needs to be rebuilt (part of a day)

Deck port side needs more work (not flat enough) (couple days, start when glass hull lip)

At least two more coats of primer, then two or three (?) top coats (weekend?)

Attach deck to hull with new rub rail and fasteners (another weekend?)

Glass interior seam (couple evenings?)

Install motor and controls (evenings)

Install cleats and lights (evenings)

Run wiring (weekend)

Install seats (day)

Buy battery, go boating?

Wish me luck folks.

Frank

Please Log in or Create an account to join the conversation.

Re:Progress on my Power Cat 14T 14 years 9 months ago #2526

  • MarkS
  • MarkS's Avatar
  • Offline
  • Moderator
  • Moderator
  • Posts: 5348
  • Karma: 118
  • Thank you received: 5
Good luck, Frank. You're coming down the home stretch now man. The fact that you have your tasks laid out in order indicates your organizational skills are in fact up there with the high quality of your workmanship, so the finish line is definitely in sight. Keep us posted on your progress, buddy.

Please Log in or Create an account to join the conversation.

Mark

Re:Progress on my Power Cat 14T 14 years 9 months ago #2527

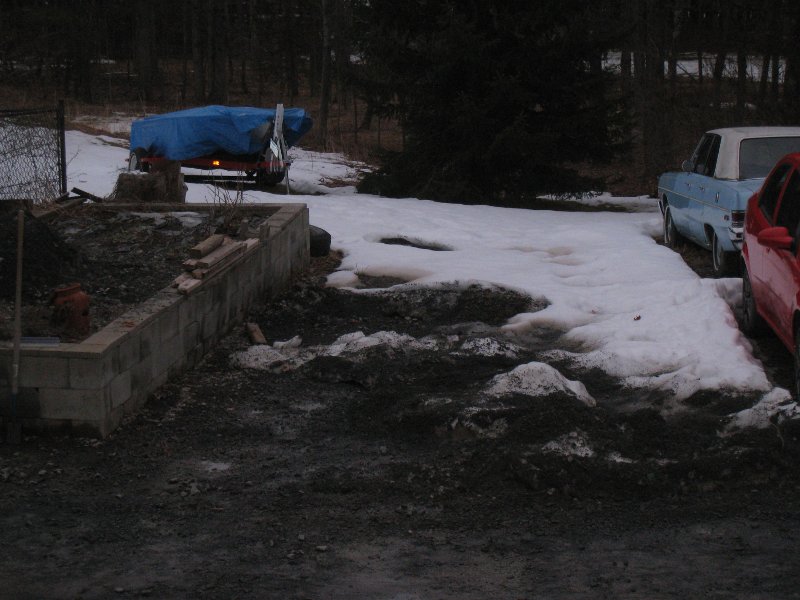
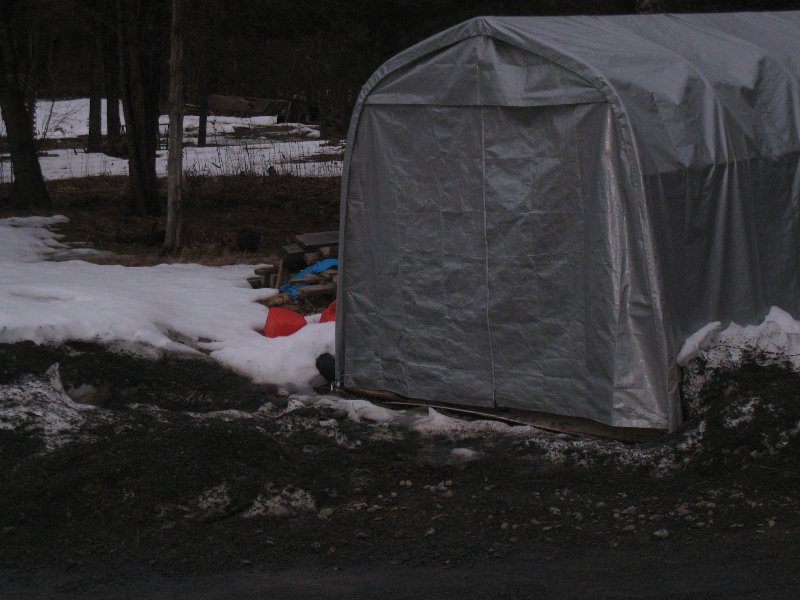
Thanks Mark. So much of it depends on weather. In the short term, more snow has to melt for me to even get at the boat. Unfortunately, the only place my guy could plow snow was right where I need to go to get at the boat. On top of that, all this plowed up snow is in a sun shadow, so will be about the last snow to melt. Once I can get at the boat, and the temps stay above 50, I can do the early glass and fill work. This weekend I'll work at getting the garage ready to turn into a temporary paint booth. My back hasn't been great this week, so I need to always keep that in mind too.

Glad to hear you're doing better. Won't be long till you're back at it!

TGIF

Frank


Can't get to the hot rod either...

Attachments:

Please Log in or Create an account to join the conversation.

Got my work cut out for me! 14 years 8 months ago #3648

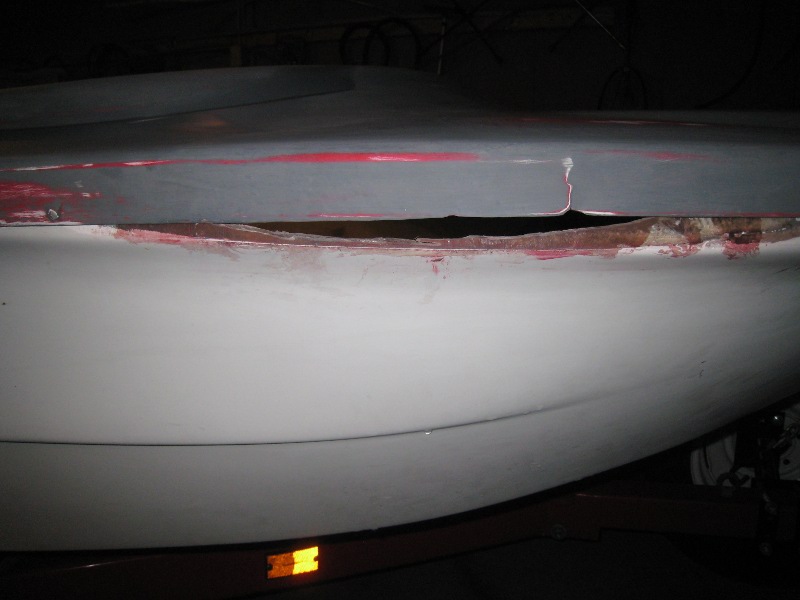
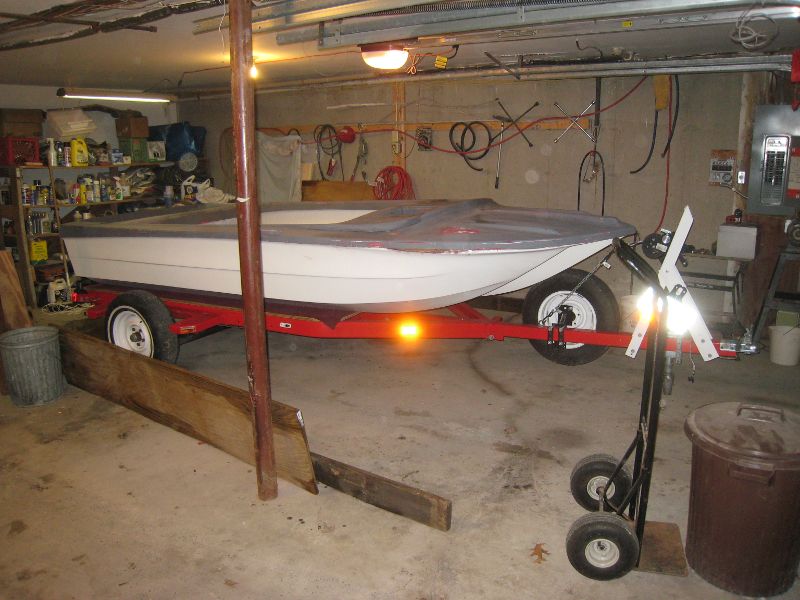
No pun intended. You can see in the "repair" pic where I had to cut out part of the hull lip because it fit the deck too tight. That's on for tomorrow, and maybe a bit more work, like dealing with places that got wet over the winter and the primer blistered. Finally, the space between the two metal poles and the other wall is going to be my temporary paint booth in a few weeks.

I'll have some full dress shots of the merc probably Sunday I'll share with you folks. Taking care of a little detail work.

Frank


Attachments:

Please Log in or Create an account to join the conversation.

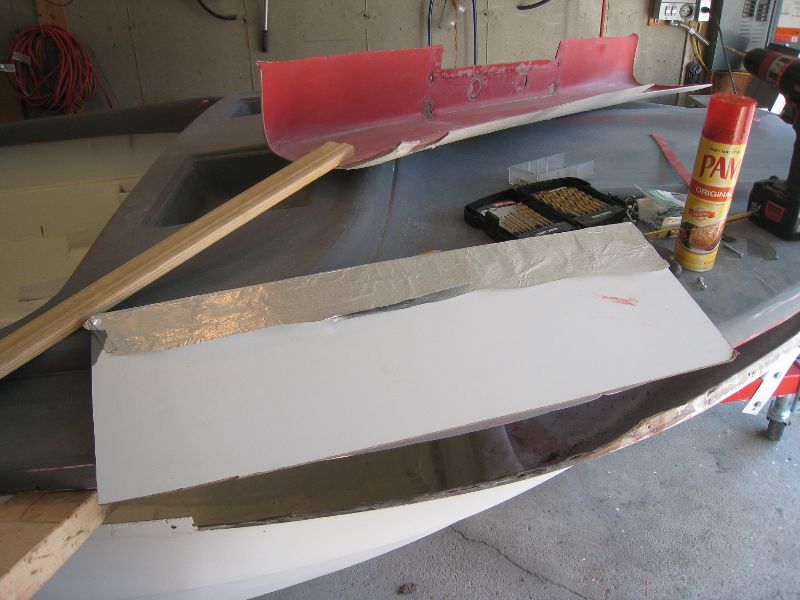
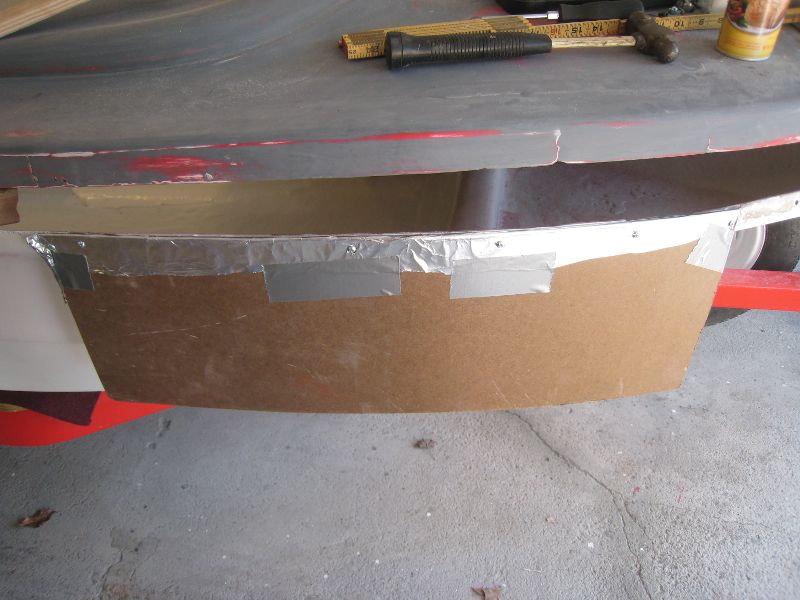
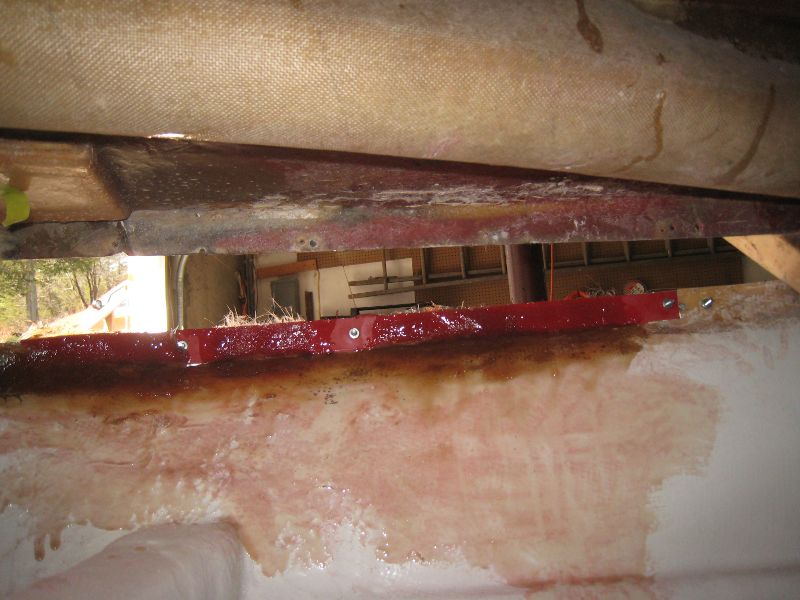
Rebuilding hull lip 14 years 8 months ago #3677

Maybe this will work. Hull lip was too far "out" for the rub rail to fit the deck lip. So I cut a piece of glass out of my old splash pan, fitted it to the cut out hull lip area, held it in place with a piece of 1/8" hardboard covered in foil sprayed with PAM for my mold release, screwed everything together to hold it in place, and just now glassed it in. Maybe it will work, maybe not. If not, need another brilliant idea.

My problem with fitment here was that the boat had been smashed at this location and very poorly repaired. When I removed the deck, I fixed the smashed area in the hull separate from the deck, not thinking that maybe when they got put back together they would be too tight (or too loose). Well, they were too tight over that entire repaired area. I been at this pretty much all morning!

I'll let y'all know if this works.

Frank


Attachments:

Please Log in or Create an account to join the conversation.

Re:Progress on my Power Cat 14T 14 years 8 months ago #3684

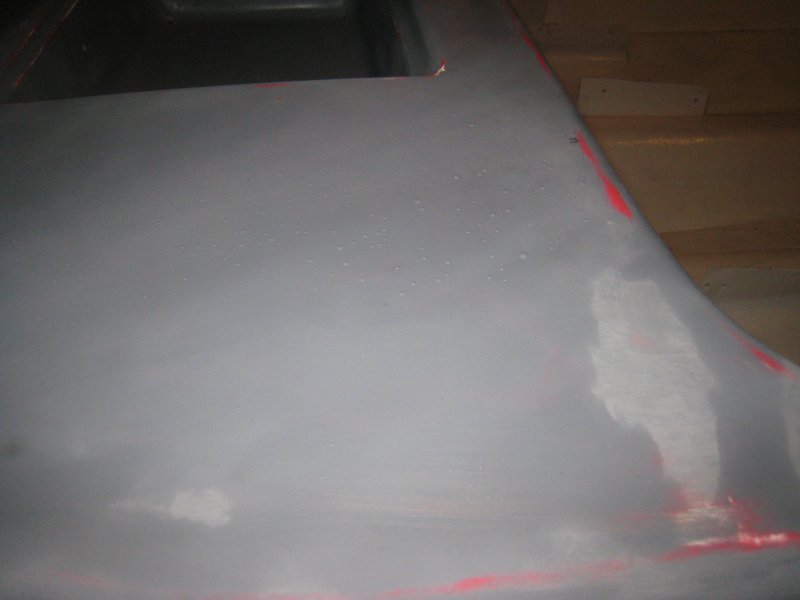
Well, after spending nearly all morning trying to figure out the best way to fix the boat, looks as though I was not successful. I've run out of ideas I guess. Wish I could get it right, but nope. Plus the whole deck needs to be sanded again (moisture got under the primer), and I don't know if I have it in me. Bah.

Frank

Please Log in or Create an account to join the conversation.

Re:Progress on my Power Cat 14T 14 years 8 months ago #3687

Frank, you're on the right track, but instead of trying to patch in an old piece, you need to built it up with new material.

The idea you had for a "form" is the part that is on the right track.

You need to build the form and screw it to the outside of the hull. The best material to use is thin melamine paneling like they use for the cheap wall paneling. This material needs hardly any release agent which is why all the fabricators use it. You will want to wax it anyway, and or use PVA release agent. When you wax it just make sure you let the wax dry before you start coating. I sometimes spray some PVA on it as well, but this is probably overkill.

You will need to taper the inside of the adjoining hull material and step your build up material as for any other repair.

You can then start your layup with gel coat if desired, (it will make a nice smooth waterproof outer layer even though you are painting over it). After the gel has started to kick, a thin layer of mat will be next followed by alternating layers of cloth and mat. Build up no more than four layers at a time so as not to cook the resin. You may want to end up with some heavy roving for one of the inner layers, followed by mat for the last layer to keep it all water tight.

edit: You know, looking at it again, you could just do this after the lid is on and save yourself the trouble of making the form. You're planning on glassing it together anyway right?

Please Log in or Create an account to join the conversation.

Dave in sunny Buffalo


Classic Fiberglass Boat Owners Association:
www.classicfiberglasboats.com/

Re:Progress on my Power Cat 14T 14 years 8 months ago #3695

Dave, that is melamine. The piece I fit in to where I had cut the hull lip out was screwed to the melamine and the melamine was screwed on both ends to good hull lip forming a curve that matched right up with the curve of the hull. Maybe it's not the hull lip I need to rebuild, maybe it's the deck lip. I have no clue. Plus the deck lip hardly fits down over the hull lip on the starboard side. I think maybe I can force it when the time comes to get the rub rail on IF I can get the rub rail on. And yes, I fully plan to glass the interior seam with probably 2-3 layers of mat, each successive one being a bit wider than the previous.

Guess I need to sleep on it, as I'm not happy, and feel like saying heck with it. All the time I've spent on this boat, all the work and effort, and come so close to the end, and I'm just at a loss. It was more of a project than I ever should have taken on. The optimism of ignorance...

I just got back from a 2 hour cruise in my hot rod. I built that from scratch and been driving it since '01. Least I got one summer toy that works!

Thanks for the ideas. We'll see what happens.

Frank

Please Log in or Create an account to join the conversation.

Re:Progress on my Power Cat 14T 14 years 8 months ago #3697

  • MarkS
  • MarkS's Avatar
  • Offline
  • Moderator
  • Moderator
  • Posts: 5348
  • Karma: 118
  • Thank you received: 5
Don't give up Frank, you're too close to being done! I know you're frustrated, sometimes taking a break from the project is necessary to maintain your sanity, buddy. Wish I knew something about fiber-glassing, I'd drive up and help you. (I don't know squat about it, except I love these boats. ;) ) Hope you get it fingered out pal.

Please Log in or Create an account to join the conversation.

Mark

Re:Progress on my Power Cat 14T 14 years 8 months ago #3732

On top of fitment problems Mark, all the primer is screwed up, needs to be completely sanded down, maybe worse (i.e., more fill). Guess I'll go out and see how long my shoulders can take sanding this a.m.

Just got the pt&t back together, new "down" solenoid, everything works the way it's supposed to now. Just need a boat to hang it on.

Frank

Please Log in or Create an account to join the conversation.

Time to create page: 0.340 seconds

Donate

Please consider supporting our efforts.

Glassified Ads

1956 Lonestar Meteor
( / Boats)

1956 Lonestar Meteor
12-24-2024

Mercury outboard
( / Engines)

noimage
11-03-2024

Classic Mercury Outboard Motors
( / Engines)

Classic Mercury Outboard Motors
10-18-2024

FG Login

FiberGoogle

Who's Online

We have 10235 guests and no members online