Welcome, Guest
Username: Password: Remember me

TOPIC: 115 lower unit changes started

115 lower unit changes started 6 years 4 weeks ago #138305

yes they will. and the shift shaft ext. and water tube ext. and drive shaft ext.

Please Log in or Create an account to join the conversation.

115 lower unit changes started 6 years 4 weeks ago #138306

  • Dr.Go!
  • Dr.Go!'s Avatar Topic Author
  • Offline
  • Contributing Member
  • Contributing Member
  • Posts: 1719
  • Karma: 19
  • Thank you received: 125
Thanks. Was hoping so. If I don’t mess anything up, then maybe I will have an extension kit available if anyone ever needs to go the other way and lengthen one. Not sure anyone does that anymore.

Please Log in or Create an account to join the conversation.

Dr.Go!

115 lower unit changes started 6 years 4 weeks ago #138312

  • 63 Sabre
  • 63 Sabre's Avatar
  • Offline
  • Contributing Member
  • Contributing Member
  • Posts: 4676
  • Karma: 147
  • Thank you received: 167
Great start Mark. Will be following this one. Keep everything you are working on at waist level and they'll be no problems.

Please Log in or Create an account to join the conversation.

115 lower unit changes started 6 years 4 weeks ago #138315

  • Dr.Go!
  • Dr.Go!'s Avatar Topic Author
  • Offline
  • Contributing Member
  • Contributing Member
  • Posts: 1719
  • Karma: 19
  • Thank you received: 125
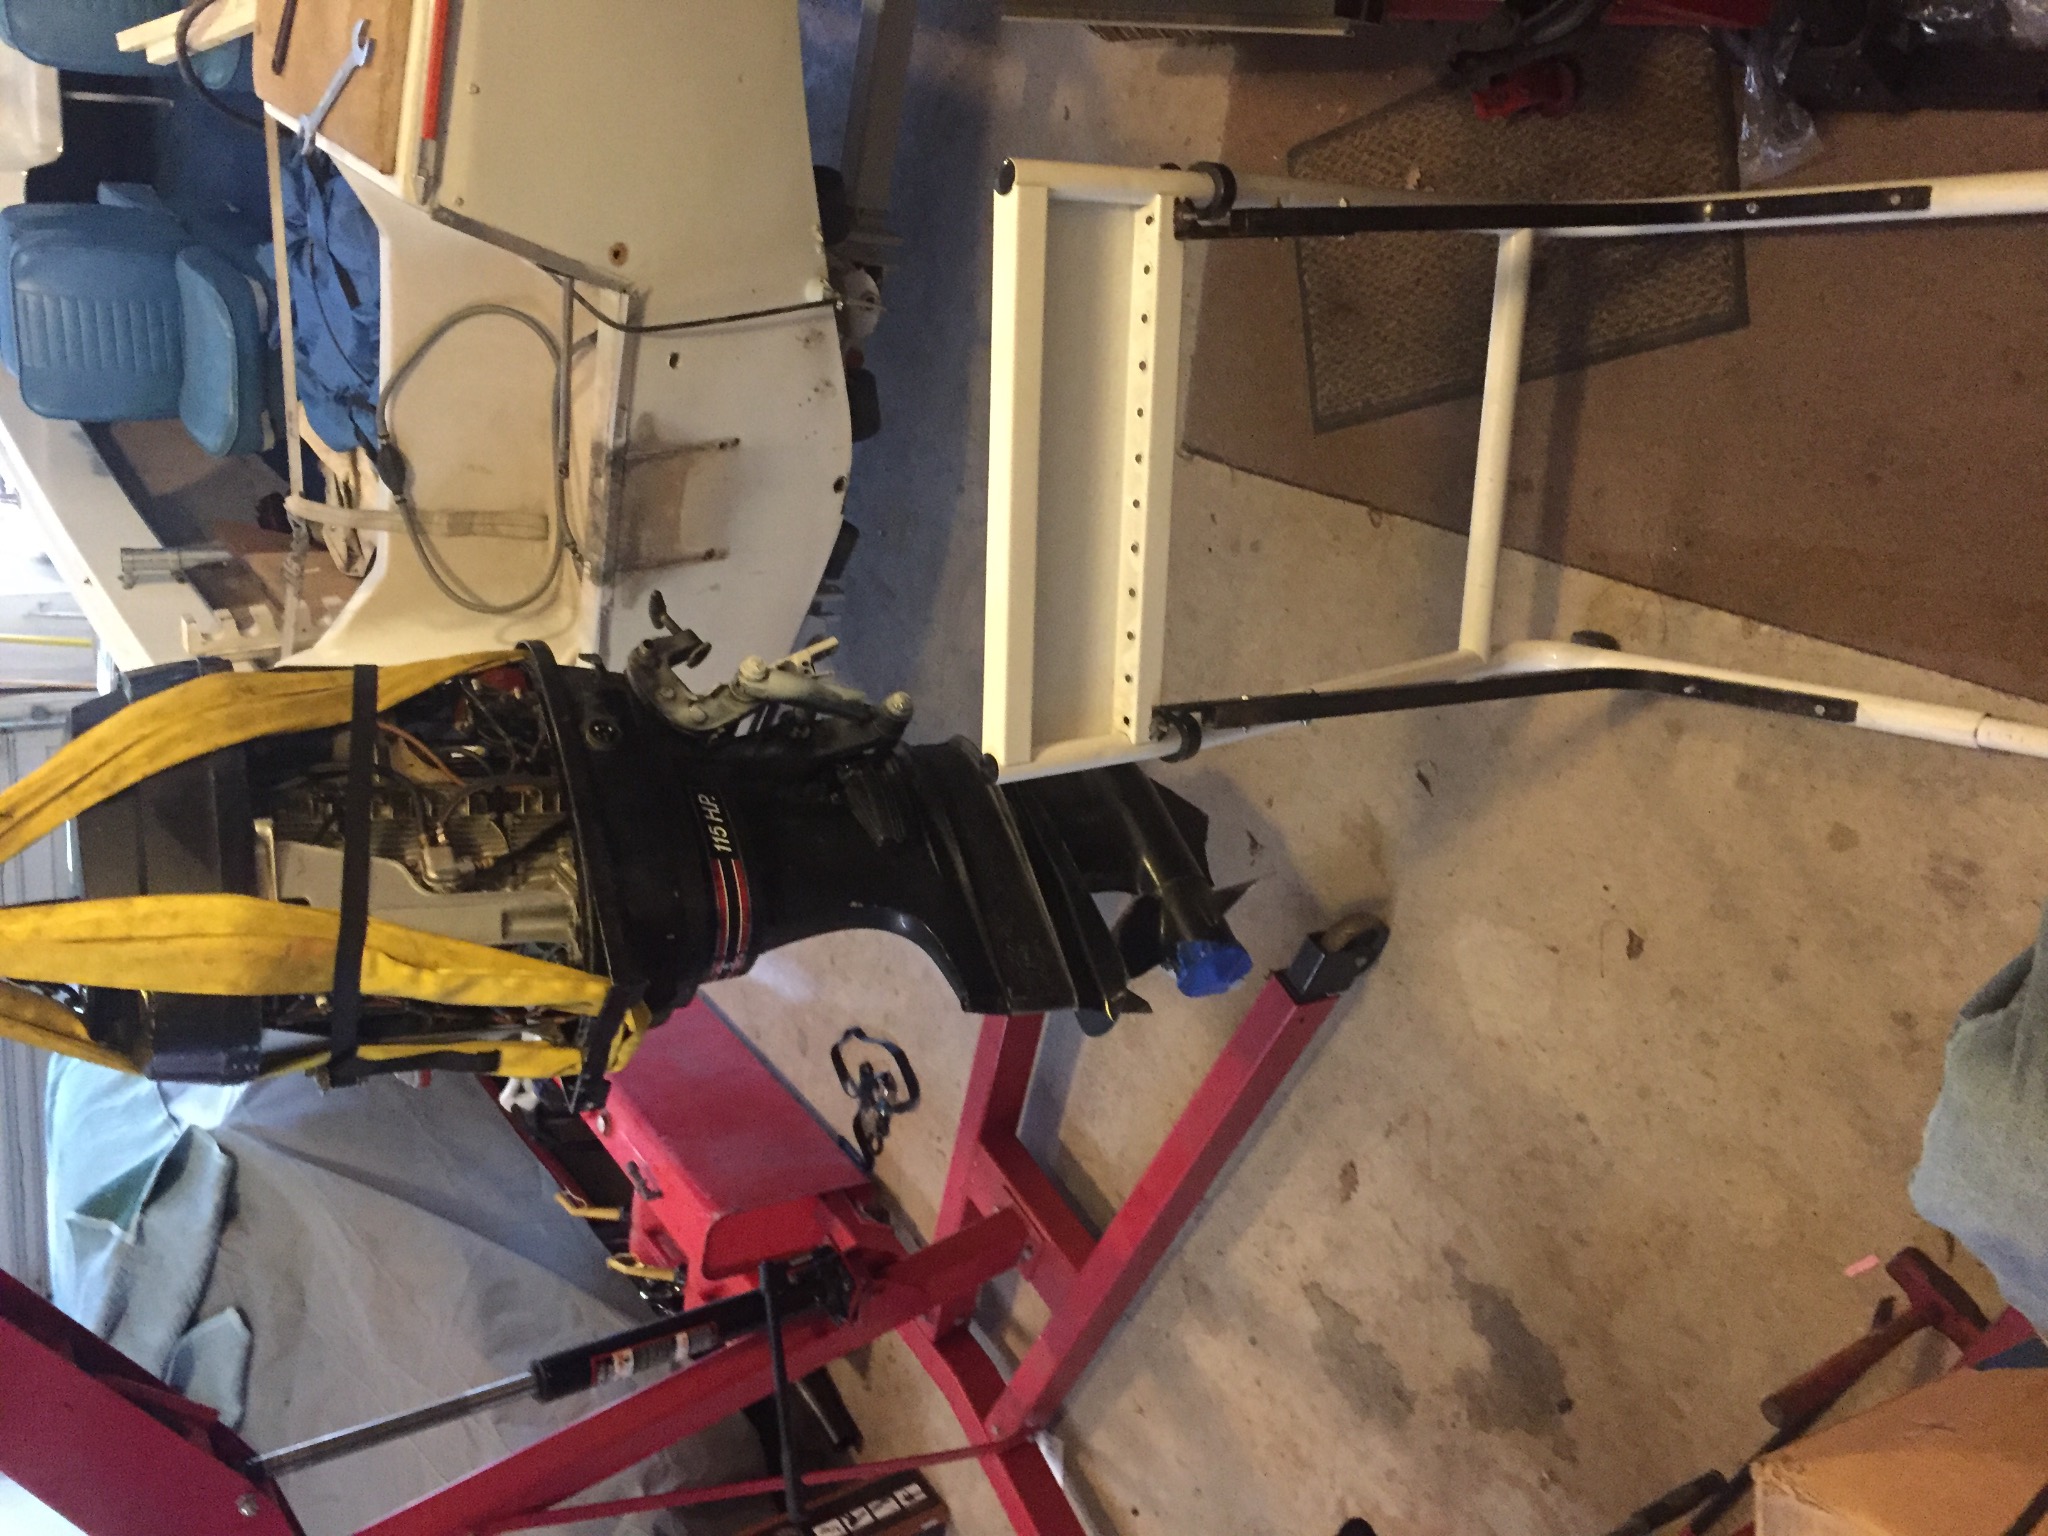
Great tip. I need to clear a path to the vice and use some soft jaw protectors so I don’t put a pattern in the skeg. I think I will spray those faster threads a few times and let it soak before I separate the two. I may have to put a few sandbags in the back of the stand if I need to tilt a bit to remove the lower section so that I don’t do damage with an unexpected face plant off that stand since it will be top heavy. I used a shipping blanket folded 4 Times, then cardboard and last a box with taped bottom with a split in the tape for tip of skeg. That allowed for a controlled decent of the unit without a big crash. Worked nicely.

Please Log in or Create an account to join the conversation.

Dr.Go!

115 lower unit changes started 6 years 4 weeks ago #138320

  • Dr.Go!
  • Dr.Go!'s Avatar Topic Author
  • Offline
  • Contributing Member
  • Contributing Member
  • Posts: 1719
  • Karma: 19
  • Thank you received: 125
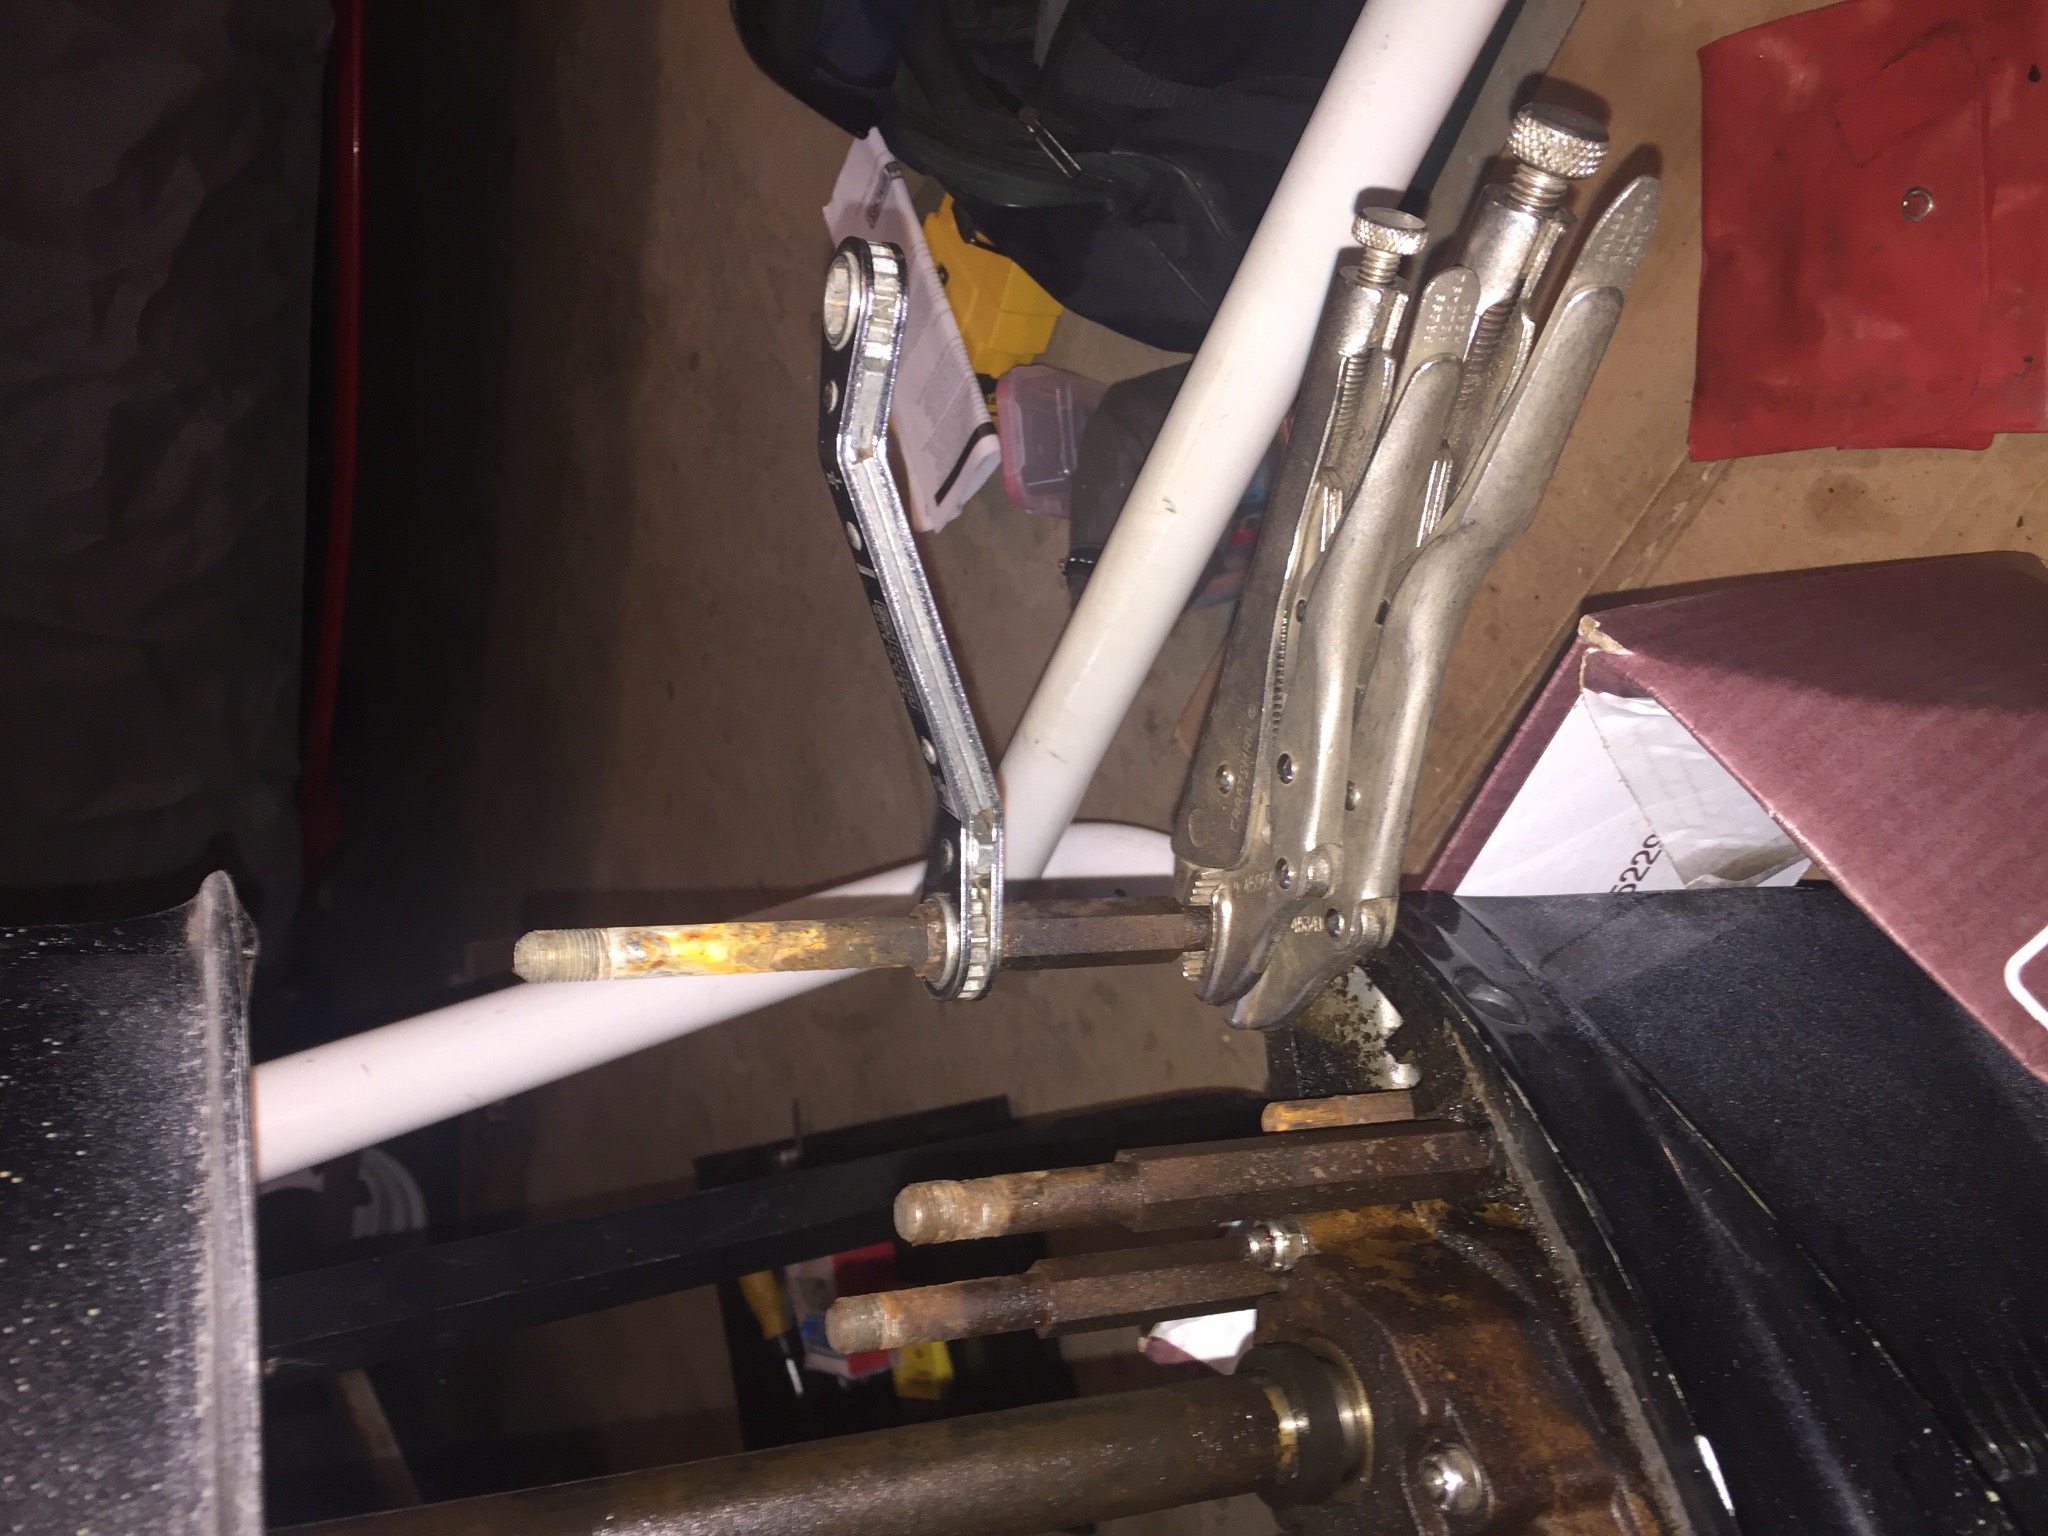
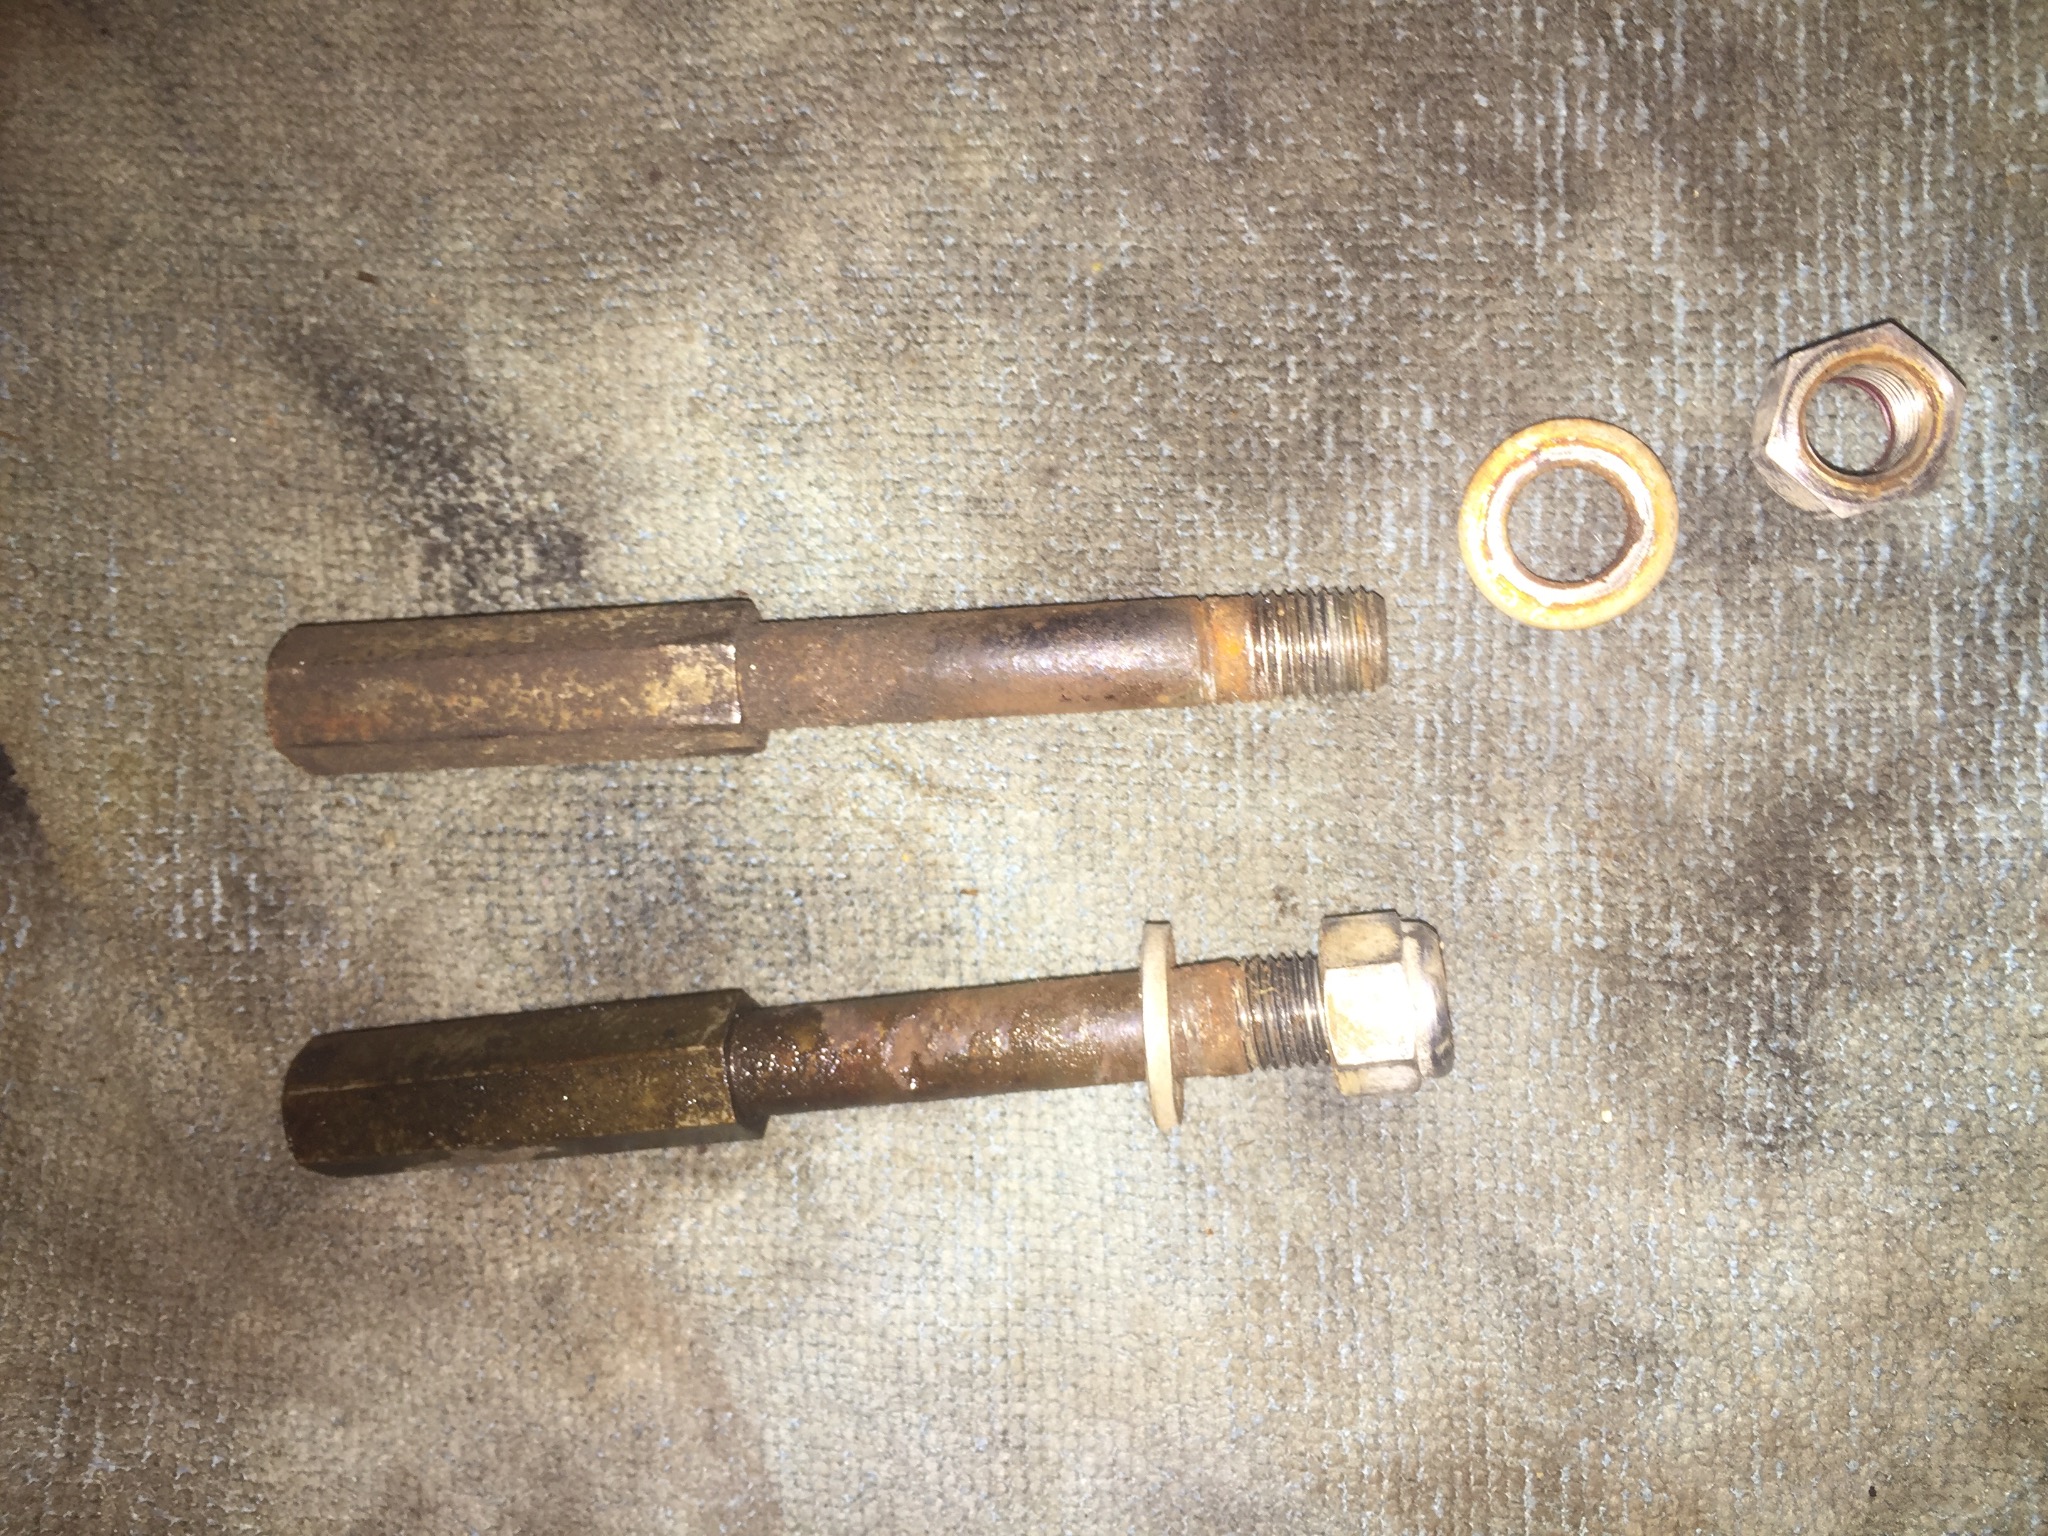
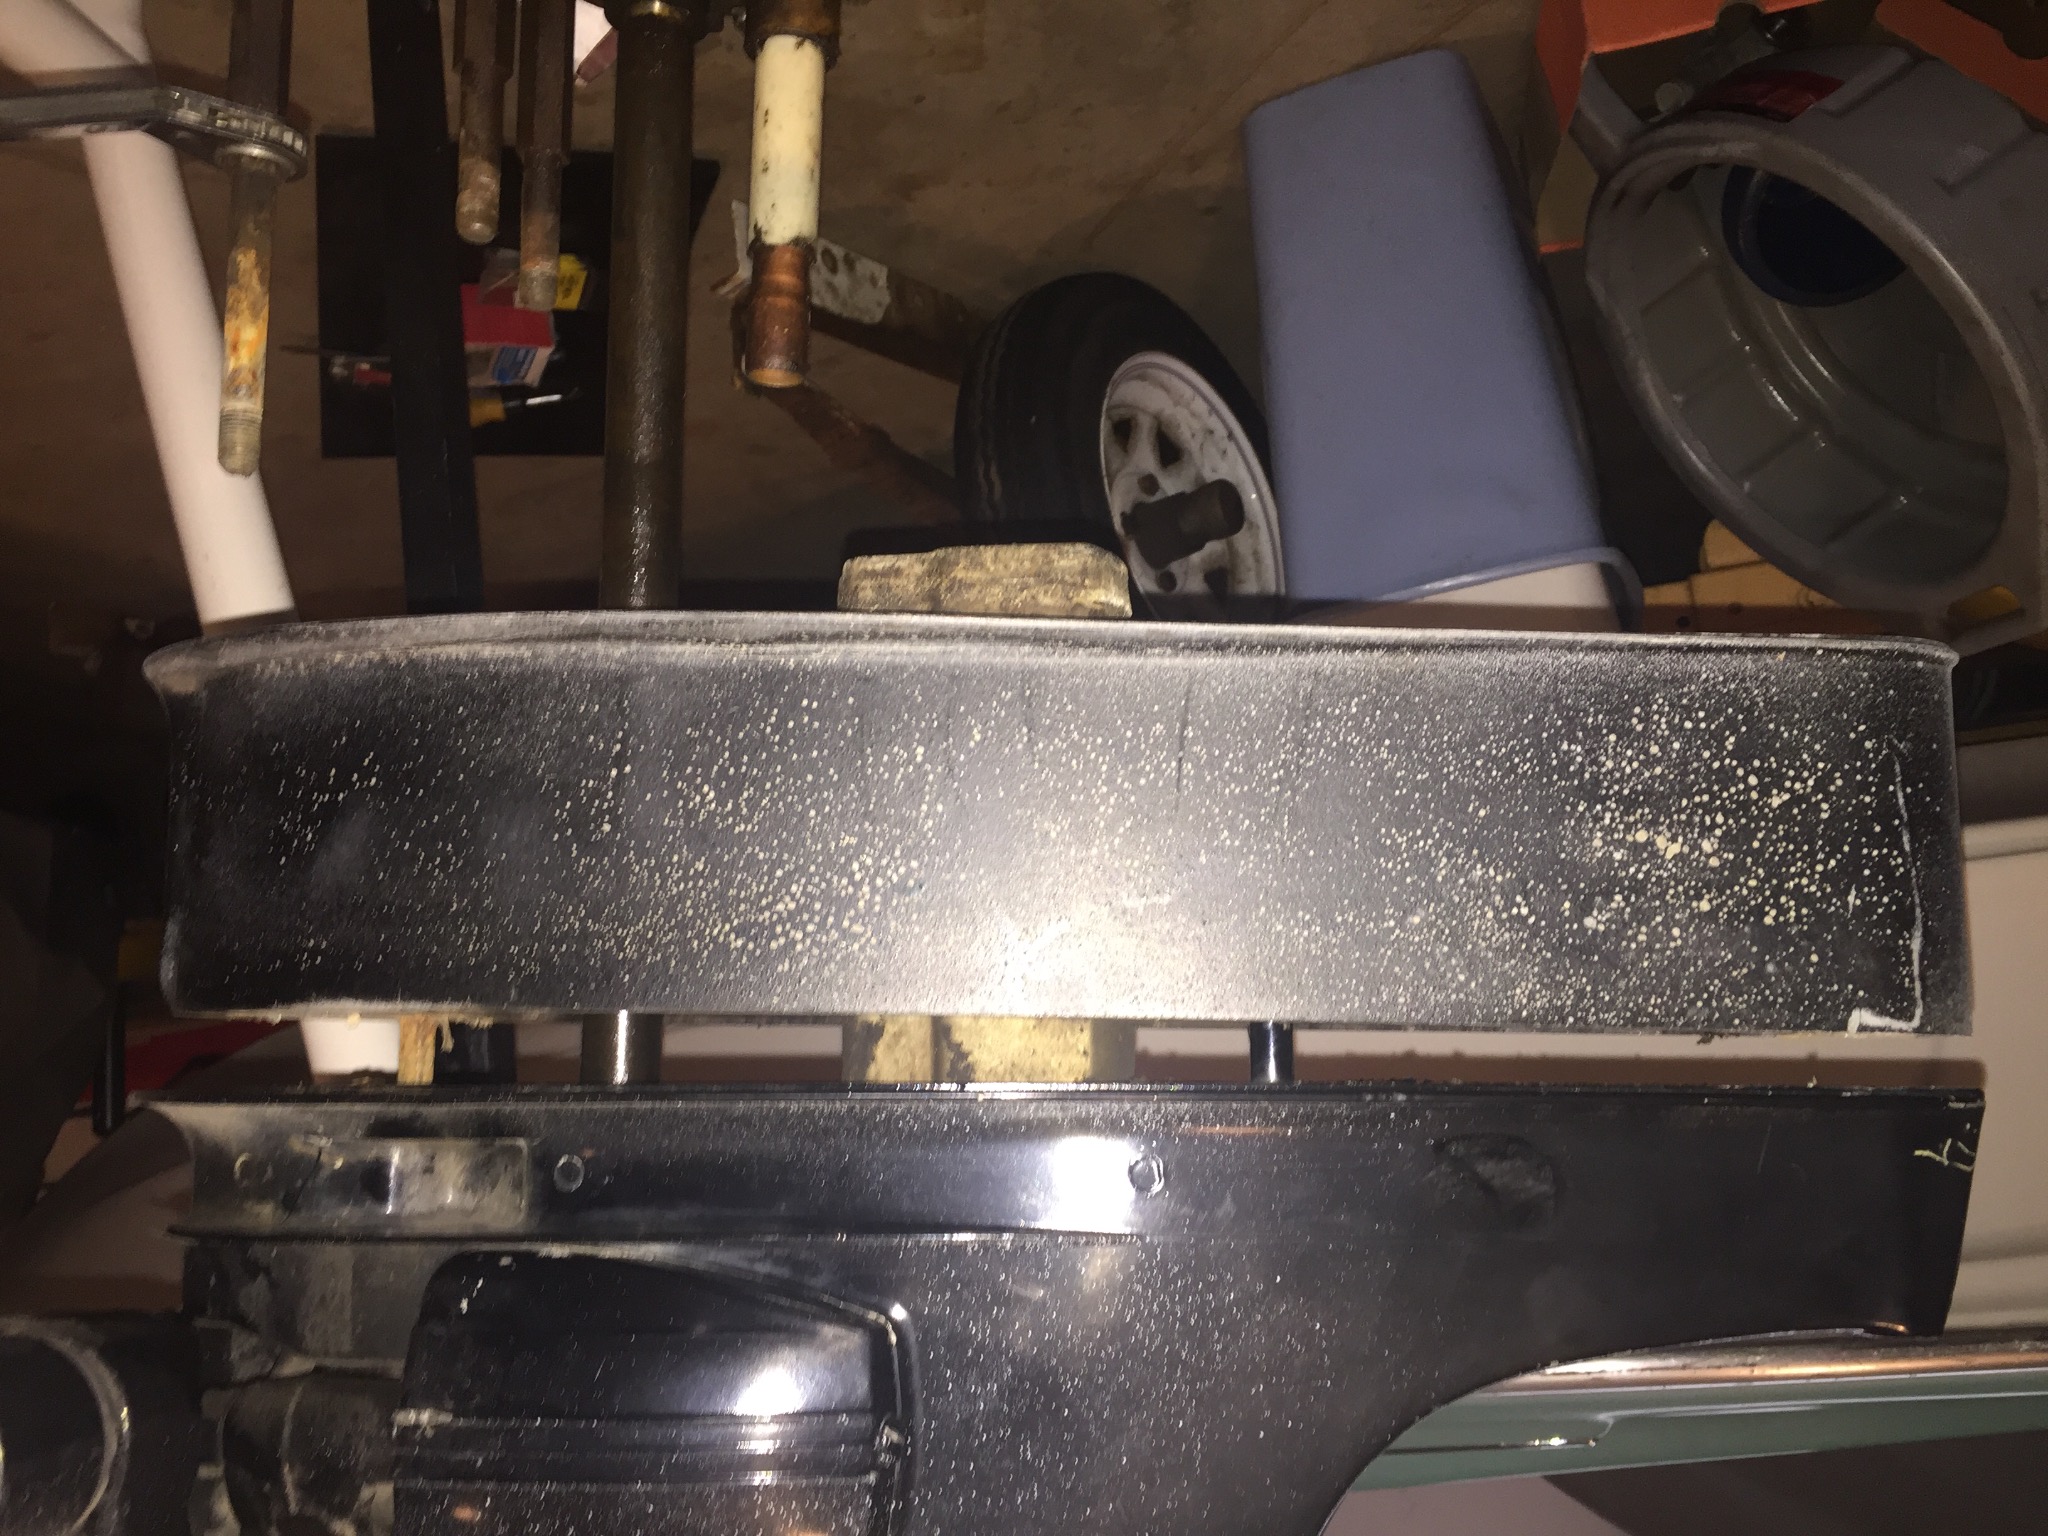
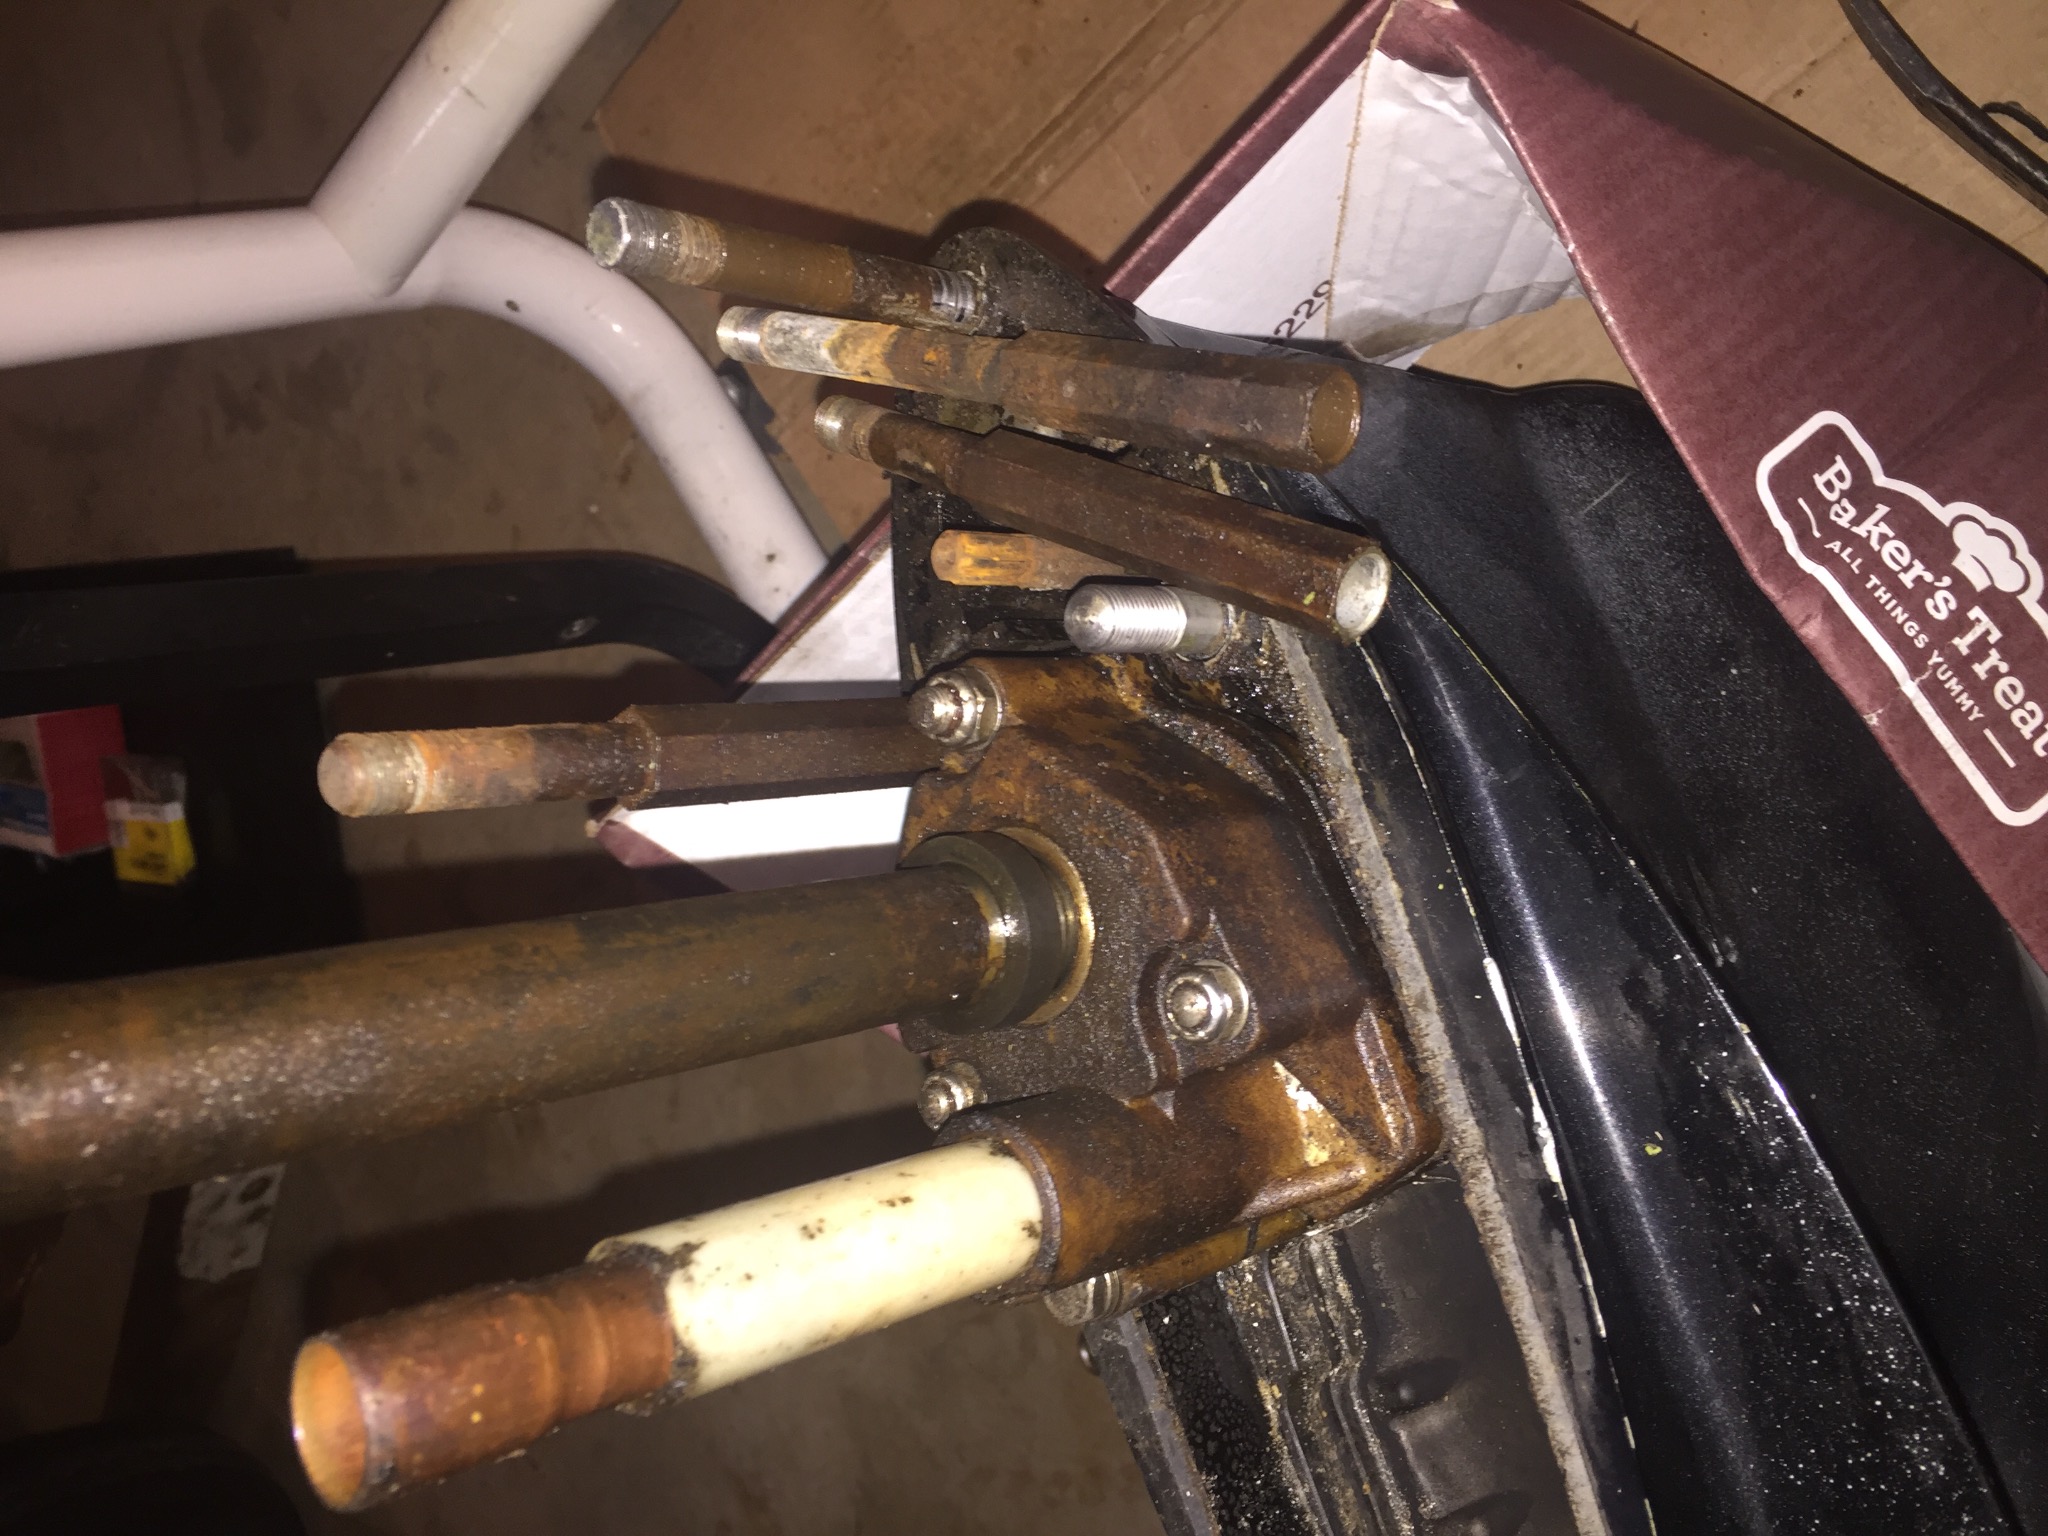
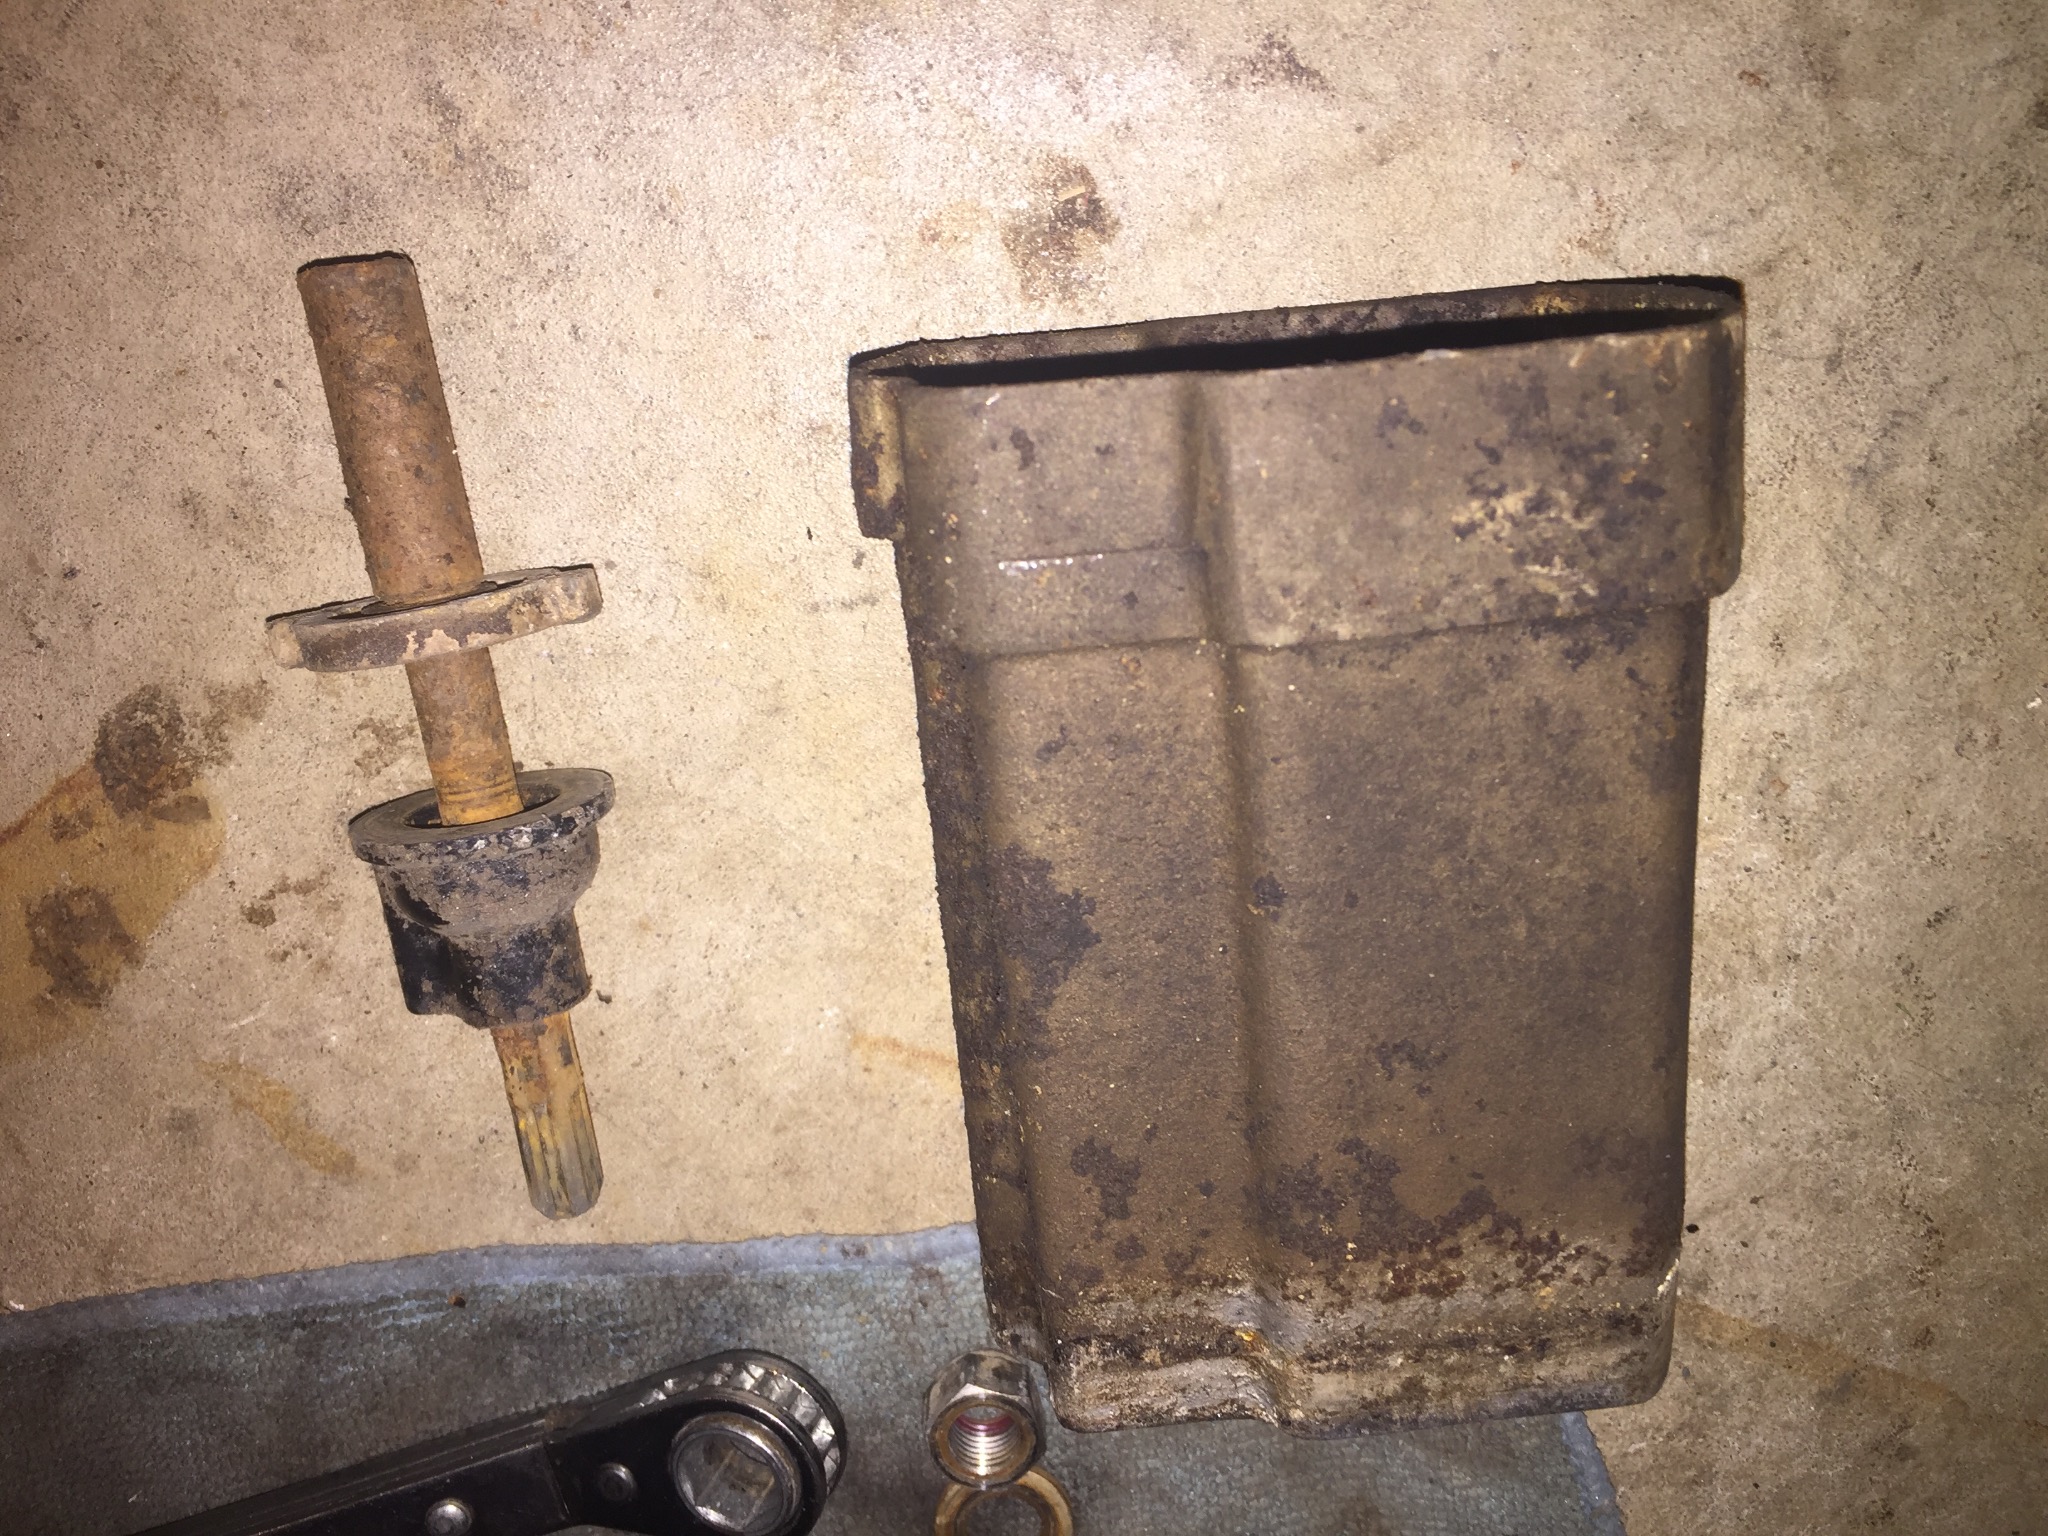
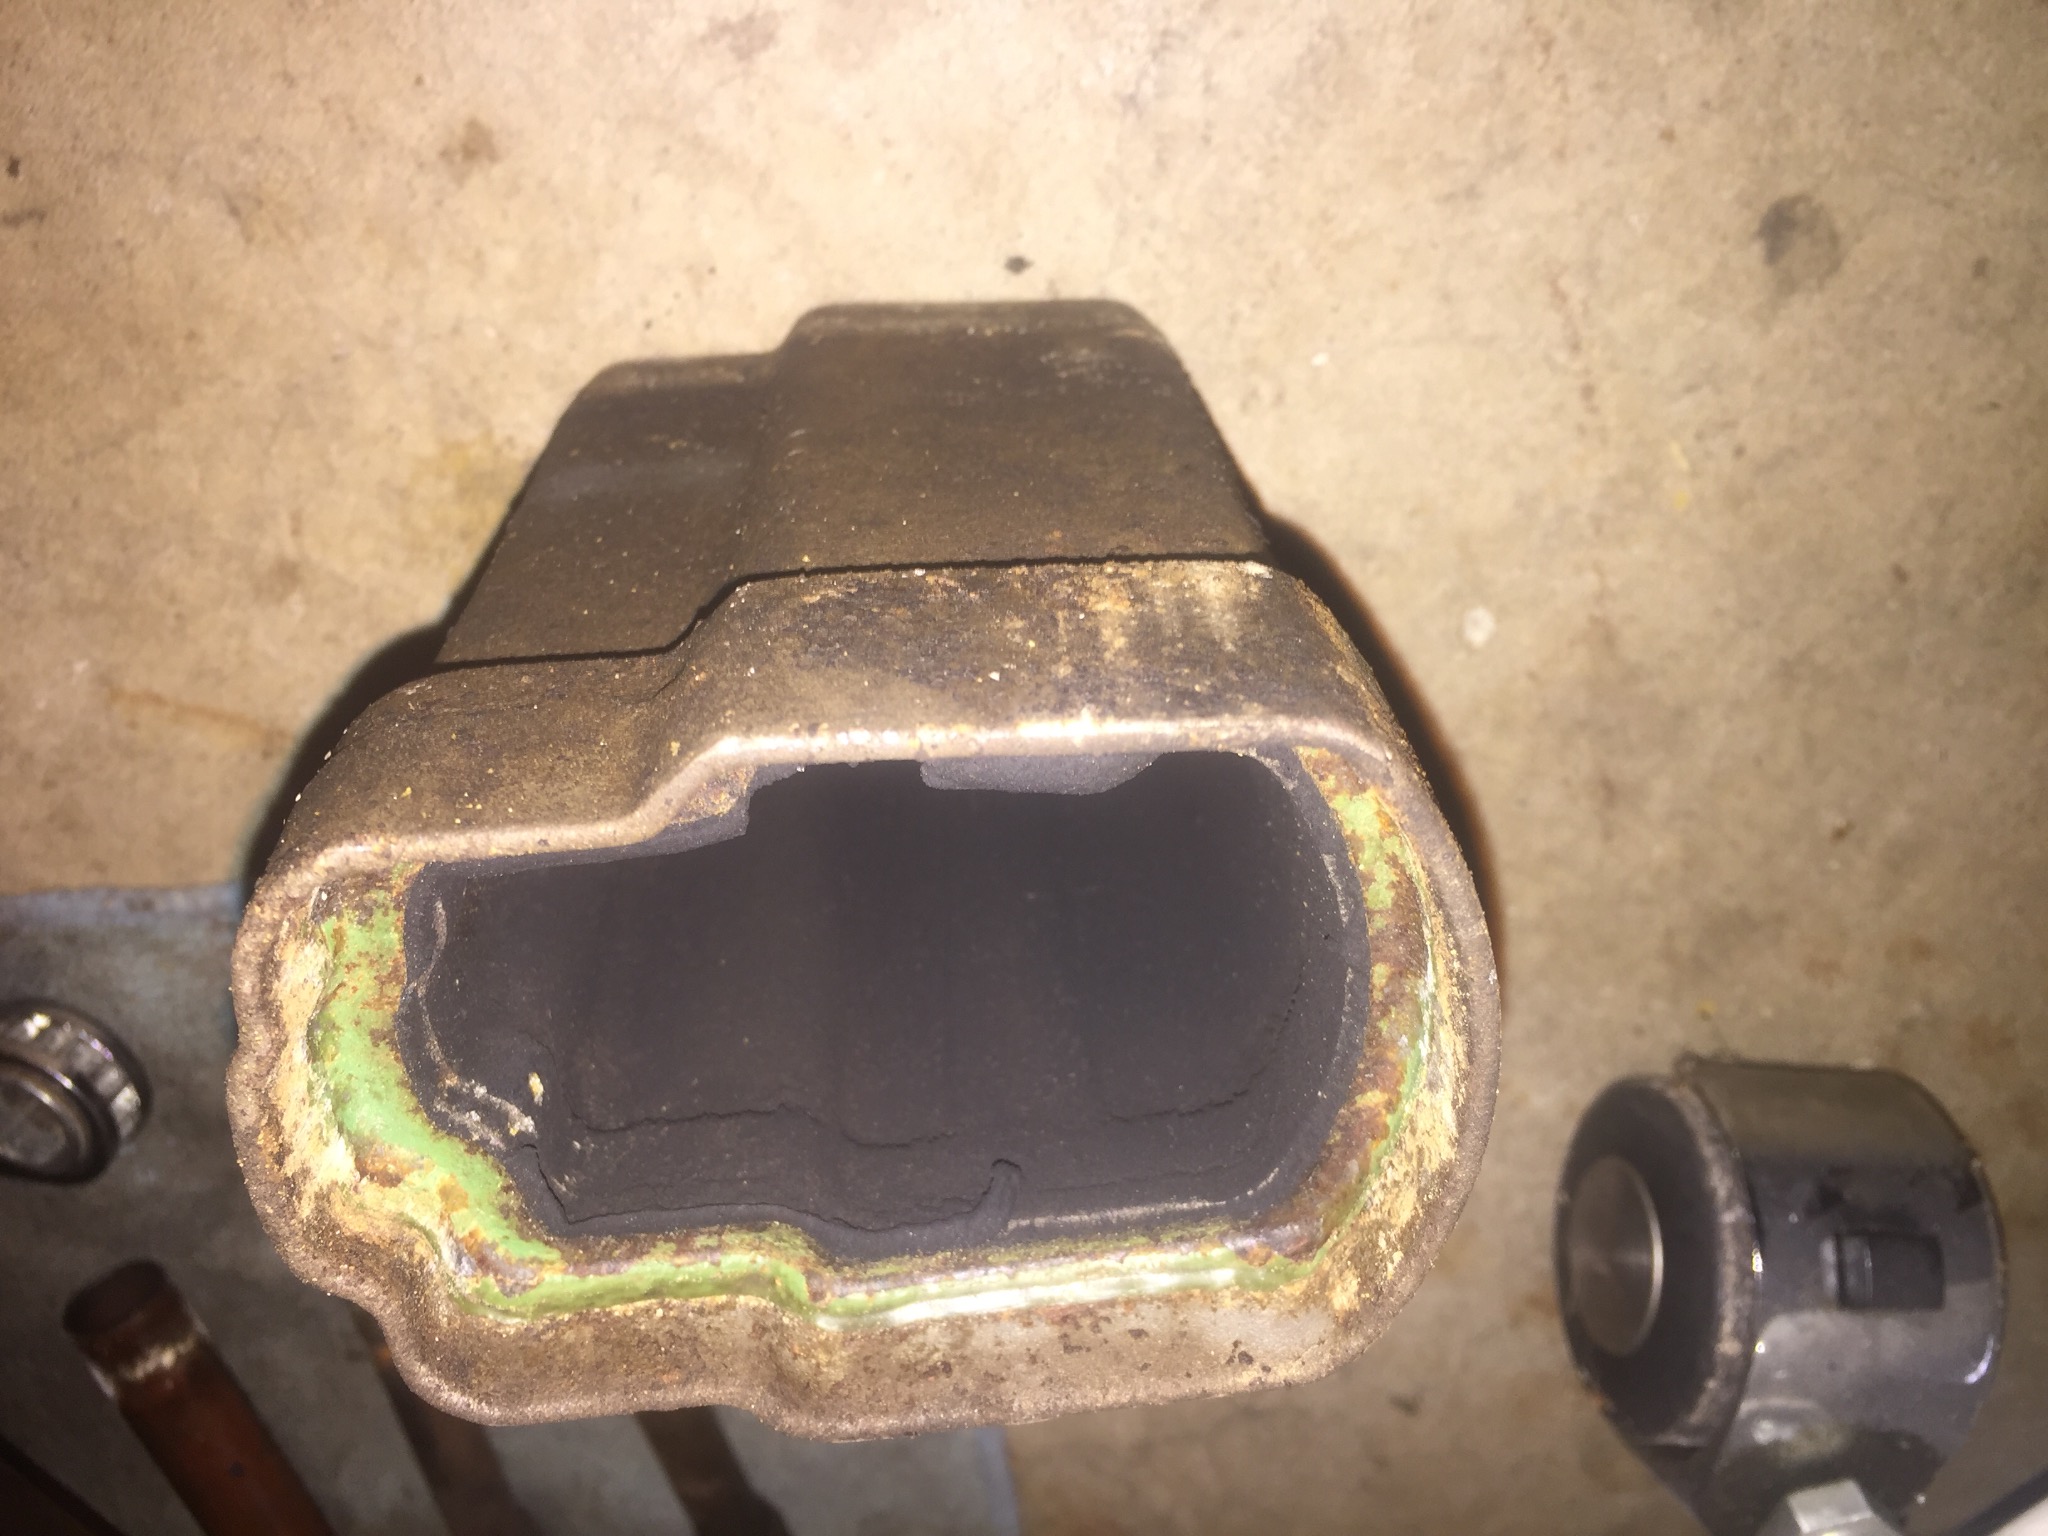
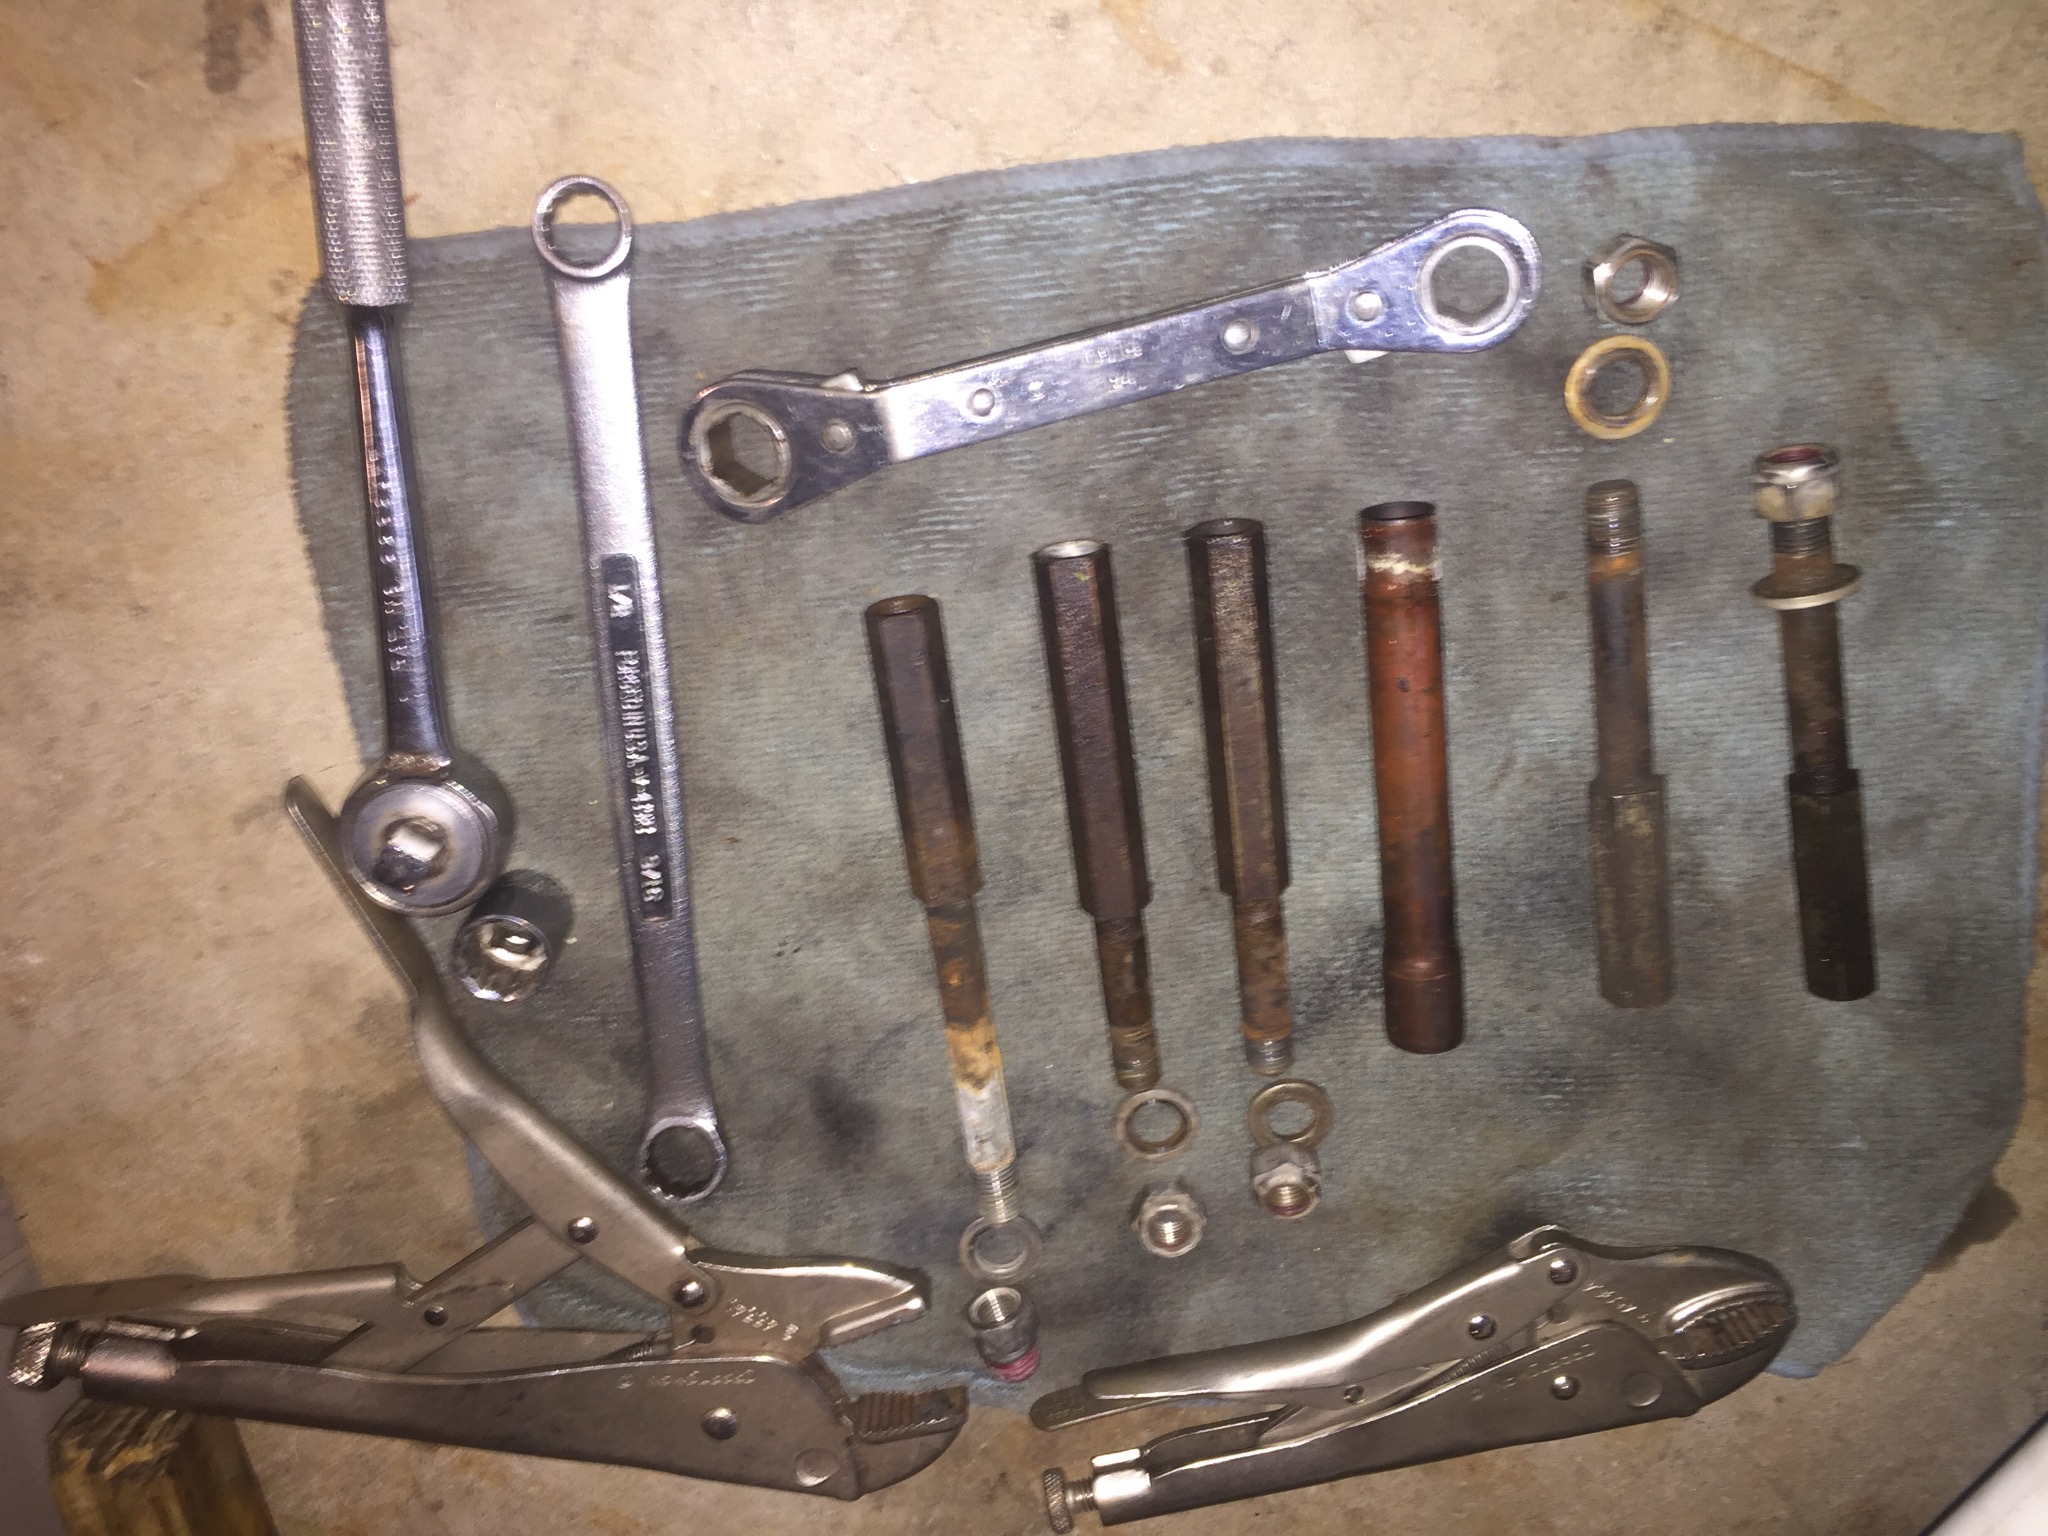
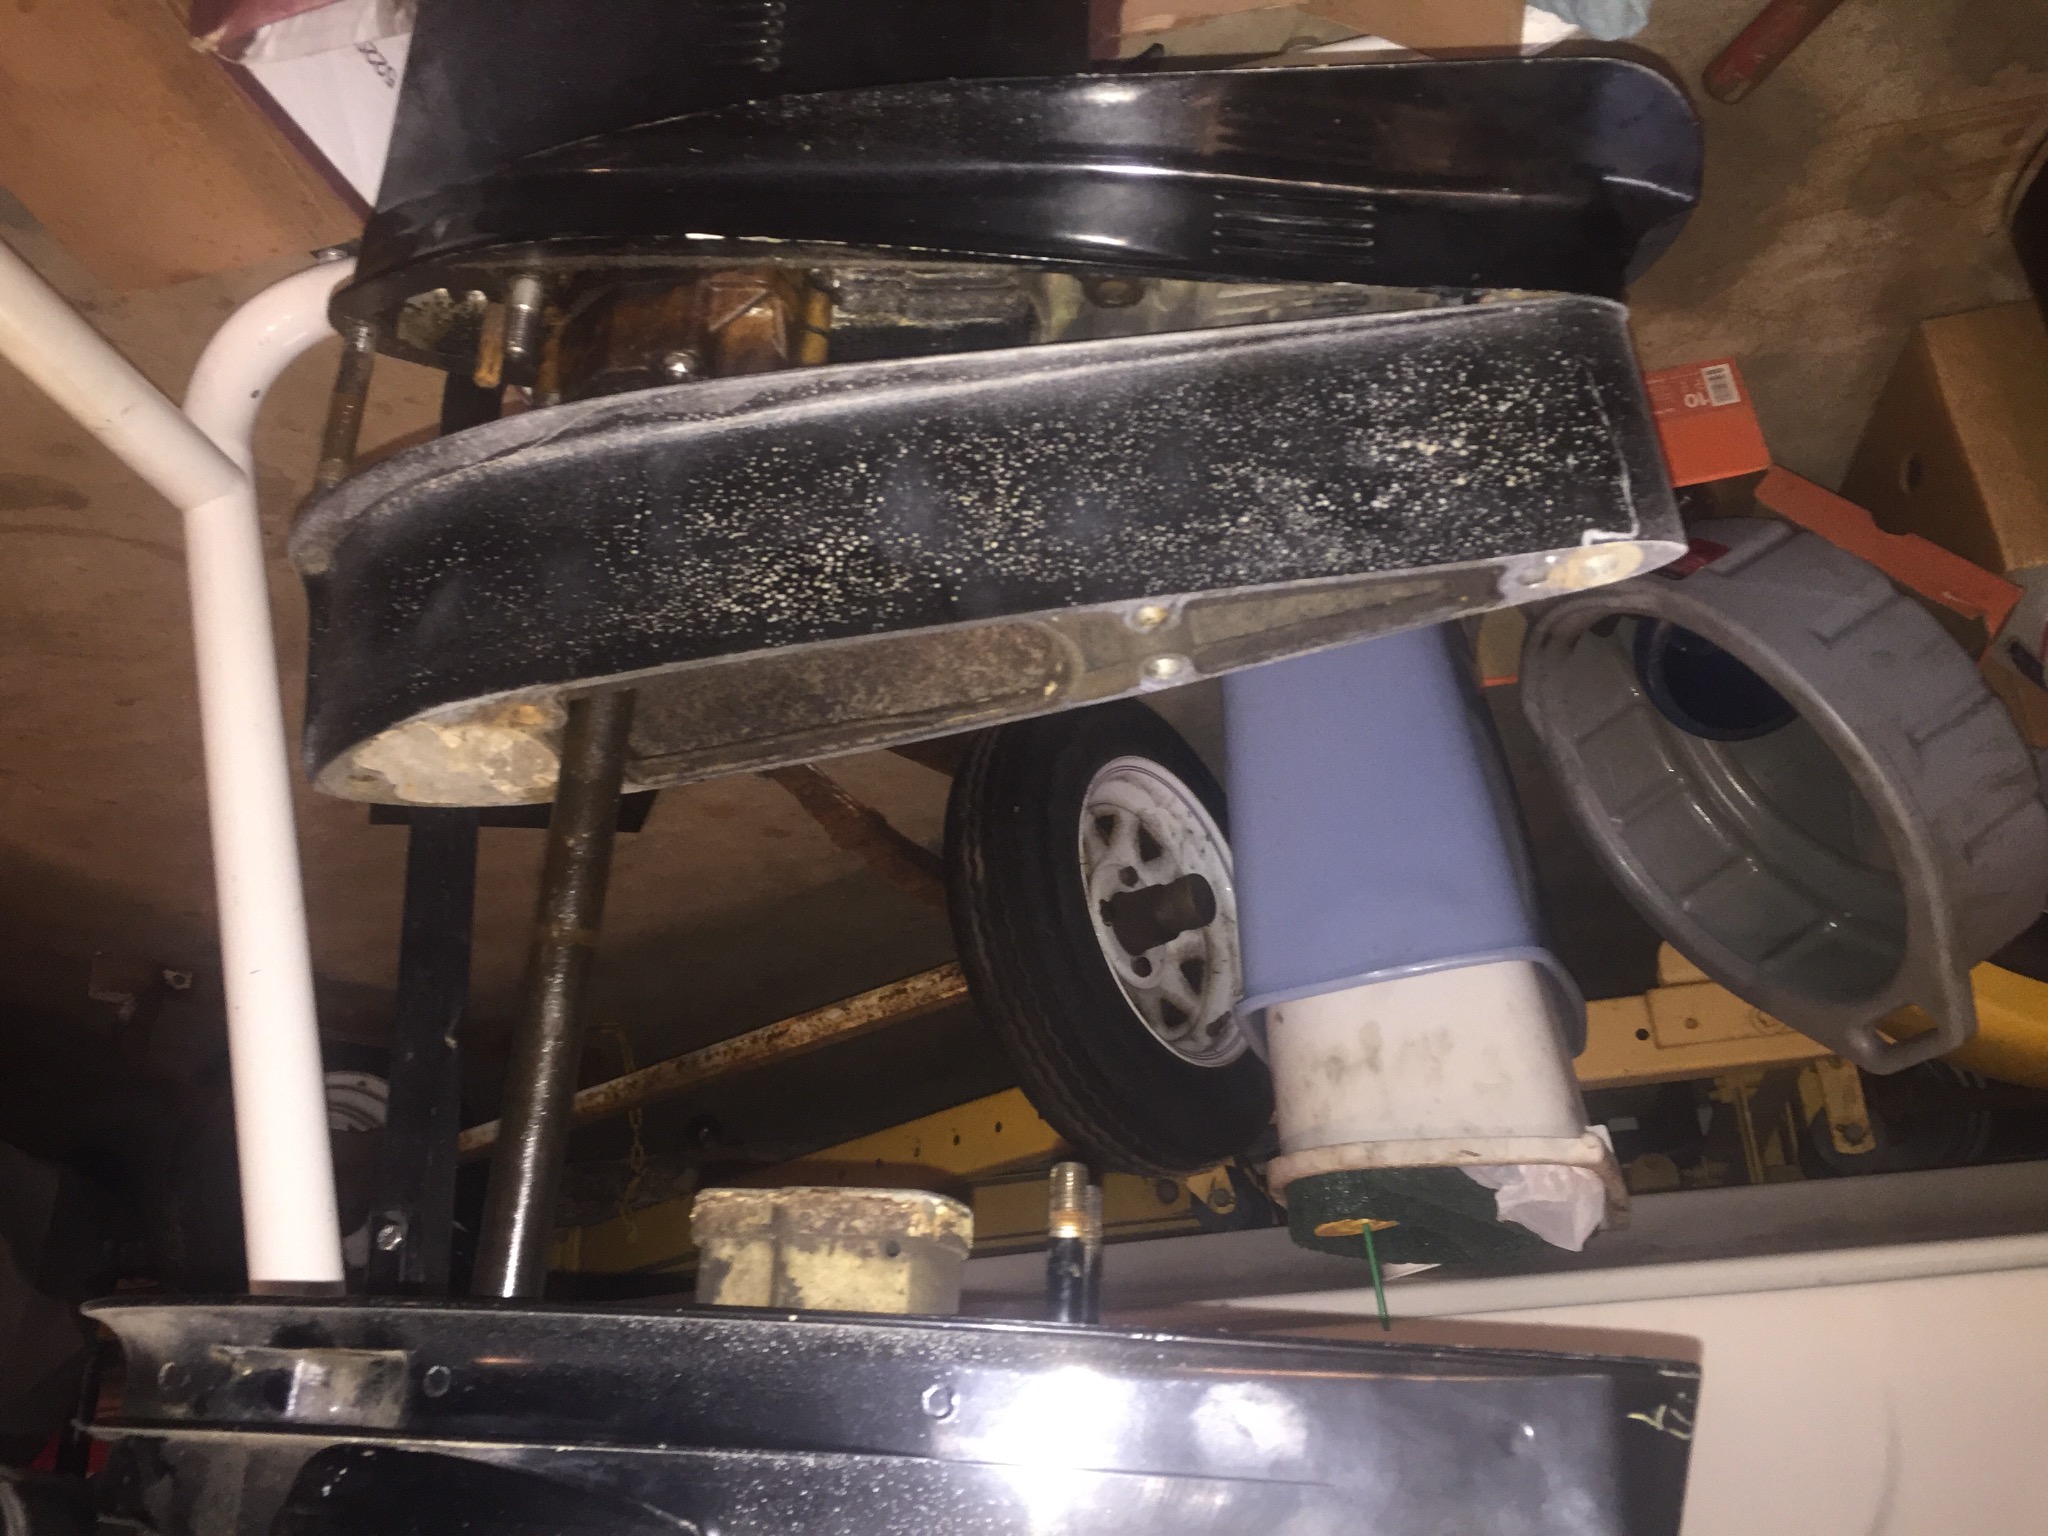
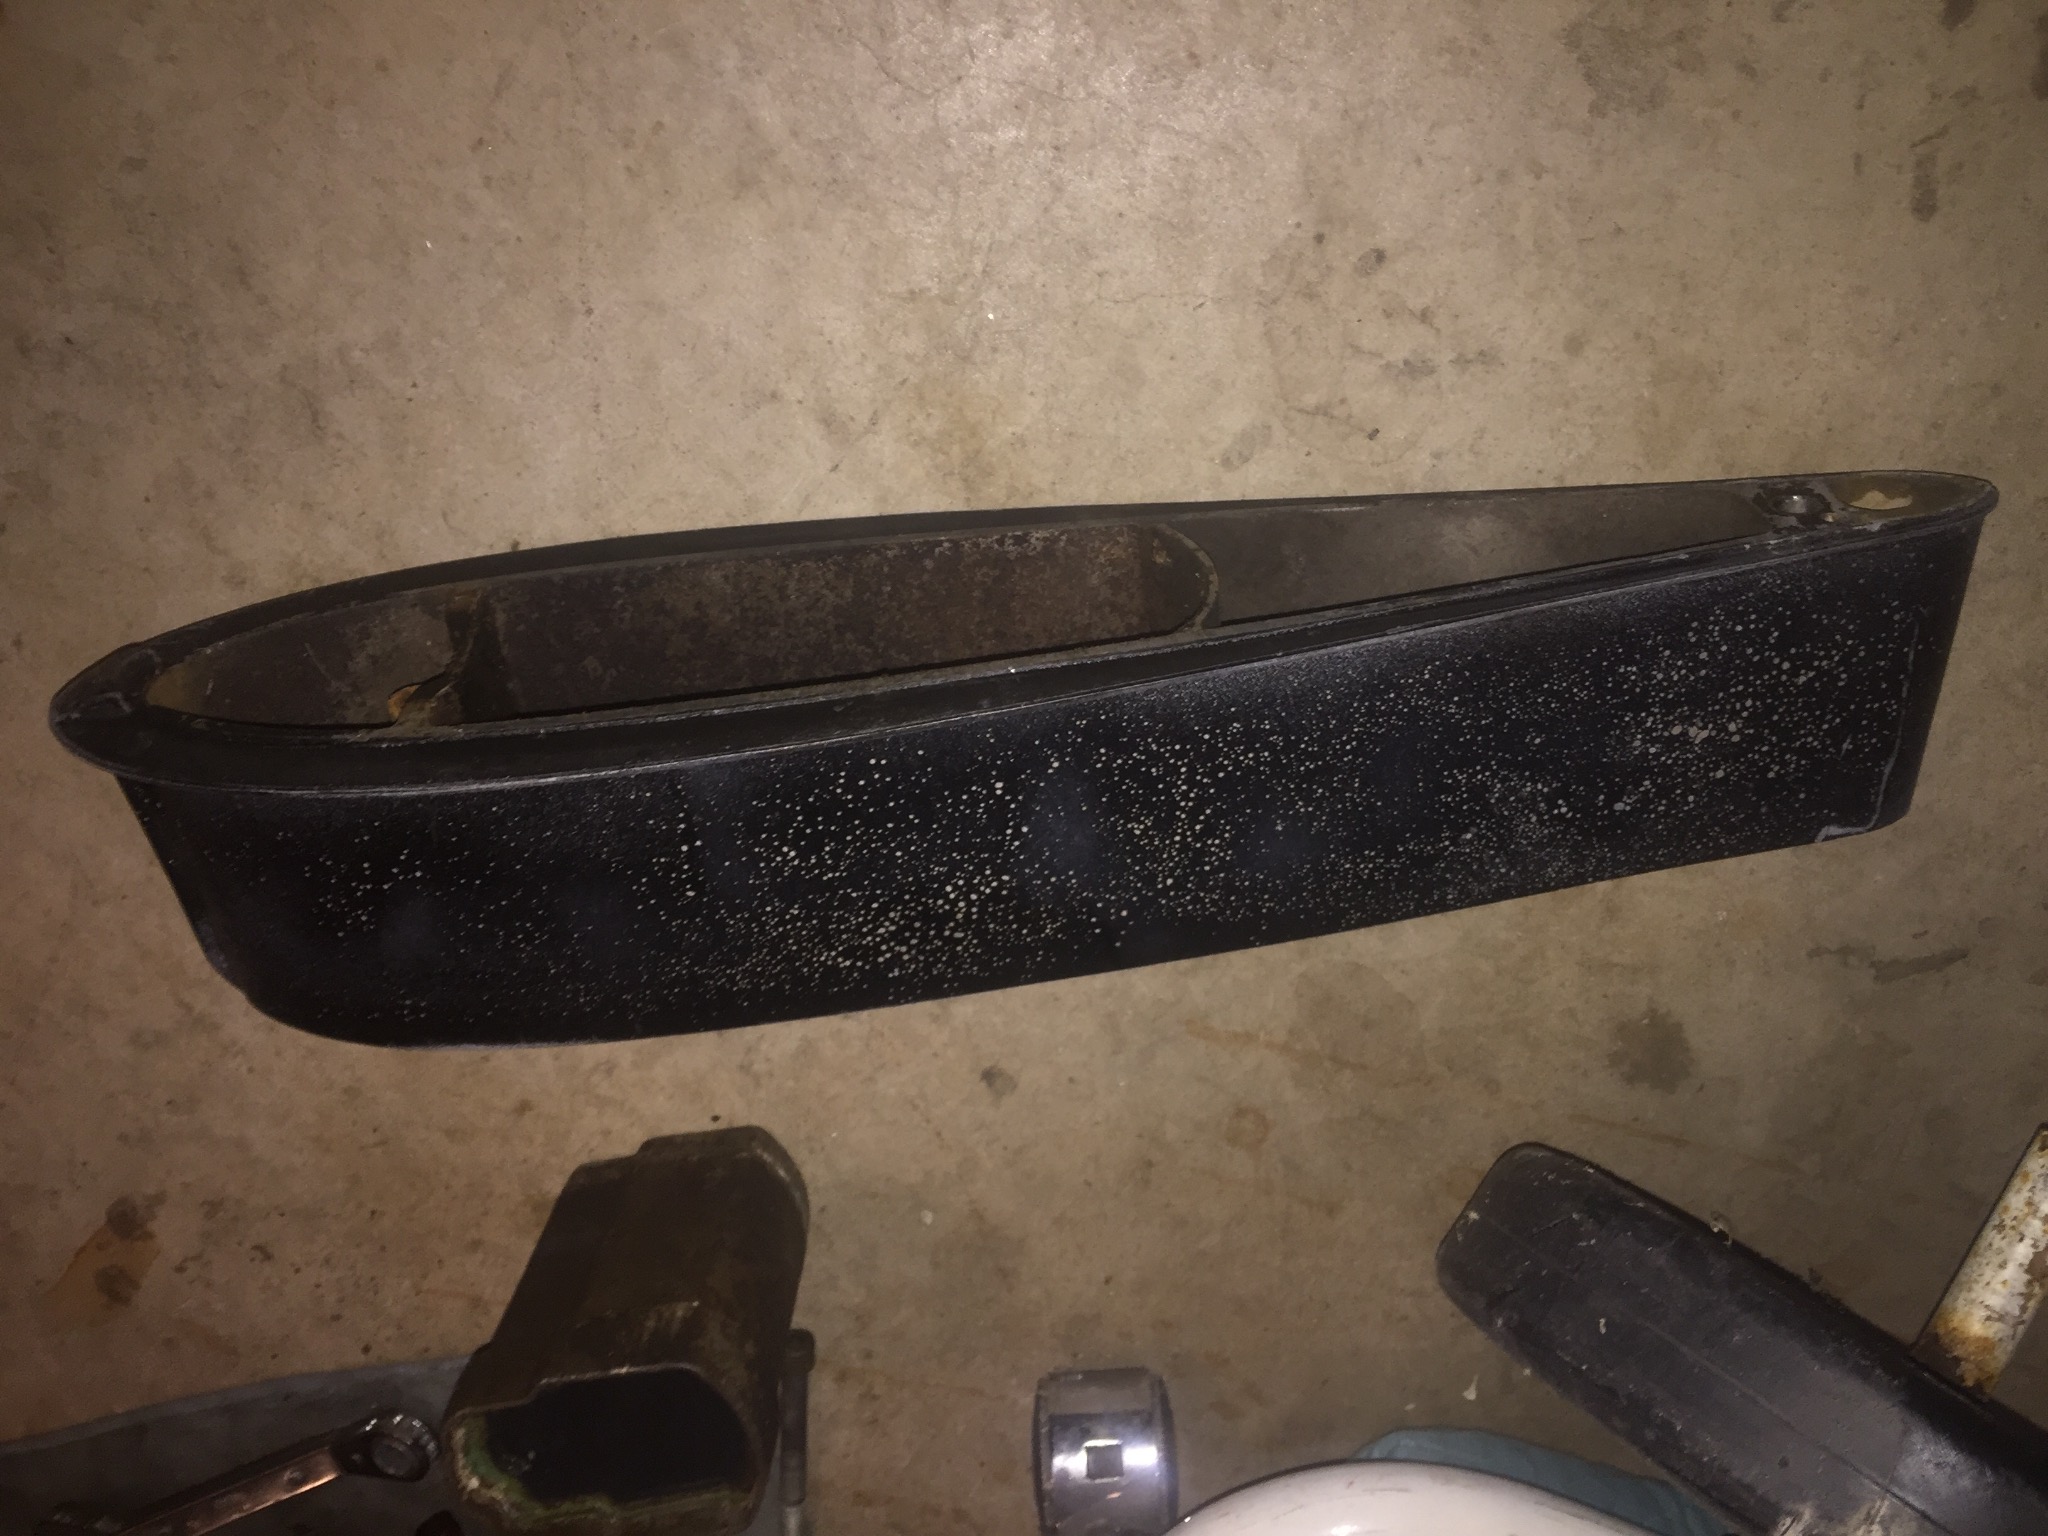
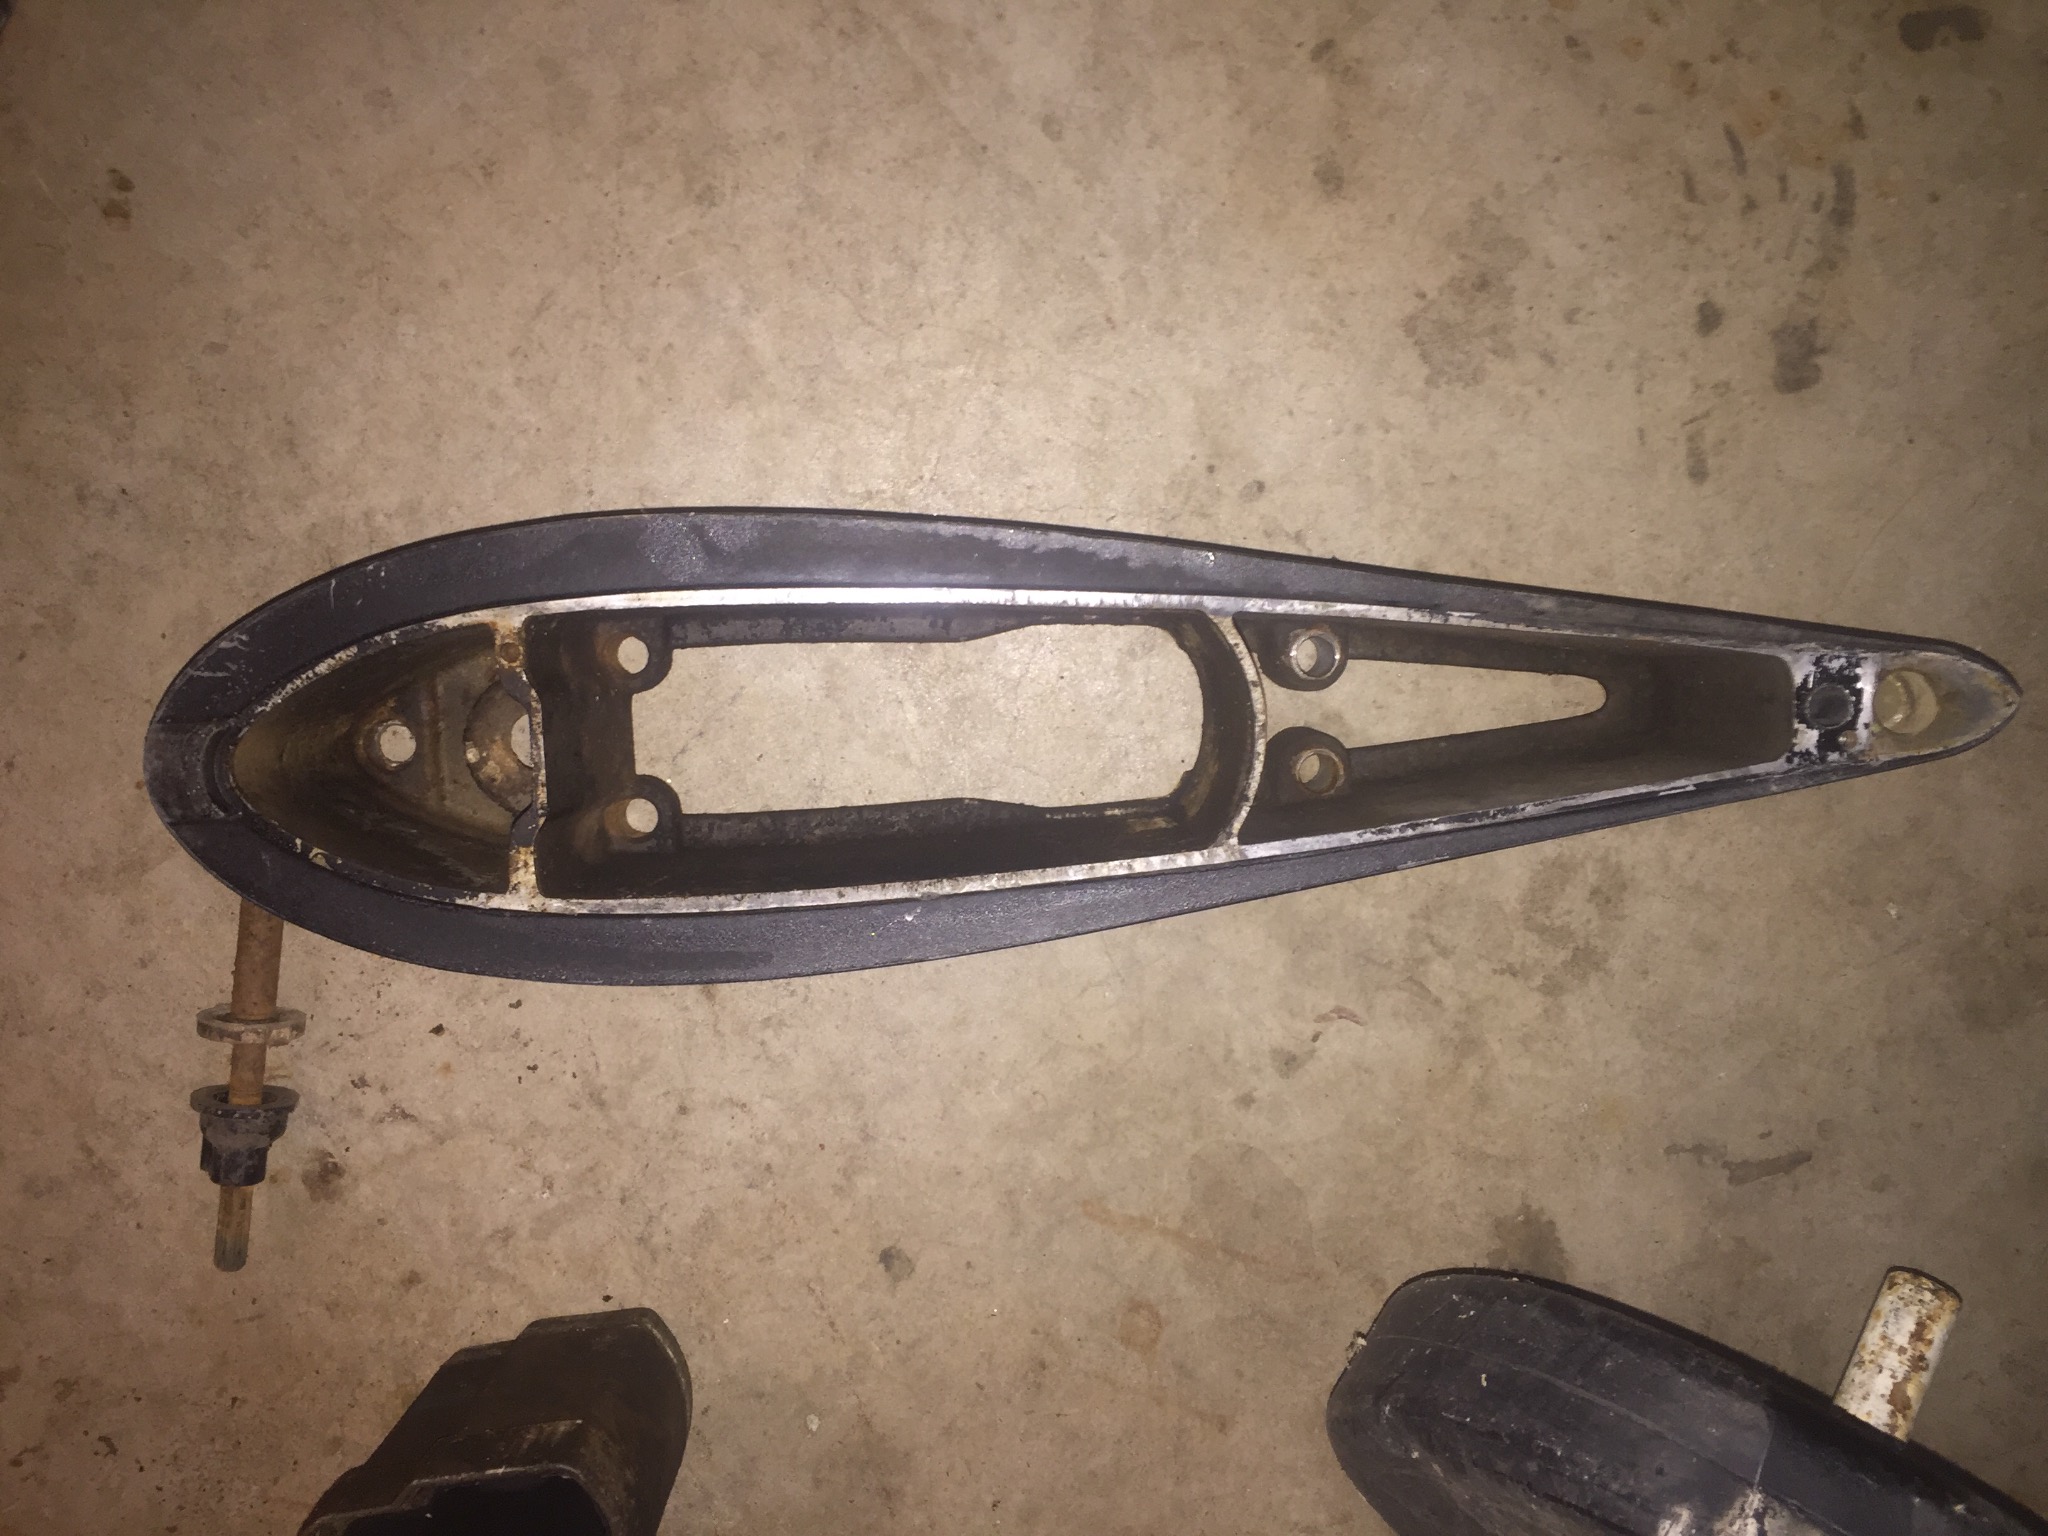
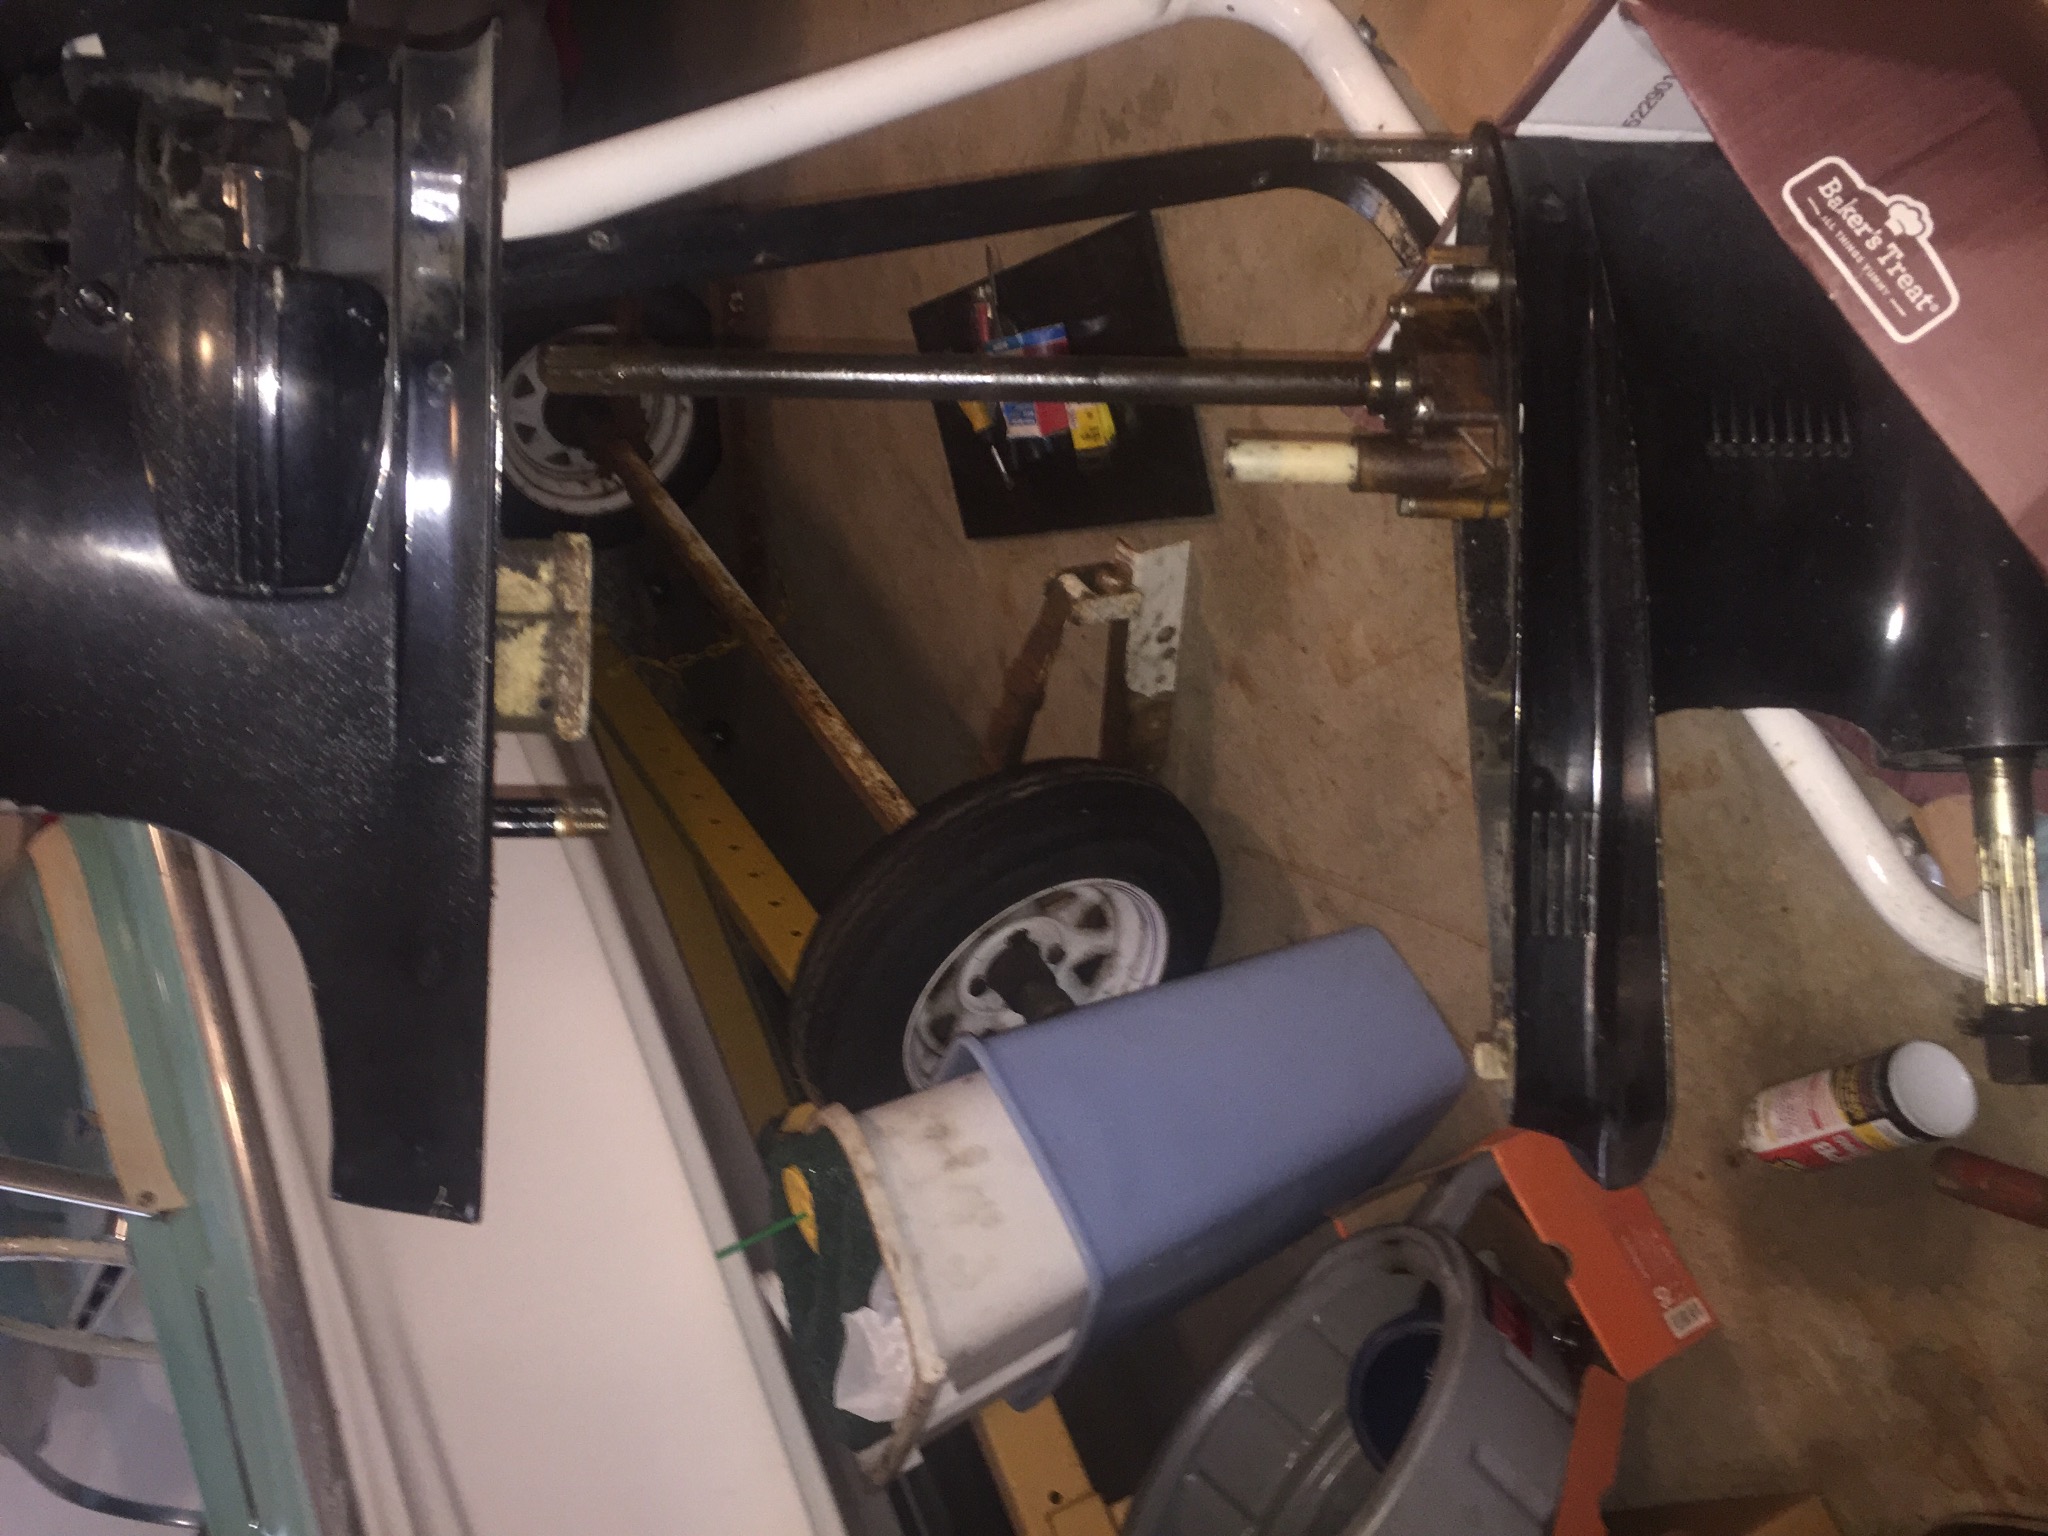
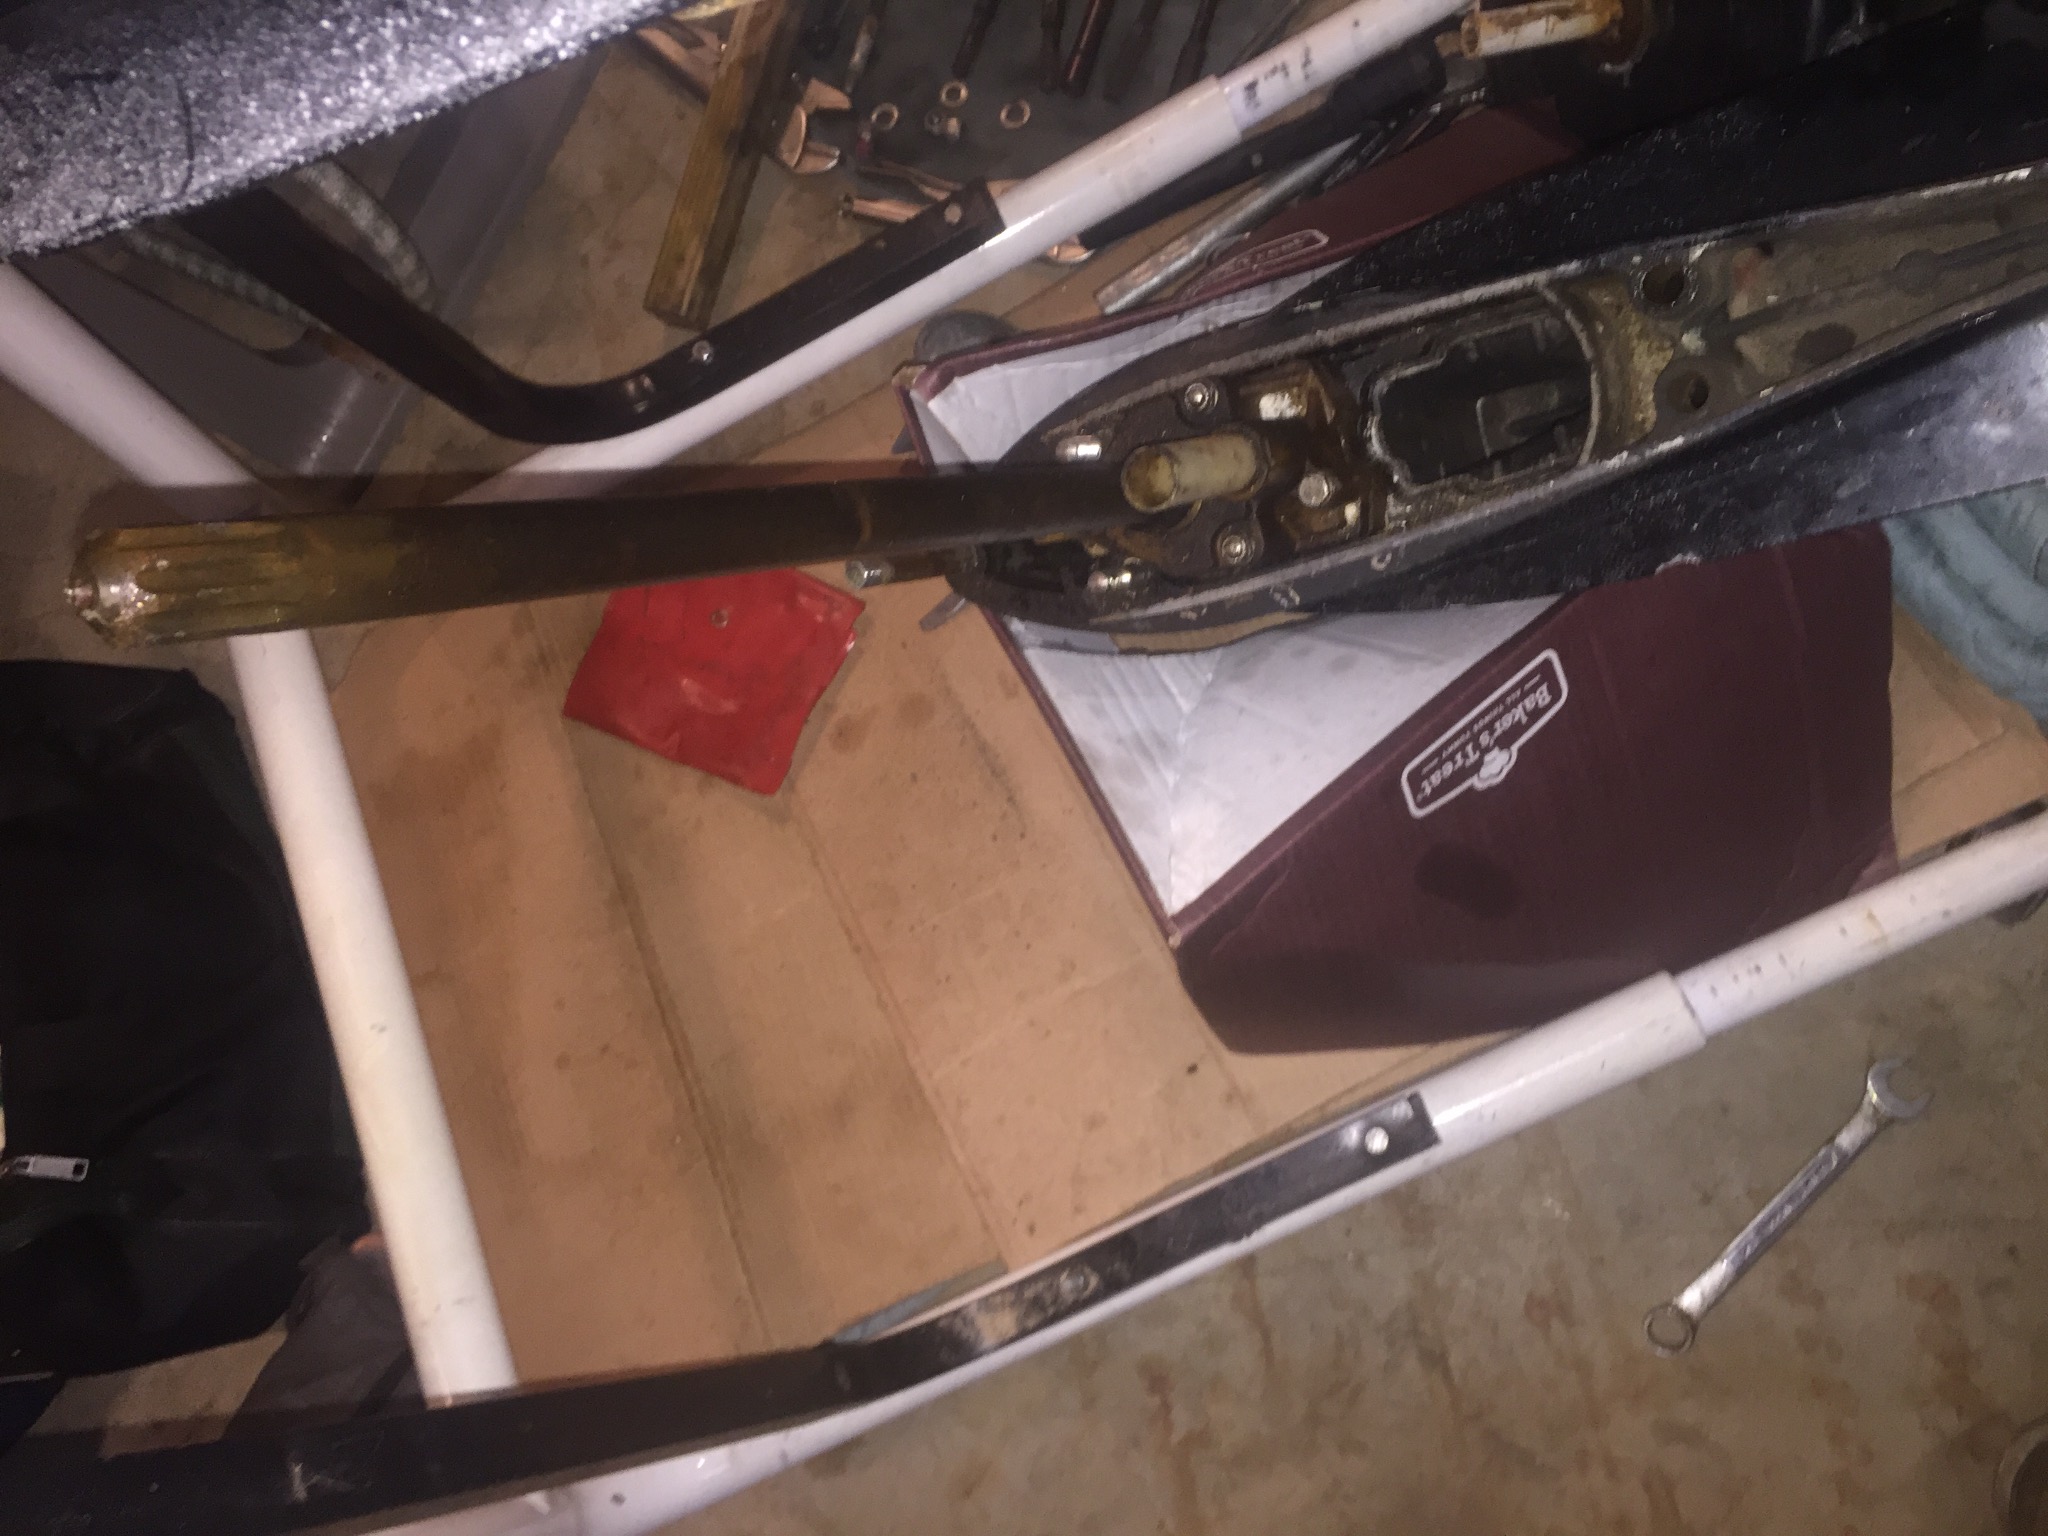
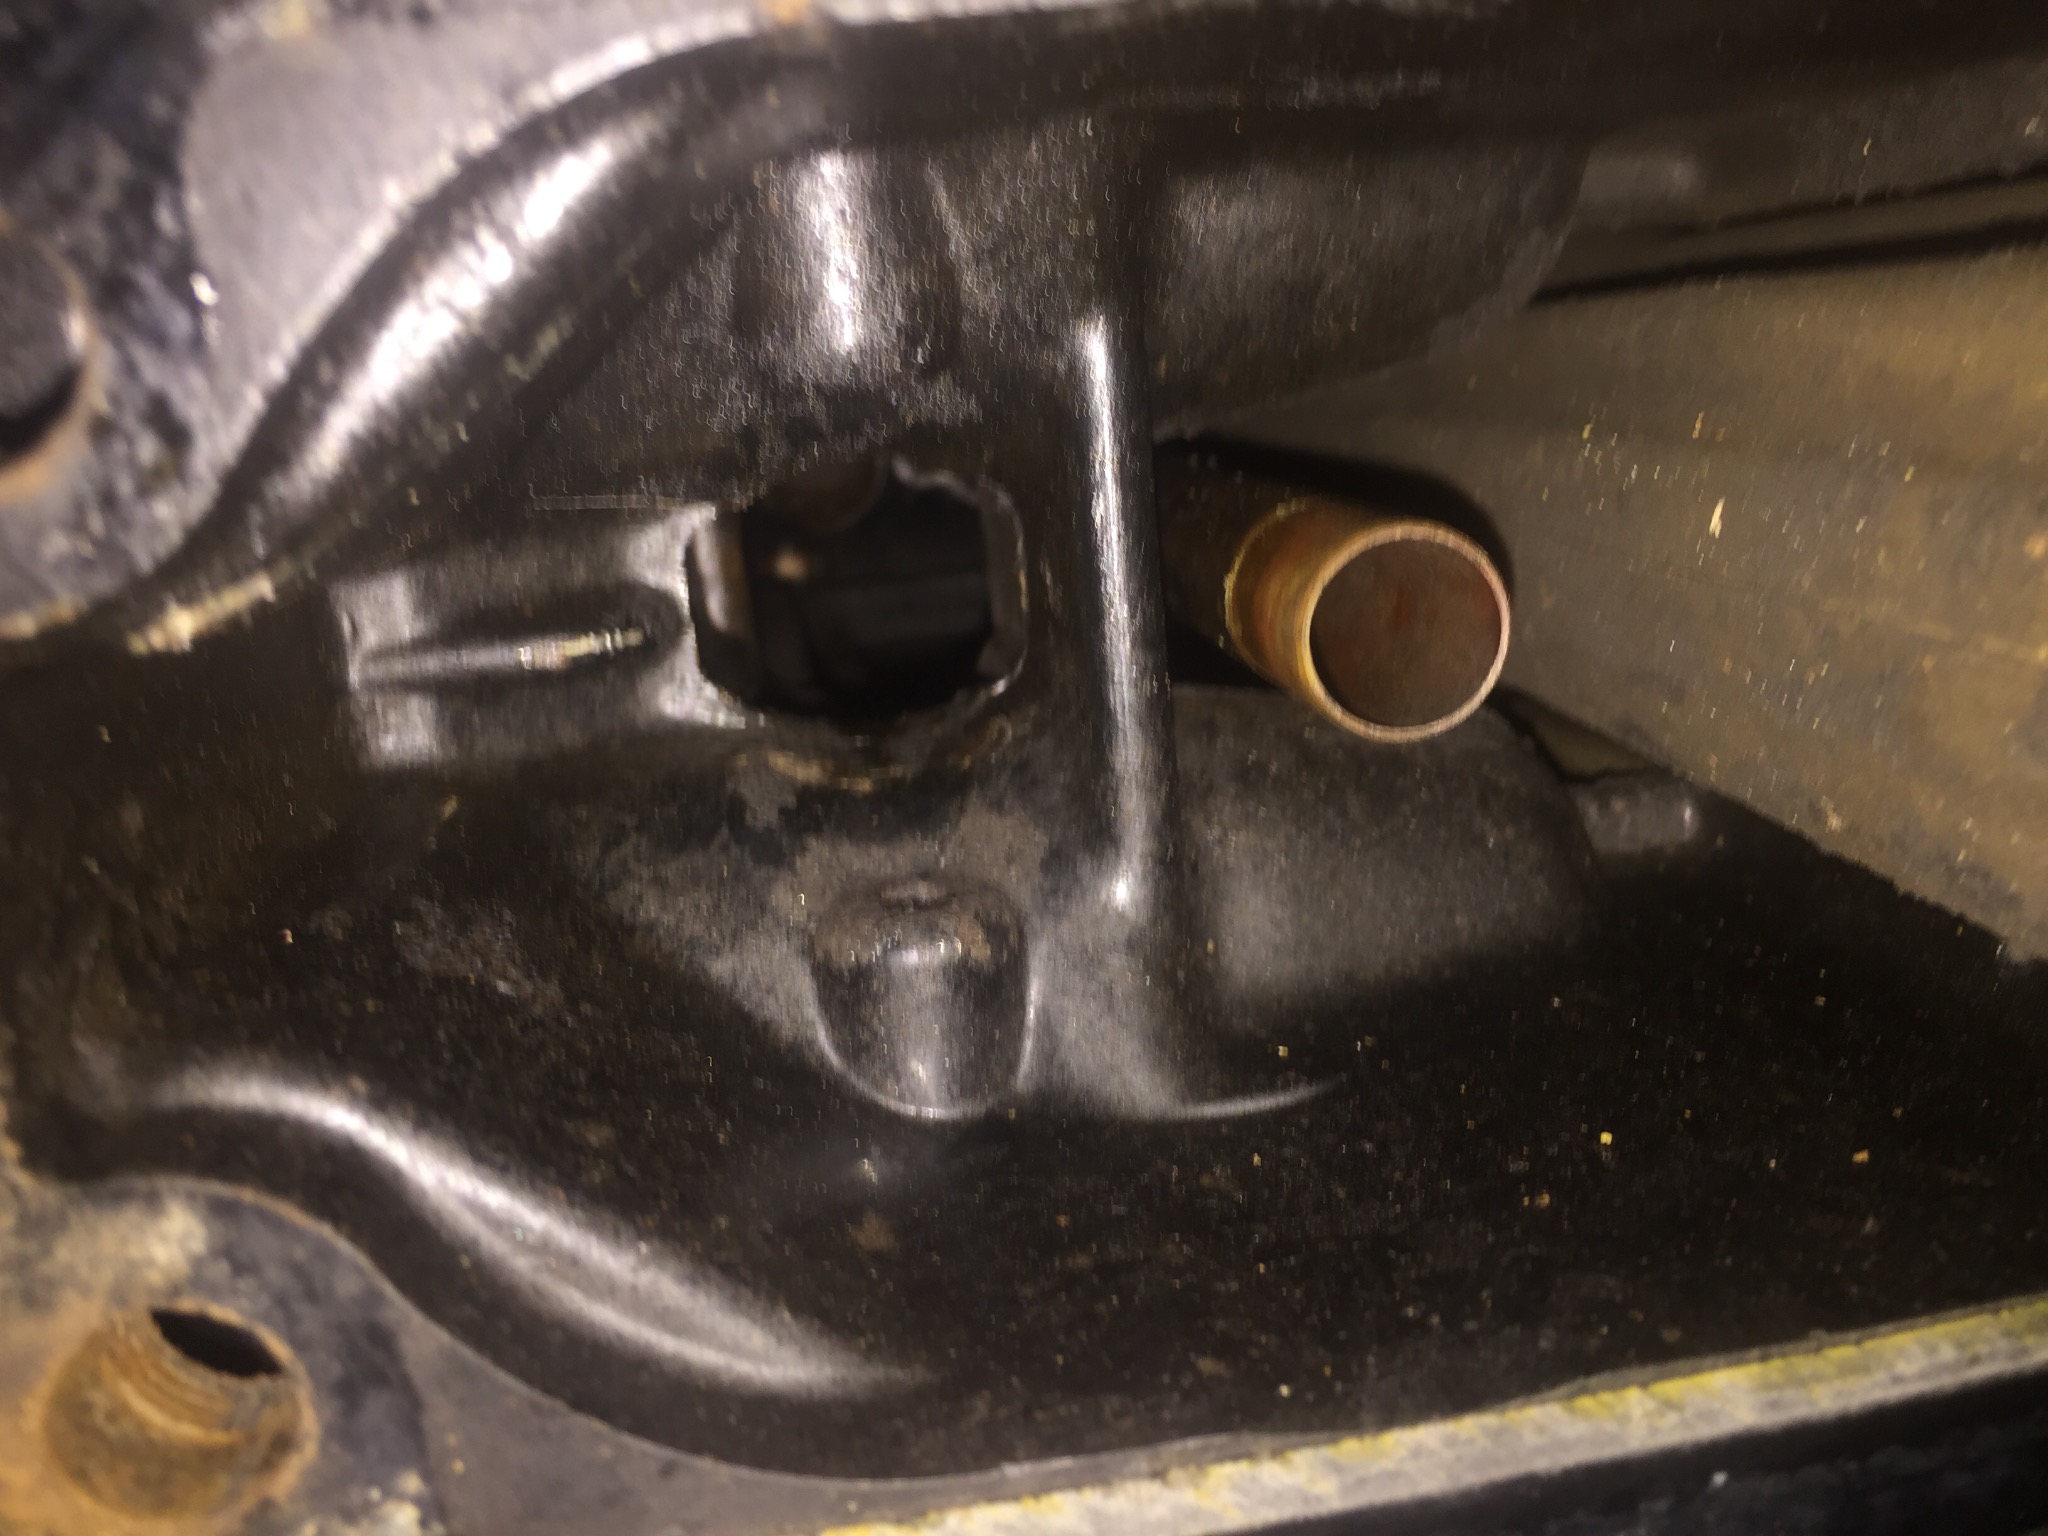
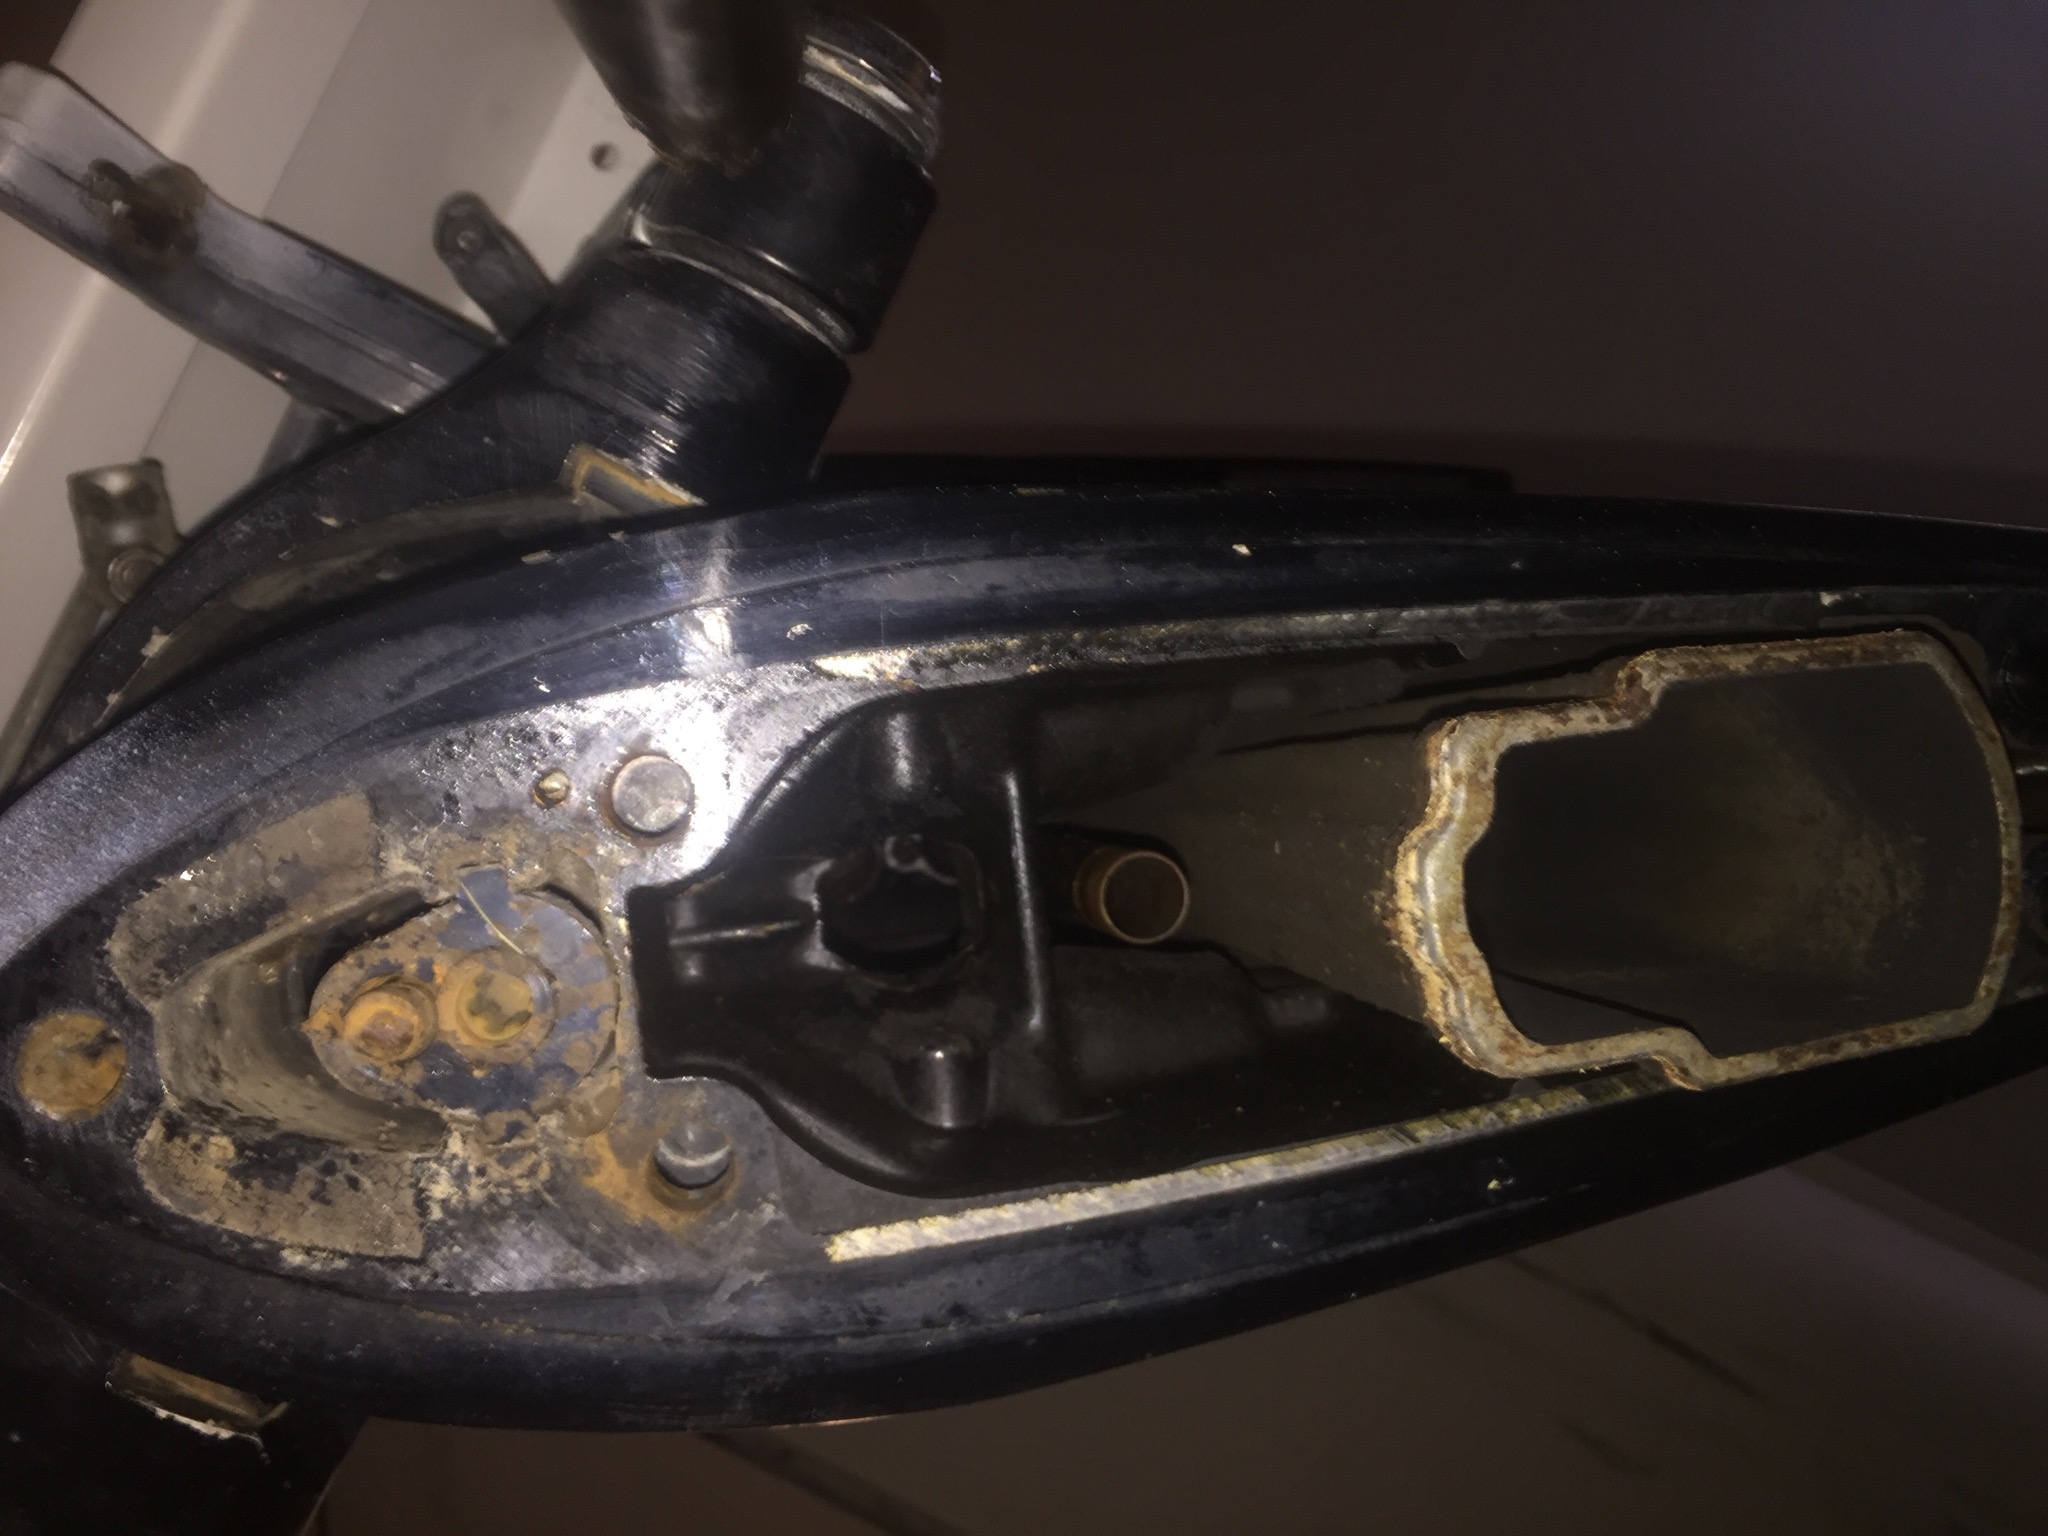
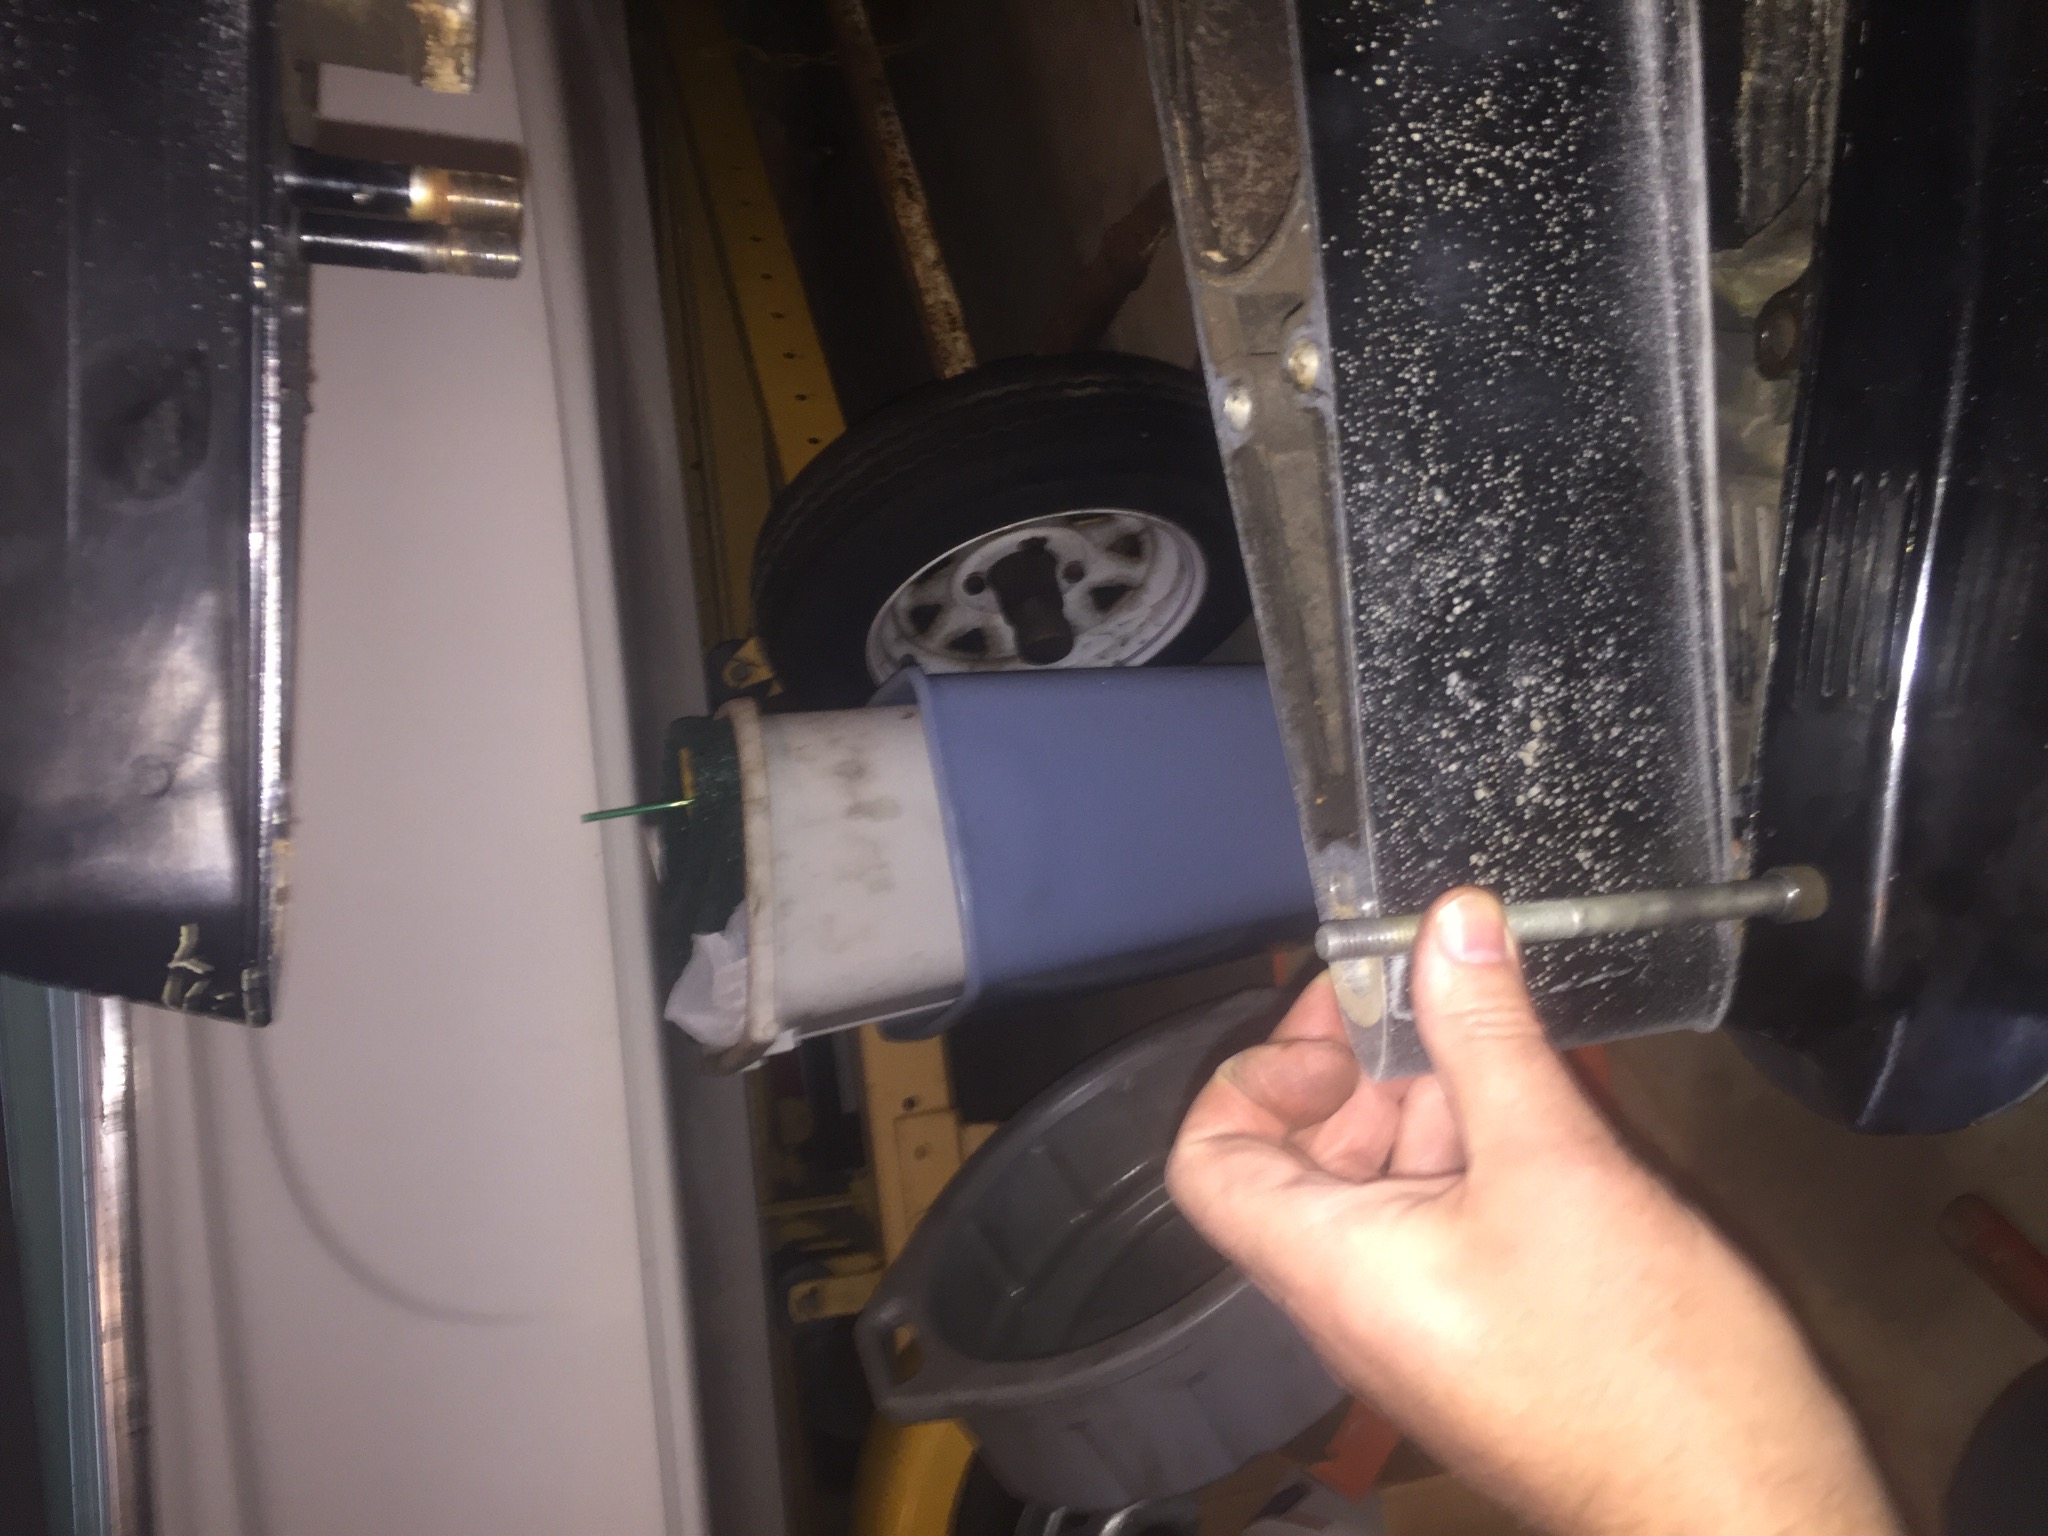
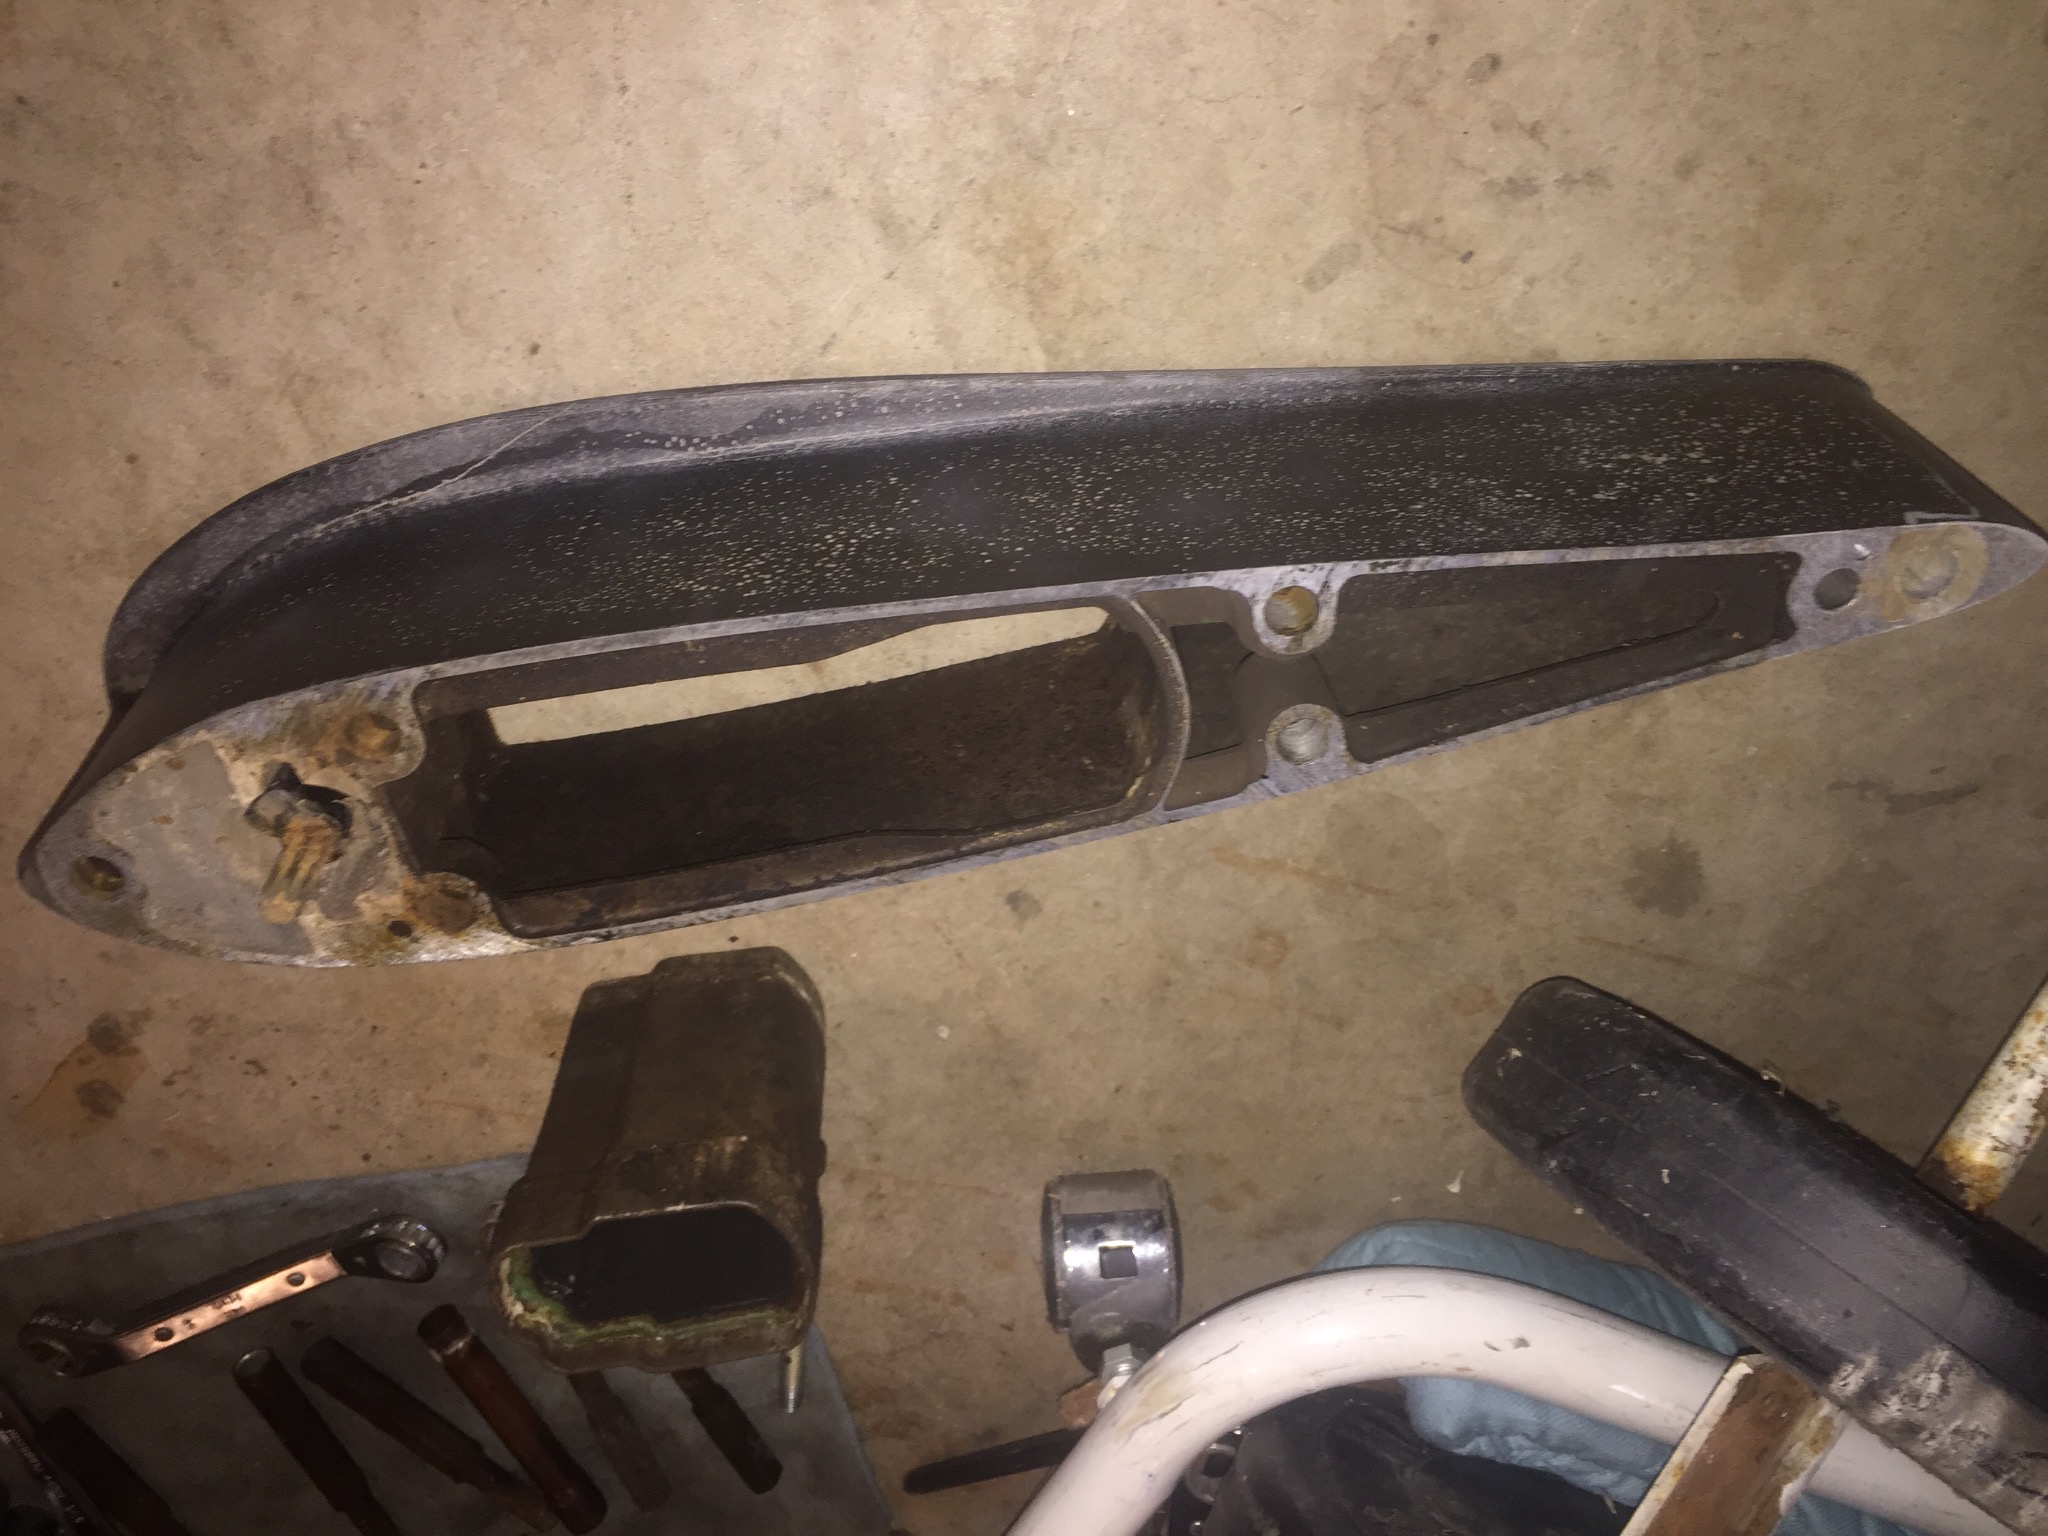
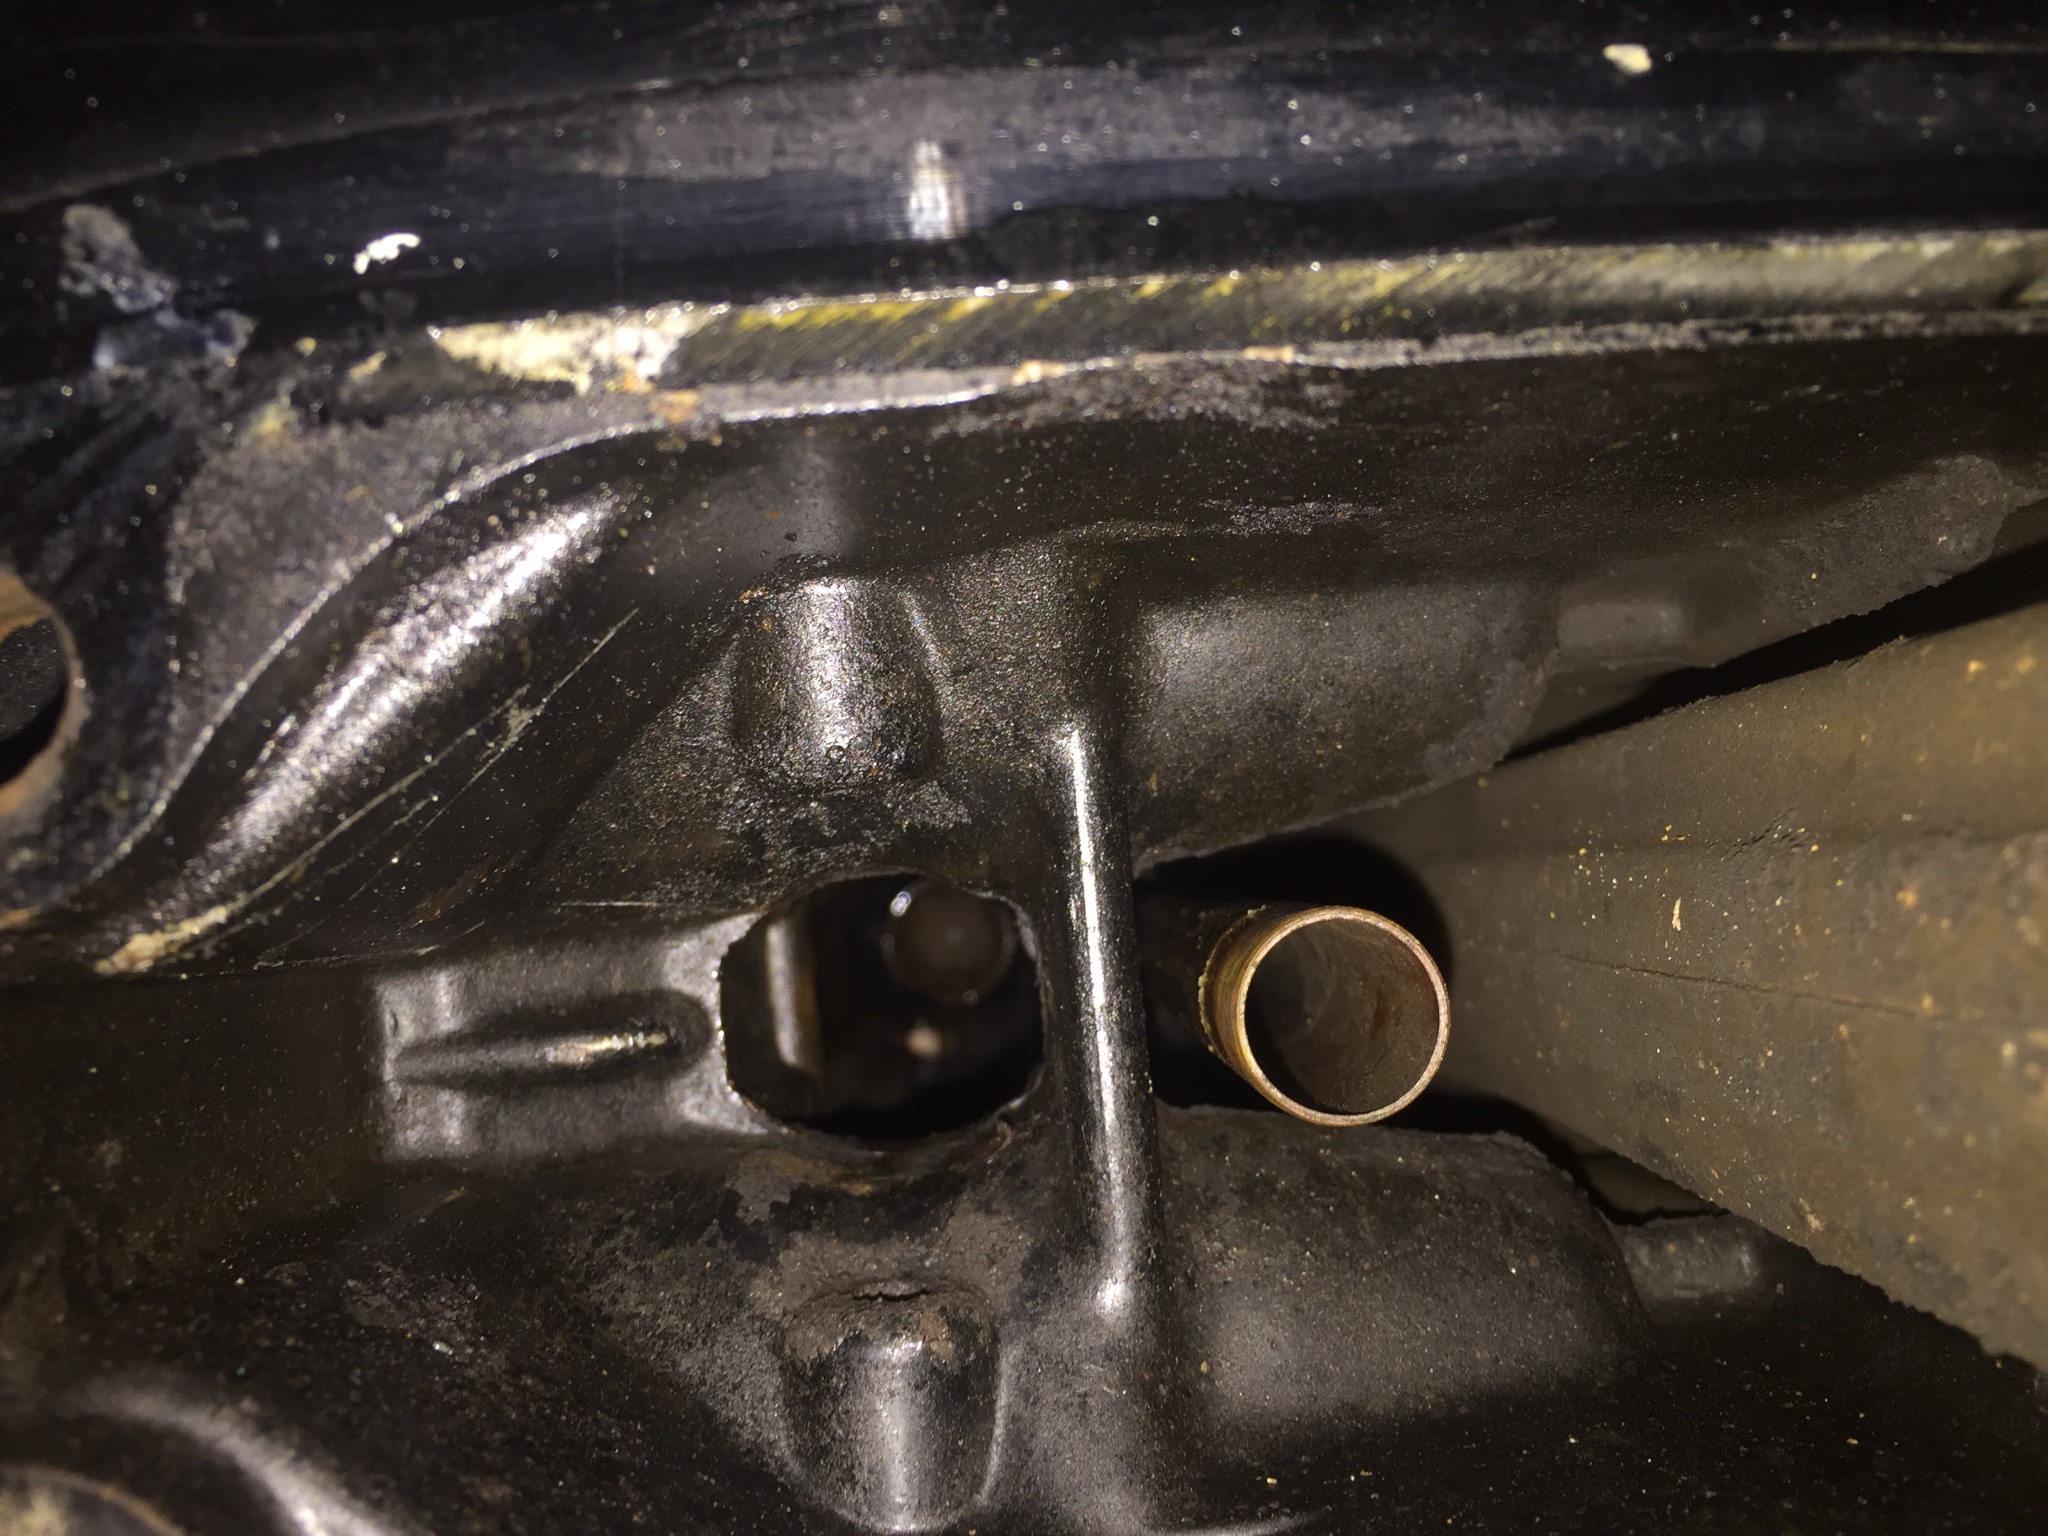
A few more pictures. Had to use two sets of vice grip pliers on the front bolt because it slipped with only one. All other fasteners came loose with a long wrench and a crisp but not so hard bump with a small hammer. Then they spun off by hand. I know this was a Lake Michigan motor, so do I assume fresh water makes this removal easier than a salt water motor? Everything is apart except one thing. You guessed it from the picture... the drive shaft extension is still up inside the mid section. It would have been too perfect if that was still attached to the drive shaft. Time for some research of my manuals to see if there is any decent way to remove that 5 inch extension from the crank while the powerhead and mid section is still married. Any special secrets or skills the pros could share with me at this time would be so greatly appreciated.

Please Log in or Create an account to join the conversation.

Dr.Go!

115 lower unit changes started 6 years 4 weeks ago #138321

  • Dr.Go!
  • Dr.Go!'s Avatar Topic Author
  • Offline
  • Contributing Member
  • Contributing Member
  • Posts: 1719
  • Karma: 19
  • Thank you received: 125
A few more pictures.

Please Log in or Create an account to join the conversation.

Dr.Go!

115 lower unit changes started 6 years 4 weeks ago #138324

  • 63 Sabre
  • 63 Sabre's Avatar
  • Offline
  • Contributing Member
  • Contributing Member
  • Posts: 4676
  • Karma: 147
  • Thank you received: 167
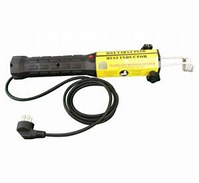
Now that's progress! I probably would have stripped and broken at least two of them, Yesterday while watching Garage Squad on the Velocity channel I saw something pretty neat that I didn't know existed. Called an induction heater made especially for situations like you had.

Instead of twisting, stripping or breaking the nut or bolt they just put this thing around it and voila! Of course you already knew about these things :huh:
Attachments:

Please Log in or Create an account to join the conversation.

115 lower unit changes started 6 years 4 weeks ago #138328

  • Dr.Go!
  • Dr.Go!'s Avatar Topic Author
  • Offline
  • Contributing Member
  • Contributing Member
  • Posts: 1719
  • Karma: 19
  • Thank you received: 125
I knew of the process of using heat expansion as your friend... but didn’t know of this tool. Nice. Once I get more counterweight on my stand, I will tilt the motor horizontally so I can do a little inspecting up inside without having to lay on my back and steaming up my safety glasses as I inspect with a flashlight. Wondering if I could fashion something like the old weighted dent puller than could be modified on the end with a split and latch collar or like a line wrench turned 90 degrees so I could slide over shaft from the side that was snug enough to not slip over the expanded coupling end and give it a few gentle taps. My concern would be that if really stuck, I am stressing against the crank and all of its bearing caps, etc. I certainly do not want to try this without some expert advice first so I don’t end up damaging motor. Maybe I will try to spray some thread loosener at that next coupling a few different times and let it soak. Then if I cannot gently separate, maybe I could try some propane bottle torch heat since motor shaft above should remain colder and as of right now is about 36-38 degrees. Any thoughts or ideas are welcome before I regret any miss steps. Thanks.

Please Log in or Create an account to join the conversation.

Dr.Go!

115 lower unit changes started 6 years 4 weeks ago #138330

  • 63 Sabre
  • 63 Sabre's Avatar
  • Offline
  • Contributing Member
  • Contributing Member
  • Posts: 4676
  • Karma: 147
  • Thank you received: 167
Now you're getting' out of my league. Of course with an OMC you wouldn't have that problem.....just kiddin'.
That induction heater is pretty pricey. $350 -$550 on line, probably more for a pro model.

Torching it might work but gotta remember that up there is old grease, maybe some gunky fuel and mice, don't forget the mice.
Is that a copper tube?? maybe sweat on a coupler and a longer pipe that sticks out the bottom that way you would have something to play with.

Please Log in or Create an account to join the conversation.

115 lower unit changes started 6 years 4 weeks ago #138332

  • Dr.Go!
  • Dr.Go!'s Avatar Topic Author
  • Offline
  • Contributing Member
  • Contributing Member
  • Posts: 1719
  • Karma: 19
  • Thank you received: 125
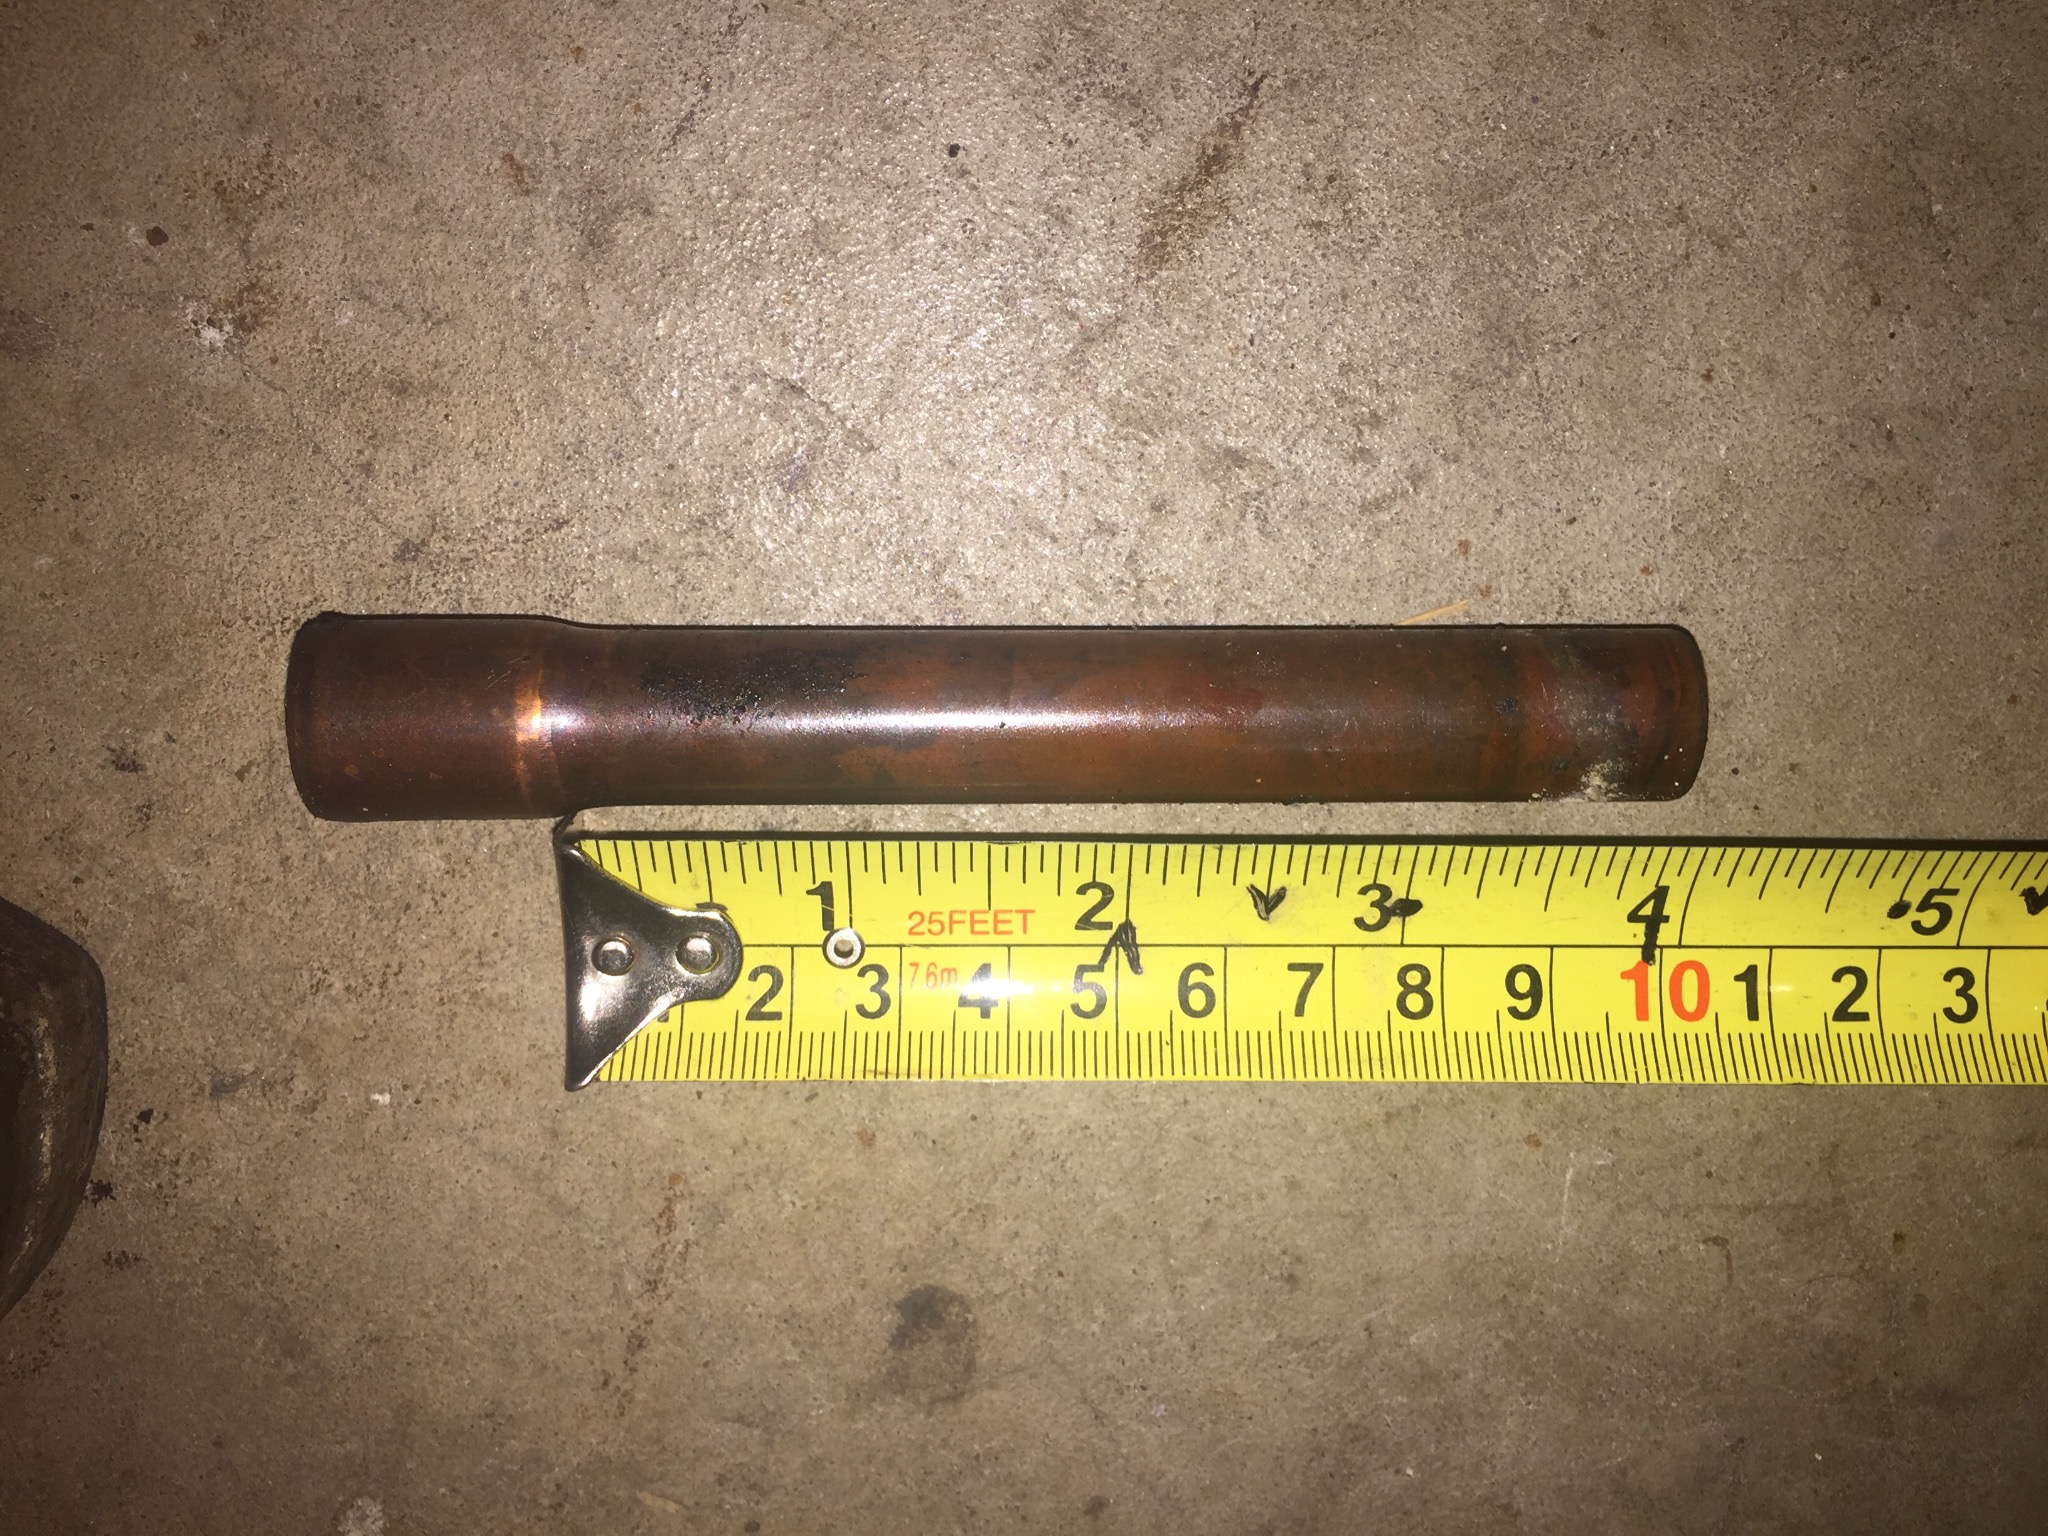
Thanks. The short copper extension came out and was at the bottom where I could see it ( and surprised it came apart so nicely). This is the hardened splined 5 inch shaft extension and that is at the top inside where all other extension pieces were down low. You are smarter than me Cal and your once engines as I think you know all the tricks. First, I was supposed to buy the right shaft length lol, but this combination motor came along for the right price and was a running motor... I wasn’t having lunch finding a short shaft with my peanut budget. Other members helped me find good short shaft motors for fair pricing, but 2 blown vehicle engines made those options not possible. You also have the mad skills to raise or lower transoms like you have a shop full of elves working through the night. I would just botch that up lol. Good info on flammable like old grease and mice nests. For sure don’t want to lose the motor to a careless fire and especially not the whole garage and house!

Please Log in or Create an account to join the conversation.

Dr.Go!

115 lower unit changes started 6 years 3 weeks ago #138334

  • ed-mc
  • Offline
  • Platinum Boarder
  • Platinum Boarder
  • Posts: 1412
  • Karma: 232
  • Thank you received: 117
You may have to Bite the Bullet and pull the powerhead to gain access to the stub shaft. Not sure there's any other way to effectively grab the shaft with the powerhead installed on the center section.

Here's a thought, to give you a good excuse to pull the powerhead, while it's apart you could convert it to a 1350. The early 1150/1350 blocks had the same, huge intake and exhaust ports.

The way they cut down the 1150's hp was to put very large plastic venturis in the carbs; radically reduced the reed stops; different exhaust inner baffle plate on early models. IIRC later on Merc superceded the baffle to the same one used on the 1350.

So if you were to split the crankcase, you can change the reed stops (or bend them to 1350 specs), then install the later-model, smaller venturis in the carbs & re-jet to .0785 main jets.

Larger reed stops and less restrictive venturis will drastically increase airflow through the powerhead. The baffle plate, if not the "tuned" style, would probably make minimal difference compared to reed stop/carb mods. That baby will really scream!

With the manifold cover off the block, it's also a good time to check/renew the crankshaft seals, bearing cap O-rings, and the crankshaft ball bearings. Most likely the upper bearing (the thick one) will be OK, the bottom one is a thinner 6206 and usually they can stand being replaced, they'll be a bit on the rough side. Easy enough to pull the bearing off the crank, then heat up a new bearing & install.

Anyway, just a thought, like you needed more work, eh?? ;)

Please Log in or Create an account to join the conversation.

115 lower unit changes started 6 years 3 weeks ago #138336

  • Dr.Go!
  • Dr.Go!'s Avatar Topic Author
  • Offline
  • Contributing Member
  • Contributing Member
  • Posts: 1719
  • Karma: 19
  • Thank you received: 125
Well - oh my - should be my response. The good Doc has mentioned this information in the past when we talked about this motor before I bought it. As a kid, my favorite motor was a shorty 135. When you offer such great info about somewhat easy mods compared to crazy engine mods, it is like you are dangling candy. I got the nickname Dr. Go! From a friend when I was 20 after telling him the speed boat I set up was only doing barely under 90mph. I would have loved 100, but it wasn’t within the set-up or in my budget. I was bitten as a kid with in-lines, then read every Powerboat article on Mod-VP racing. After expressing my disappointing reality, my friend said... Dude - you have an obsession for speed! I should start calling you Dr. Go! The name stuck when I used it racing snowmobiles. My brother and I raced a 1976 Mercury 440 snow twister factory mod sled for oval ice racing... we could break 100 with that. Had a fast bike, so the boat was the only thing falling short of 100... even though I am toning down my obsession with speed, it is only natural that once you dangle performance options in front of me, it gets my attention. It’s just more time and more money right? lol. Oh boy?!?!?!?! I hope that shaft extension just falls out on its own during the night or this could get way more involved! Thanks for the added information... I think anyway 🙂

Please Log in or Create an account to join the conversation.

Dr.Go!

115 lower unit changes started 6 years 3 weeks ago #138338

  • curse
  • curse's Avatar
  • Offline
  • Contributing Member
  • Contributing Member
  • Posts: 445
  • Karma: 5
  • Thank you received: 2
subscribed to thread. I'm guessing swapping a good powerhead onto a shorty with bad powerhead would be easier??

Please Log in or Create an account to join the conversation.

1960 slickcraft catalina
1963 g-w invader ski-bird
1972 g-w invader drag & ski 14
Portage Michigan

115 lower unit changes started 6 years 3 weeks ago #138339

if you have a spare shaft just put it in place and hit it hard both up and side to side. I have seen people drill a hole in the sid of the leg and use an impact gun on it it works..

Please Log in or Create an account to join the conversation.

115 lower unit changes started 6 years 3 weeks ago #138342

  • Dr.Go!
  • Dr.Go!'s Avatar Topic Author
  • Offline
  • Contributing Member
  • Contributing Member
  • Posts: 1719
  • Karma: 19
  • Thank you received: 125
I will look at that option as I do have a different year lower unit that is all apart. I will measure and compare before experimenting. May have to wait a week or so before I can get a minute to try this. Hey Curse - are you thinking of swapping your powerheads? PM me. I may end up with a part you could use. I would think if a person had a long and short motor of the same model and year that pulling a bad powerhead from a shorty and swapping it with a good powerhead from a long shaft wouldn’t be too bad. My motor came with the extension and I wanted a short shaft.
Attachments:

Please Log in or Create an account to join the conversation.

Dr.Go!

115 lower unit changes started 6 years 3 weeks ago #138344

  • 63 Sabre
  • 63 Sabre's Avatar
  • Offline
  • Contributing Member
  • Contributing Member
  • Posts: 4676
  • Karma: 147
  • Thank you received: 167
Mark, just a thought.
If all else fails and the thing is still stuck, go to your local welding shop or liquor store (REALLY THEY STOCK THE STUFF TO KEEP KEGS COLD) and get some dry ice. put it in a old soup can or something and jam it against the shaft for an hour or so. Might just fall out on it's own. Wear gloves if you try it.
"Dry Ice will shrink metal to slide on sleeves, bushings or bearings. Add Dry Ice to a 90% pure alcohol to create a cold liquid near -109.3°F. that can be used like liquid nitrogen."
I've used the dry ice thing a few times on corroded bolts. As an aside it keeps ice cream really hard during a hot summer day but it quickly freezes your beer.

Please Log in or Create an account to join the conversation.

115 lower unit changes started 6 years 3 weeks ago #138347

  • Dr.Go!
  • Dr.Go!'s Avatar Topic Author
  • Offline
  • Contributing Member
  • Contributing Member
  • Posts: 1719
  • Karma: 19
  • Thank you received: 125
Forgot about dry ice. Family used it back in the day to transport sea food from the gulf to the Great Lakes region by car in summer before air conditioning. I think you may have been a college professor sometime in the past because you always have some awesome information and advice that has science and physics mixed in. Maybe you were advisor to the flux capacitor designer from Back to the future. I love your advice so keep it coming.

Please Log in or Create an account to join the conversation.

Dr.Go!

115 lower unit changes started 6 years 3 weeks ago #138350

  • 63 Sabre
  • 63 Sabre's Avatar
  • Offline
  • Contributing Member
  • Contributing Member
  • Posts: 4676
  • Karma: 147
  • Thank you received: 167
Surely you jest.
School of hard knocks and nothing more. My tool inventory includes drills and taps and a propane torch to remove broken bolts and screws...it is well used.
Of course this site accounts for 99% of all acquired knowledge. There are professionals who know how to do things right, I on the other hand am ace #1 shade tree, nothing more.

Please Log in or Create an account to join the conversation.

115 lower unit changes started 6 years 3 weeks ago #138351

  • Dr.Go!
  • Dr.Go!'s Avatar Topic Author
  • Offline
  • Contributing Member
  • Contributing Member
  • Posts: 1719
  • Karma: 19
  • Thank you received: 125
You are a get er done guy and that is why many of your pictures are out on the water with your latest finished projects and my pictures are mostly in the garage with stuff torn apart lol. It is pretty rewarding to get stuff fixed and back in use I will say. I better get that impeller housing off and get the lower section to the prop shop for skeg repair asap. Got to keep the project moving.

Please Log in or Create an account to join the conversation.

Dr.Go!

115 lower unit changes started 6 years 3 weeks ago #138353

  • curse
  • curse's Avatar
  • Offline
  • Contributing Member
  • Contributing Member
  • Posts: 445
  • Karma: 5
  • Thank you received: 2
I have the motor you picked up for me which is a nice motor, then I have the shorty I found about a week after we met up. The shorty is missing a carb or 2 and looks like it was tinkered with so I figured the low hour powerhead on the good motor mounted on the shorty bottom would be the way to go. I guess i'm looking for the best way to do it. I'll keep an eye on this thread and see if I can figure it out.

Please Log in or Create an account to join the conversation.

1960 slickcraft catalina
1963 g-w invader ski-bird
1972 g-w invader drag & ski 14
Portage Michigan

115 lower unit changes started 6 years 3 weeks ago #138354

  • curse
  • curse's Avatar
  • Offline
  • Contributing Member
  • Contributing Member
  • Posts: 445
  • Karma: 5
  • Thank you received: 2
And, without going to the garage and looking at it, I don't think mine has the extension which can be removed.

Please Log in or Create an account to join the conversation.

1960 slickcraft catalina
1963 g-w invader ski-bird
1972 g-w invader drag & ski 14
Portage Michigan

115 lower unit changes started 6 years 3 weeks ago #138356

  • Dr.Go!
  • Dr.Go!'s Avatar Topic Author
  • Offline
  • Contributing Member
  • Contributing Member
  • Posts: 1719
  • Karma: 19
  • Thank you received: 125
I believe you are correct on your long shaft having the one piece mid section. Your powerhead swap makes sense. However, you presently are hoping the previous owner of that 14 foot invader has the transom at a really good height. I believe what I remember from your past pictures, that was originally a long shaft transom height that was cut down a few inches. My assumption would be that a previous owner didn’t want to keep raising a long shaft motor for more speed ( because that could make it more top heavy and maybe even affect chine walking more. By cutting down the transom height, but using the short shaft, it is still raising the lower unit for less drag. You also are less top heavy and even save a few pounds. The down side is that you haven’t had a chance to test the boat yet... if you wanted to water ski with it or plane off a boat load of people, it is possible it could ventilate by sitting maybe too high for that and leave you with just a speed machine for one or 2 people. I would run a straight edge off the bottom and then measure that against your short shaft to be sure your water intake is still under water and how much prop blade you might have sticking out of the water. If your transom were not cut down, maybe I can determine if I have enough long shaft parts for you to try that first with a filler plate on your transom. I would start a thread asking what others are running on their 14 foot invaders. I think there are a few on here and maybe they have all of this sorted out.

Please Log in or Create an account to join the conversation.

Dr.Go!

115 lower unit changes started 6 years 3 weeks ago #138367

  • curse
  • curse's Avatar
  • Offline
  • Contributing Member
  • Contributing Member
  • Posts: 445
  • Karma: 5
  • Thank you received: 2
I do plan on checking more before I decide what to do. A quick measurement in the garage shows the bottom of the boat will be above the water intake so yes it would all be under water. Of course that could change some when I actually measure as it's on the boat which I will do, I'm just collecting info right now.


I'm wondering if there were short and long shaft transoms on these boats since i've seen both, maybe a lot of people cut them down?? If people cut them down, they all cut them to the 18" height (by the looks of the pics i've seen) and that seems strange to me.

Please Log in or Create an account to join the conversation.

1960 slickcraft catalina
1963 g-w invader ski-bird
1972 g-w invader drag & ski 14
Portage Michigan

115 lower unit changes started 6 years 3 weeks ago #138372

  • Dr.Go!
  • Dr.Go!'s Avatar Topic Author
  • Offline
  • Contributing Member
  • Contributing Member
  • Posts: 1719
  • Karma: 19
  • Thank you received: 125
When using the shaft shaft on the cut down long shaft transom, that is still like raising a motor 3” above a stock to stock match. For a speedster, it should fly when you find the best prop for it. I saw this model with a 115hp Merc long shaft lifted up a bit and it hit 72mph on radar at 1000 foot run. He said it can be a chime walking handful at times. If you change the rubber motor mounts to solid and use dual cabl steering tensioned in a push/pull configuration to remove all slip, that can help you better control that chine walk. When I did that on my old 200 V-6, it would make my boat buzz with vibration at certain rpms when it must have reached some resonant frequencies. Didn’t bother me, but would surprise passengers when slowing to a cruise. Hydraulic steering is nice, but I have yet to rig my own yet. Drove twin 150s with hydraulic steering and it was amazing to not have to fight steering torque.

Please Log in or Create an account to join the conversation.

Dr.Go!

115 lower unit changes started 6 years 3 weeks ago #138391

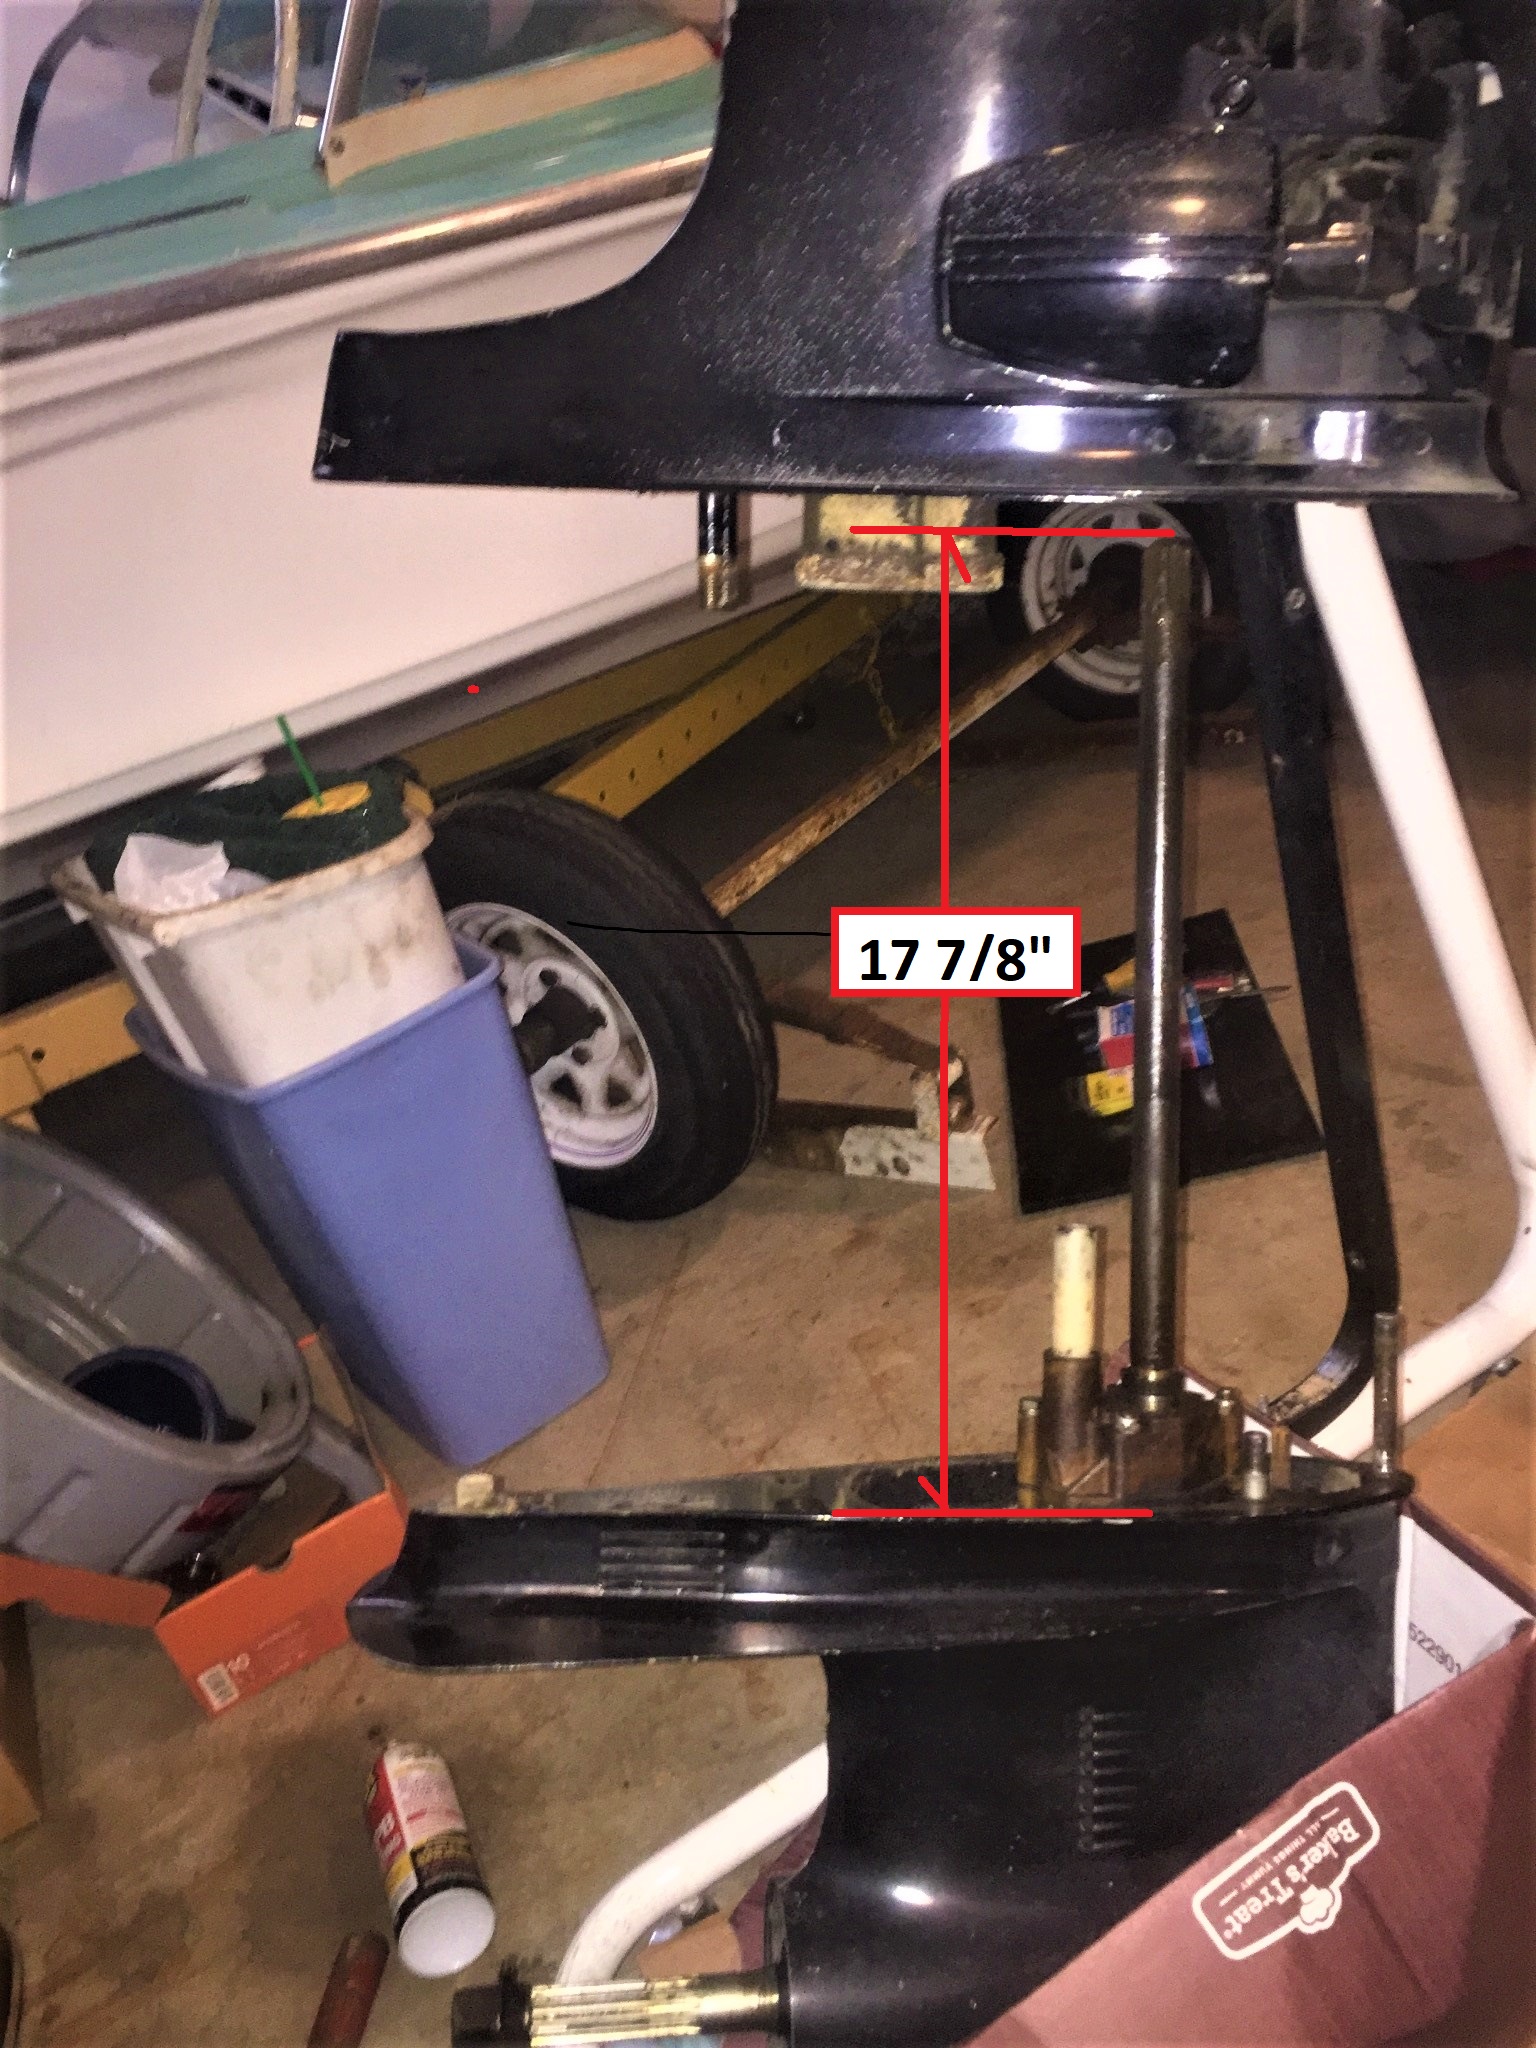
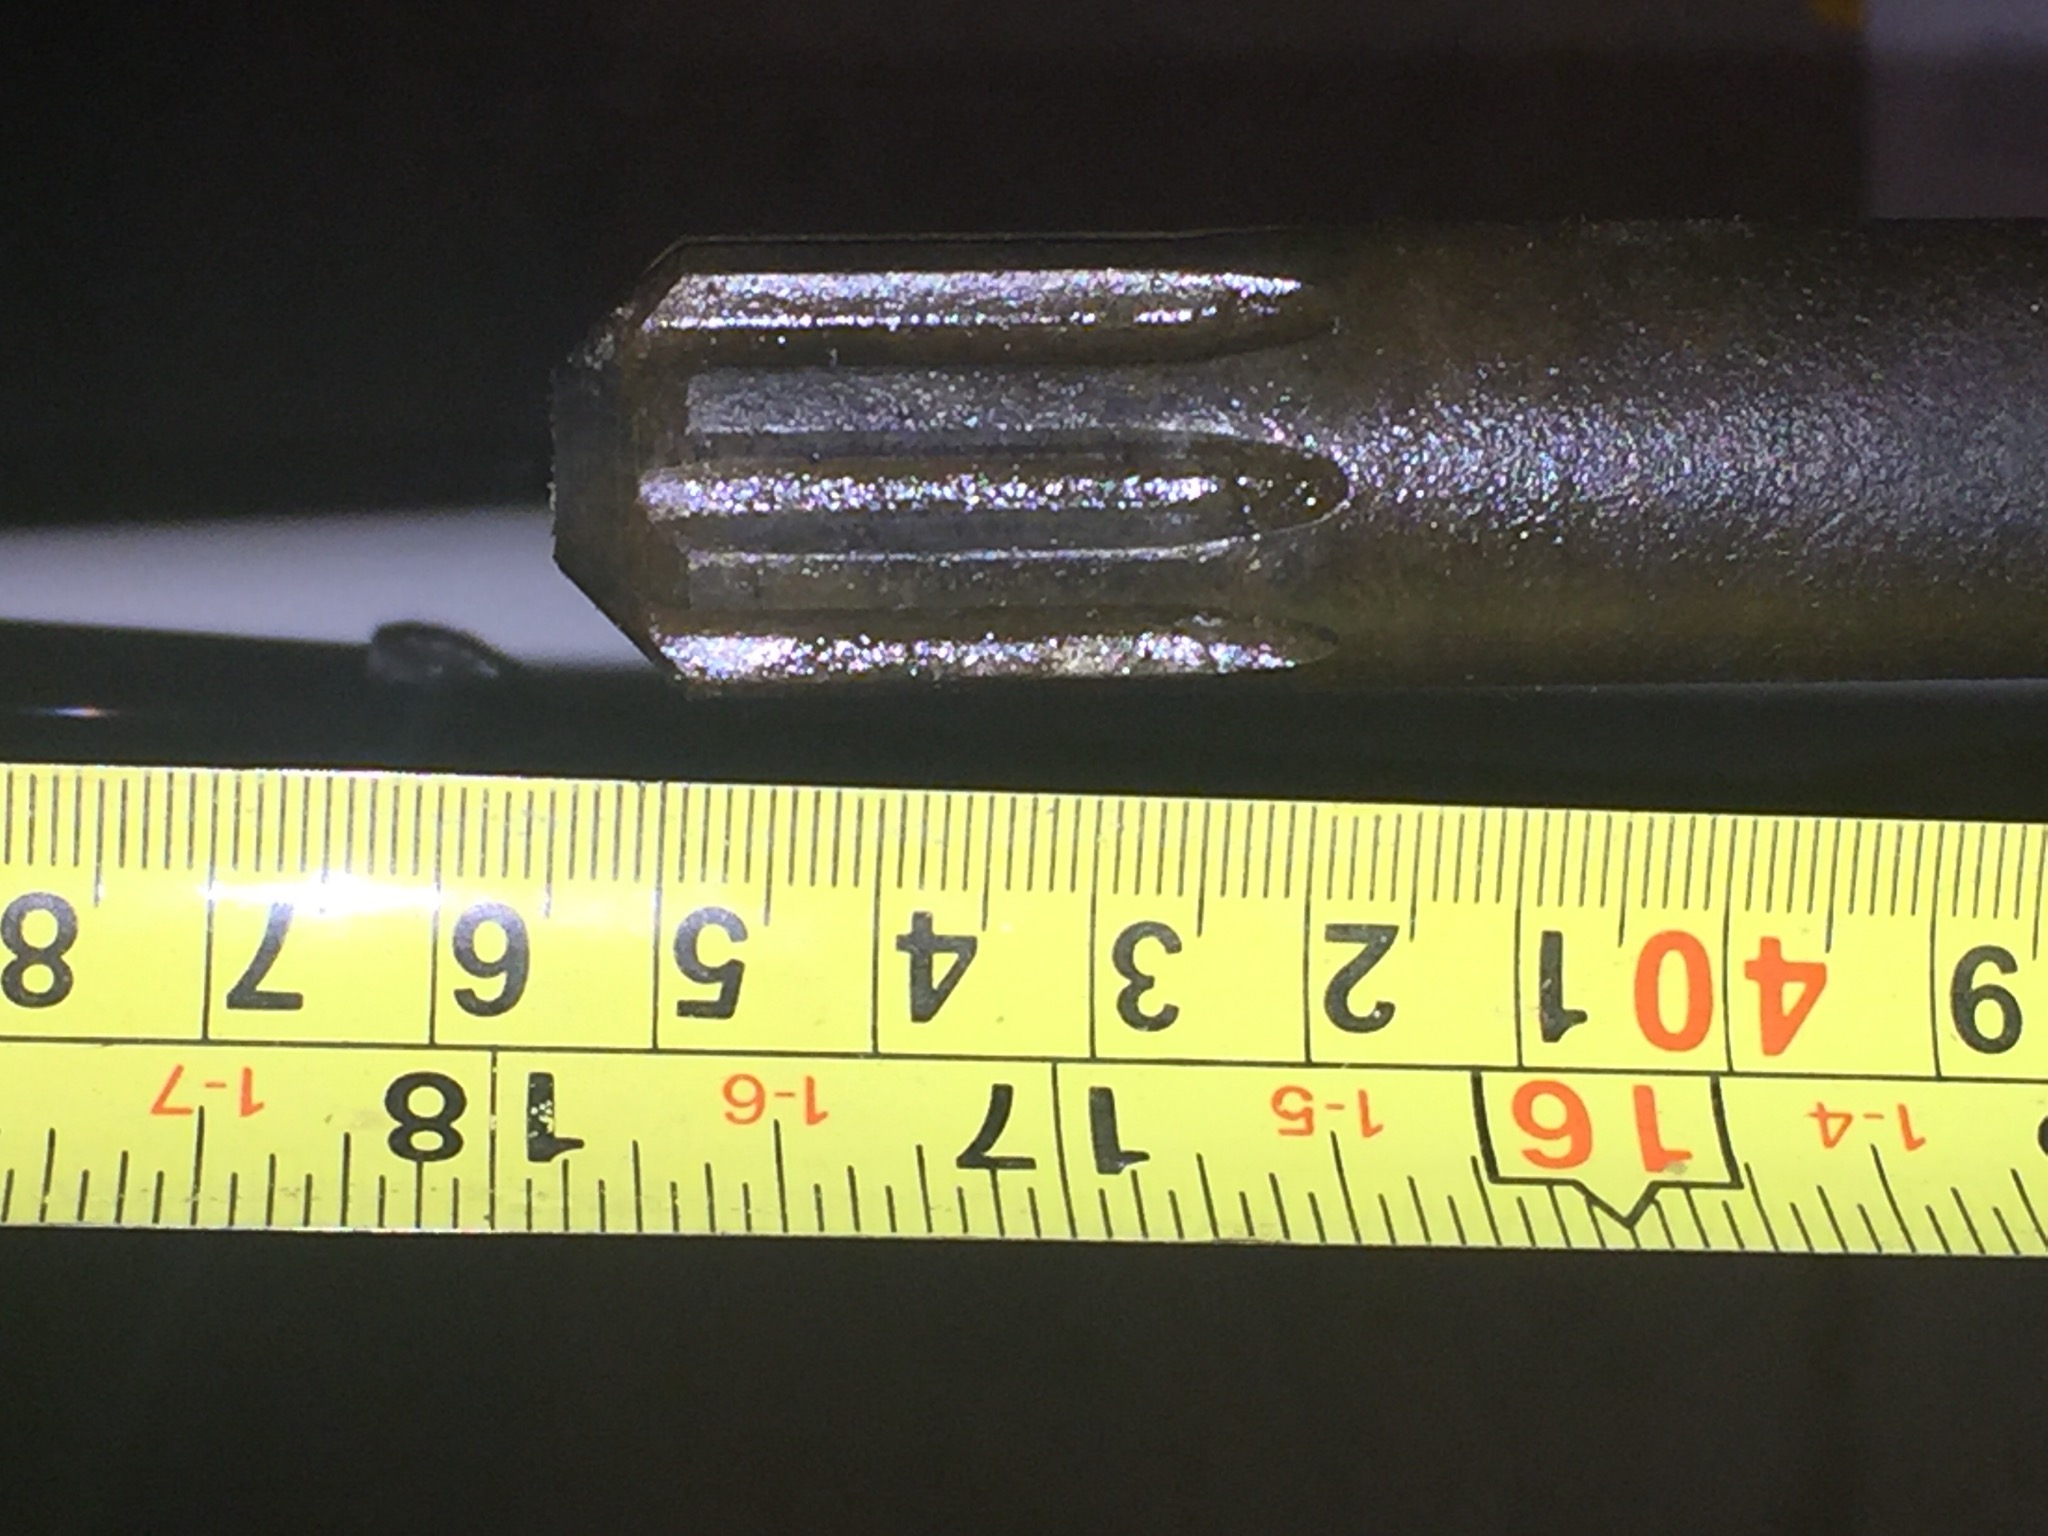
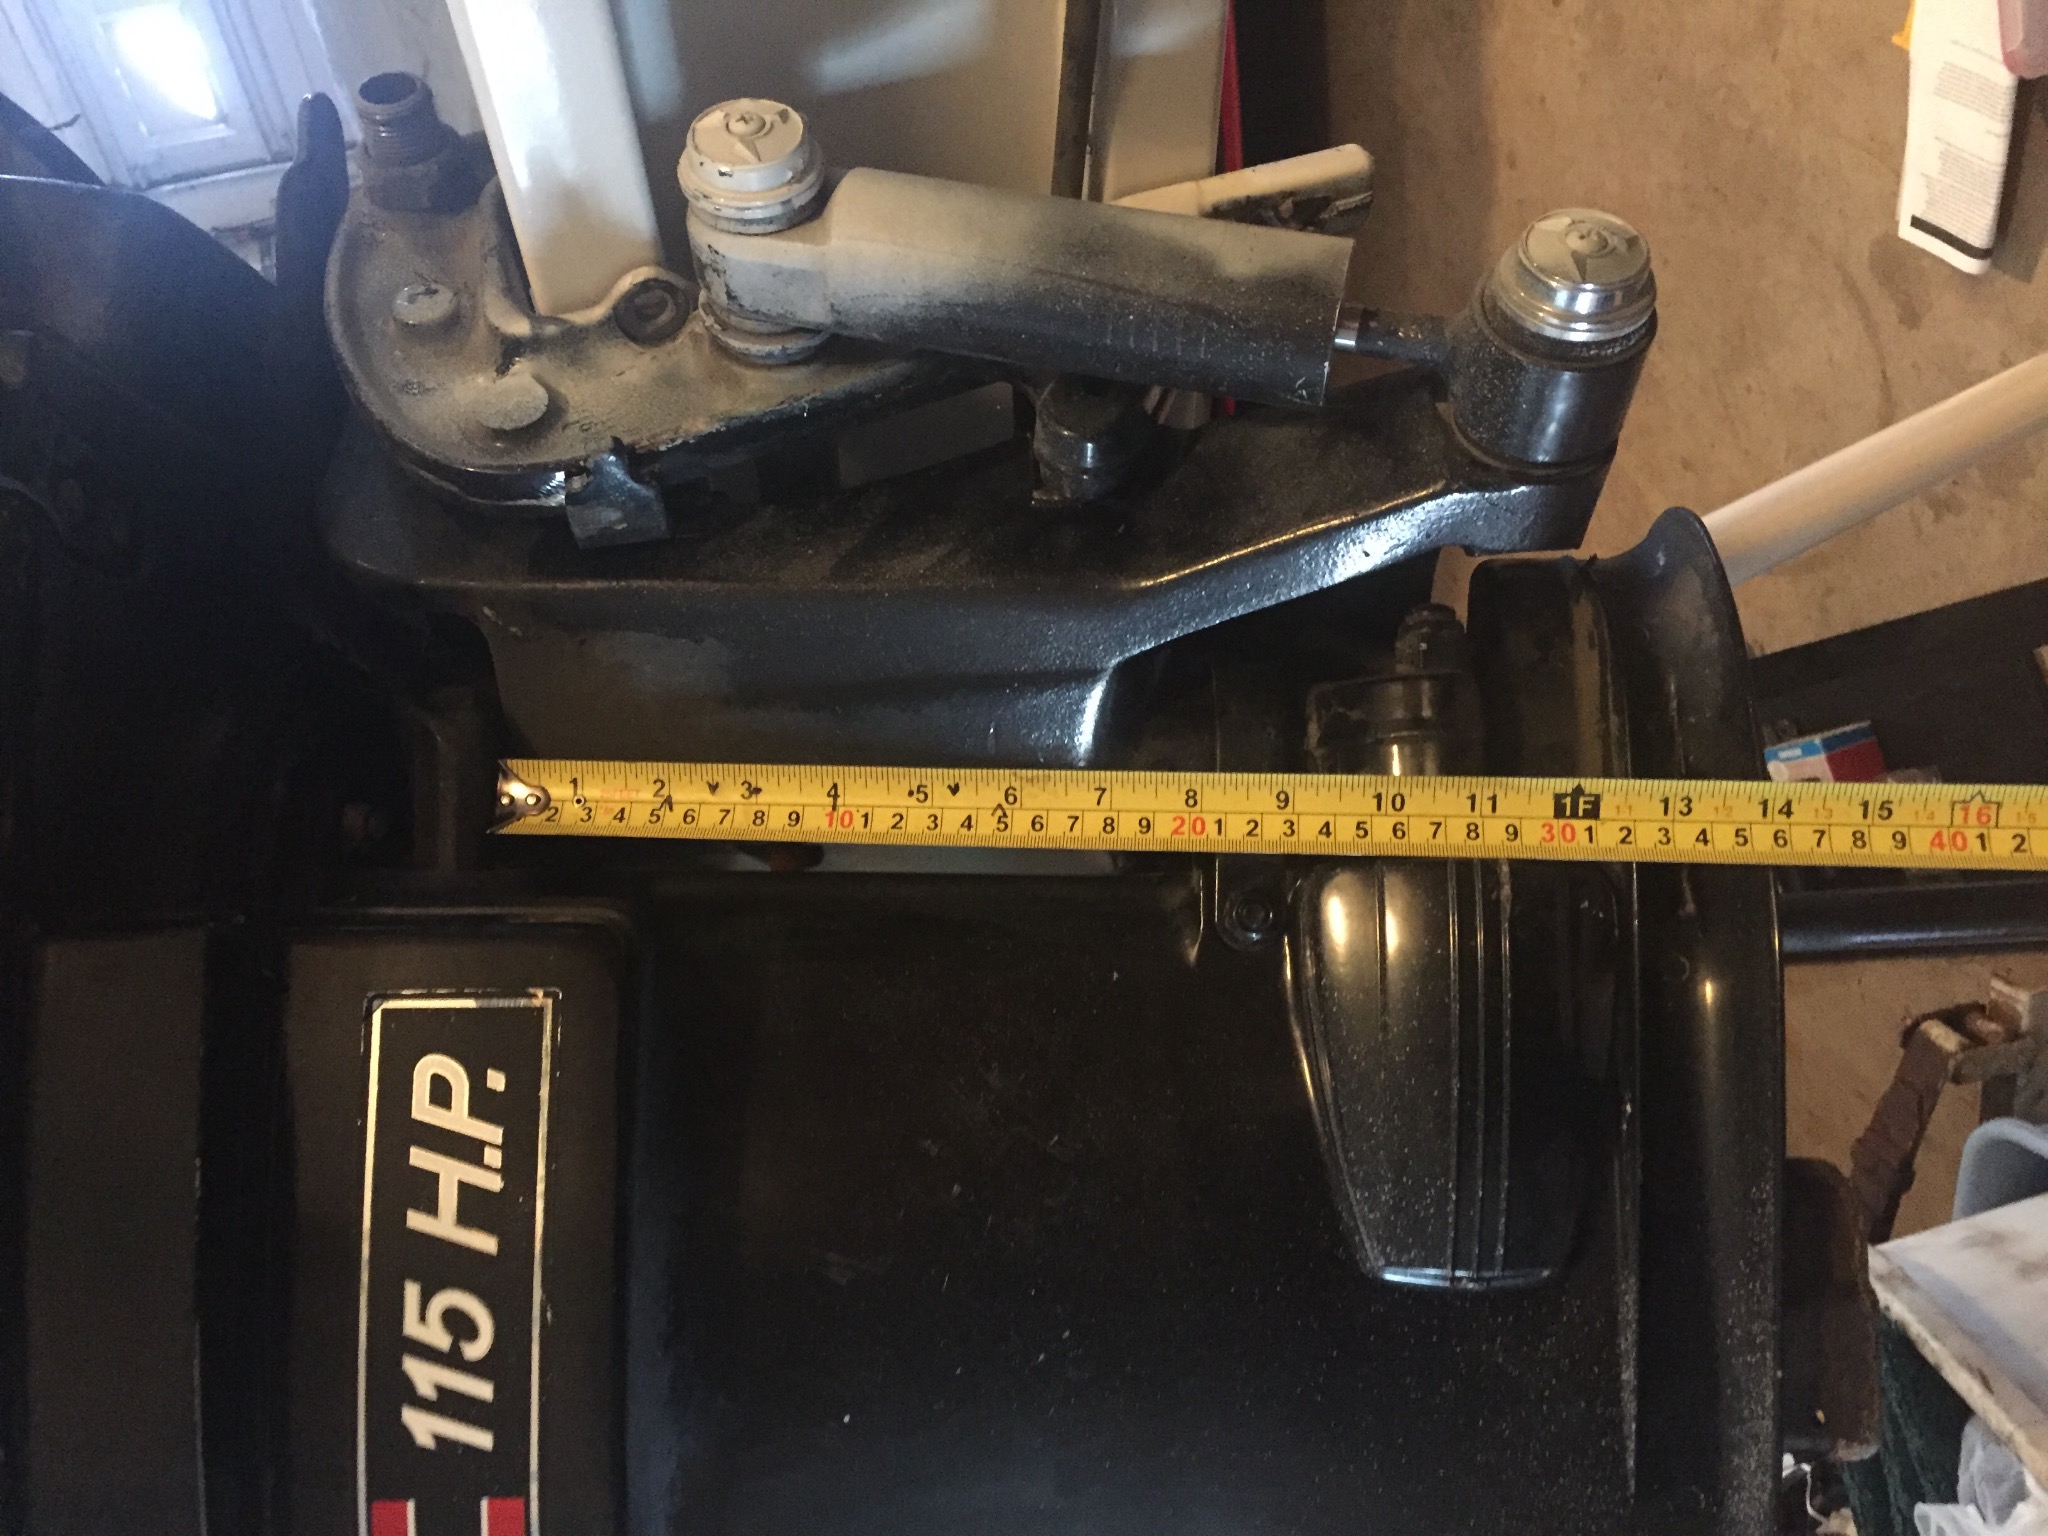
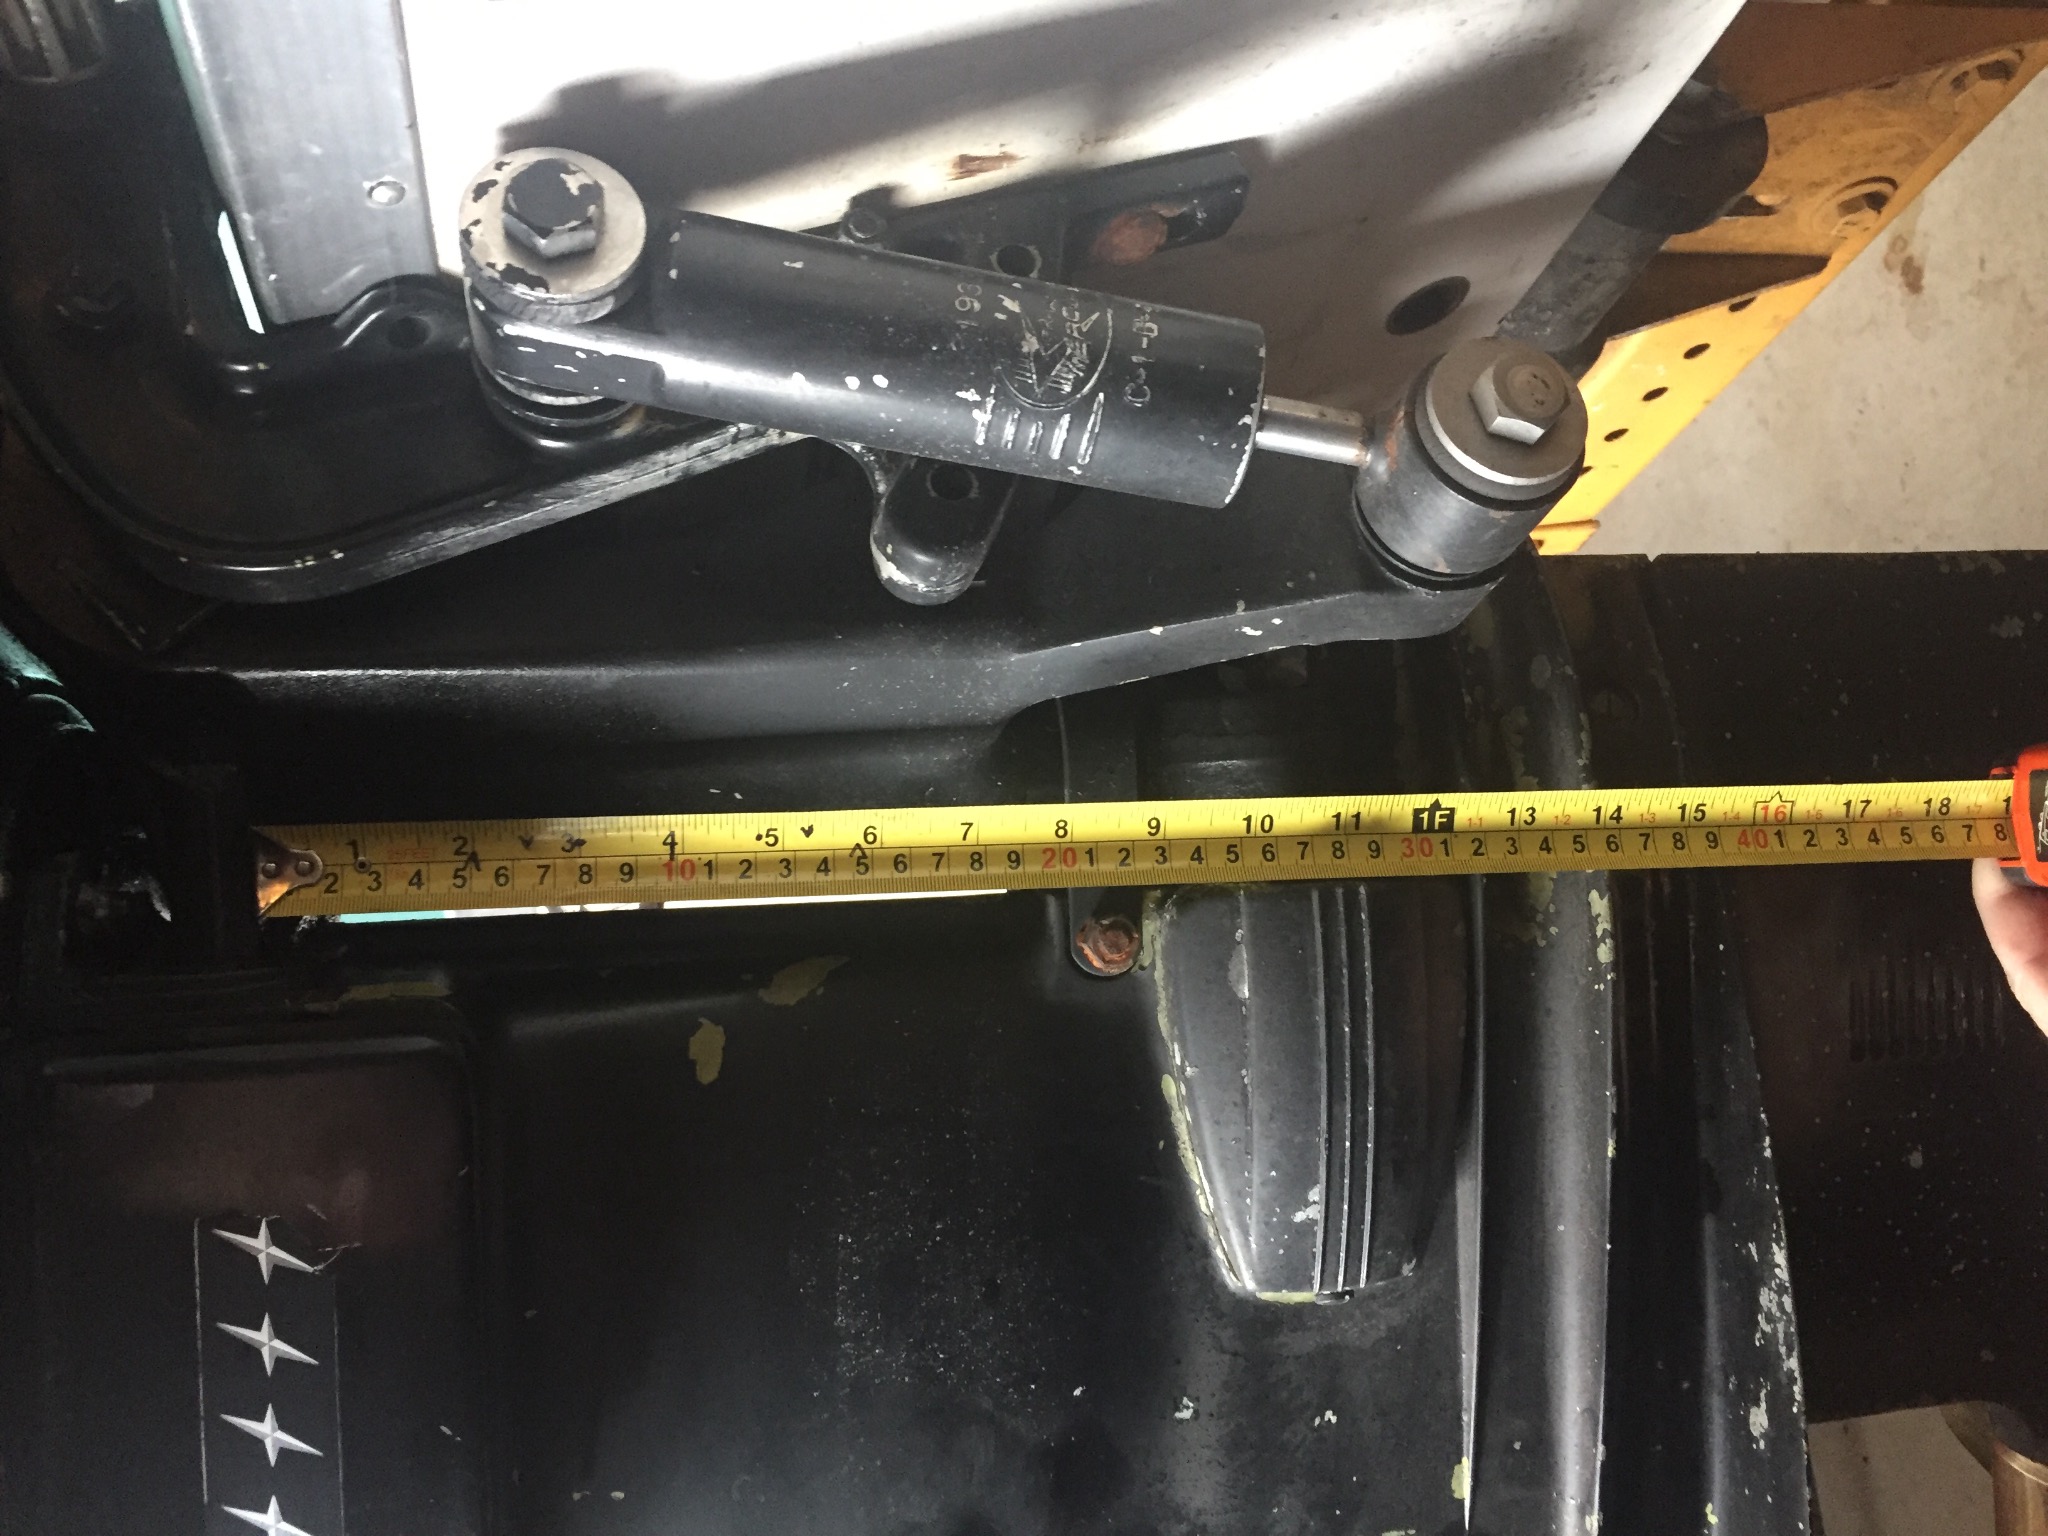
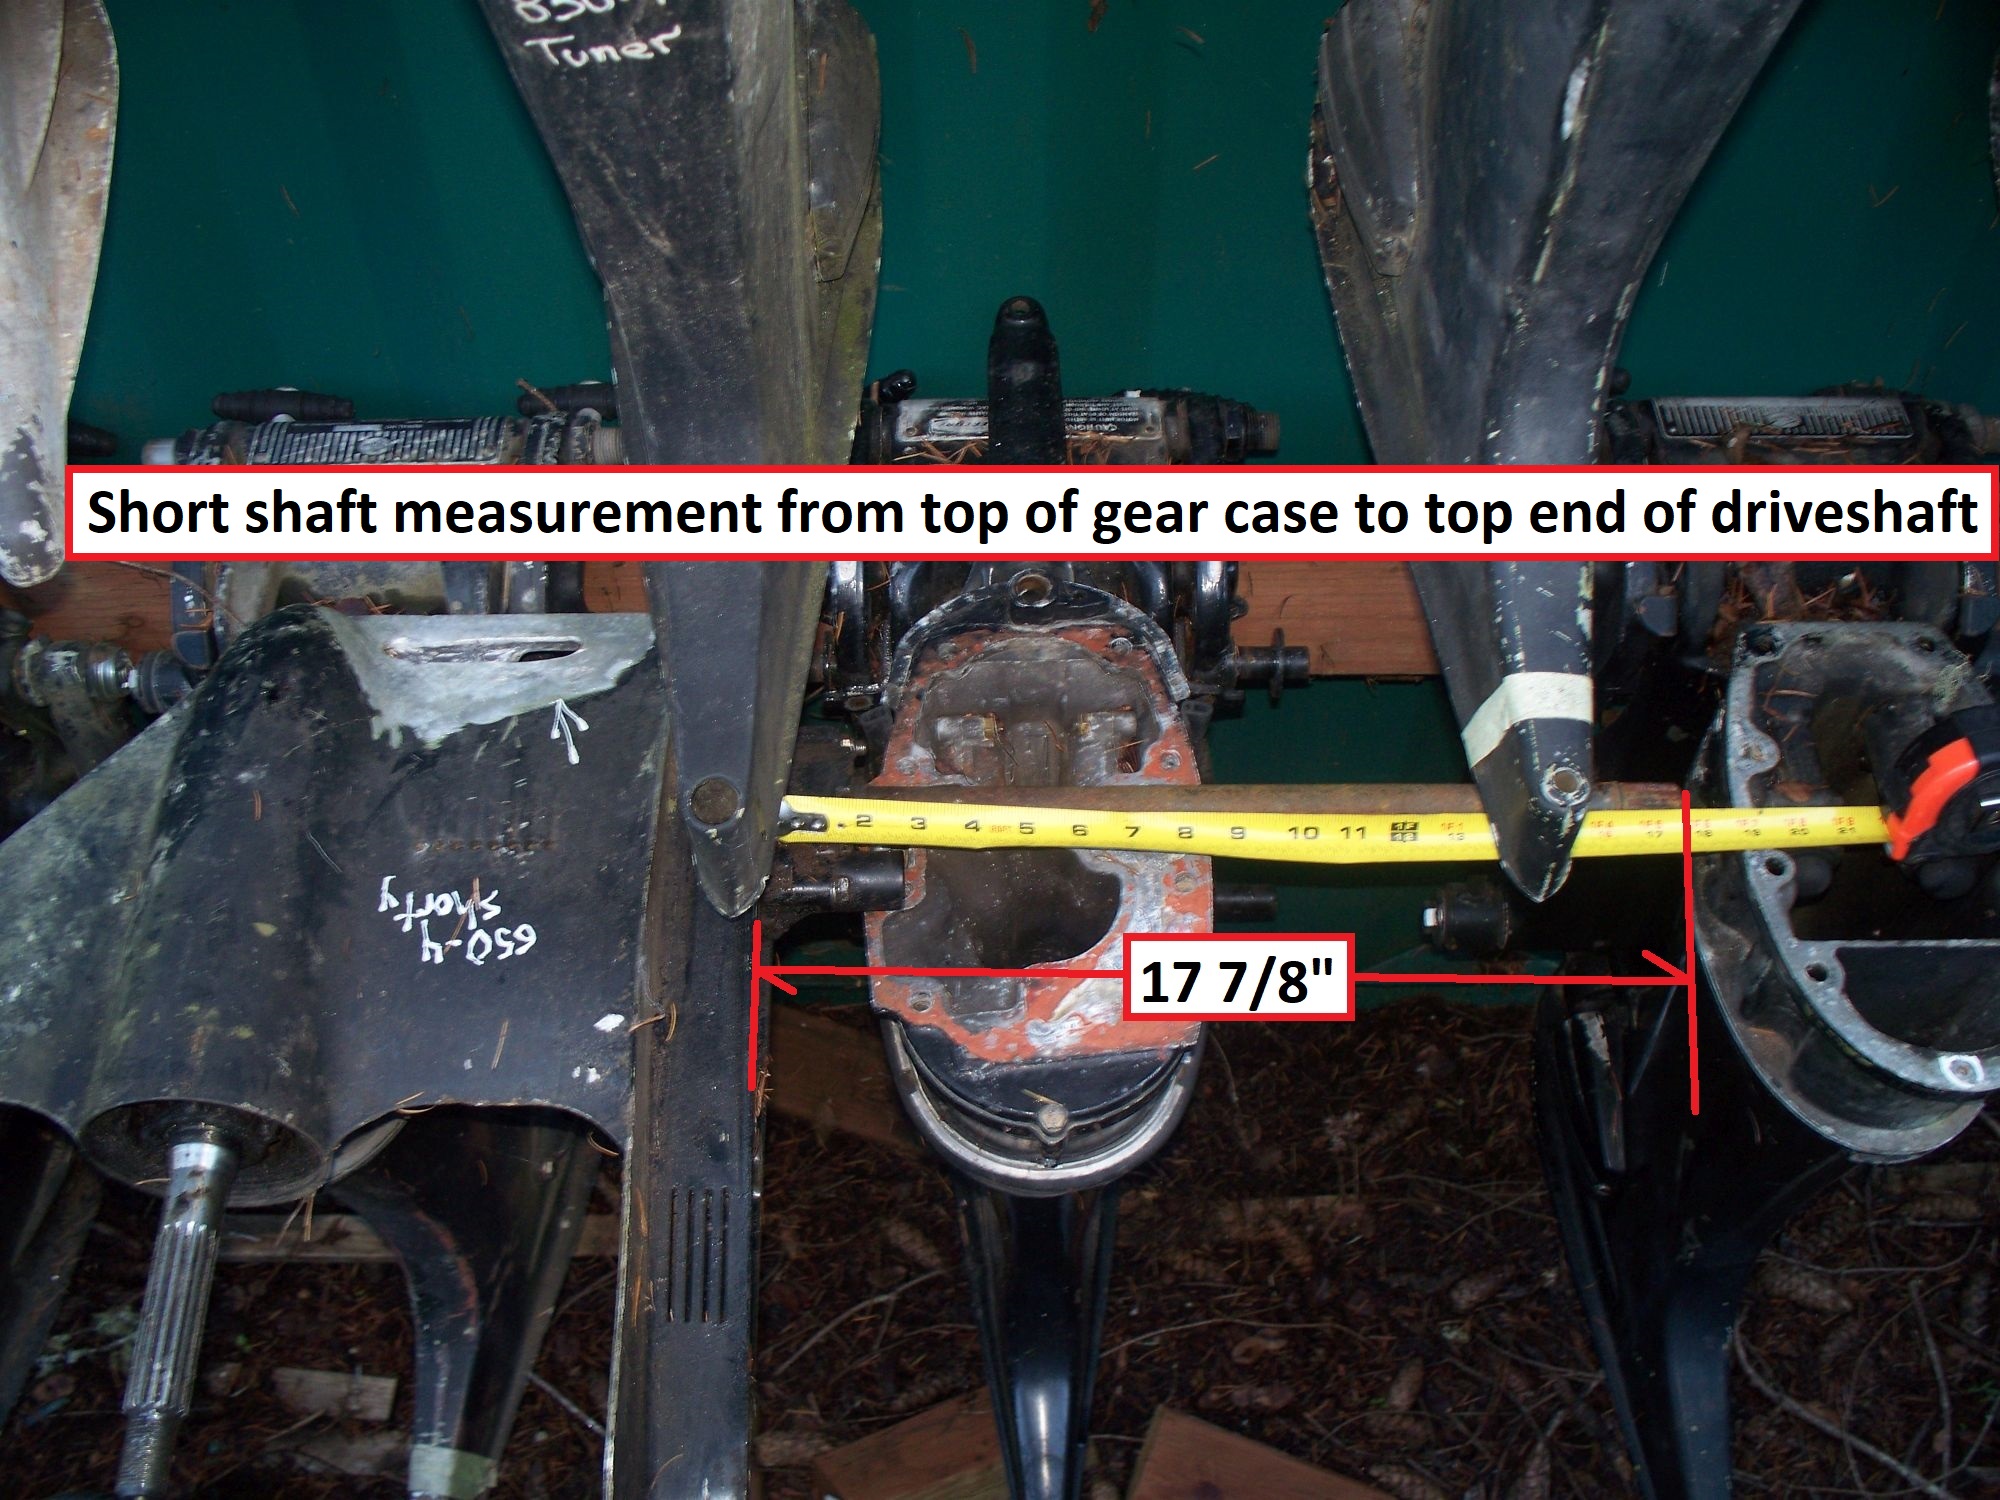
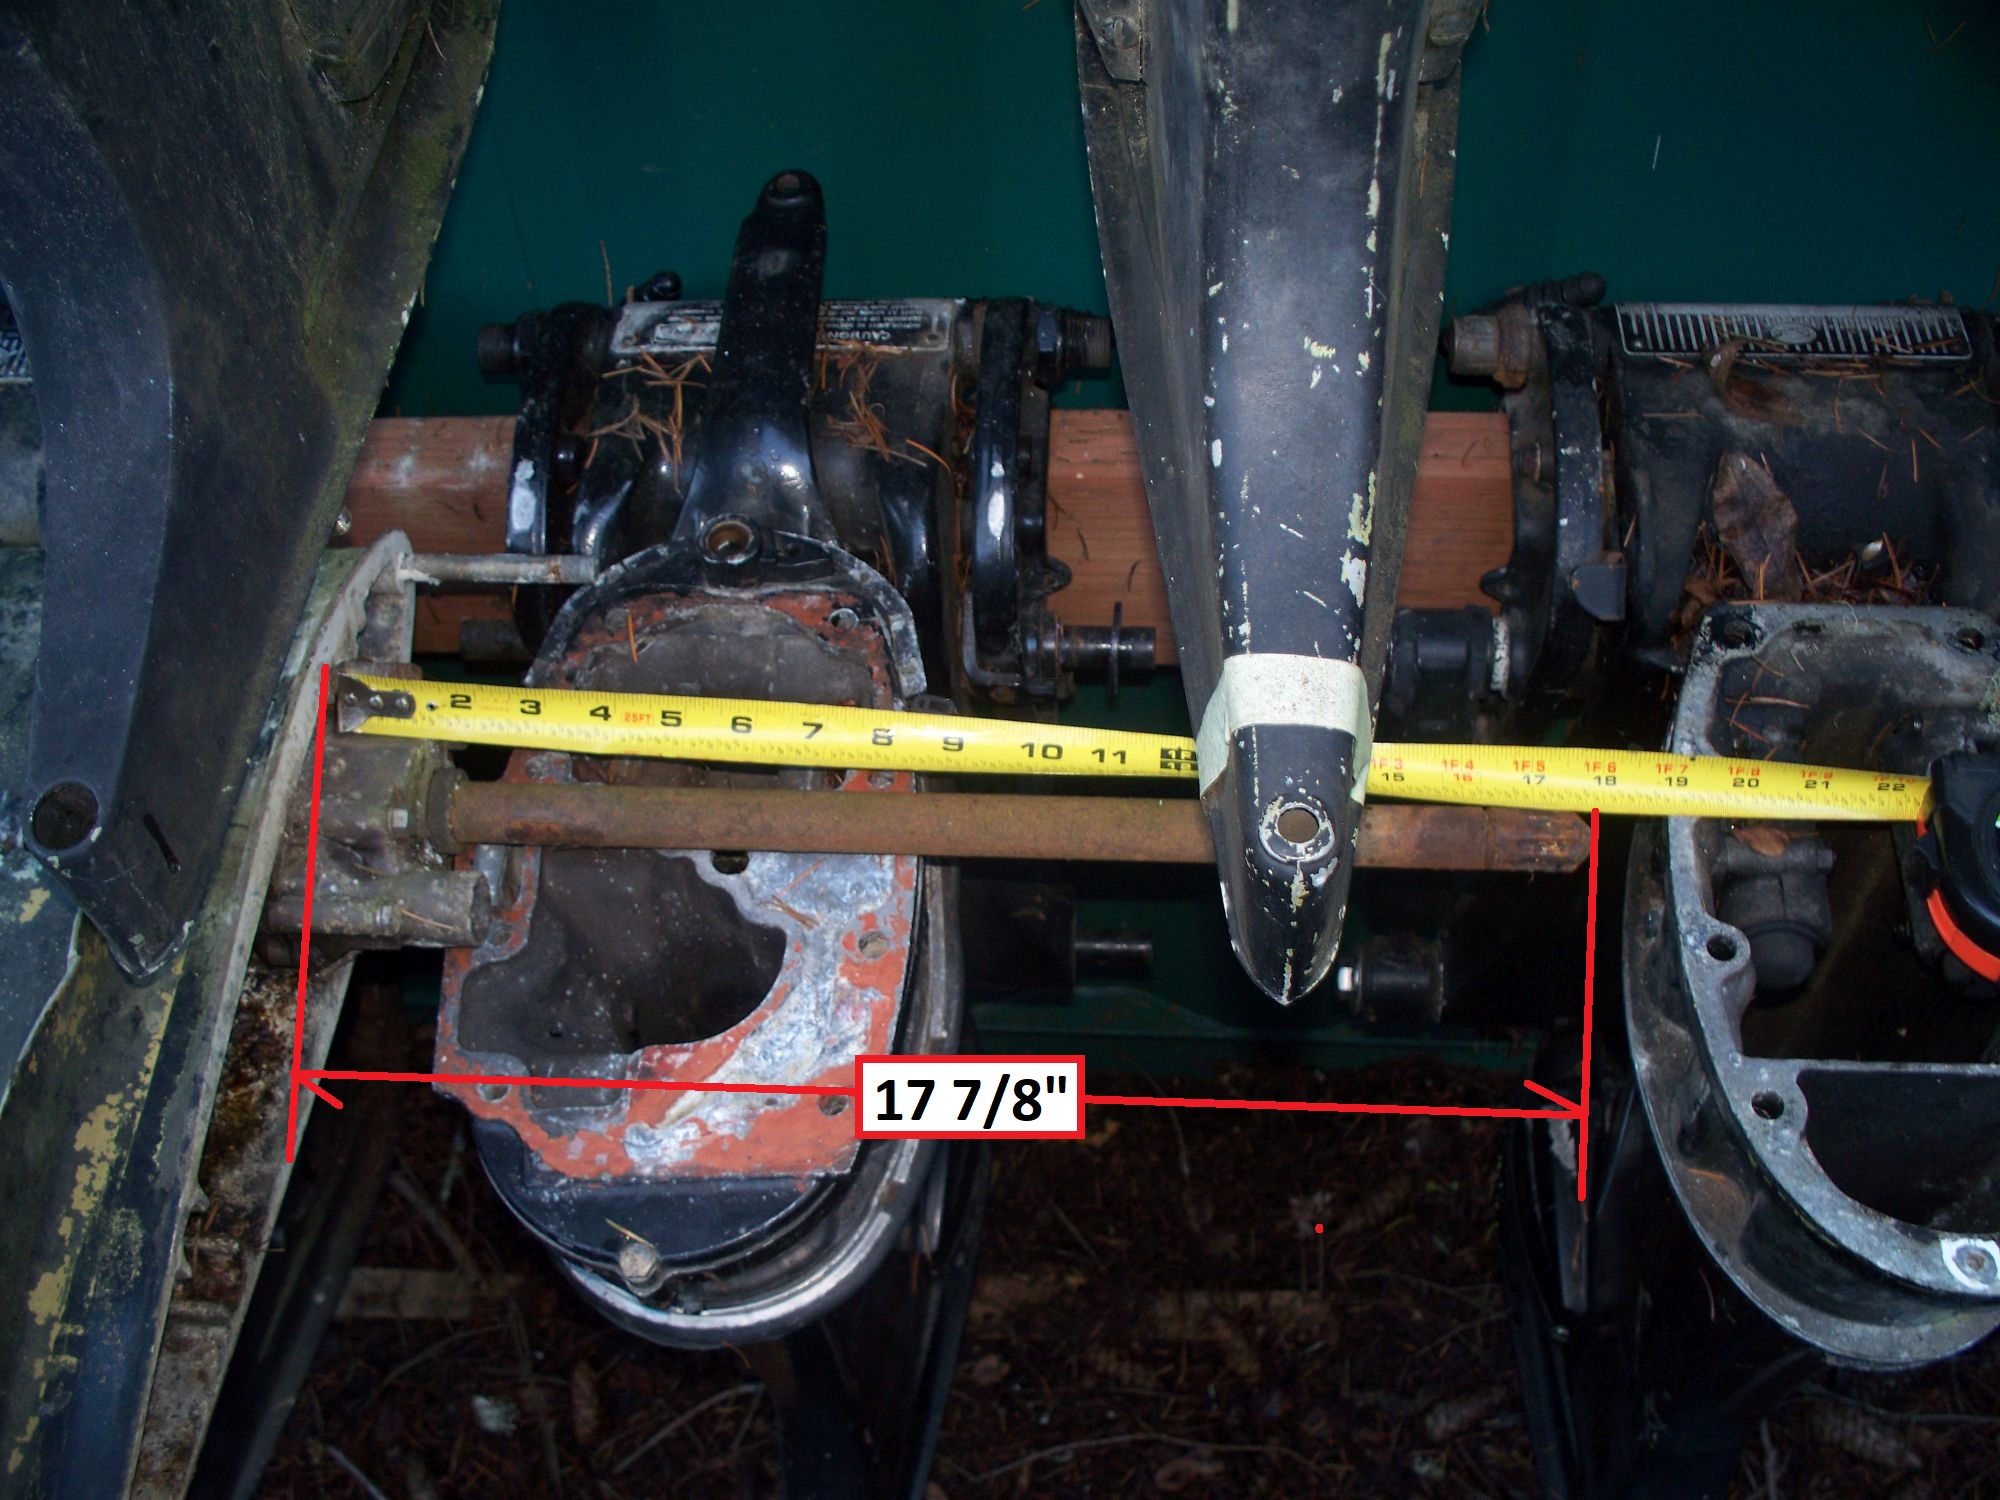
If the driveshaft measurement matches the one in my picture,...Someone installed a long shaft lower unit into this assembly.
If there is a stub shaft in the top, you will need to remove the exhaust extension plate to remove it, or rotate it so that its flat sides on the outside surface of the female, lower end, is rotated to where the stub shaft will slide down and out the bottom of the driveshaft housing.
doc

Attachments:
The following user(s) said Thank You: Dr.Go!

Please Log in or Create an account to join the conversation.

115 lower unit changes started 6 years 3 weeks ago #138394

  • Dr.Go!
  • Dr.Go!'s Avatar Topic Author
  • Offline
  • Contributing Member
  • Contributing Member
  • Posts: 1719
  • Karma: 19
  • Thank you received: 125
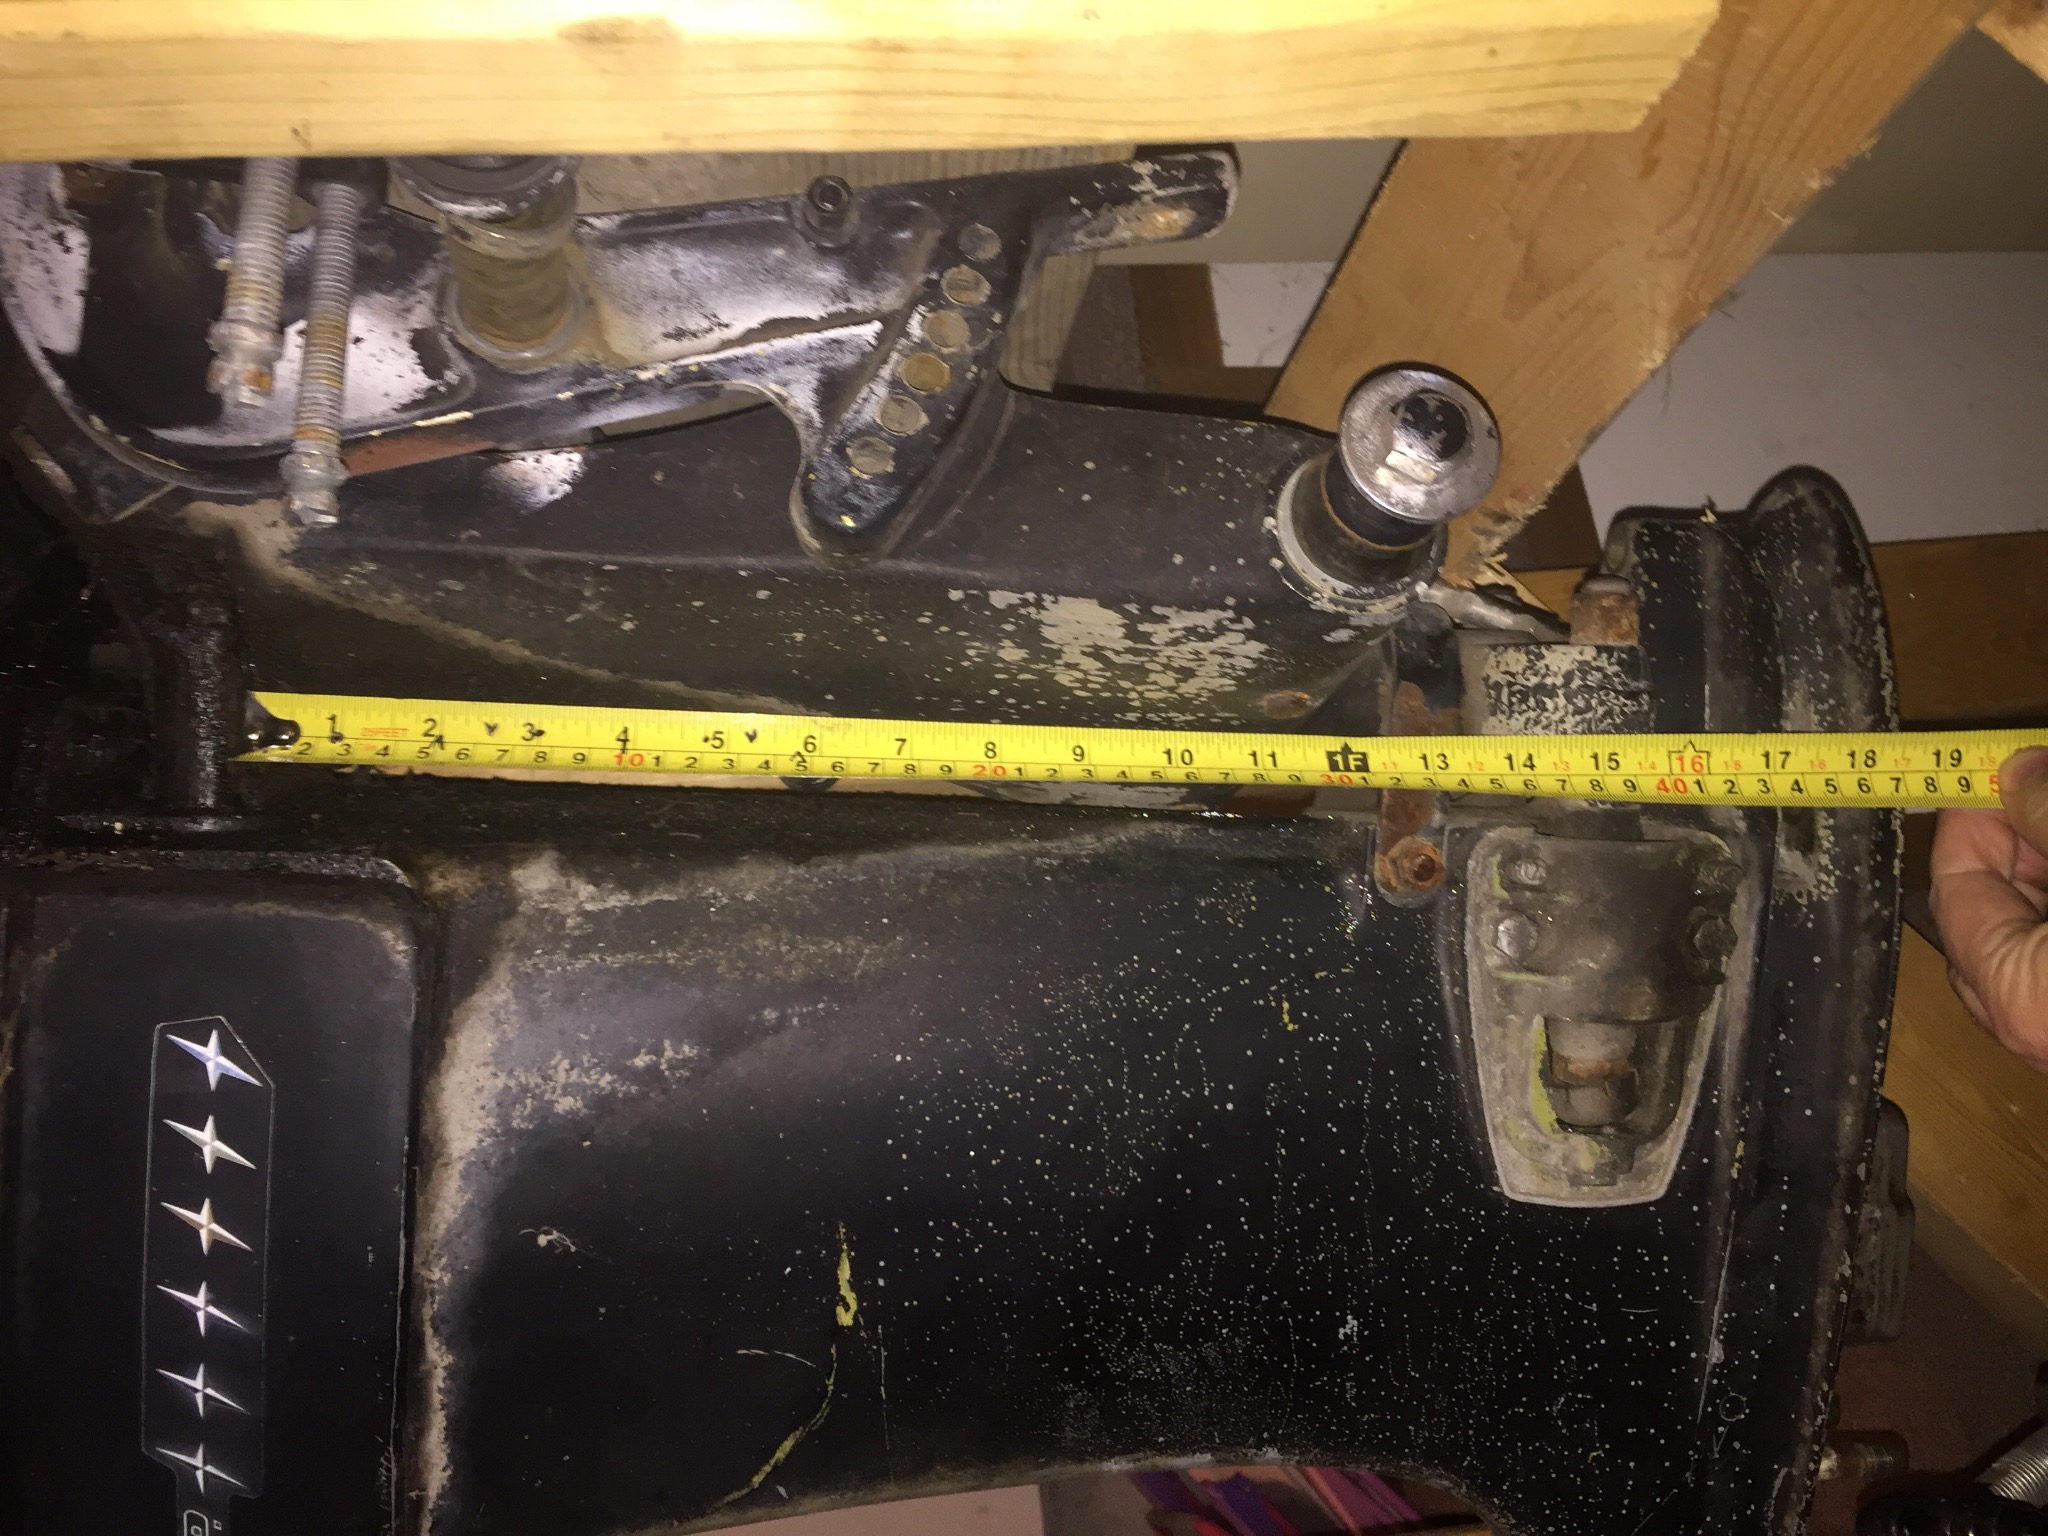
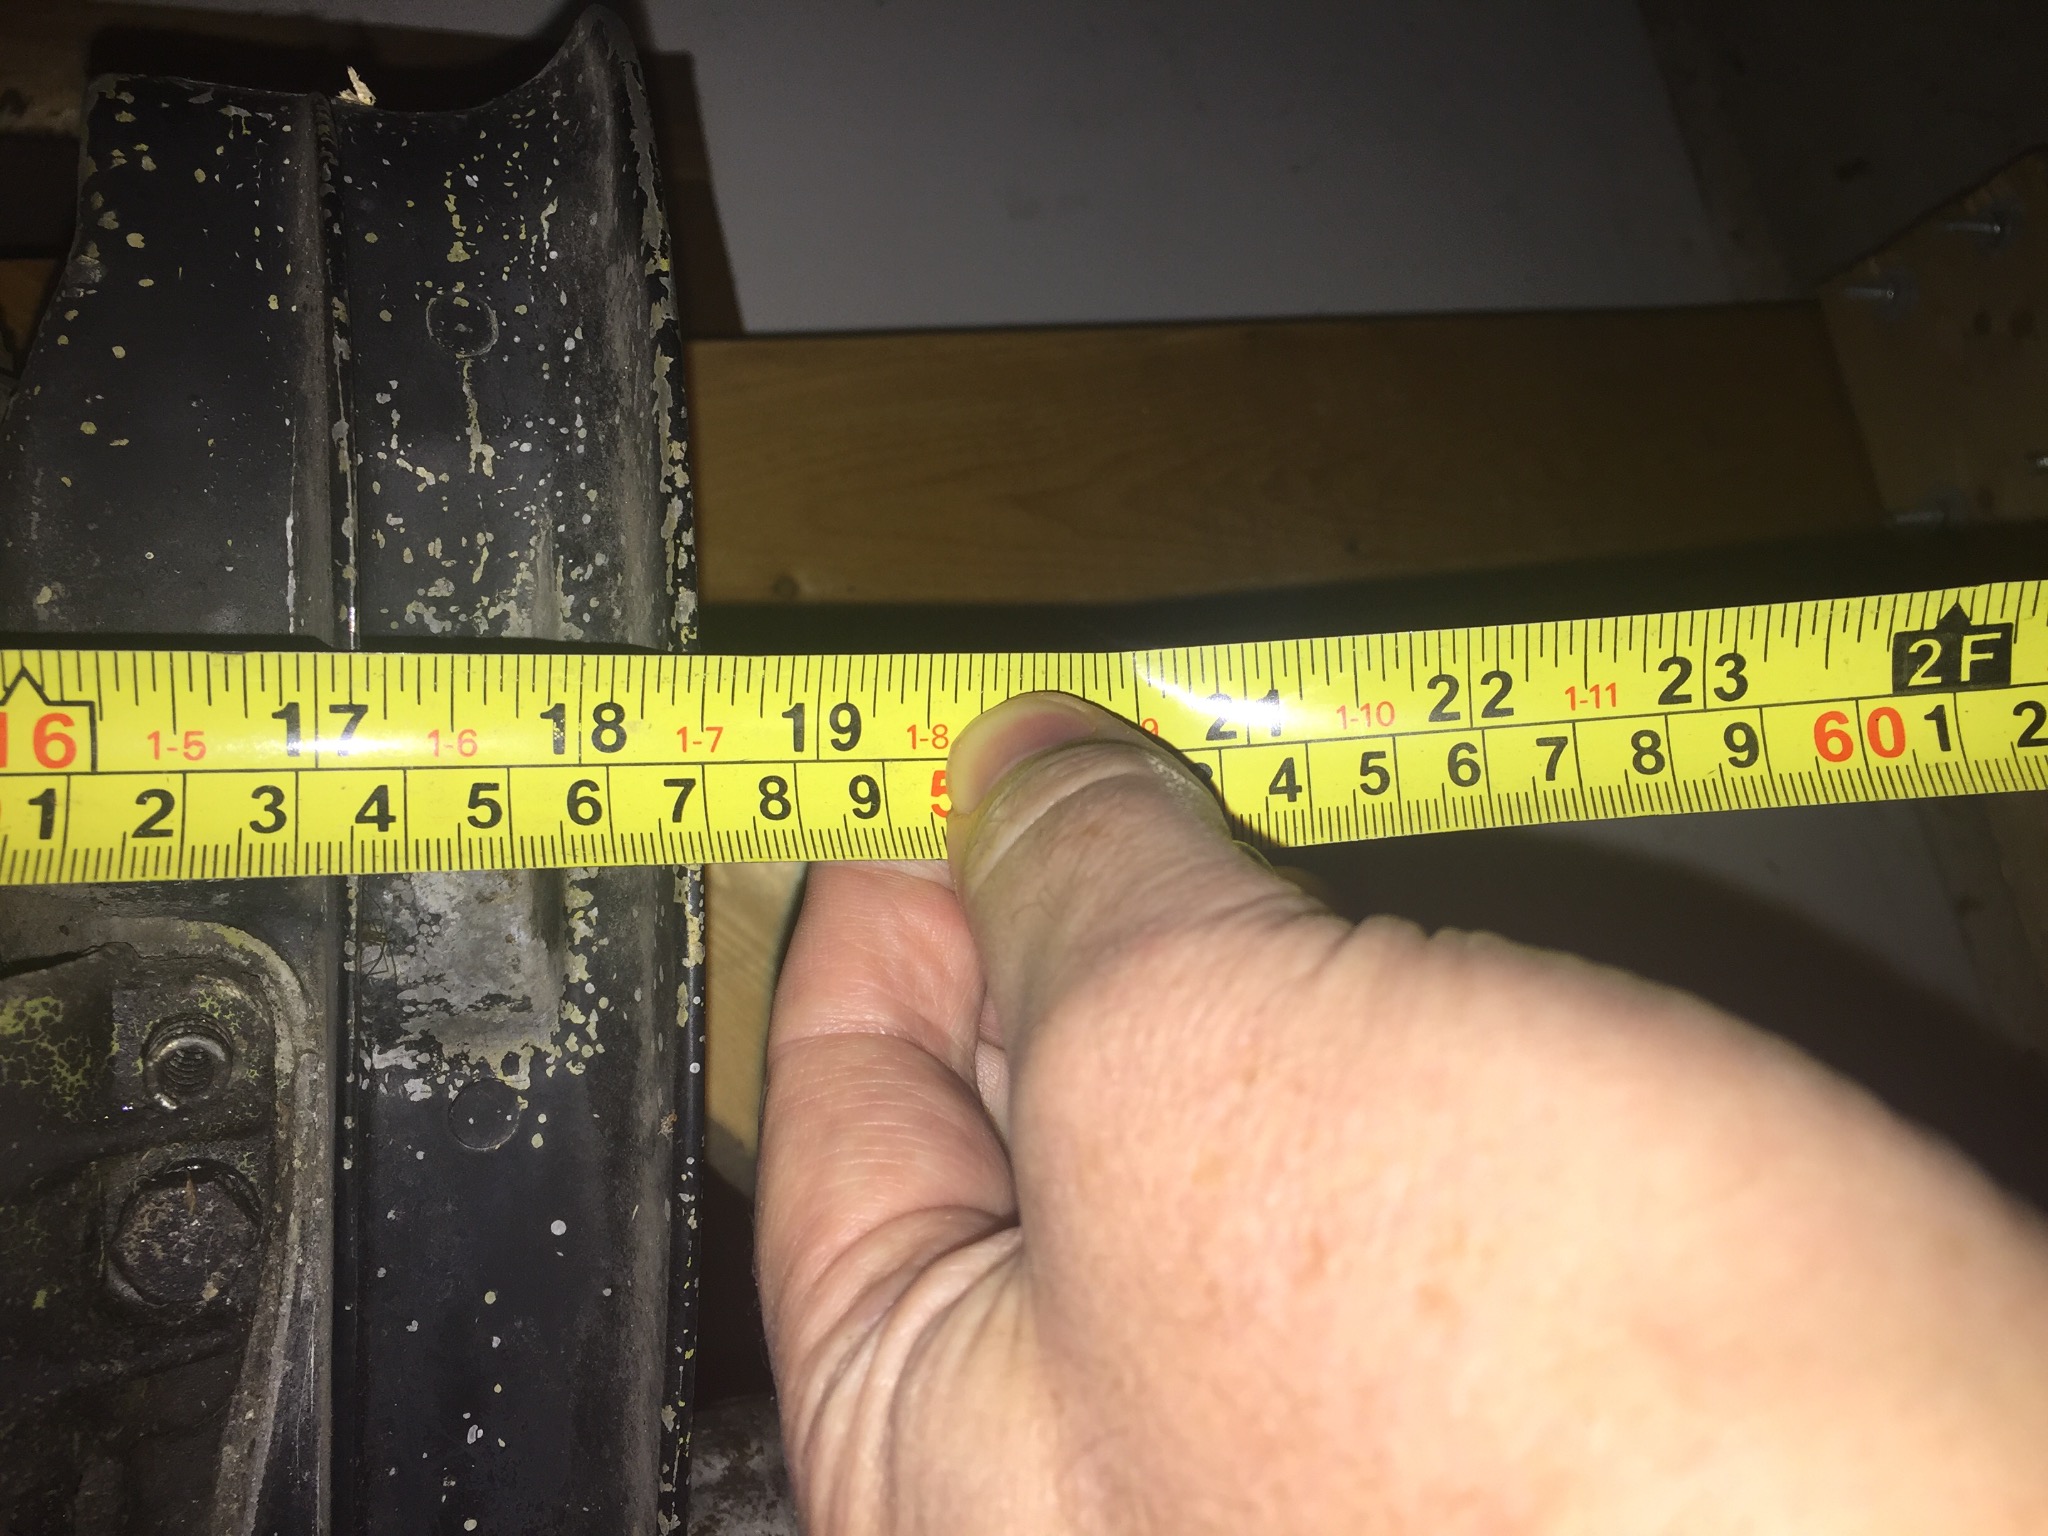
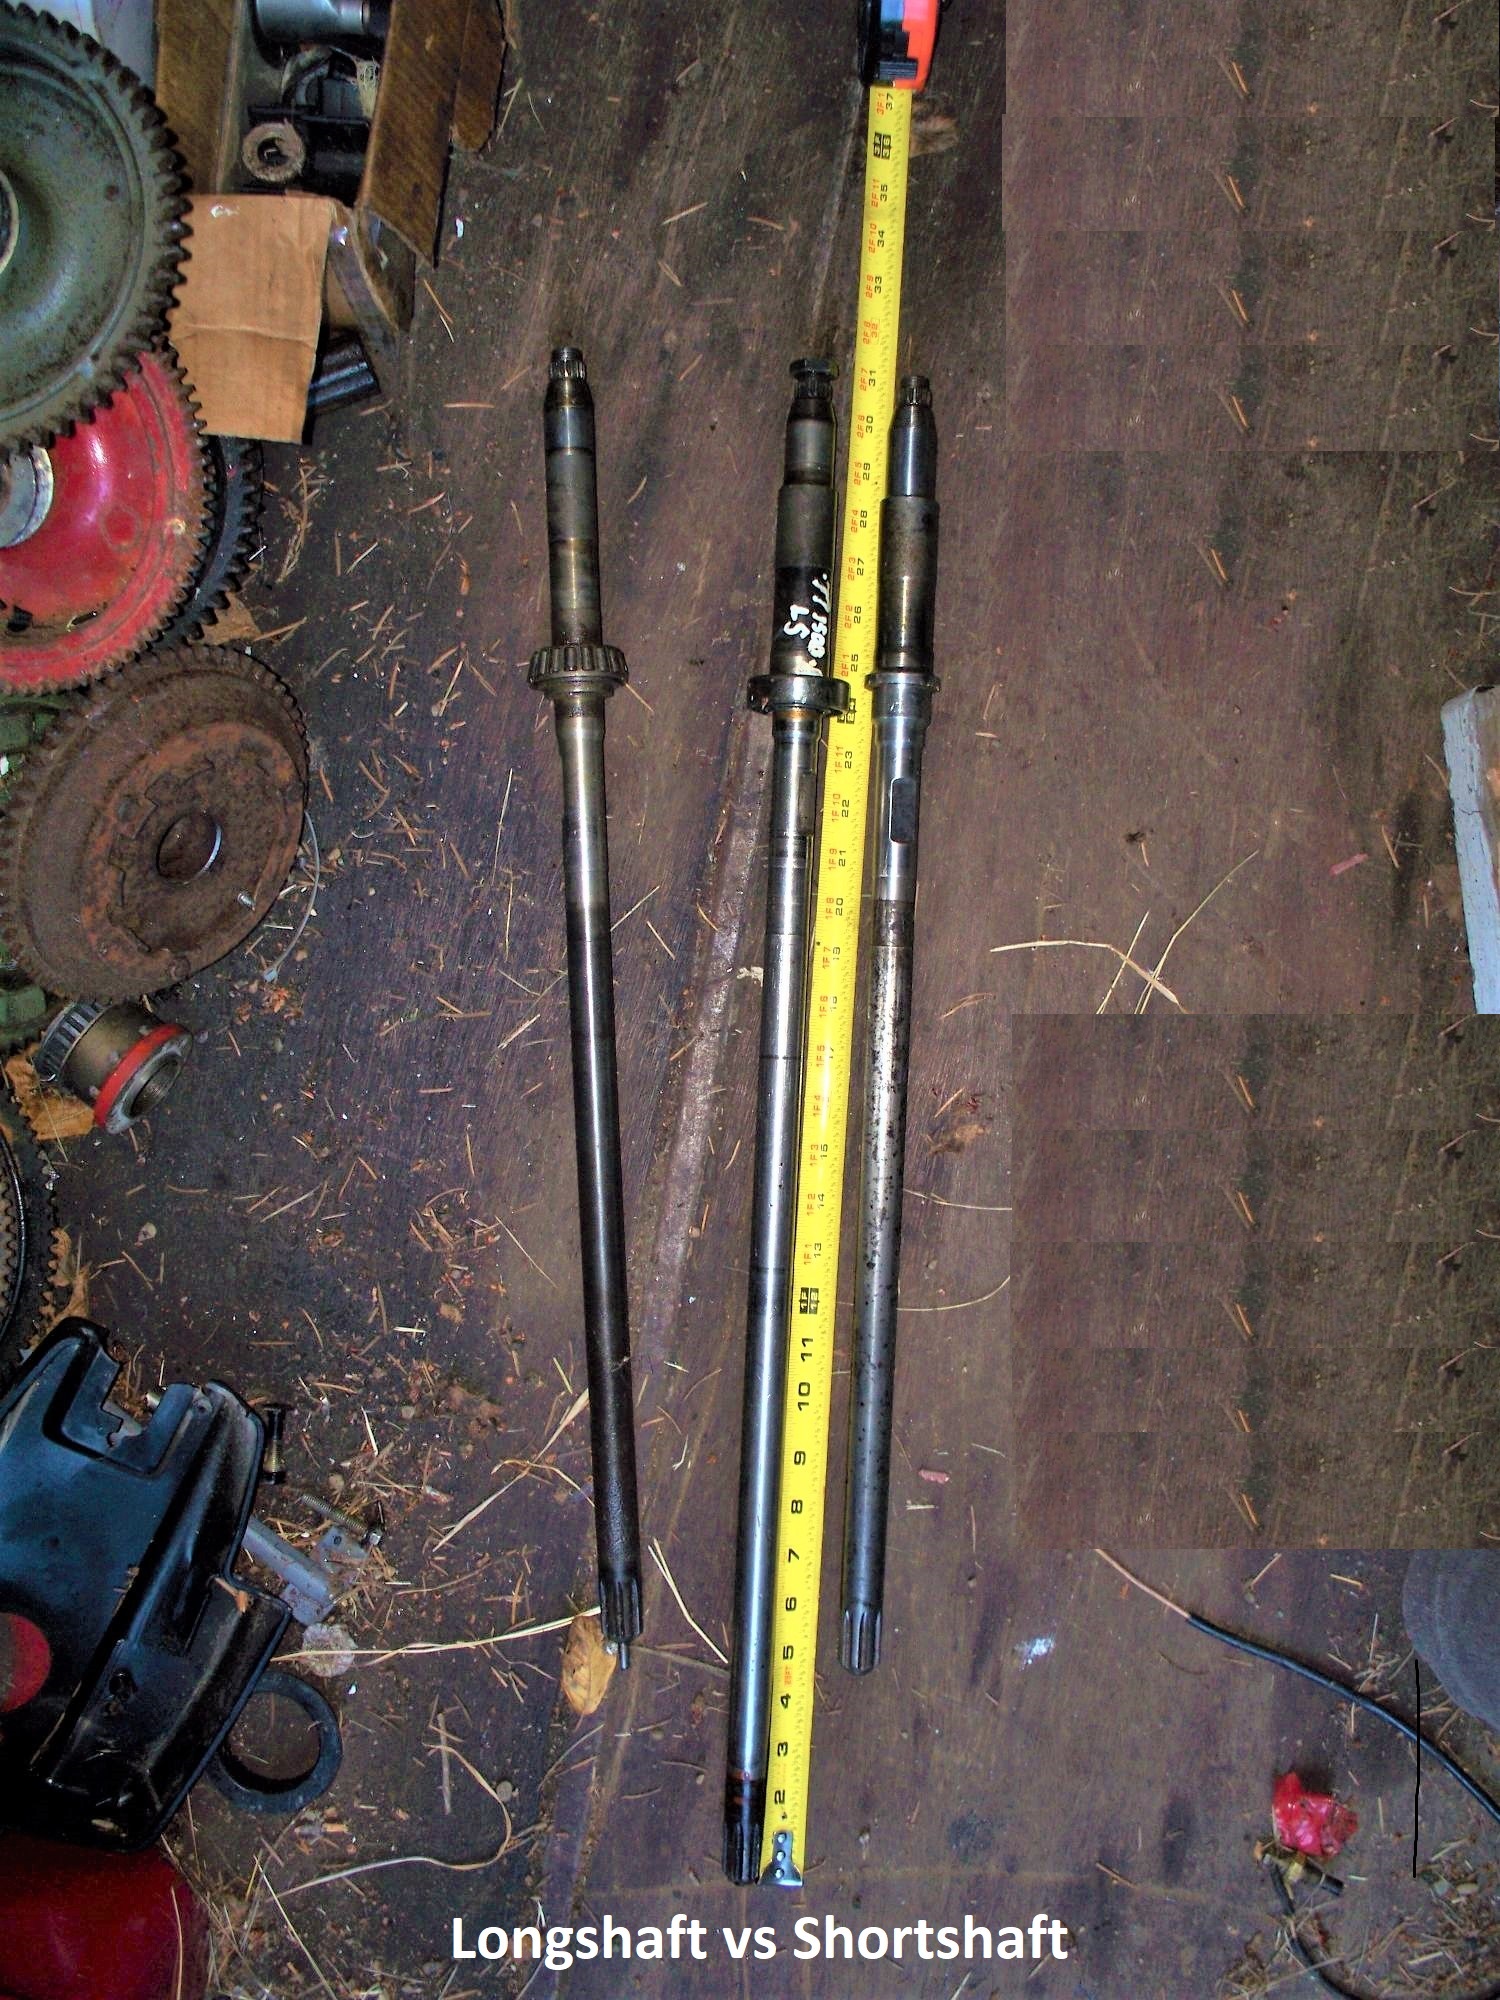
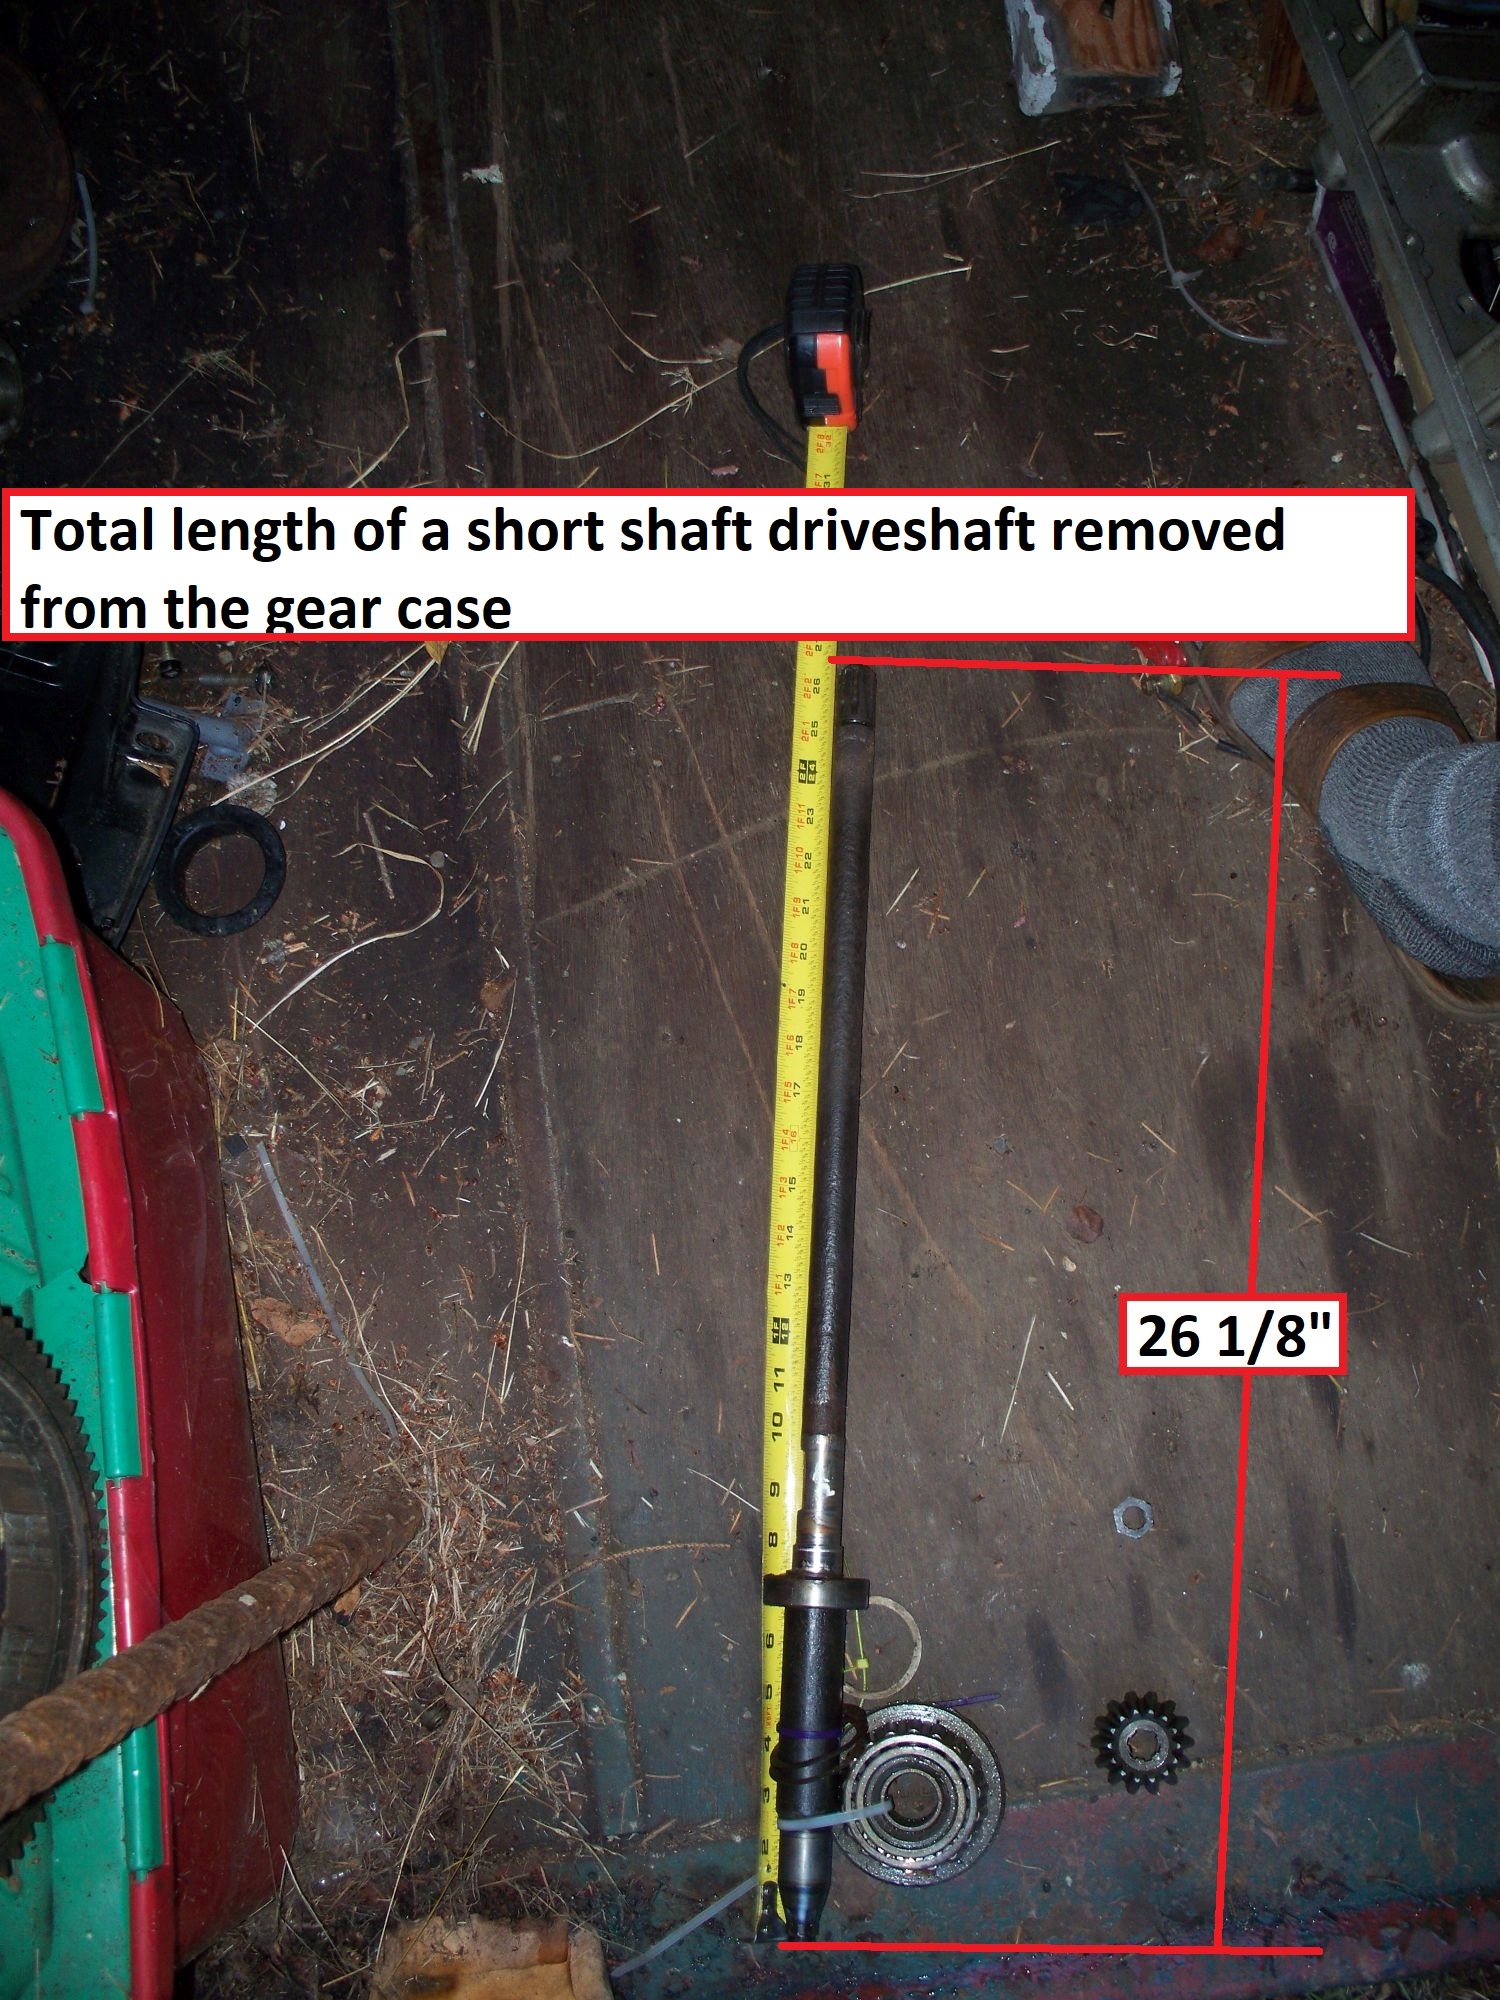
Thank you for the expert advice for me to check. I had been out of town for several days when I saw Docs post. I just recently got home. Guess what was the first thing I did after unpacking the car... yep - got out the camera and tape measure. Docs diagnosis was spot on according to my pictures. So now time to ponder. Would I be wiser to find a member who needs a good working long shaft lower unit that would have a good working short shaft they would be willing to trade? Or is it better for me to somehow locate a short drive shaft and then do a complete tear down ad re-assembly? I don’t know which is harder to get... but I do know which will be less labor. I am open to all suggestions and also offers if someone has a shorty to swap. I also have no clue of a ballpark value of this unit and how that compares with the value of a shorty. I wouldn’t want to just sell it and then find out a shorty is twice the price or can’t find one. Thanks to all who have advised me thus far!
Attachments:

Please Log in or Create an account to join the conversation.

Dr.Go!

115 lower unit changes started 6 years 3 weeks ago #138395

I think you can have it cut off and resplined, at least that is what I have read. They say you don't even have to take the shaft out. IDK but hopefully that will help.
The following user(s) said Thank You: Dr.Go!

Please Log in or Create an account to join the conversation.

115 lower unit changes started 6 years 3 weeks ago #138396

  • Dr.Go!
  • Dr.Go!'s Avatar Topic Author
  • Offline
  • Contributing Member
  • Contributing Member
  • Posts: 1719
  • Karma: 19
  • Thank you received: 125
Would you know of a place to do that? Should I try a local auto engine rebuild shop or look for purely an expert machine shop? I assume an expert shop would understand metallurgy and ensure the proper procedures to ensure the new splines would have proper hardness to ensure it won’t sheer from being too brittle or strip out splines from being too soft. Anyone done this before and have a suggested ballpark cost? I have also heard the short shaft Merc 65hp lower unit will fit. I would need to know what years would fit and if gear ratios are the same. I will start digging in my manuals to see if I can find anything there. Thanks for the alternative option... I will have to weigh all options before proceeding.

Please Log in or Create an account to join the conversation.

Dr.Go!

115 lower unit changes started 6 years 3 weeks ago #138397

  • 63 Sabre
  • 63 Sabre's Avatar
  • Offline
  • Contributing Member
  • Contributing Member
  • Posts: 4676
  • Karma: 147
  • Thank you received: 167
Hey Mark, I see there about 5 or 6 machining shops around your area. None of them have a web address so a phone call might be in order. I just searched "machine shops in ........, Wi."
The following user(s) said Thank You: 69Jetflte

Please Log in or Create an account to join the conversation.

115 lower unit changes started 6 years 3 weeks ago #138398

  • ed-mc
  • Offline
  • Platinum Boarder
  • Platinum Boarder
  • Posts: 1412
  • Karma: 232
  • Thank you received: 117
This machine shop is in Big Bend, WI and highly-regarded:

www.wintechenginemachine.com/index.htm

Pretty sure the Doc has mentioned to me that they have shortened & re-splined driveshafts for him.

HTH............ed
The following user(s) said Thank You: 69Jetflte

Please Log in or Create an account to join the conversation.

115 lower unit changes started 6 years 3 weeks ago #138400

ed-mc wrote: This machine shop is in Big Bend, WI and highly-regarded:

www.wintechenginemachine.com/index.htm

Pretty sure the Doc has mentioned to me that they have shortened & re-splined driveshafts for him.

HTH............ed

Sounds like these guys have you covered. I have never had it done, just read it somewhere. Thanks guys

Please Log in or Create an account to join the conversation.

115 lower unit changes started 6 years 3 weeks ago #138401

  • Dr.Go!
  • Dr.Go!'s Avatar Topic Author
  • Offline
  • Contributing Member
  • Contributing Member
  • Posts: 1719
  • Karma: 19
  • Thank you received: 125
Though I had done a local search and we do have good machine shops, I had not yet called any and I haven’t heard anyone talking about that kind of work since I have been here 30 years. I am liking the company from Ed’s link for many reasons. If experts from so far away know of them and likely used them, then that is a good insuring endorsement for me. They are not super far from where the Milwaukee boat show is located and I am going in January. I will be calling, so big thanks. Though they likely know this answer, I assume I need exactly 5 inches cut off... please confirm. As the old carpenter once told me - you have cut that board twice and it is STILL too short!

Please Log in or Create an account to join the conversation.

Dr.Go!

115 lower unit changes started 6 years 3 weeks ago #138402

Just measure the extention piece. to be sure.

Please Log in or Create an account to join the conversation.

115 lower unit changes started 6 years 3 weeks ago #138403

Please Log in or Create an account to join the conversation.

115 lower unit changes started 6 years 2 weeks ago #138415

  • Dr.Go!
  • Dr.Go!'s Avatar Topic Author
  • Offline
  • Contributing Member
  • Contributing Member
  • Posts: 1719
  • Karma: 19
  • Thank you received: 125
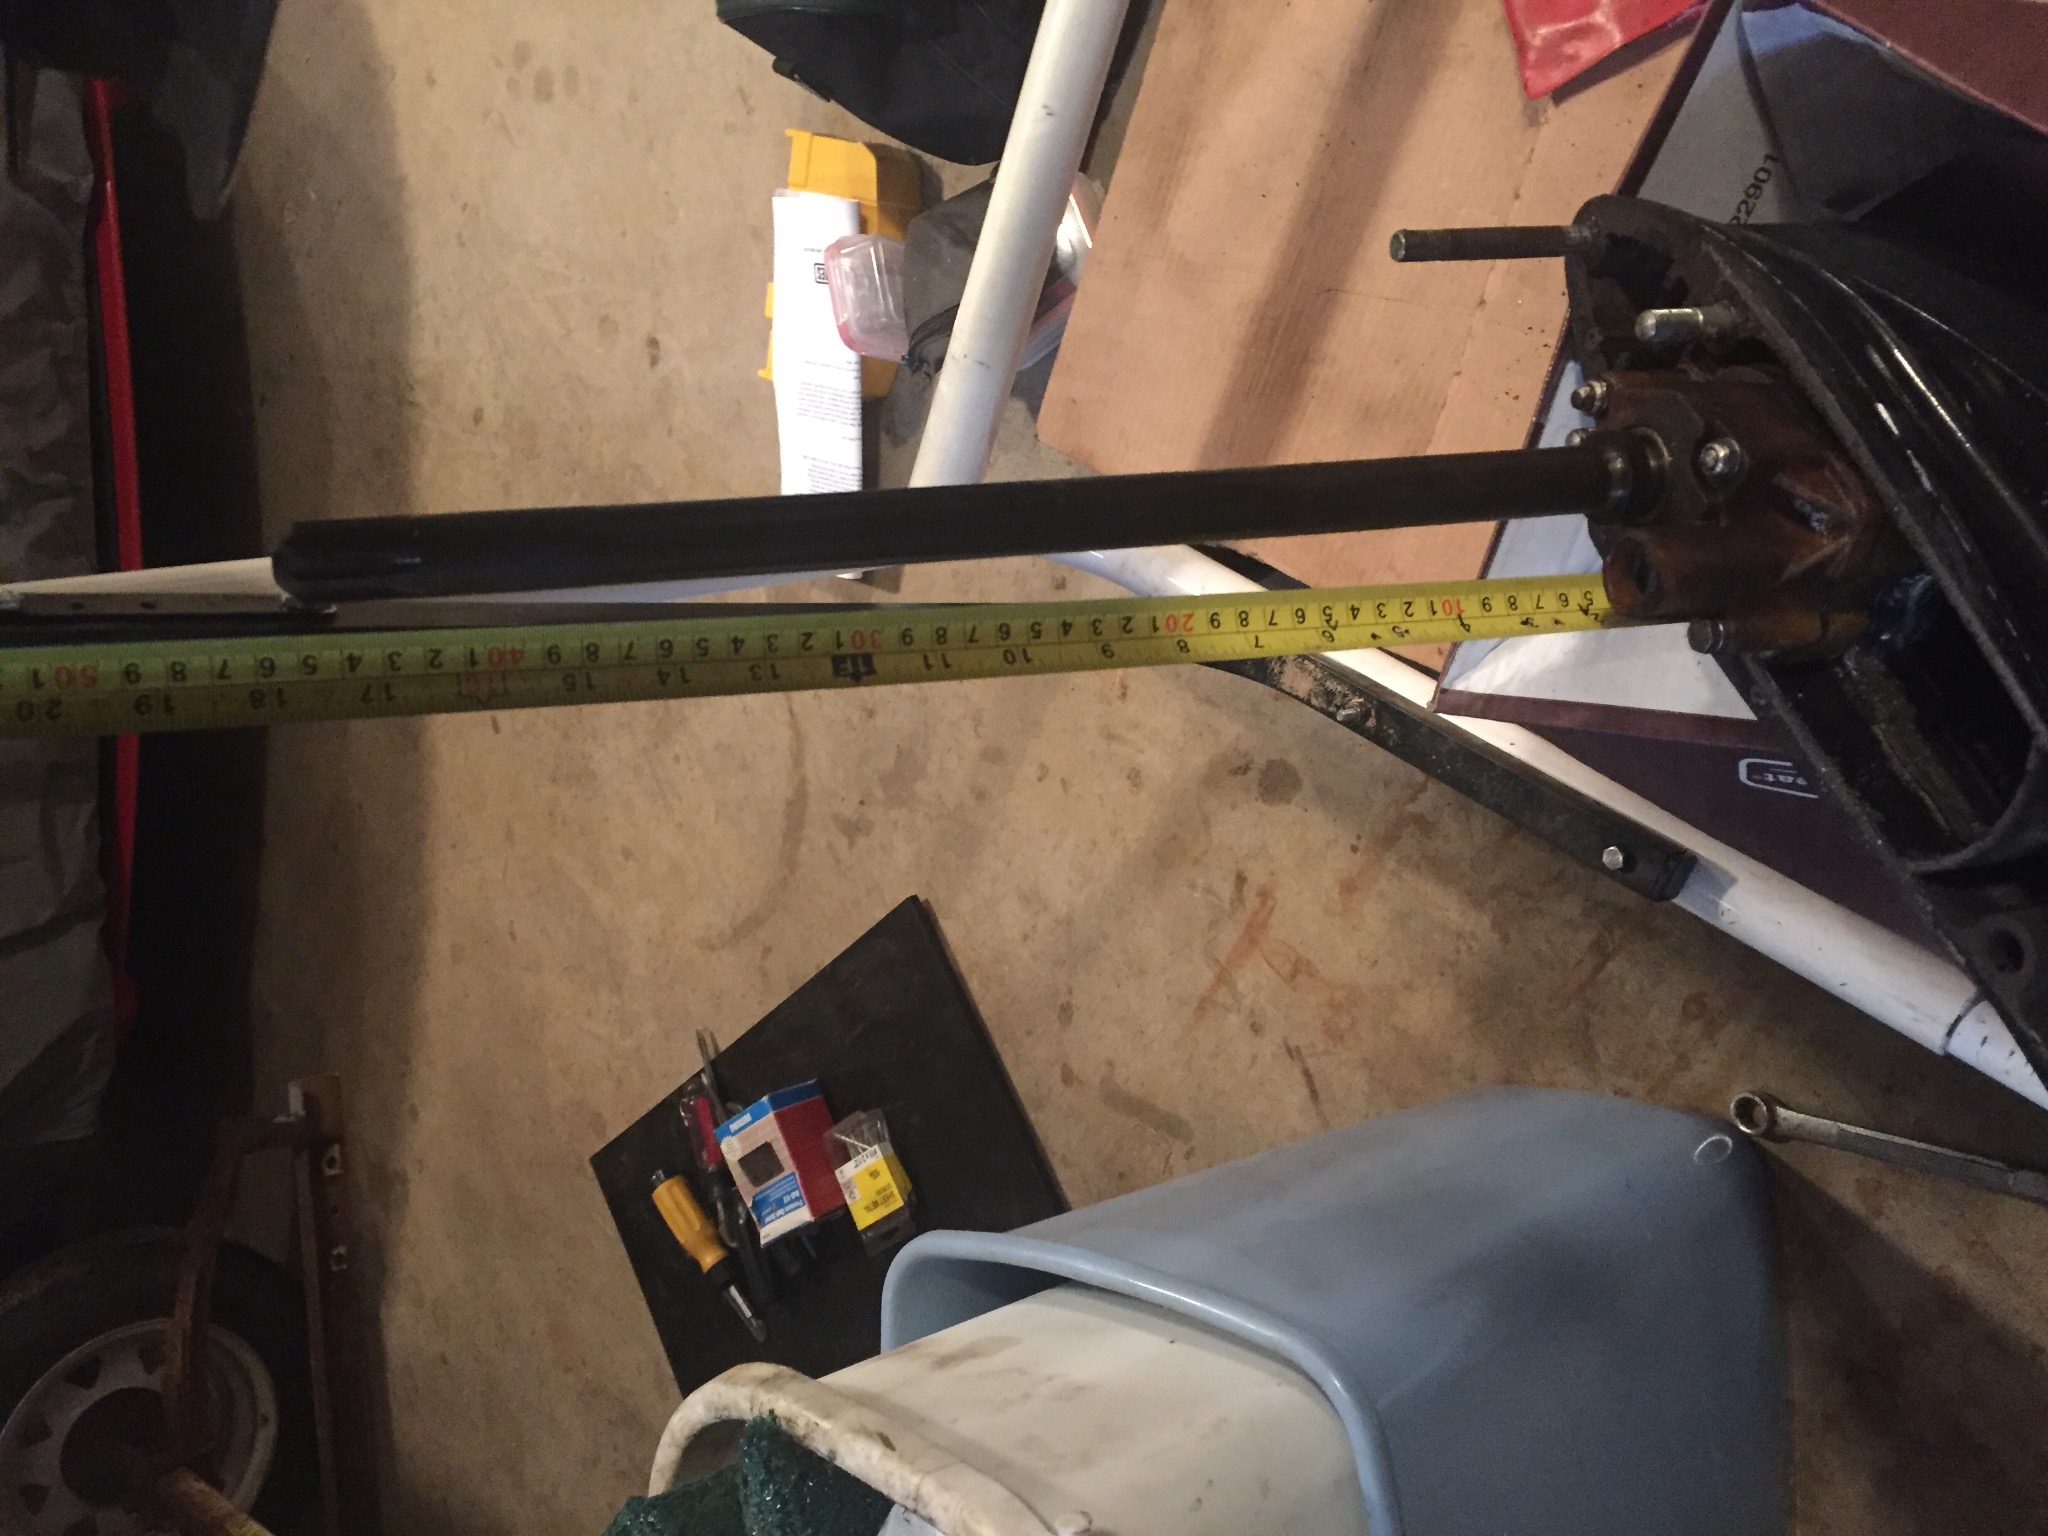
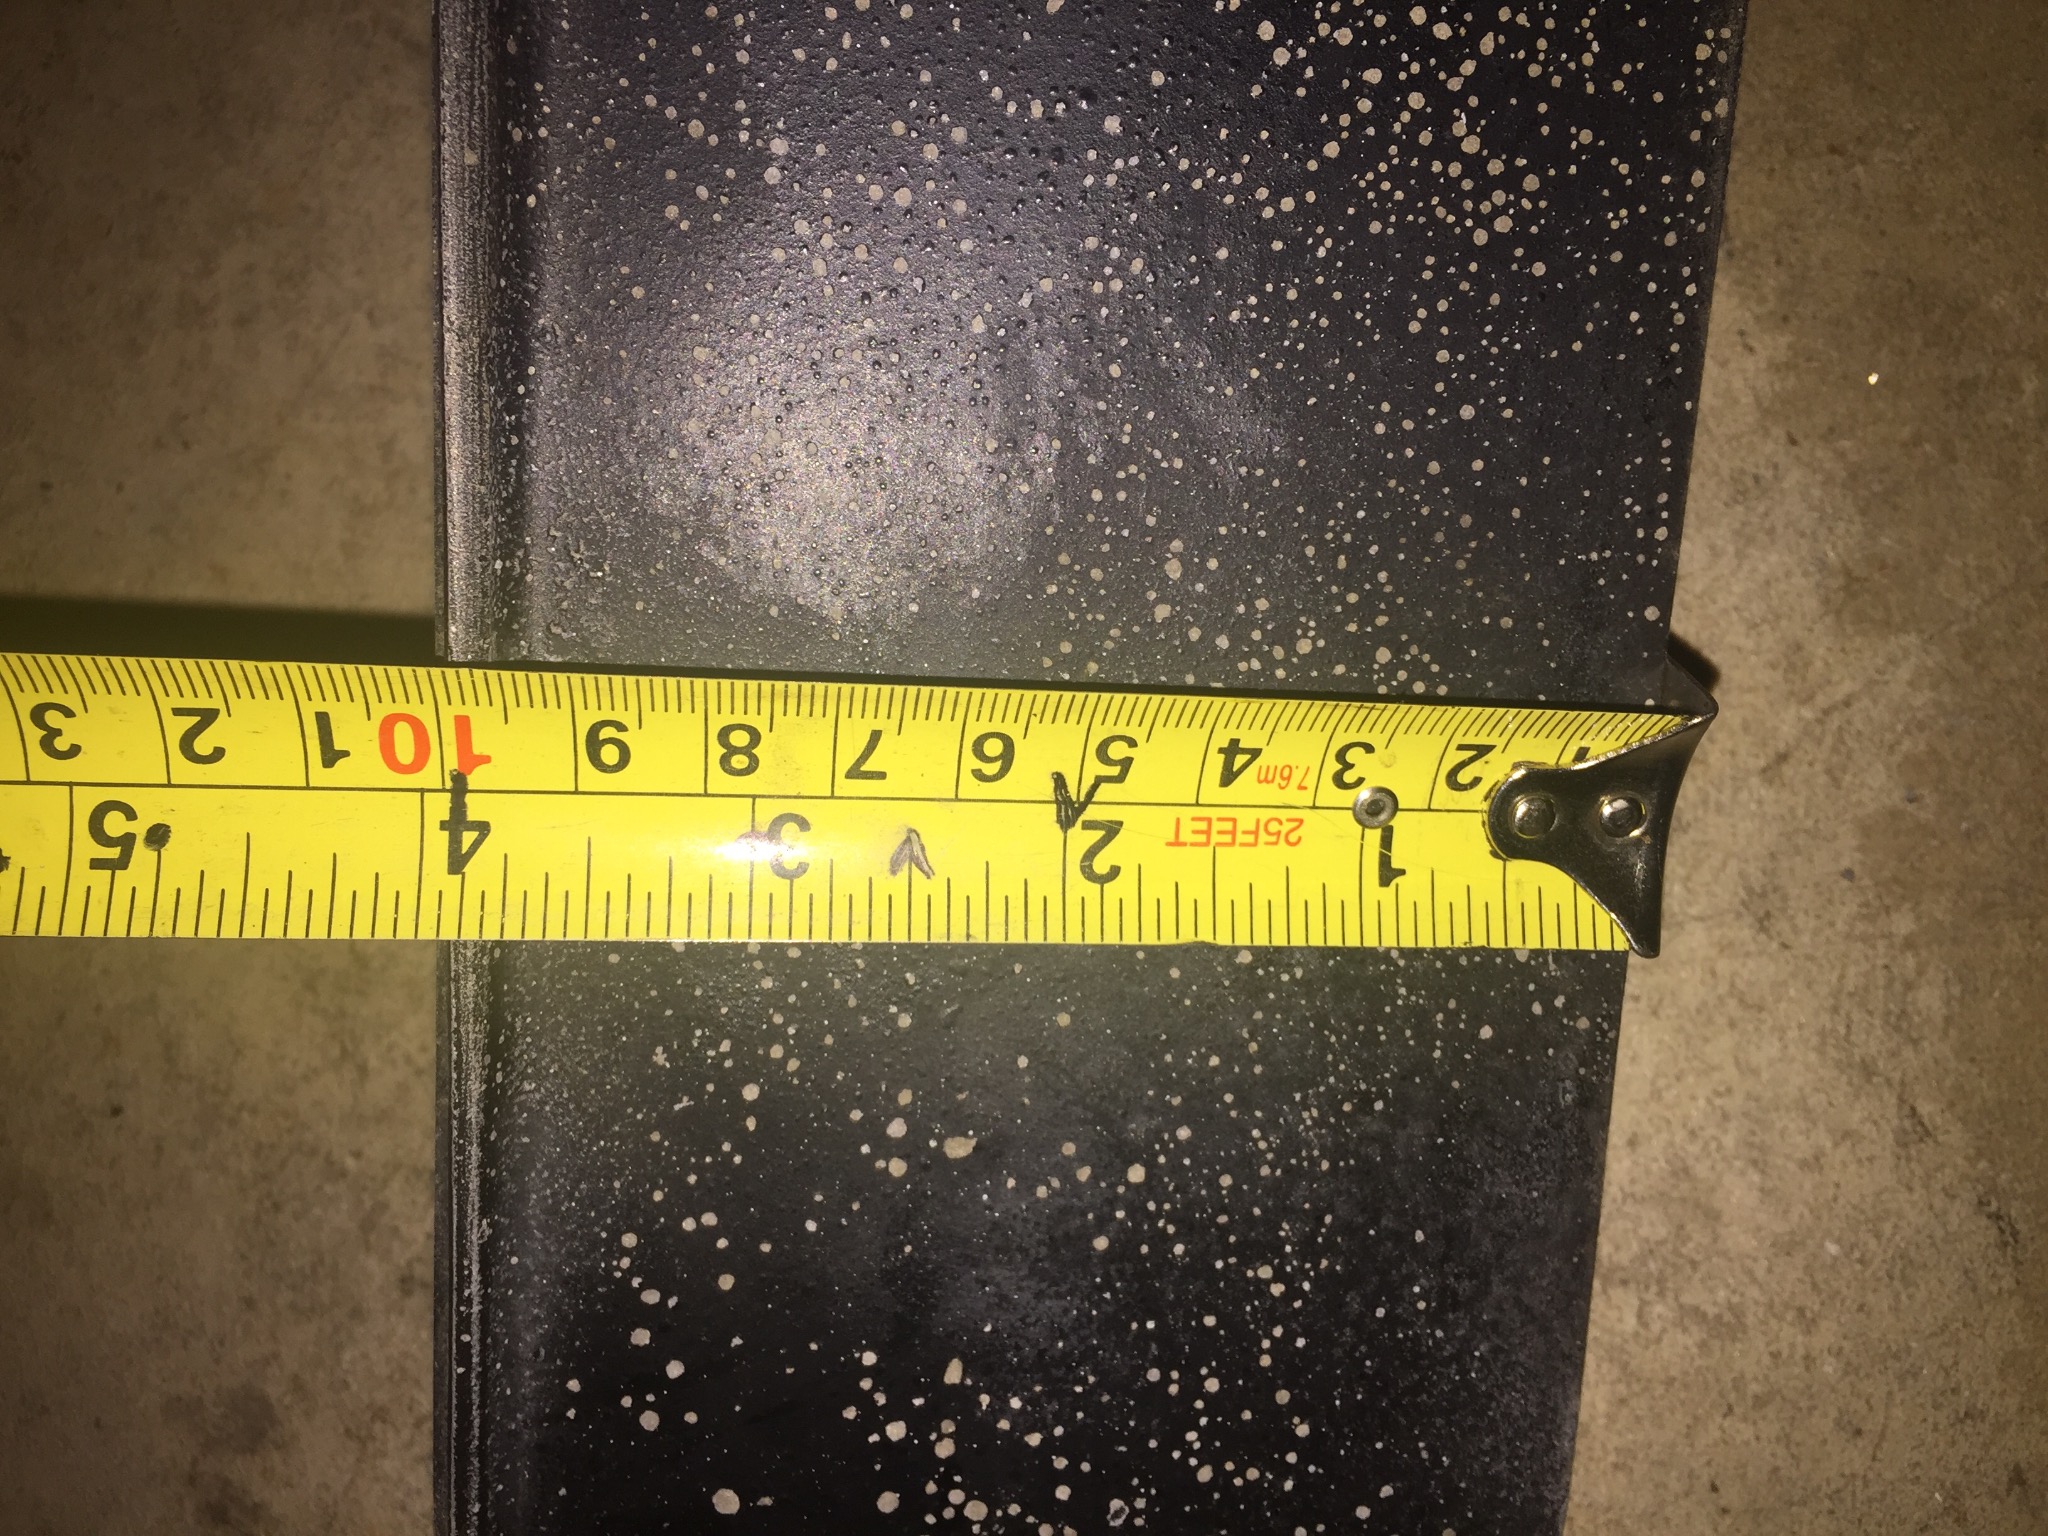
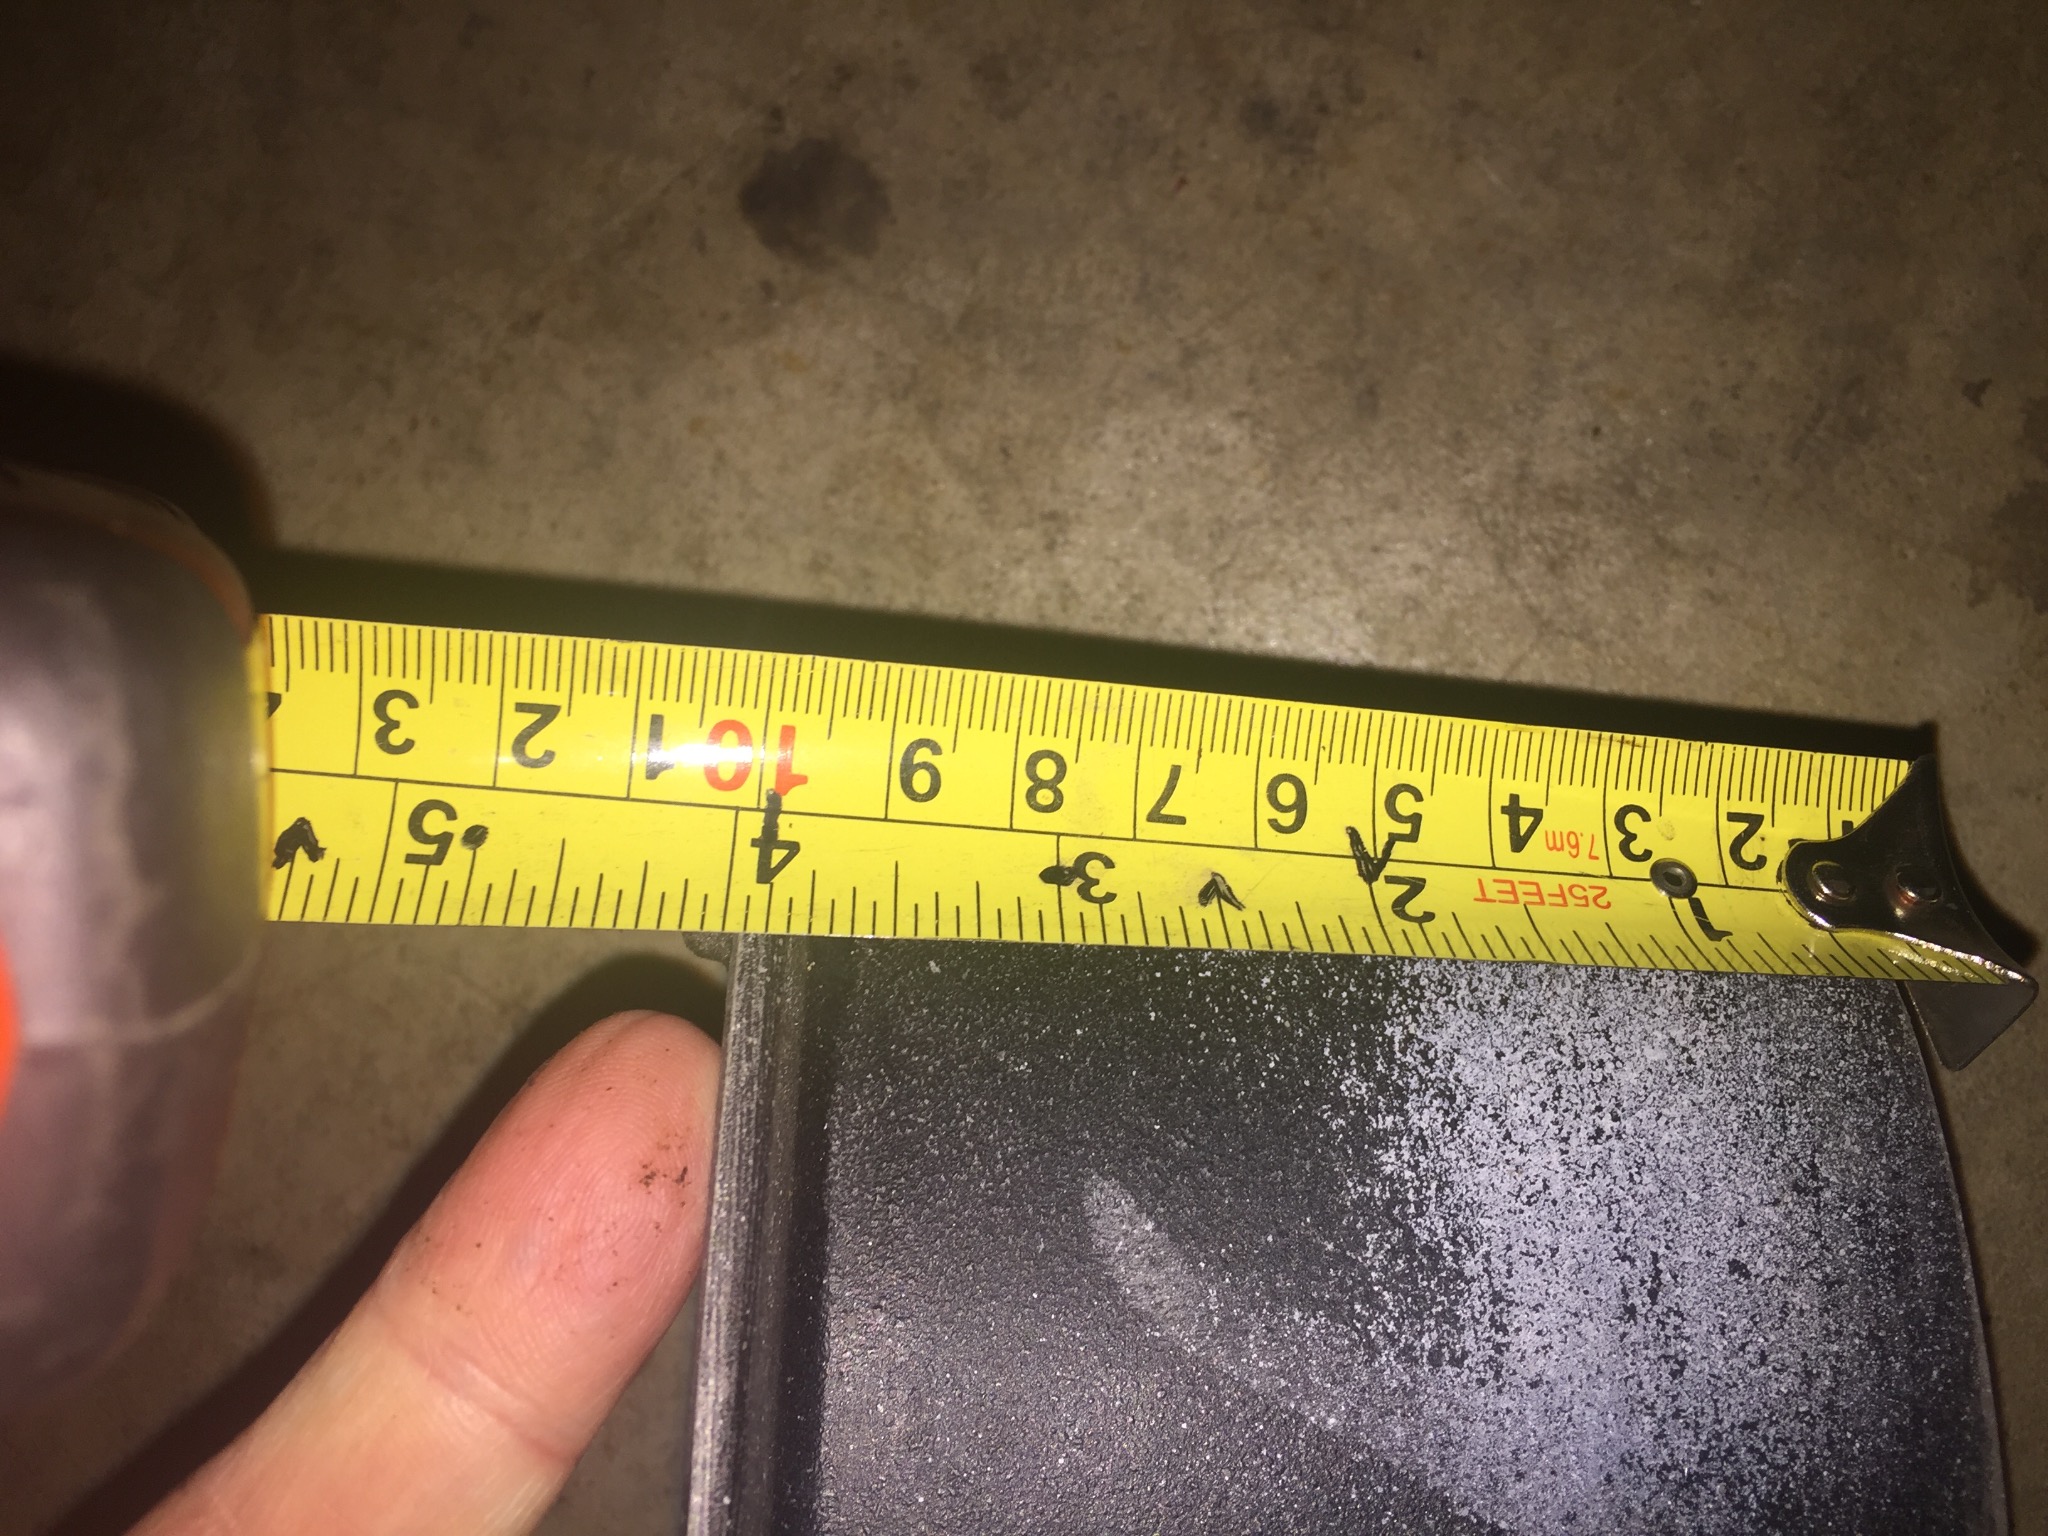
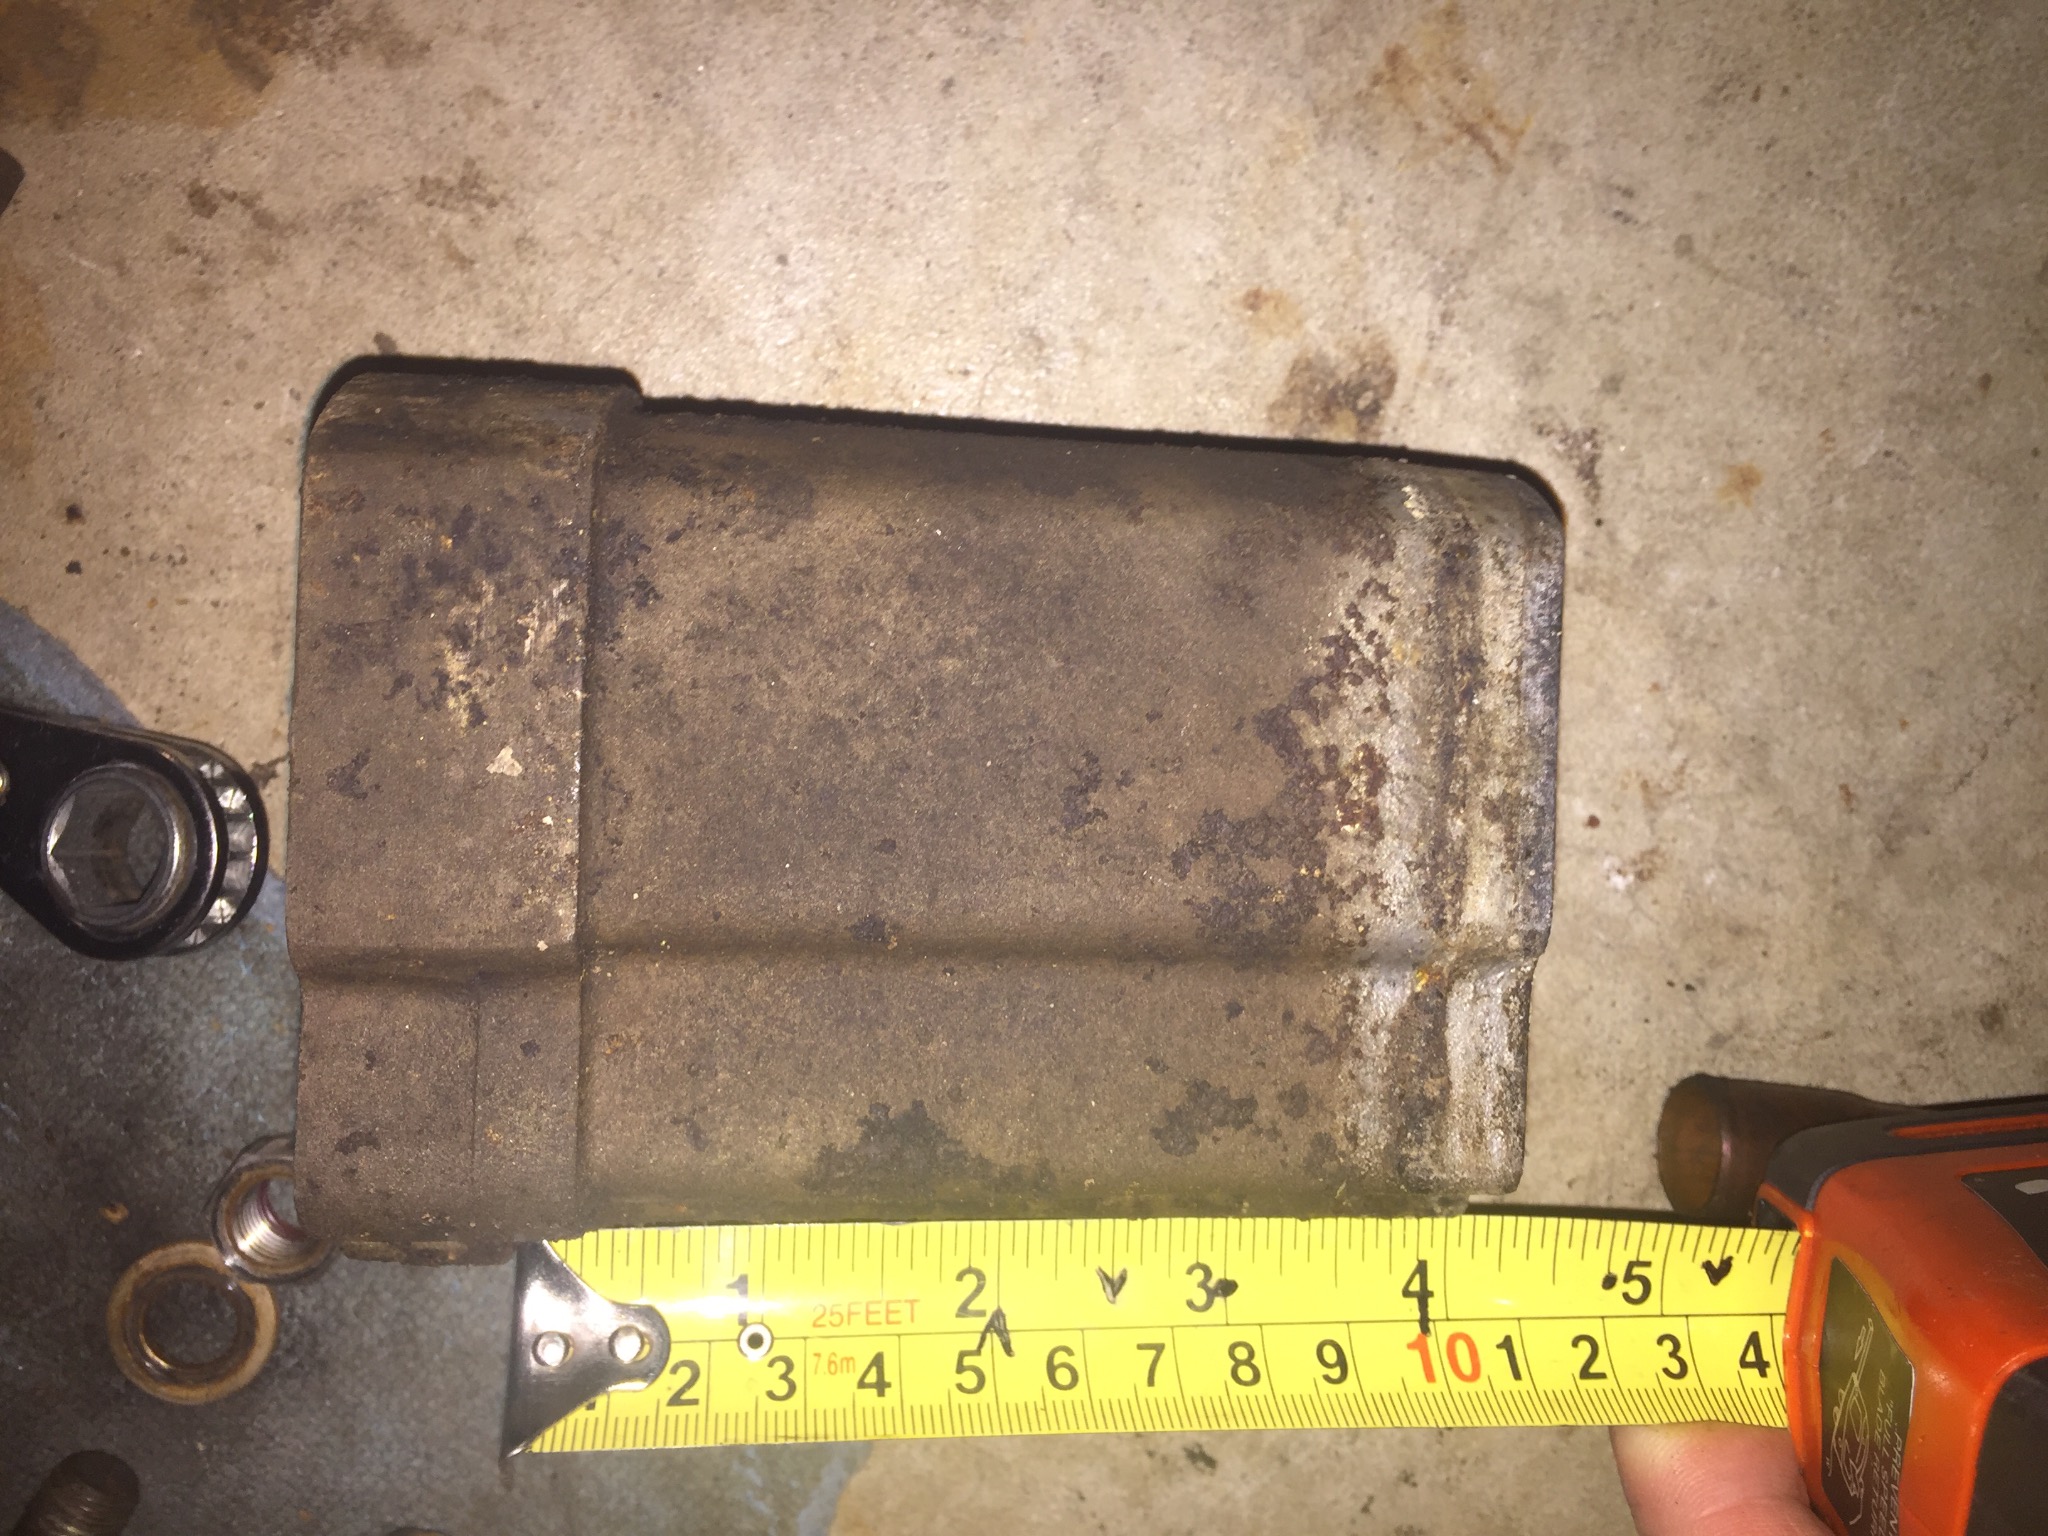
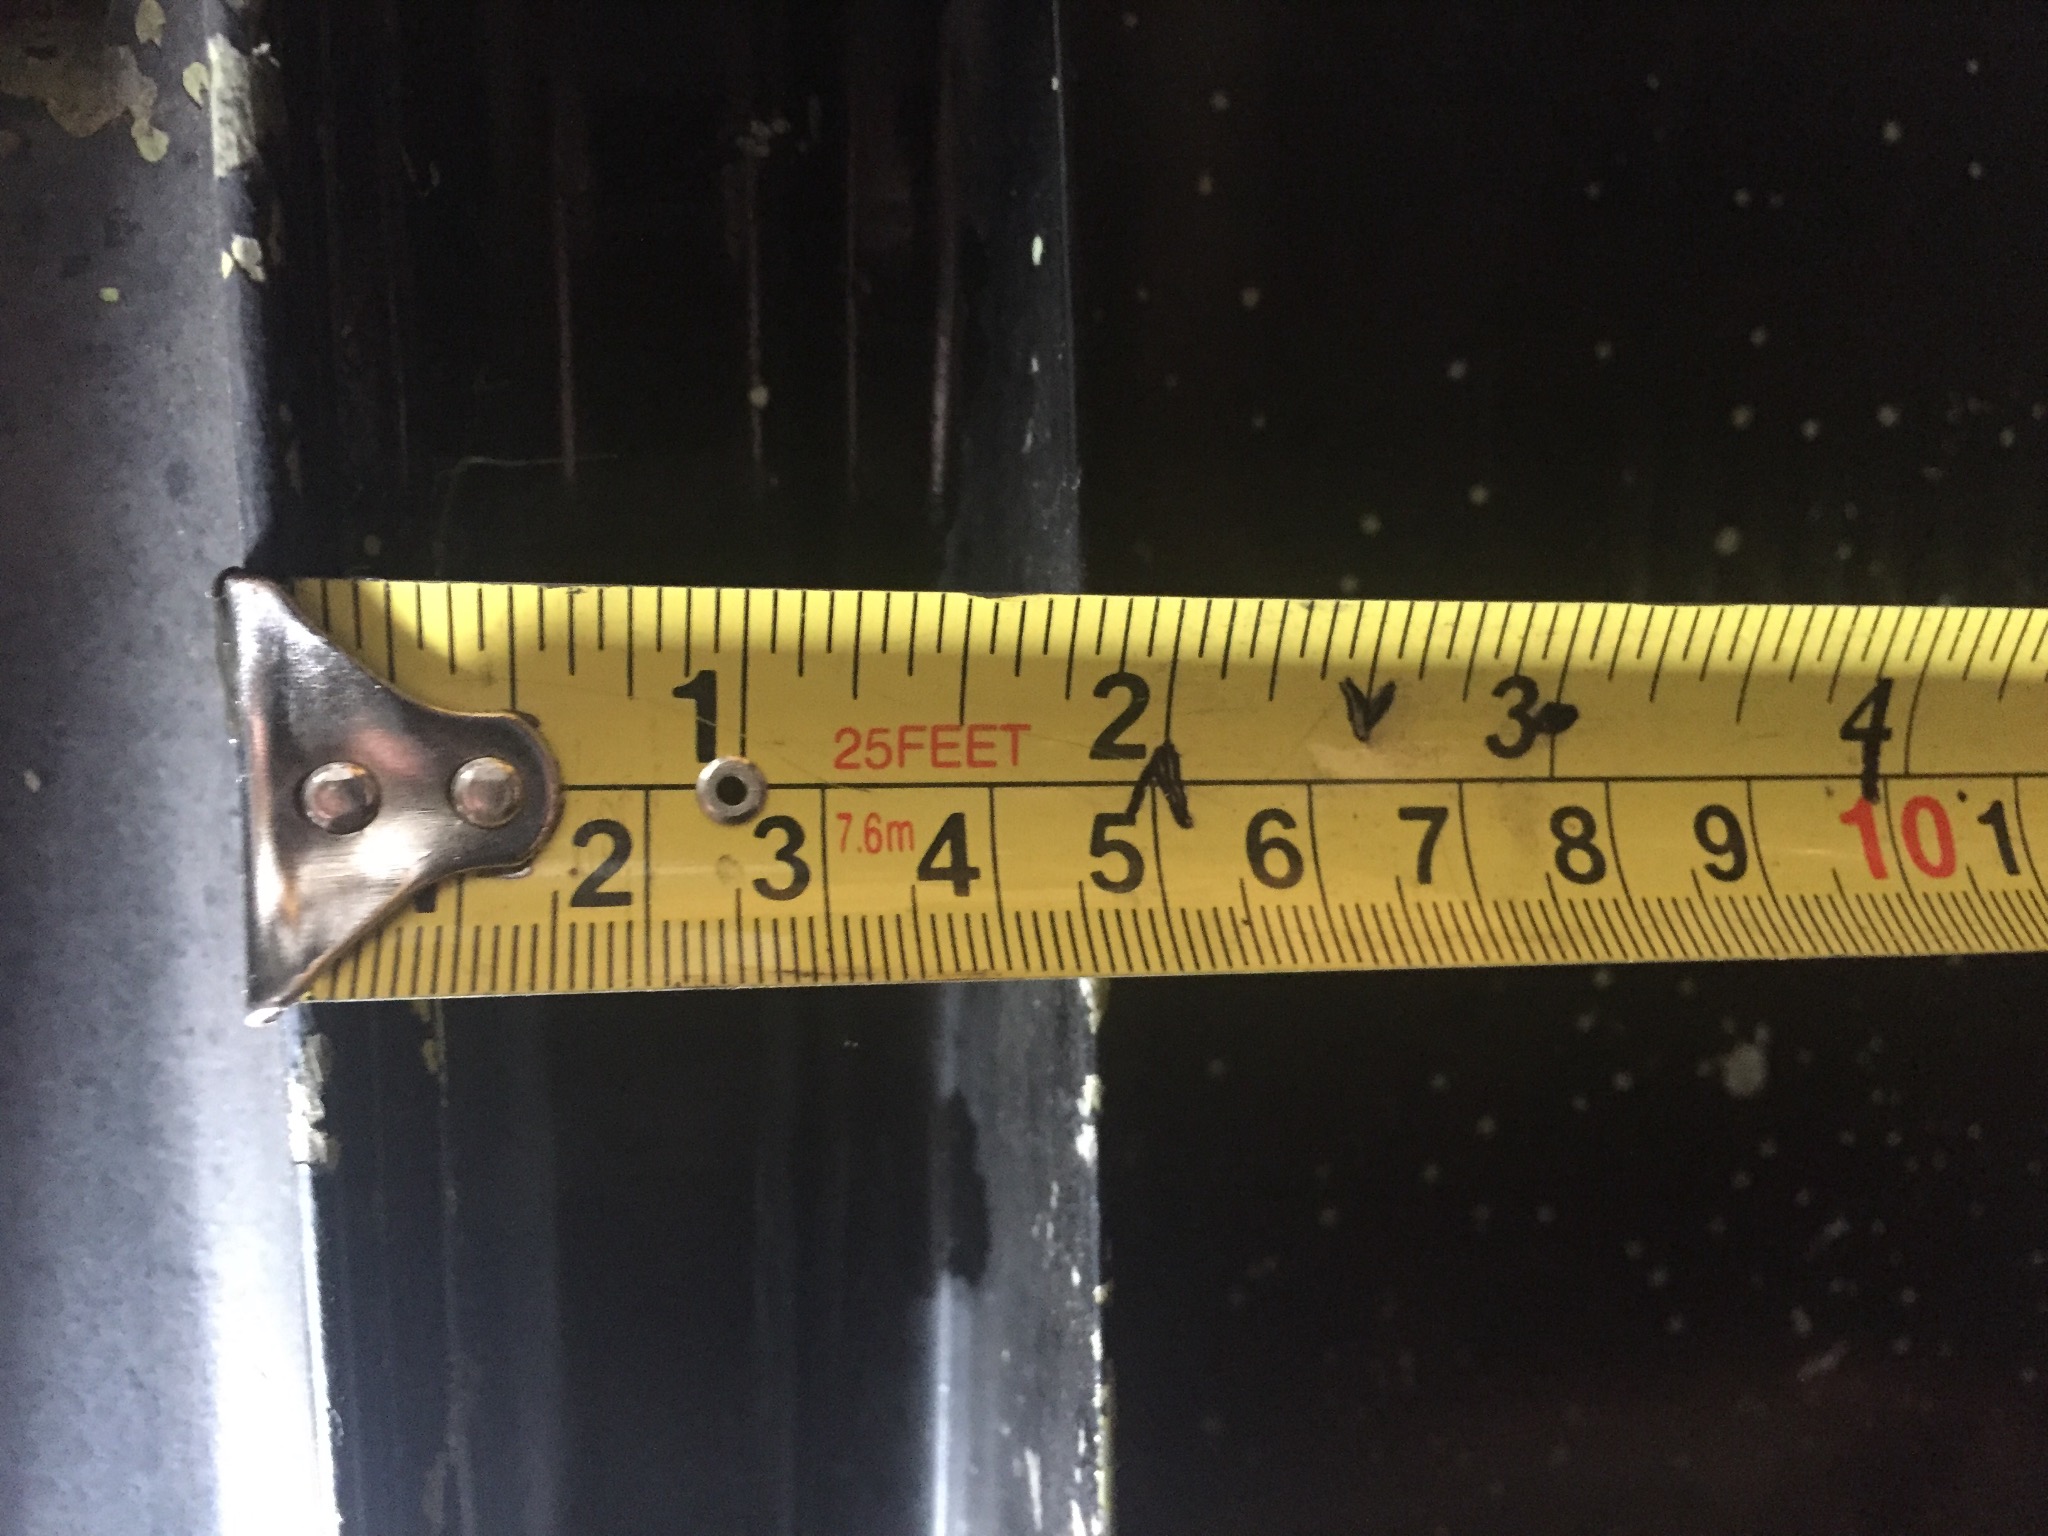
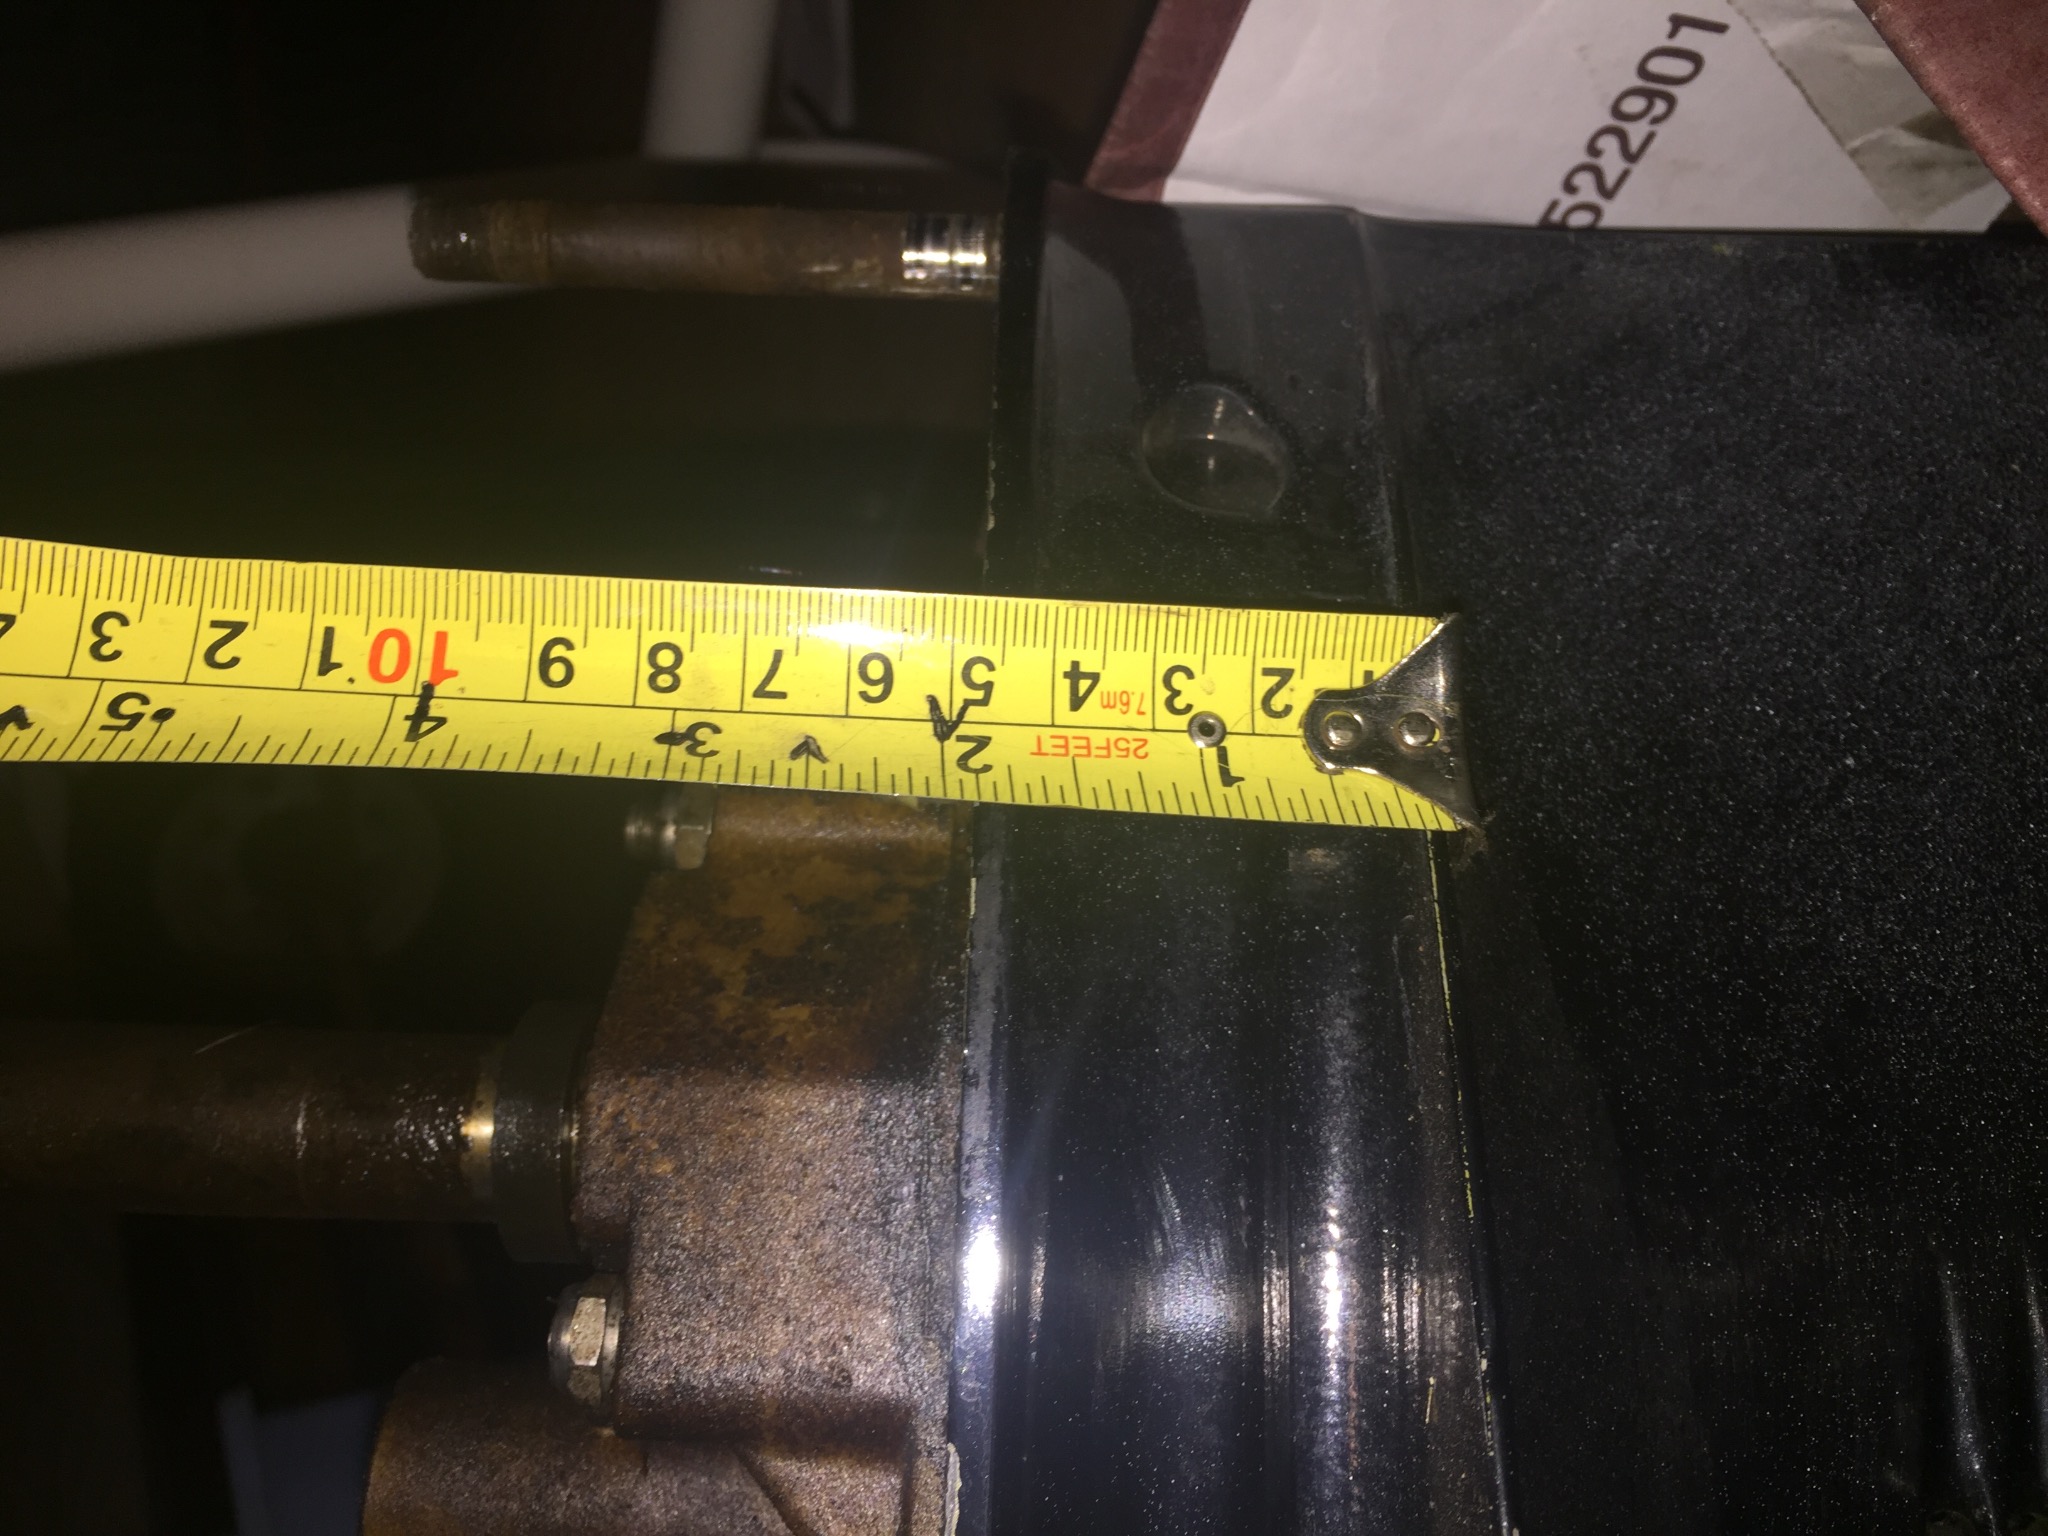
Dave thanks for the suggestion to measure. The attached picture show some results. This is another example when I realize how valuable this site is with so much expertise. I had made an assumption of a 5 inch difference based on hearing way back as a kid that a short shaft was 15 inches and a long shaft was 20 inches. Their is obviously way more I need to learn because as the pictures show, the spacer is 4 inches. Other pieces which have a little room to vary are close to 4 inches. Would this make my final short shaft a 16 inch motor? And if the shorty turns out to be a 15 inch motor, does that mean my long shaft motor using an extension is really only a 19 inch motor? Is it possible the extension version of a long shaft is actually an inch shorter than a true long shaft mid section 20 inch motor? I may need to measure a true long shaft. If I had been hasty and just run to a local machine shop, I would have a shaft that is 1 inch too short! Hopefully using that recommended shop, they would likely have caught my mistake due to their experience. Now I know why I always hear to measure twice and cut once.
Attachments:

Please Log in or Create an account to join the conversation.

Dr.Go!

115 lower unit changes started 6 years 2 weeks ago #138418

  • Dr.Go!
  • Dr.Go!'s Avatar Topic Author
  • Offline
  • Contributing Member
  • Contributing Member
  • Posts: 1719
  • Karma: 19
  • Thank you received: 125
I measured from the bottom of the upper mounts of 3 engines to get the same point of reference. One 1965 short shaft 1000 Merc 100hp. One 1965 long shaft 100hp parts motor. One 1971 short mid section 115 that had the 4 inch extension that I want to return to short shaft. The reality for me the way I see it is that if that extension is 4 inches, then the shaft should be shortened 4 inches... well here is what I found. Both short shaft mid sections measured the same at 14 inches and the 2 separate lower units measure 1 and three quarter inches. That makes a total of 15 and three quarter inches. If I roughly add a half inch to account for measuring the the centerline of the top mount for a total of 16 and one quarter inch. The long mid section measured 18 and a half inch. When I add the lower unit measurement to the ventilation plate of 1 and three quarter, I get 20 and a quarter inch. Then if I add the half inch for the top, I get 20 and three quarters of an inch. So this would show a difference of 4 and a half inch from a true shorty to a true long shaft. My short extension piece was only 4 inches, so a half inch shorter likely. Maybe the math and parts were an easier thing to make rather than perfectly matching and making the kit more expensive and more confusing??? Just guessing. I am so glad people have been helping me along because I could have been hasty assuming a 5 inch difference and I could have had the shaft cut too short. That would have been a costly and time consuming mistake. I would rather put money towards supporting this site with its amazing members rather than spend money on my mistakes. Big thanks so far!

Please Log in or Create an account to join the conversation.

Dr.Go!

115 lower unit changes started 6 years 2 weeks ago #138419

The old doctor screwed up.
The 17 7/8" measurement from the top of the gear case to the top of the driveshaft is correct for a SHORT SHAFT, not a long shaft as I stated.
So-o-o-o,...The is probably still a removable stub shaft up in the driveshaft housing that needs to be removed to completely eliminate the short-to-long Bay Kit.
I'm really sorry for this error - I have lot on my mind right now and should have double-checked my post with a clear mind.
doc
Attachments:
The following user(s) said Thank You: Dr.Go!

Please Log in or Create an account to join the conversation.

115 lower unit changes started 6 years 2 weeks ago #138420

  • ed-mc
  • Offline
  • Platinum Boarder
  • Platinum Boarder
  • Posts: 1412
  • Karma: 232
  • Thank you received: 117
Well, you can stuff the supposed short-shaft L/U up the hole and you'll find out real quick if there's still a stub in there! It'll bottom out and you'll still have 4 inches to go, I'd reckon!!

Please Log in or Create an account to join the conversation.

115 lower unit changes started 6 years 2 weeks ago #138421

  • Dr.Go!
  • Dr.Go!'s Avatar Topic Author
  • Offline
  • Contributing Member
  • Contributing Member
  • Posts: 1719
  • Karma: 19
  • Thank you received: 125
No problem Doc. Thanks for the pictures... this is actually decent news as I won’t have to mess around getting the shaft cut and spines. I had not yet gotten around to placing counter weight on the back of the stand so that I can tilt the motor to make it easier for me to look up inside. My neck is too stiff to twist upside down and look up in there. I will just go back in this thread to determine what method might work best to try first. Thanks again Doc and Ed. Maybe I can give something a try this weekend. I will try to see this post until success. Now maybe I will pull that impeller and drop the unit off at the prop shop to repair my broken skeg. Then I can focus on removal of the shaft extension.

Please Log in or Create an account to join the conversation.

Dr.Go!

115 lower unit changes started 6 years 2 weeks ago #138424

  • Dr.Go!
  • Dr.Go!'s Avatar Topic Author
  • Offline
  • Contributing Member
  • Contributing Member
  • Posts: 1719
  • Karma: 19
  • Thank you received: 125
Sorry for the hasty picture. It did not focus up inside but I do think I see the female end of that extension. I couldn’t get my fat head in there at the same time fitting a flashlight and camera up there. I just tried a random picture without looking.
Attachments:

Please Log in or Create an account to join the conversation.

Dr.Go!
Time to create page: 0.556 seconds

Donate

Please consider supporting our efforts.

Glassified Ads

1956 Lonestar Meteor
( / Boats)

1956 Lonestar Meteor
12-24-2024

Mercury outboard
( / Engines)

noimage
11-03-2024

Classic Mercury Outboard Motors
( / Engines)

Classic Mercury Outboard Motors
10-18-2024

FG Login

FiberGoogle

Who's Online

We have 13550 guests and no members online